
Introduction
Stucco and fiber cement siding are two exterior materials, and this article compares their repairability and long-term maintenance. You’ll see practical, hands-on guidance on patching, replacing damaged sections, and what keeps these materials lasting. If a spec matters, check the product label, manufacturer instructions, and local rules before you dive in.
From a DIY angle, start with a careful visual check for cracks, loose edges, or water intrusion to decide if you can patch or need a larger fix. Always follow the listed methods from the material you’re working with and respect local codes, weather, and flashing details. If you’re unsure about a repair method, verify with the label or maker’s guidance and choose safer, reversible options.
Key takeaways
- Assess stucco vs fiber cement damage before tearing out, to choose repairs.
- Identify hairline cracks early and seal promptly to slow moisture intrusion.
- DIY stucco repairs require compatible patch material and proper curing conditions.
- Fiber cement repairs usually involve matching finish and edge detailing for blend.
- Safety: wear eye protection, masks, and clothing protection when disturbing surface.
- Plan maintenance schedules around seasonal cycles and inspections for durable performance.
Table of Contents
- Introduction
- Key takeaways
- Quick Comparative Overview
- Common Failure Modes and Root Causes
- DIY Stucco Repairability: Step-by-Step Guidance
- DIY Fiber Cement Repairability: Step-by-Step Guidance
- Tools, Materials Checklist and Safety
- Visual Checkpoints and Inspection Workflow
- Long-Term Maintenance Schedules and Treatments
- Cost, Time, and Effort Comparison for DIY Vs Pro Work
- Conclusion
- FAQ
Quick Comparative Overview
This section lays out the core mindset for repair and maintenance between stucco and fiber cement. You’ll see how each material responds to weather, impact, and ordinary wear from a DIY perspective. The goal is to flag what tends to be simpler or more complex for a homeowner to tackle over time.
We’ll preview the repair approach, maintenance cadence, and what to verify on product labels or datasheets. Expect practical takeaways you can apply from day one to upcoming projects. The focus is on clear expectations, not brand claims.
High-level pros and cons for DIYers
When it comes to DIY repairs, understanding the material’s characteristics is key. Here are some practical advantages and trade-offs for both stucco and fiber cement siding.
Pros of Stucco
- Excellent insulation properties.
- Fire-resistant.
- Wide range of colors and textures available.
- Can be applied over existing surfaces, reducing waste.
Cons of Stucco
- Brittle, prone to cracking from settling or minor impacts.
- Requires specialized tools for application and repair.
- Labor-intensive finish work.
- Susceptible to moisture damage if not properly sealed.
Stucco is a good DIY option when you’re comfortable with the potential maintenance and have the right tools. It’s best suited for new construction or major overhauls due to its labor-intensive nature.
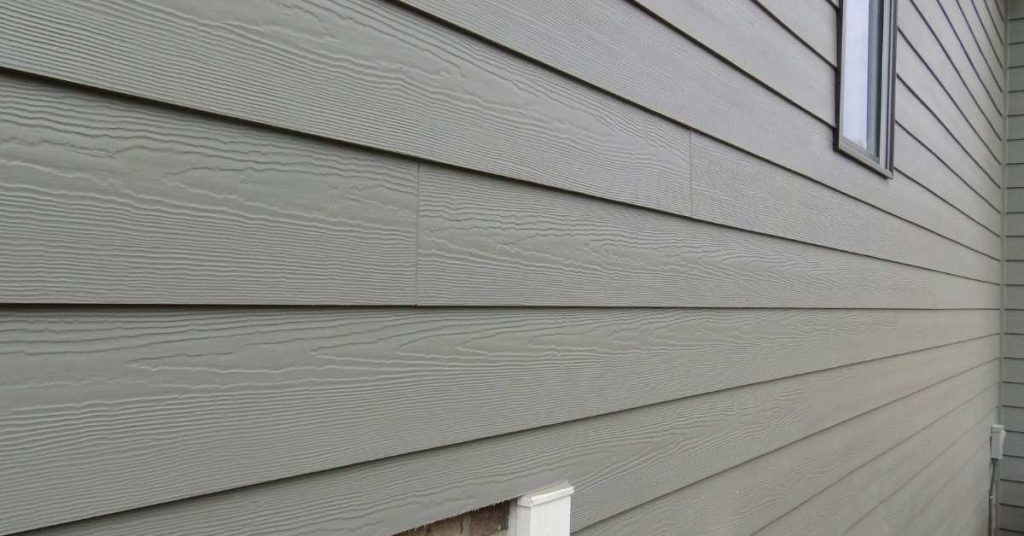
Pros of Fiber Cement
- Highly durable, resistant to rot, insects, and fire.
- Low maintenance, retains color well with minimal fading.
- Can be painted or stained to match any design aesthetic.
- Easy to cut and install using standard woodworking tools.
Cons of Fiber Cement
- Heavier than other siding materials, requiring proper support during installation.
- More expensive upfront cost compared to other options.
- Less forgiving in cold temperatures, may crack if not installed properly.
- Not easily repairable by DIYers due to its hardness and weight.
Fiber cement is a great DIY option for those who want low maintenance, durability, and are willing to invest more upfront. It’s best suited for new installations or partial replacements.
What homeowners should check first
Before you grab your tools, it’s crucial to inspect your siding thoroughly. This will help you determine if a DIY repair is realistic or if you need professional help.
Moisture damage is a significant concern for both materials. Check for any signs of water intrusion, such as warping, swelling, or discoloration. If left untreated, moisture can lead to serious structural issues.
Inspect for cracks. In stucco, hairline cracks are normal but should be monitored. In fiber cement, even small cracks can indicate a more significant problem. Any crack wider than 1/8 inch in stucco or 1/16 inch in fiber cement should be addressed.
Check the condition of fasteners. Loose or missing nails and screws can cause siding to warp or fall off. Tighten any loose fasteners and replace any that are missing.
The final thing to check is the overall condition of the paint or finish. Peeling, chipping, or fading paint can indicate underlying issues. If more than 20% of your siding has paint damage, it might be time for a full replacement rather than spot repairs.
Common Failure Modes and Root Causes
Here we describe typical problems each material develops in the real world of home maintenance. Look for cracks, loose edges, and moisture signs as common indicators. The section connects those symptoms to likely causes you can investigate.
Understanding underlying issues helps you decide whether to repair, reseal, or call in help. We’ll note where to check product instructions or local rules if a fix requires specific steps. Use this as a diagnostic checklist rather than a guesswork guide.
Stucco-specific failures (cracks, delamination, moisture)
Stucco’s a tough cookie, but it ain’t perfect. Here’s what to look out for when your stucco starts acting up.
Hairline cracks are the first sign of trouble. They’re usually no big deal, just surface stuff. But if they’re wider than a credit card, or running in straight lines, you’ve got a problem. Check for these:
- Poor base compaction – check your substrate
- Too much water in the mix – check your ratios
- Temperature changes – check local climate patterns
Larger fissures and delamination (when it starts peeling off) are serious. They let water in, and that’s bad news. Check for:
- Water intrusion – look for stains or damp spots
- Improper installation – check your lath and scratch coat
- Too much water in the mix again – yeah, it’s a thing
And remember, moisture is stucco’s kryptonite. If you find any of these issues, don’t wait. Fix ’em quick before they turn into big, expensive headaches.
Fiber cement-specific failures (board damage, nail pops, edge rot)
Fiber cement boards are tough, but they’re not indestructible. Here’s what to look out for:
Board Damage: Cracks or holes can appear due to impact or water intrusion. Check for signs of damage after installation and during regular inspections. Water is the usual culprit, so ensure proper flashing and caulking at seams and edges.
Nail Pops: Nails backing out can happen if the board wasn’t properly secured or the substrate wasn’t flat enough. Check nail heads are secure and countersunk. If not, drive them back in and fill with a bit of caulk to prevent water entry.
Edge Rot: This happens when water gets trapped between the board’s edge and the house wrap or flashing. It’s a slow process, but it can cause serious damage over time. Ensure proper drainage at edges and check for signs of rot during inspections.
DIY Stucco Repairability: Step-by-Step Guidance
Expect a practical, safety-focused workflow for small to medium stucco repairs. The steps emphasize clean surfaces, proper patching material choice, and feathering edges for a smooth blend. Don’t skip moisture management before applying patches.
Each step is described in sequence with actionable actions a competent DIYer can perform. Verify product labels or manufacturer instructions for patching and curing times when you reach that stage. Use this as a hands-on guide you can adapt to your wall section.
Step-by-Step Repair Process
This step-by-step guide walks you through the process of repairing your stucco siding, from preparation to final checks.
- Inspect the damage and gather necessary tools: trowel, hawk, joint compound, mesh tape, sandpaper, safety glasses, gloves, and drop cloths. If the damage is extensive or structural, consult a professional.
- Prepare the area by clearing debris, removing loose stucco, and cleaning the surface with water.
- Apply mesh tape over cracks or holes, pressing firmly to ensure adhesion. Use a trowel to apply joint compound over the tape, feathering out the edges.
- Allow the compound to dry according to manufacturer’s instructions. Lightly sand any rough spots and wipe away dust with a damp cloth.
- Inspect your work, ensuring all repairs are smooth and blend well with the surrounding stucco. Apply a primer and paint if necessary.
Patching hairline and small cracks
Fixing minor cracks in your stucco siding involves surface preparation, choosing the right patch compound or caulk, application technique, and blending for a seamless finish.
Use a utility knife to score around the crack, then clean it with water. Apply painter’s tape along both sides of the crack to create a smooth edge.
For hairline cracks, use a paintable acrylic latex caulk. For larger cracks up to 1/4 inch wide, use an exterior-grade joint compound. Apply using a trowel or caulking gun, ensuring it’s well packed into the crack. Remove tape immediately after application for a clean edge.
Blend the patched area with surrounding stucco using a drywall sanding sponge or fine-grit sandpaper. Wipe away dust and apply primer and paint if necessary to match the existing finish.
Repairing delaminated or hollow areas
Delamination occurs when stucco separates from its backing, often due to moisture issues. Hollowness indicates missing or damaged lath behind the stucco.
Test for hollowness by gently tapping the area with a hammer. A dull thud indicates hollowness; a solid sound means the structure is intact. If delamination is present, use a utility knife to score around the affected area and carefully remove it.
If the lath is damaged or missing, replace it before proceeding with repairs. Apply exterior-grade joint compound over the hole, using mesh tape if necessary. Allow drying, sand lightly, and blend with surrounding stucco as described in previous steps.
If structural concerns are present, such as large areas of delamination or significant hollowness, consult a professional. They can assess the damage and determine if additional repairs or reinforcement is needed.
DIY Fiber Cement Repairability: Step-by-Step Guidance
This section outlines a practical procedure for common fiber cement repairs, focusing on cutting, fastening, seam sealing, and finishing. The workflow keeps cuts square and edges protected to prevent future splitting. Follow surface prep and sealant guidelines closely for best results.
Work with materials and fasteners specified by the manufacturer and your local code officer. Verify any seam sealants or primers recommended for fiber cement on the product label or data sheet. Use this as a repeatable sequence you can reference during the project.
Step-by-Step Repair Process
This section guides you through a clear, numbered sequence of practical steps to repair your fiber cement siding like a pro.
- Preparation: Inspect the damage, gather tools (hammer, pry bar, utility knife, trowel, caulk gun), and wear safety gear (gloves, goggles).
- Remove damaged material: Carefully cut out damaged areas using a utility knife or saw, keeping cuts straight and clean.
- Main repair: Follow the specific repair type guidance below – replace boards, patch seams, etc. Always ensure fasteners are secure and joints are sealed.
- Finishing touches: Apply paint or sealant as needed to match existing siding and protect repairs from weathering.
- Final check: Inspect your work, test joint integrity with a light spray of water, and make any necessary adjustments before moving on.
Replacing a single damaged board
Learn how to safely remove a damaged fiber cement board, measure and cut a replacement, fasten correctly, and seal joints for weather resistance.
First, safely remove the damaged board using a pry bar and hammer. Be careful not to damage surrounding boards or yourself.
Next, measure and cut a new board to match the size of the removed one. Use a circular saw with a fine-toothed blade for clean cuts.
Then, fasten the new board using galvanized nails or screws spaced appropriately (usually 8-12 inches apart). Ensure you’re driving fasteners into studs or blocking behind the siding. Finally, seal joints with a compatible caulk to maintain weather resistance.
Repairing seams, nail pops, and small chips
Discover techniques for resetting fasteners, re-sealing joints with compatible caulk, and filling or painting chips to maintain your fiber cement siding’s integrity.
For nail pops, remove the popped nail, fill the hole with a suitable filler (like spackling compound), let it dry, then sand smooth before repainting.
To reseal joints, first clean the area thoroughly. Then, apply a bead of compatible caulk along the seam using a caulk gun. Smooth it out with your finger or a damp rag, ensuring a tight seal.
For small chips, use a filler suitable for fiber cement. Apply, let dry, sand smooth, then paint to match existing siding. If the chip is too large, consider replacing the board instead.

Tools, Materials Checklist and Safety
Translate typical DIY needs into a practical list of tools and materials for both stucco and fiber cement tasks. Include essentials for removal, patching, sealing, and finishing, plus safety gear you should wear during each repair type. Consider disposal guidelines for waste from each material.
Make note of any specialty items or calibrations required by manufacturer instructions. If in doubt, check labels, datasheets, or local regulations before purchasing. This section helps you prepare before you start any repair work.
Tools and materials for stucco work
Before you start any repair, check this list to ensure you’ve got the right tools and materials.
- Hammer: For tapping on laths and removing old patches.
- Trowel (4″ – 6″): Essential for applying and spreading patch material.
- Stucco patching compound: Choose one compatible with your existing stucco. Skip this, use the wrong type, and you’ll end up with mismatched colors or textures.
- Mesh tape (1″ – 2″): For reinforcing large cracks or delaminated areas.
- Scratch brush: To roughen up surfaces for better patch adhesion. Without this, patches won’t stick properly.
- Safety glasses: Protect your eyes from debris and dust.
- Dust mask: Essential when sanding or removing old material to avoid inhaling harmful particles.
- Drop cloths: To protect surrounding areas from patch material drips.
Quick rule: Always check manufacturer recommendations for your specific stucco type before purchasing materials.
Tools and materials for fiber cement work
Before you cut, fasten, or seal, consult this list to ensure you’ve got the right tools and materials.
- Circular saw with fiber cement blade: For clean cuts. Using a regular blade can cause excessive dust and damage.
- Nails (1″ – 2″, galvanized): For attaching boards. Skip this, use the wrong type, and you’ll risk nail pops or rusting.
- Fiber cement sealant: To fill seams and prevent water intrusion. Don’t skip this step; it’s crucial for long-term performance.
- Tape measure: Essential for accurate cuts and measurements. Without this, you’ll end up with improperly sized boards or gaps between them.
- Chalk line: For marking cut lines on the board.
- Safety glasses: Protect your eyes from debris during cutting.
- Dust mask and goggles (with side shields): Essential when cutting to protect against silica dust. Skip this, risk lung damage or eye irritation.
- Disposable coveralls: To protect clothing from fiber cement dust.
Quick rule: Always wear appropriate PPE and follow manufacturer guidelines for safe disposal of fiber cement waste.
Personal safety and environmental handling
Safety should always be your top priority. Follow this checklist to protect yourself and the environment.
- Respirator (N95 or P100): Essential when sanding, cutting, or removing old material to prevent inhaling harmful particles like silica dust.
- Safety glasses with side shields: Protect your eyes from debris and dust. Without this, you risk eye irritation or injury.
- Ear protection (earplugs or earmuffs): To protect against loud power tool noises. Skip this, risk hearing damage.
- Silica-dust control measures: Use wet cutting techniques or vacuum dust collection systems when working with fiber cement to minimize silica dust exposure.
- Proper disposal/recycling of waste: Check local regulations for safe disposal or recycling options. Improper disposal can harm the environment and may be illegal.
Quick rule: Always prioritize safety over speed, and follow local guidelines for waste disposal to protect both you and the environment.
Visual Checkpoints and Inspection Workflow
Provide a photo-friendly inspection sequence with clear checkpoints you can compare against. Look for cracking patterns, edge separations, and moisture indicators as the primary signals. Use a simple pass/fail rubric to decide when to repair now or monitor for later.
Include guidance on documenting conditions and what to photograph for reference. If you see something unusual, verify requirements in the product instructions or local building rules before proceeding. This helps you stay objective and consistent in assessments.
Exterior Visual Checklist (What to Photograph)
Use this checklist before and after repairs, or when inspecting for damage. Photos help track progress and document issues.
- Windows and doors: Check seals, caulking, and any cracks around them. Skipping can lead to water intrusion and energy loss.
- Wall-to-wall junctions: Inspect where walls meet each other. Cracks here can indicate structural issues or poor installation.
- Base of walls: Check for cracks, moisture stains, or efflorescence (white powdery substance). These signs may indicate water damage or foundation problems.
- Under eaves and overhangs: Inspect for damaged or missing flashing. This can cause water to infiltrate the interior.
- Eaves and fascias: Check for rot, cracks, or insect damage. These issues can compromise the structural integrity of your home.
- Gutters and downspouts: Ensure they’re securely attached and functioning properly. Clogged or damaged gutters can cause water to back up and damage siding.
- Chimney and vents: Inspect for cracks, gaps, or missing mortar. These issues can lead to energy loss and carbon monoxide backdrafting.
- Close-ups of cracks: Photograph any cracks you find. This helps track their progression over time and aids in repair decisions.
Quick rule: Always photograph before and after repairs for future reference and to document work done.
Interior Signs to Correlate with Exterior Findings
Use this checklist when inspecting interior spaces. These symptoms can indicate urgent exterior repairs are needed.
- Water stains or discoloration: On ceilings, walls, or floors. These signs often indicate a leaky roof or damaged siding that needs immediate repair to prevent further damage.
- Efflorescence (white powder): On interior walls or ceilings. This usually indicates water intrusion through the exterior cladding, requiring prompt attention.
- Drafts: Around windows, doors, or baseboards. These can indicate gaps in your home’s envelope that need to be sealed to prevent energy loss and moisture intrusion.
- Mold or mildew: On walls, ceilings, or around windows. These growths often signal water damage that needs to be addressed promptly to prevent further spread.
- Cracking or peeling paint: On interior walls or ceilings. This can indicate underlying structural issues or moisture problems that need to be addressed.
- Musty odors: These often accompany mold growth and indicate a moisture problem that needs to be addressed.
Quick rule: If you notice any of these interior symptoms, inspect the corresponding exterior areas immediately to identify and address any damage.
Long-Term Maintenance Schedules and Treatments
Lay out a practical maintenance cadence that minimizes future repairs for both materials. Tie tasks to seasonal patterns and easy-to-perform checks. The aim is to catch issues early and extend the life of the siding without major intervention.
Frame tasks as simple inspection triggers and routine treatments you can schedule on a calendar. Confirm any recommended coatings, cleaners, or sealants from the manufacturer’s instructions or local guidelines before application. Use this as a realistic long-term plan you can follow.
Stucco Upkeep and Painting/Finish Considerations
Stucco needs periodic attention to keep it looking good and performing well. The key is to address finishes at the right time, resealing or repainting without trapping moisture.
Check your stucco every spring for any cracks or damaged areas. Use a quality exterior caulk to fill these gaps. Remember, preventing water intrusion is crucial to avoid further damage.
When it’s time to paint or reseal, choose a substrate or primer that matches the existing finish and follows product guidance. This ensures proper adhesion and longevity of your new coat.
Fiber Cement Upkeep and Re-sealing/Painting
Maintaining fiber cement siding involves regular checks on joints, fasteners, caulking, and flashing to preserve the envelope.
Inspect your siding annually for any nail pops or loose joints. Tighten or refasten as needed. Repaint when the finish starts fading or chipping, typically every 10-15 years depending on climate and exposure.
Keep an eye on caulking around windows, doors, and trim. Reseal any gaps to prevent water intrusion. Flashing should also be checked regularly to ensure it’s securely attached and not damaged.
Cost, Time, and Effort Comparison for DIY Vs Pro Work
Compare the relative time investment and skill level required for DIY versus professional help. Consider the upfront labor, material costs, and potential follow-up repairs when making a decision. The emphasis is on practical planning rather than exact figures.
Identify typical cost components homeowners should budget for and how they vary by material. If you’re unsure, verify with local contractors or manufacturer recommendations to avoid surprises. This section helps you set reasonable expectations for both paths.
Estimating DIY Effort and Hidden Time Sinks
DIY siding projects can seem straightforward, but there are tasks that often take longer than expected. Prep work is a big one – you’ve got to remove old siding, prep the surface, and install new flashing. This alone can take days.
Curing time is another hidden time sink. Stucco needs time to cure properly before it’s ready for painting or finishing. Fiber cement also needs time to off-gas after installation. You’ll need to plan your project timeline accordingly.
Before committing to a DIY project, test out the work. Try installing a small section of siding in an inconspicuous area. This will give you a realistic idea of how long the job will take and if it’s something you’re comfortable doing.
When Hiring a Pro is the Smarter Choice
While DIY can save you money, there are times when hiring a professional is the better option. Extensive water damage is one such case. Water damage can compromise the structural integrity of your home. A pro will know how to assess and repair this properly.
Structural movement is another red flag. If your home has shifted or settled, you’ll need a pro to ensure that your siding is installed correctly and safely. Large-area replacements are also best left to the pros. They have the experience and equipment to handle big jobs efficiently.
Professionals also offer warranties on their work. This can give you peace of mind knowing that if something goes wrong, it’s covered. Plus, they’re insured, so if there’s an accident on your property, you won’t be held liable.
Conclusion
Safety, durability, and appearance -> that’s the bottom line. If you repair with care and test as you go, you’ll keep water out, stay on budget, and keep the home looking sharp.
Start with a simple, cognitive rhythm: inspect moisture and damage, choose the repair path (stucco vs fiber cement), assemble the exact tools and materials you’ll actually use, run a small test patch, then complete the repair in clear steps and seal the area. Document the results, then schedule a periodic inspection and maintenance rinse to catch issues early.
Common mistakes to avoid are sticking to bad patch mixes or improper primers, skipping moisture checks, and rushing repairs without protection or proper ventilation. Always wear eye protection and a dust mask, keep kids and pets away from work zones, and work in dry conditions with a plan to prevent oversaturation or cracking. Remember: test first, then repair; plan the sequence, and clean up as you go to avoid letting problems linger.
If the damage is widespread, you’re dealing with active water intrusion, or you don’t feel confident running through the steps safely, call a pro. A quick professional check can save you from larger leaks or crumbling later. Stay steady, follow the plan, and you’ll protect both the look and the life of the siding.
FAQ
What DIY repairs are practical on minor cracks in stucco, and when should you call a pro for stucco vs fiber cement?
Minor hairline cracks can often be filled with a compatible patching compound after cleaning and priming the edges. If cracks keep widening, run along the entire panel, or show movement, stop and consult a professional. For fiber cement, small surface cracks may be repaired with a compatible filler, but deeper or expanding issues should be evaluated by a pro.
How can you tell if water intrusion is affecting stucco or fiber cement siding, and what maintenance steps to take?
Look for damp spots, staining, or efflorescence on the surface and checking for peeling paint or soft edges. Ensure flashings and joints are sealed and gutters are directing water away. If moisture is suspected behind the siding, stop DIY work and get a professional assessment.
What patching materials and steps work for small repairs on stucco and for fiber cement, and what to avoid?
Use patching compounds that match the material type and follow the label for set time and curing. Clean the area, apply the patch in thin layers, and feather edges for a blend. Avoid mixing products across different siding types or using silicone in places not approved by the manufacturer.
How often should you inspect stucco and fiber cement siding, and what signs indicate you need maintenance now?
Inspect at least a couple of times a year and after major storms for cracks, chips, or loose panels. Watch for peeling coatings, exposed fasteners, or gaps at joints. If you notice bulging, soft spots, or water stains, schedule a check with a qualified contractor.