
Introduction
Stucco over AAC is applying a compatible base coat to Autoclaved Aerated Concrete walls. Pre-installation prep is key—clean surfaces, seal any joints, and plan how you’ll store and handle panels to avoid damage. Handle AAC panels with care, store flat in a dry, shaded area, and check manufacturer guidance for any site-specific restrictions.
Choose a base coat and adhesives that are recommended for AAC, and check labels for suction management and cure times. Fasteners and mechanical anchors need to be appropriate for AAC and your substrate; follow the manufacturer’s instructions and local rules. During installation, monitor suction as you apply each coat and adjust with wetting or bonding agents per guidance, and keep the process practical for a DIY job.
Key takeaways
- Ensure AAC walls are clean, dry, free from dust, and properly cured before stucco.
- Inspect panel surfaces for cracks, chips, and edge integrity; reject damaged panels.
- Store AAC panels off ground, protected from moisture, use gloves during handling.
- Choose base coat and adhesives compatible with AAC and stucco, follow manufacturer guidelines.
- Use approved adhesive options for AAC panel installation per local code and labels.
- During suction control, test substrate suction and wear PPE during assessments.
Table of Contents
- Introduction
- Key takeaways
- Why Choose Stucco over AAC — Benefits and Cautions
- Understanding AAC as a Stucco Substrate
- Choosing the Right Base Coat for AAC
- Fasteners and Mechanical Anchoring for AAC Panels Under Stucco
- Suction Control and Surface Preparation
- Tools, Materials Checklist, and Mixing Guidelines
- Step-by-Step Application Process and Sequencing
- Common Mistakes, Troubleshooting, and Quality Checkpoints
- Conclusion
- FAQ
Why Choose Stucco over AAC — Benefits and Cautions
Stucco can provide a continuous thermal barrier, fire resistance, and a broad finish palette compared to other exterior options. It helps unify exterior aesthetics while allowing texture and color variations that suit many climates. Quick comparisons to alternatives highlight where stucco shines and where it may fall short.
Common cautions include adhesion between stucco and AAC, moisture management pathways, and potential cracking. These concerns can be mitigated with careful prep, appropriate coatings, and detailing. Expect guidance on base coats, bonding agents, and AAC-specific surface prep to maximize performance.
Performance advantages and use cases
Stucco over AAC offers several practical benefits. It’s a great choice for exterior cladding, providing a durable, long-lasting finish.
Thermal continuity is key. Stucco forms a solid barrier, reducing heat loss in winter and gain in summer. This improves energy efficiency and comfort.
Stucco also provides fire resistance, meeting many building codes’ fire-resistant cladding requirements. It’s non-combustible and can help slow the spread of flames.
For builders, stucco is easy to apply and finish, offering a wide range of textures and colors. For homeowners, it requires minimal maintenance compared to other finishes like wood or vinyl siding.
When not to use stucco on AAC and risk factors
While stucco has many benefits, there are situations where it’s not suitable for AAC. Constant saturation is a big no-no.
Improper detailing, like lack of flashing or inadequate drainage, can lead to water buildup behind the stucco, causing damage to the AAC and promoting mold growth.
Seismic activity is another concern. Stucco’s rigid nature can make it vulnerable in high seismic zones. Before specifying stucco, check local building codes and consult with a structural engineer if necessary.
Lastly, existing cracks in the AAC need attention. They should be filled and sealed before applying stucco to prevent moisture intrusion and further cracking.
Understanding AAC as a Stucco Substrate
AAC’s porosity and surface texture influence suction and absorption, which in turn affect bond strength for base coats. The smooth or lightly textured surface can require targeted preparation to achieve reliable adhesion. These properties drive how well the coat will hold up over time.
Adhesion implications extend to primer choices and the interaction with common base coats. Fastener performance and suction management are linked to AAC’s pore structure, guiding embedment and potential sleeve use. Surface preparation and moisture control set the stage for consistent results.
AAC surface conditions that affect adhesion
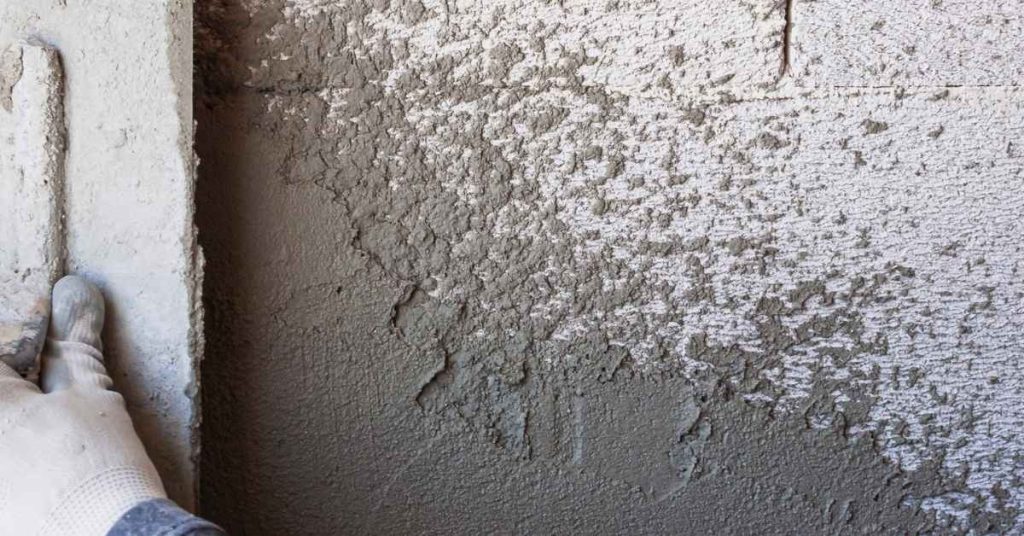
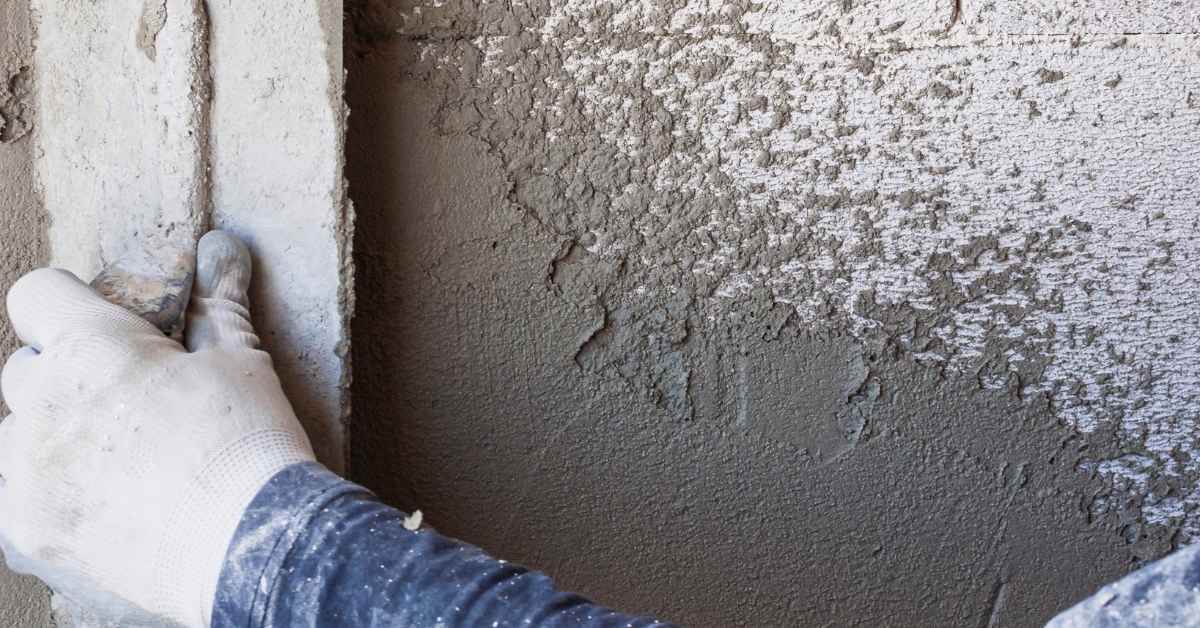
Before applying a base coat, inspect your AAC panels for any surface issues. These can impact the bond strength of your stucco.
Dust: Remove all dust and loose material using a wire brush or compressed air.
Laitance: This is a weak, cement-rich layer that forms on AAC surfaces during curing. Scrub it off with water and a stiff brush before applying any base coat.
Loose edges and cracks: Tighten loose edges using screws or nails driven into predrilled holes. For cracks, use a compatible repair mortar to fill them in.
Repairing and prepping damaged AAC panels
Before stucco application, repair any damage on your AAC panels. This ensures a smooth, even surface for your base coat.
Chips: Use a compatible repair mortar to fill in chips. Apply with a trowel, making sure to push the material into the voids. Smooth it out and let it cure according to the manufacturer’s instructions.
Voids: Similar to chips, use a repair mortar to fill any voids or hollow spots. Again, ensure the material is pushed in and smoothed out for an even surface.
Leveling joints: If your AAC panels have uneven joints, use a joint compound to level them out. Apply with a trowel, making sure to fill any gaps. Smooth it out and let it cure before proceeding.
Choosing the Right Base Coat for AAC
The base coat acts as the interface between AAC and the finish, influencing moisture management and suction control. Its behavior under sun and wind helps determine long-term durability and crack resistance. Understanding this role helps you select a compatible system.
Base coat types vary in bond strength, elasticity, and vapor permeability. Cementitious, polymer-modified, and thin-coat options each have fit cases on AAC. Surface prep and bonding considerations should be tested before full application.
Cementitious vs polymer-modified base coats
When choosing a base coat for AAC, you’ve got two main options: cement-based and polymer-modified. Each has its pros and cons.
Cement-based are traditional, cheap, and breathable. They’re good when you need to match existing textures or colors on your AAC. But they can crack if the substrate moves, and they don’t stick as well in hot, humid conditions.
Polymer-modified blends offer better adhesion, flexibility, and crack resistance. They’re great for new builds or when you need to bridge minor surface imperfections. However, they can be pricier and may not match existing textures perfectly.
Additives, bonding agents, and primers
To ensure your base coat sticks to AAC like glue, consider using additives, bonding agents, or primers. These enhance adhesion, seal the surface, and improve suction control.
First, evaluate your AAC’s condition. If it’s new, smooth, or has been exposed to weather, a primer might be enough. For damaged or porous surfaces, use a bonding agent or additive mixed into your base coat.
Always follow manufacturer recommendations and lab adhesion data. Some products are designed for specific AAC types or surface conditions. Don’t guess; test first on a small area before full application.
Fasteners and Mechanical Anchoring for AAC Panels Under Stucco
Choose corrosion-resistant fasteners suitable for AAC and stucco, such as stainless or high-quality zinc-plated hardware, and match screw styles to the AAC core. Properly rated fasteners help prevent pull-out and cell crushing during wind or seismic loads. Material compatibility keeps corrosion risk low.
Anchoring systems and lath attachment patterns matter to avoid damage or crippling failures. Through-fasteners and mechanical anchors must be coordinated with lath attachment and suction control. An orderly sequence supports uniform attachment and easier inspections.
Fastener types and selection criteria
When it comes to AAC panels under stucco, you’ve got a few options for fasteners. Here’s what you need to know:
Mechanical Anchors: These are your best bet for heavy-duty applications. They’ve got a sleeve that goes into the panel and a bolt that screws in. Make sure to check the embedment depth on the product label – it should be at least 2 inches for AAC.
Corrosion-Resistant Screws: For lighter loads, you can use screws. Stainless steel or galvanized are your best bets here. Check the pull-out value – you want something that can handle at least 50 lbs of tension per square inch.
Washers: Always use washers with your fasteners to spread out the load and prevent the stucco from cracking. A standard washer will do, but if you’re using a big screw or anchor, consider a larger one.
Layout, embedment, and corrosion protection
First things first, check your manufacturer’s guidelines for AAC panel installation. They’ll give you the best advice tailored to their product.
Now, let’s talk spacing. You want your panels secure but not overstressed. Aim for about 600mm (24″) centers. But remember, local codes might have different rules, so check with your building department.
Embedment depth is crucial. You need enough to hold the panel in place but not so much that you hit the other side. A good range is around 100-150mm (4″-6″). Again, check your manufacturer’s recommendations and local codes.
Lastly, corrosion protection. We’re talking about stucco here, so it’s a wet environment. You need to protect those fasteners. Use hot-dipped galvanized or stainless steel fasteners. If you’re in a coastal area with high salt content, go for the stainless. And always use corrosion-resistant washers. Follow your manufacturer’s advice on sealants too.
Suction Control and Surface Preparation
Porous AAC surfaces generate suction as moisture moves through the pores. Controlling suction helps the base coat set and tack properly. Understanding suction informs your pre-treatment plan.
Pre-treatment options include cleaning, profiling, pre-wetting, or applying a compatible bonding agent. A consistent workflow reduces the risk of adhesive failure and cracks. Plan the sequence to keep suction teams aligned with fastener considerations.
Measuring and managing suction
Suction on porous AAC surfaces is like a sponge soaking up water. It’s caused by tiny pores pulling moisture in, driven by surface tension and capillary action.
High suction shows as rapid water loss, poor tack (base coat doesn’t stick), and cracking risk. To check:
- Wipe the surface with a pH-neutral damp cloth.
- Lightly mist it.
- Observe how quickly it absorbs.
If absorption is rapid, pre-treat to equalize suction. Pre-wet or use primers designed for high suction.
Primers, wetting, and pre-treatment protocols
Pre-treating AAC surfaces prepares them for base coats. Follow these steps:
- Clean the surface to remove dust and laitance.
- Lightly mist or dampen the AAC (not soaking wet).
- Apply bonding primer or diluted base coat, following manufacturer’s guidelines.
Match pre-treatment products with your chosen base coat system. Some manufacturers recommend specific primers or dilution rates for high suction surfaces.
Tools, Materials Checklist, and Mixing Guidelines
Assemble essential tools, PPE, lath or mesh options, base coats, and fasteners before starting. Have a clear containment plan for AAC dust and debris and ready wash tools for surface prep. A well-organized kit speeds up work and reduces mistakes.
Follow practical mixing guidelines and pot-life notes to maintain workability. Document water-to-mix ratios and mixing times, then adjust for temperature and humidity. Re-tempering steps should preserve performance without compromising cure.
Tools and materials checklist
Before you start, ensure you have all the necessary tools and materials for a successful stucco-over-AAC installation. Use this checklist to verify your site is well-equipped.
- Trowels (square and margin): For applying and smoothing base coats.
- Hawk: To hold and transfer material from the bucket to trowel.
- Mixing drill with paddle: Essential for mixing base coat materials.
- Mixing trough: Provides a large, flat surface for mixing.
- Buckets (5-gallon): For holding and transporting mixed material.
- Brushes (stiff and soft): For cleaning and applying bonding agents.
- Masonry skip: To contain waste materials and debris.
- Float: For leveling and smoothing base coats.
- Margin tabs: To maintain a consistent thickness of the base coat.
- Level: Ensures your base coat is applied evenly.
- Grinder (with diamond blade): For finishing edges and cutting lath.
- PPE (gloves, eye protection, dust mask, respirator): Protects you from hazards on-site.
- Drop cloths: Covers areas to protect them from debris and spills.
- Containment plan: A strategy for managing AAC dust and debris.
- Lath/mesh options (cementitious stucco lath, welded or expanded metal mesh, fiber-reinforced mesh): Choose the right one for your project. Check datasheets for compatibility with AAC substrates.
- Fasteners (stainless or hot-dip galvanized screws, washers, and anchors): Ensure they’re rated for AAC and compatible with your lath choice.
- Base coat products: Choose one designed for stucco over AAC. Check datasheets for bonding agents, primers, and admixtures.
Quick rule: Always double-check your tools, materials, and fasteners before starting to avoid delays and ensure a successful installation.
Mixing consistency, pot life, and quality control
Proper mixing is crucial for achieving the best results with your base coat. Follow these steps to ensure consistent mix quality and manage pot life effectively.
- Water-to-mix ratio: Follow manufacturer’s guidelines to avoid overwatering, which can weaken the base coat.
- Mixing time: Stir continuously for the recommended duration (usually 3-5 minutes) to ensure a homogeneous mix.
- Pot life: Keep track of how long your mixed material remains usable. Discard any material that exceeds its pot life.
- Temperature and humidity: Maintain mixing and application temperatures within the recommended range (usually 50-90°F, 10-32°C) and avoid high humidity to prevent curing issues.
- Consistency check: Test your mix by dropping a small amount onto a flat surface. It should spread evenly without leaving dry patches or being too runny.
- Adhesion test (optional): Perform a scratch test on the AAC substrate to ensure the base coat adheres properly before application.
- Cleanup and retempering: Clean your tools thoroughly after use. If you need to retemper material, follow manufacturer’s guidelines to preserve performance.
Quick rule: Always prioritize proper mixing and monitoring of pot life to ensure a strong, durable base coat that adheres well to the AAC substrate.
Step-by-Step Application Process and Sequencing
Lay out the sequence from lath/mesh attachment to scratch, brown, and finish coats with clear responsibilities. Establish a logical flow to minimize backtracking and ensure proper cure between coats. A disciplined sequence supports consistent textures and bond.
Detail the timing, environmental controls, and substrate-specific considerations for AAC. Include mixing, application thicknesses, and curing checks, along with inspection milestones. This plan helps catch issues early and keeps the project on track.
Step-by-Step Process
The following steps will guide you through the application process of your concrete project, ensuring a strong and durable finish.
- Preparation: Review your plans, gather tools (shovel, rake, screed, trowel, etc.), and ensure materials are on-site. Check local weather forecast to avoid unexpected rain.
Why: Proper planning ensures a smooth process and helps prevent delays.
Check: Tick off each item in your list as you gather them. - Safety Checks: Ensure all safety measures are in place (hard hats, safety glasses, gloves, etc.). Check that the area is clear of debris and hazards.
Why: Safety is paramount to prevent injuries.
Check: Perform a quick walkthrough of the site. - Formwork Setup: Assemble forms according to your plans. Ensure they’re level, square, and properly braced.
Why: Proper formwork ensures your concrete takes the desired shape.
Check: Use a level and tape measure to ensure accuracy. - Concrete Pouring: Pour concrete into forms, starting at one corner. Use a shovel to spread it evenly, then use a rake to distribute it throughout the form.
Why: Even distribution prevents weak spots and ensures consistent strength.
Check: Observe the surface for any low or high spots. - Finishing: Use a screed to level the concrete, then use a bullfloat to smooth the surface. Allow it to cure for 15-30 minutes, then use a trowel for final finishing.
Why: Proper finishing ensures a smooth, durable surface.
Check: Observe the surface for any imperfections or low spots. - Curing: Keep the concrete moist and covered with plastic sheeting for at least 7 days. This allows it to cure properly.
Why: Proper curing prevents cracking and ensures maximum strength.
Check: Ensure the surface remains consistently damp. - Final Inspection: After curing, inspect your concrete for any cracks or imperfections. Address any issues promptly.
Why: Early detection of problems prevents costly repairs later on.
Check: Perform a visual inspection and use a straight edge to check for level.
Pro tip: Always follow the manufacturer’s instructions when mixing concrete. Using too much or too little water can weaken your final product.
Lath/mesh installation and scratch/brown/finish coat sequence
Before you start slinging concrete, you need to get your lath or mesh in place. It’s the skeleton of your slab, so don’t skimp on this step.
Attach lath/mesh properly to formwork using nails or staples, spacing them no more than 6″ apart. Check manufacturer instructions for specific attachment methods. Make sure it’s taut and wrinkle-free – you don’t want any sloppy-looking concrete.
Now, let’s build those coats. You’re aiming for a total slab thickness of around 4″-6″, but remember, it’s better to add more than one thin coat rather than trying to pour all at once. Here’s how:
Scratch coat: Start with a 1-2″ thick layer. Let it cure for at least 3 days before moving on. This gives the concrete time to set and bond with the lath.
Brown coat: Apply another 1-2″ layer over the scratch coat. Again, let it cure for at least 3 days. The brown coat helps distribute stress evenly across your slab.
Finish coat: Your final layer should be around 1-2″ thick as well. This is where you’ll add any color or texture. Let it cure for at least 7 days before using the surface to give it time to gain full strength.
Curing, drying times, and environmental considerations
After you’ve applied your final coat, it’s not just a matter of letting time pass. You need to control the environment to ensure proper curing and prevent issues like excessive shrinkage or poor adhesion.
Temperature: Keep the concrete between 50°F (10°C) and 90°F (32°C) during curing. Check your product label for specific recommendations. If it’s too hot, shade the area; if it’s too cold, consider heating.
Wind: Protect your concrete from strong winds. They can dry out the surface too quickly, leading to cracking. Use windbreaks or cover the area with plastic sheeting.
Sun exposure: Direct sunlight can also speed up drying and cause issues. Keep the concrete shaded for at least a few days after pouring. Check local rules about using sun-reflective covers if it’s extremely hot.
Common Mistakes, Troubleshooting, and Quality Checkpoints
Identify common suction control pitfalls and verify substrate readiness before continuing. Ensure proper adhesion conditions and avoid applying coats on damp or frozen surfaces. Early checks prevent waste and rework.
Document fastening errors, mix problems, and application accidents to guide corrective steps. Establish pre-, during-, and post-installation inspections with clear acceptance criteria. Use photos to track progress and verify tolerances over time.
Diagnosing delamination, cracking, and efflorescence
Use this checklist when you notice issues with your stucco finish over AAC.
- Delamination: Check for peeling or lifting of the stucco. Causes: Insufficient suction control, inadequate adhesion. Skip this and it can lead to full debonding.
- Cracking: Look for hairline fractures or wider cracks. Causes: Thermal movement, substrate settlement. Miss these and they’ll worsen over time.
- Efflorescence: White powdery deposits on the surface indicate salt migration. Causes: Excessive moisture, poor suction control. Ignore this and it can compromise adhesion.
- Suction test: Perform a simple water drop test to check for excessive or insufficient suction. Skip this and you won’t know if suction is right.
- Adhesion test: Gently scratch the surface with a coin or blade to check adhesion. Miss this and you might not catch weak bonds.
- Moisture content: Check AAC surface moisture using a non-contact moisture meter. Neglect this and you could apply stucco on damp surfaces, causing issues.
- Temperature check: Ensure the AAC surface is within the recommended temperature range (50-90°F or 10-32°C). Overlook this and cold or hot temperatures can affect adhesion and curing.
- Fastener pull test: Check fasteners’ holding power by gently pulling on them. Skip this and you might not catch loose or insufficiently embedded fasteners.
- Coat thickness: Measure the base coat’s thickness to ensure it meets specifications. Ignore this and you could end up with an uneven finish or weak coverage.
Quick rule: Regularly inspect your stucco install for these issues. Early detection helps prevent costly repairs later on.
Visual and tactile quality checkpoints during install
Use this checklist throughout the installation process to ensure quality at each stage.
- Bond test: Perform a pull test on the base coat before applying the next layer. Skip this and you won’t know if the previous coat is properly bonded.
- Suction test: Check suction levels after each step (priming, wetting, etc.). Neglect this and you might proceed with incorrect suction conditions.
- Fastener pull test: Test fasteners’ holding power after embedding. Overlook this and you could miss loose or insufficiently embedded fasteners.
- Coat thickness: Measure each coat’s thickness to ensure it meets specifications. Ignore this and you might end up with an uneven finish or weak coverage.
- Lath/mesh alignment: Ensure lath/mesh is properly aligned and secured before applying the base coat. Miss this and you could have misaligned or loose lath/mesh affecting the final finish.
- Joint taping: Inspect taped joints for proper embedding and alignment. Overlook this and you might end up with cracked or visible joints later on.
- Corner bead installation: Check corner beads are properly installed and aligned. Ignore this and corners may crack or look uneven.
- Sealant application: Ensure sealants are applied correctly at windows, doors, and other openings. Skip this and you could have water intrusion issues.
- Cure progress: Monitor the curing process to ensure it’s proceeding as expected. Neglect this and you might not catch any delays or issues with curing.
Quick rule: Regular in-process checks help catch and correct issues early, saving time and money in the long run.
Conclusion
Sticking with the right base coat, proper fasteners, and solid suction control makes stucco over AAC durable, weatherproof, and easy to finish without costly fixes.
To lock it in, confirm the AAC is suitable for stucco, prep the surface and address suction, choose the correct base coat, install the right fasteners in the correct pattern, mix and apply in the right order, and finish with proper curing and a final inspection. Start small if you’re unsure, test patches, and follow the manufacturer’s guidelines for every product. Safety gear on, tools ready, and keep the area dry and clean as you work.
Common mistakes to avoid are skipping suction control, using the wrong base coat or fasteners, and rushing the sequence which can trap moisture or cause cracking. Don’t drive fasteners through weak spots, don’t substitute products without checking compatibility, and don’t skip curing and quality checks. Safety first: plan the steps, work steadily, and stop if conditions aren’t right.
If the project is large, there are structural concerns, water intrusion signs, or you’re unsure about fastener patterns and load paths, calling a professional is the smart move. With careful prep, steady work, and clear checks, you’ll finish strong and keep the stucco looking good for years to come.
FAQ
What pre-installation prep should I do for AAC wall panels?
Inspect panels for damage and moisture exposure before bring them to the job. Clean the surface to remove dust, oils, and loose particles. Plan storage flat and off the ground, protected from weather, until installation.
How should I handle and store AAC panels on site?
Handle panels with care to avoid chips and cracks. Stack them evenly and support the edges so they don’t bend. Keep them dry and covered if rain is in the forecast, and don’t expose them to rapid temperature swings.
What’s the installation process step-by-step, from start to finish?
Prepare the substrate per the base coat system instructions. Apply the chosen adhesive or base coat evenly, then place the AAC panels in position and align them plumb. Secure with appropriate fasteners or mechanical anchors as specified, and proceed with curing and suction control as directed by the product labels.
What adhesive options are suitable for AAC panels under stucco, and how do I choose?
Choose adhesives labeled for AAC or foam substrates and compatible with your base coat system. Read the label for open time, cure conditions, and bonding notes. If in doubt, call the manufacturer or check their instructions for your panel type and climate.
What post-installation finishing steps should I follow to get a solid stucco look on AAC?
Do suction control and surface prep again after installation before applying the base coat. Apply the base coat and mesh as specified, then finish with your chosen stucco texture. Inspect for gaps, cracks, and delamination and address promptly per product guidance.