

Introduction
Three-coat stucco uses three separate layers, while one-coat finishes are completed in a single composite application. Thickness targets and cure times depend on the system you choose, so always check the product label and local rules rather than guessing. Also verify how a weather-resistive barrier is used and how the lath is installed, since mistakes there show up in the finish.
For a DIY job, plan your lathing, mixing, and trowel work to stay consistent across walls, and be prepared to adjust if weather changes. Follow manufacturer instructions for cure times and sealing details, and look for warning signs like cracking or moisture intrusion that mean you need to pause and reassess. If in doubt, check local code guidance and rely on practical, hands-on steps rather than formulas.
Key takeaways
- One-coat stucco requires thicker outer layer with fewer steps; verify substrate compatibility.
- Three-coat systems demand proper lath, scratch coats, and cure planning for durability.
- Plan weather-resistive barriers and flashing carefully to prevent moisture intrusion.
- Ensure correct lath spacing, fasteners, and corner details to avoid cracks.
- Control and expansion joints must be planned early to manage movement.
- Safety note: follow manufacturer directions and local codes; improper mix leads to failures.
Table of Contents
- Introduction
- Key takeaways
- Quick Comparison Overview
- Thickness Targets and Layer Breakdown
- Cure Times, Environmental Factors, and Testing
- Common Failures in One-Coat Stucco
- Failure Modes for Three-Coat Stucco and Edge Cases
- Weather-Resistive Barriers, Flashing, and Weep Screed Detailing
- Lathing Practices and Material Selection
- Control Joints, Expansion Joints, Cost, Maintenance, Safety, and DIY Planning
- Conclusion
- FAQ
Quick Comparison Overview
This section lays out the core distinctions between three-coat and one-coat stucco at a glance. You’ll see how thickness, coat count, and curing windows influence installation pace and long-term performance. Practical tradeoffs in labor intensity, durability, speed, and cost are highlighted to help you pick a path that fits your project.
We compare application methods, including lamination to lath and the required coats for each system, along with typical substrate expectations. Then we summarize how each system tends to perform under weather, temperature swings, and moisture management. A concise quick-decision guide helps you decide when speed and budget win versus when durability and careful workmanship matter more.
When to choose one-coat
One-coat stucco is your friend when you’re on a tight budget, need a quick turnaround, or live in a mild climate. It’s great for light remodels where durability isn’t the top priority.
Here’s why it works:
- Faster application time – one coat instead of three.
- Lower material cost – fewer layers mean less money spent on product.
- Suitable for mild climates – it holds up well in areas with minimal temperature swings and low humidity.
Keep in mind, one-coat stucco has a shorter lifespan than three-coat. It’s not ideal for new construction or high-moisture areas due to its reduced durability and moisture management capabilities.
When to choose three-coat
Three-coat stucco is the go-to for new construction, high-moisture areas, or when you want your finish to last a lifetime. It’s specified for higher-performance installations due to its superior durability and moisture management.
Here’s why it’s worth the extra effort:
- Enhanced durability – three layers mean better resistance to cracking, peeling, and impact damage.
- Improved moisture management – the additional layers provide better protection against water intrusion and allow for more effective drainage.
- Versatile finish options – with three coats, you can achieve a wider range of textures and colors.
Note that, while it offers superior performance, three-coat stucco requires more time and labor to apply. It’s also more expensive due to the additional materials needed.
Thickness Targets and Layer Breakdown
Three-coat stucco uses separate base, brown, and finish coats, with lath, reinforcing mesh, and a weather barrier aligned to each layer. One-coat systems blend base and finish into a single application, alongside the lath and barriers required for that approach. Check your product labels and installation guides for exact expectations.
We describe typical thickness targets in safe ranges and emphasize consulting manufacturer datasheets for numbers and tolerances. In practice, thickness is checked with gauges or calipers and by comparing to joint and edge details. Common issues arise from being too thin or too thick, so follow staging and technique to stay within target ranges.
Three-coat layer functions
A three-coat stucco system is composed of three distinct layers, each with its own role:
- Scratch coat (base): This first layer provides a rough surface for the next coat to adhere to. It’s typically 1/4″ to 3/8″ thick.
- Brown coat: Applied over the scratch coat, this leveling coat smooths out imperfections and provides a uniform surface. Its thickness usually ranges from 3/8″ to 1/2″.
- Finish coat: The final layer provides the desired texture and color. It’s typically applied at 1/8″ to 1/4″ thick.
The total thickness of a three-coat system usually ranges from 3/8″ to 3/4″. Distributing the thickness across layers allows for better adhesion, improved performance, and easier application.
One-coat composition and limits
A one-coat stucco system combines the functions of a base and finish coat into one. This is achieved by mixing bonding agents with aggregates to create a single, self-leveling application.
The typical thickness range for one-coat systems is 1/4″ to 3/8″. While this simplifies application, it also has limitations:
- Less flexibility: One-coat systems have less room for error in application. They’re more prone to cracking if applied too thin.
- Limited texture: Since the finish is incorporated into a single layer, textural options are limited compared to three-coat systems.
Specifying thickness in plans
When specifying stucco thickness in your project plans, include the following details:
- The name of each layer (e.g., scratch coat, brown coat, finish coat)
- Target thickness ranges for each layer and the total system
- Acceptance tolerances (e.g., plus or minus 1/8″)
- A note to reference manufacturer recommendations and local building codes
For example: ‘Stucco System: Three-coat, total thickness 3/4″ +0″, -1/8″. Scratch coat: 3/8″ +0″, -1/8″. Brown coat: 1/2″ +0″, -1/8″. Finish coat: 1/8″ +0″, -1/8″‘.
Cure Times, Environmental Factors, and Testing
Different cure timelines emerge for three-coat versus one-coat systems as they progress toward final strength and humidity thresholds. Temperature and humidity shifts influence cure rate, with heat speeding drying and cold slowing it, while substrate moisture adds another layer of variability. We outline safe ranges to guide planning without promising exact times.
Wind, sun exposure, and shading play important roles in curing quality. Moisture in the lath or sheathing alters curing behavior and adhesion risk if not managed. Always follow manufacturer guidance and use non-destructive checks to verify readiness before moving to subsequent steps.
Monitoring and moisture testing
Before applying any stucco, check your substrate’s moisture level. Use a simple surface inspection or a moisture meter.
Stucco needs a dry base to adhere properly. If the reading is above 15-18%, wait for it to drop or consider using a vapor barrier.
After application, test again at each layer’s end and before applying the next one. Stucco should be around 12-15% moisture content when ready for the next coat.
Cold- and hot-weather protocols
Hot/dry conditions: Keep your stucco work in progress shaded from direct sun. Use windbreaks to protect it from rapid drying, which can cause cracking.
Mist the surface lightly with water during application and throughout curing to maintain a consistent moisture level.
Cold conditions: Follow manufacturer cold-weather curing procedures. This may involve using heaters or covering the work area to maintain a minimum temperature (usually around 50°F/10°C).
Common Failures in One-Coat Stucco
This section identifies failure modes most likely to show up in one-coat systems, including insufficient thickness, poor adhesion, premature drying, and moisture intrusion. Observable symptoms like cracking, delamination, or staining connect to root causes and long-term performance risks.
We explore substrate prep, lath attachment, flashing, moisture barriers, and expansion joints as contributors to these issues. Practical checks cover thickness, adhesion testing, and moisture readings behind the stucco, with timing and curing sequences explained to prevent premature drying and poor bonding.
Application errors (thickness, mix, tooling)
One of the biggest mistakes DIYers make is overworking the stucco. Remember, less is more here. You’re not trying to knead bread.
Another common error is getting the water content wrong. Too much water makes it weak and prone to cracking. Check your product label for the right ratio. A safe range is usually 3-4 parts cement to 1 part water by volume.
The thickness of your stucco application matters too. Aim for around 3/8″ to 1/2″. Too thin and it won’t provide proper coverage or protection. Too thick and it can crack under its own weight. Use a straight edge to check as you go.
Weather-resistive barrier and flashing failures
One of the biggest mistakes I see on job sites is skimping on or improperly installing the weather-resistive barrier (WRB). It’s your home’s first line of defense against water, so don’t mess it up.
Check your WRB: Make sure it’s rated for your climate and meets local building codes. Install it right – tight, seamless, and lapped properly at seams and edges. Don’t let it get punctured or torn during installation of the one-coat stucco.
Flashing is another common failure point. It’s there to direct water away from vulnerable areas like windows, doors, and corners. If it’s not done right, water will find its way in and cause all sorts of trouble behind your stucco.
Inspect your flashing: Ensure it’s properly installed at these critical points. Check for gaps or tears. Make sure it’s sealed tight with caulk or other appropriate sealant. Don’t forget to flash window and door heads too – that’s where water loves to hide.
Lath and attachment problems
Using the wrong lath or attaching it incorrectly can lead to big issues with your one-coat stucco. Here’s what you need to watch out for:
Wrong lath type: You want expanded metal lath, not wire mesh. Expanded metal gives better bond and less chance of rusting.
Attachment spacing: Check your local building codes, but generally, you’ll want to space your lath attachments around 6-8 inches apart. Too far apart and you get weak spots, too close and you’re wasting materials.
Excessive staples: Don’t go staple-crazy. Too many staples can penetrate the weather-resistive barrier (WRB), creating leak paths. It’s better to have a few well-placed staples than a bunch of poorly placed ones.
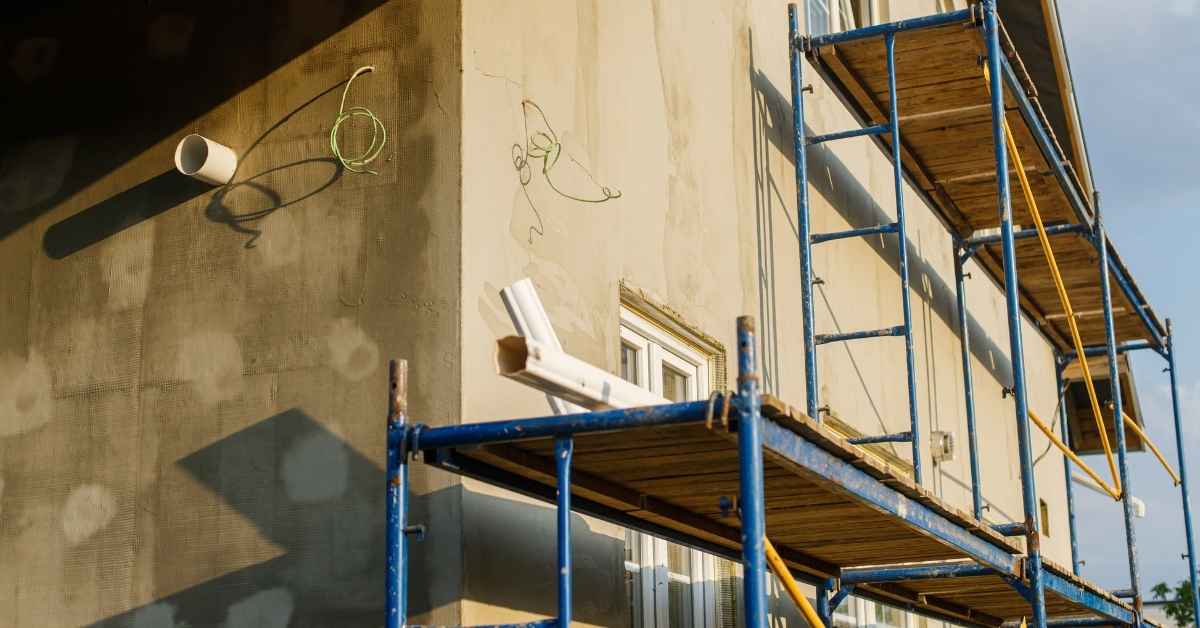
Failure Modes for Three-Coat Stucco and Edge Cases
Even three-coat systems can fail, and this section explains how substrate movement, inadequate joints, and flashing or WRB deficiencies contribute to problems. You’ll see how movement and detailing issues differ from one-coat failures and affect repair complexity.
We cover curing and moisture dynamics, material compatibility, and the onset timing of failures in challenging substrates. Diagnostics focus on how to identify root causes and plan repairs that respect the extra layers and complex sequencing of a three-coat system.
Substrate movement and structural causes
The biggest culprit for three-coat stucco failures is substrate movement. This happens when your walls shift due to thermal expansion, framing shrink/swell, or sheer loads.
Structural settlement can also cause cracks. Control details like expansion joints help mitigate this risk. But remember, these are only as good as their installation.
Key takeaway: Properly designed and installed control joints are your first line of defense against substrate movement.
Finish-coat and coating compatibility
The finish coat’s job i