
Introduction
Stucco kickout flashing is a piece of flashing, usually metal or plastic, installed at the edge where the roof overhang meets a stucco wall to redirect water away. This article outlines minimal-removal retrofit ideas that still guide water correctly and protect the wall.
You’ll need simple hand tools, basic fasteners, and compatible flashing material such as aluminum or PVC. Check the product labels and local rules for size and installation guidance, then follow a practical, step-by-step approach that fits the existing wall and roof details.
Key takeaways
- Understand stucco kickout flashing purpose and how it prevents water intrusion.
- Identify minimal-removal retrofit options that preserve siding integrity and flashing continuity.
- Choose flashing materials: aluminum or PVC, compatible with stucco and drainage.
- Assemble tools and safety gear before starting, including eye protection, gloves, and mask.
- Follow step by step process: assess, cut back, install lintel, seal joints.
- Verify installation with basic water resistance checks and inspect for gaps.
Table of Contents
- Introduction
- Key takeaways
- What Is Stucco Kickout Flashing and Why It Matters
- Why Retrofit Is Often Necessary on Existing Stucco Homes
- Materials and Material Specs for Minimal-Removal Retrofits
- Tools and Materials Checklist for Minimal Removal Approach
- Step-by-Step Minimal Stucco Removal and Installation Process
- Common Failure Points, Testing, and Troubleshooting
- Building Codes, Permits, and Inspection Considerations
- Cost, Timing, Weather, and Homeowner Skill Influence
- Conclusion
- FAQ
What Is Stucco Kickout Flashing and Why It Matters
Kickout flashing is a small but critical detail at roof-to-wall junctions. It redirects water away from the stucco joints to prevent water from traveling behind the cladding. A simple schematic description helps visualize how the flashing directs flow to the exterior edge rather than into the wall.
Failure modes include missing, undersized, or misoriented kickouts, which over time invite moisture damage, rot, and stucco cracks. Retrofits can remedy these issues by adding or adjusting the kickout with limited demolition and compatible flashing materials. This detail works in concert with drip edges, underlayment, and the drainage plane to protect the wall assembly and control termination height.
Definition and function
Kickout flashing is a critical component at roof-to-wall terminations. It’s a metal strip, usually made of galvanized steel or aluminum, that sits on top of the wall and extends up onto the roof slope.
Its job? To redirect water running down your roof away from the wall, preventing it from seeping behind your stucco cladding. Imagine it as a tiny dam, creating a barrier to keep moisture out.
Properly installed, kickout flashing ensures that water flows harmlessly over its edge and onto the ground below, keeping your walls dry and durable.
Consequences of missing or failing kickout flashing
Without a proper kickout, water can find its way behind your stucco. This leads to all sorts of trouble:
First, it can cause rot and decay in the wall’s framing and sheathing. You might not see this happening until it’s too late – that’s why it’s called hidden rot.
Next, moisture trapped behind stucco causes it to delaminate, or peel away from the wall. This leaves your home vulnerable to further water intrusion and can lead to costly repairs.
In short, missing or failing kickout flashing is a recipe for long-term damage and expensive fixes. It’s much better to install or retrofit kickouts now to prevent these problems down the road.
Why Retrofit Is Often Necessary on Existing Stucco Homes
Common conditions prompting retrofit include missing or damaged kickout flashing and gaps at transitions, plus prior imperfect repairs. Visible cracking, moisture staining, or interior water intrusion also signal a retrofit focus. The goal is to improve performance without a full replacement.
Diagnostic checks look at flashing continuity, weep systems, and interior indicators like stains or soft walls. A moisture meter and an assessment of roofing slope near walls help justify action. Retrofit strategies emphasize proper kickout installation, drainage integration, and sealing to resist recurring leaks.
Typical existing deficiencies found on inspection
Before you start any work, inspect your stucco home thoroughly. Use this checklist to identify common issues that may necessitate a retrofit.
- Missing or damaged kickout/edge flashing: Check roof-to-wall junctures for missing or rusted metal flashing. Without it, water can run down the wall and behind the stucco.
- Gaps at transitions: Inspect where different materials meet – like siding, trim, or windows. Gaps allow water to penetrate.
- Improper prior repairs: Look for signs of previous DIY fixes that may have caused more harm than good, like caulking over cracks instead of addressing the root cause.
- Visible cracking or bulging stucco: Cracks wider than a hairline and bulges indicate underlying issues. Water intrusion often causes these symptoms.
- Moisture staining: Dark stains on exterior walls suggest water has been absorbed, which can lead to further damage if left untreated.
- Efflorescence: A white, powdery substance on the stucco surface indicates moisture is present and may be causing damage behind the scenes.
- Soft spots or warped wall material: Gently press on the stucco. If it feels soft or gives way, water damage has likely occurred.
- Interior water intrusion: Check inside for stains, musty odors, or warped walls. These signs point to water getting in through the exterior.
Quick rule: If you find three or more of these issues, it’s time to consider a retrofit.
Homeowner-visible signs to trigger retrofit
As a homeowner, you can spot several telltale signs that your stucco home may need a kickout flashing retrofit. Keep an eye out for these practical indicators.
Staining: Water stains on the exterior walls or ceilings inside your home are clear signs of water intrusion. They often appear as dark, discolored patches.
Efflorescence and salt deposits: White, powdery substances or crystal-like formations on the stucco surface indicate that moisture is present and may be causing damage behind the scenes. These deposits occur when water evaporates, leaving behind mineral salts from the stucco.
Soft spots or effervescence: Gently press on the stucco with your fingers or a screwdriver handle. If it feels soft, spongy, or gives way, water damage has likely occurred. This is known as effervescence, and it’s a clear sign that you need to address the issue promptly.
Materials and Material Specs for Minimal-Removal Retrofits
Material families include corrosion-resistant metals, rigid plastics, and flexible membranes. Match them to the stucco substrate, trim, and anticipated movement to reduce cracking or delamination. Consider how each option behaves with lime-based or cementitious stuccos and prepare for coatings or primers as needed.
Key specs cover thickness or gauge, corrosion resistance, UV stability, and compatibility with sealants and fasteners. Bonding methods and flashing joints should accommodate expansion and contraction without compromising waterproofing. Surface prep and substrate condition determine long-term performance.
Flashing Material Pros and Cons
The choice of flashing material significantly impacts your retrofit’s success. Each type has its advantages and limitations.
- Corrosion-resistant metals (aluminum, stainless steel): Durable, long-lasting, and resistant to corrosion. Look for 24- or 26-gauge metal with a corrosion resistance rating suitable for your climate. Avoid using galvanized metal as it can corrode faster against stucco.
- Rigid PVC: Inexpensive, easy to install, and resistant to rot and insects. Choose UV-stabilized PVC for outdoor use. Be aware that it may become brittle over time with prolonged sun exposure.
- Flexible composite membranes: Adaptable to various shapes and movements. They offer good impact resistance but may be less durable than metal options. Ensure they’re compatible with your stucco type and trim materials.
Sealants, Fasteners, and Substrate Prep
Proper sealants, fasteners, and substrate preparation are crucial for maintaining waterproofing. Use compatible materials to avoid delamination or cracking.
Stucco is porous, so apply a primer or coating to improve adhesion. Ensure your chosen flashing material is compatible with lime-putty or cement-based stuccos. For fasteners, use corrosion-resistant options like stainless steel or hot-dipped galvanized screws.
Before installation, assess the substrate. Check for moisture conditions, porosity, and existing corrosion at fasteners. Remediate any issues to maximize adhesion and longevity.
Material Longevity and Maintenance Expectations
The expected service life of your retrofit depends on material choices, installation quality, and regular maintenance.
- Corrosion-resistant metals: With proper installation and minimal removal, metal flashings can last 50+ years. Regularly inspect for signs of corrosion or damage at fasteners.
- Rigid PVC: Expect a service life of around 20-30 years with proper UV protection. Inspect for brittleness and replace as needed.
- Flexible composite membranes: These can last up to 25 years or more, depending on the quality of materials and installation. Regularly check for signs of wear or movement.
Tools and Materials Checklist for Minimal Removal Approach
Core tools include PPE, a stable ladder, utility knife, tape measure, and a narrow- blade tool to minimize wall disturbance. Use a small tool bucket and dust suppression to keep the work area clean. A compact oscillating tool helps with precise reveals without large-scale removal.
Essential consumables are compatible exterior sealants, backer rod if needed, flashing tape, mesh or patch compounds, primers, and touch-up finishes. Optional specialty tools aid in tight spaces, while safety, containment, and waste planning keep the job orderly. Verify utility locations and local permit requirements to avoid surprises.
Essential hand and cutting tools
Use this checklist to gather the right tools for minimal stucco removal when exposing and fitting flashing.
- Hammer: For gentle tapping and prying. Skip it, you’ll struggle with precise work.
- Pry bar: To carefully lift and remove old flashing or damaged stucco. Without it, you’ll cause more damage.
- Flat blades: For scoring and cutting through stucco. Miss this, expect chipping and cracking.
- Pry blades: To separate stucco from the wall without damaging it. Don’t use regular pry bars to avoid deep gouges.
- Cordless drill/driver: For driving screws and mixing compounds. No power, no torque for tough jobs.
- Impact-resistant bits: To prevent stripping or breaking when driving screws into stucco. Wrong bit, expect stripped screws and damaged wall.
- Low-damage cutting blade: For clean cuts through stucco without causing excessive damage. Use the wrong one, you’ll create more repair work.
- Chisel: For precise reveals where full stucco removal isn’t needed. Skip it, you won’t get that tight fit.
- Tin snips: To cut and shape metal flashing. No tin snips, no clean cuts.
Quick rule: Gather these tools before starting to minimize damage and ensure a smooth workflow.
Optional specialty tools and jigs
Use this checklist for tight access retrofits where standard tools won’t cut it.
- Small angle grinder: For confined spaces where a regular grinder is too big. No room, no clean cuts.
- Flush-cut saw: To make precise cuts close to the wall surface without damaging it. Wrong tool, expect deep gouges.
- Bending brake: For shaping metal flashing to fit complex contours. No bending brake, no custom shapes.
- Heat gun: To soften old adhesive for easy removal. Skip it, you’ll struggle with stubborn adhesive.
- Snap chalk line: For accurate kickout alignment. No line, no straight kickouts.
- Compact moisture meter: To check for hidden moisture before flashing. Miss this, expect mold and rot behind your new flashing.
Quick rule: Use these tools when standard ones won’t fit or can’t handle the job.
Safety gear and consumables
Use this checklist to ensure you’re protected and have everything needed for a finished look.
- PPE (Personal Protective Equipment): Includes safety glasses, gloves, and ear protection. Skip it, risk injury or discomfort.
- Stable ladder/scaffold: For safe access to high areas. No stability, expect falls.
- Exterior-grade caulk/ sealant: Compatible with stucco for a reliable weatherproofing job. Wrong one, expect leaks and damage.
- Backer rod: For filling gaps before caulking to prevent shrinkage. Miss this, expect cracked sealants.
- Flashing tape/self-adhesive drip-edge membrane: For sealing the kickout joint. No flashing, water will find its way in.
- Mesh or patch compound: For small repairs before painting. Skip it, expect an unfinished look.
- Primer and paint: To touch up surfaces after repair work. No primer, expect peeling paint.
- Exterior stucco patch material: For filling any gaps or holes left by removed stucco. Miss this, expect visible repairs.
Quick rule: Gather these items to ensure a safe, weatherproof, and finished job.

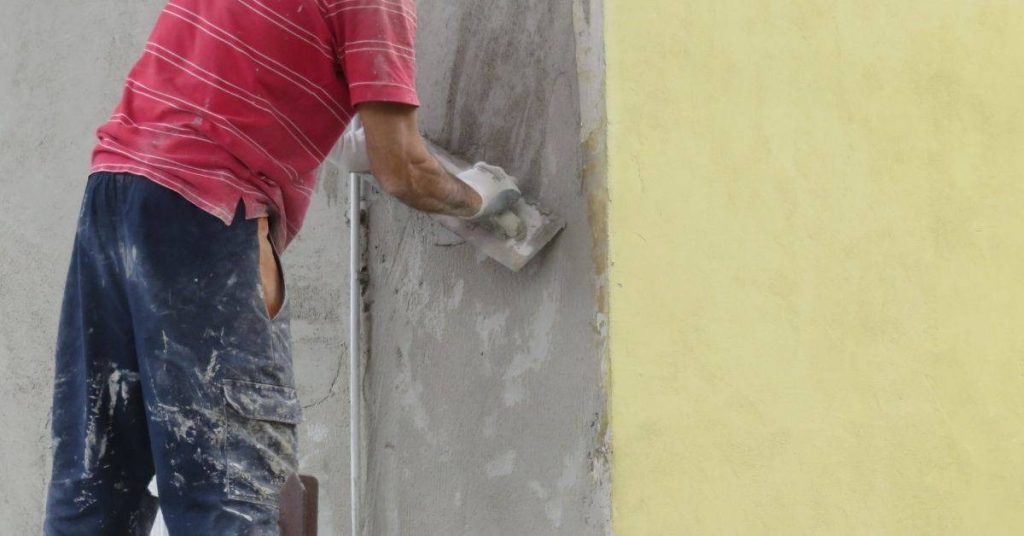
Step-by-Step Minimal Stucco Removal and Installation Process
Define the minimal-removal constraint by identifying areas that can stay intact while preserving surrounding finishes. Establish safe access, demolition limits, and disposal considerations to control scope. Plan contingencies for weather and access challenges.
Outline the sequence from minor stucco removal to flashing installation, joint sealing, and patching. Focus on neat transitions, proper bed and sealant compatibility, and controlled curing. Finish by inspecting texture match and overall weatherproofing performance.
Step-by-Step Cleaning Process
Follow these practical steps to safely and efficiently remove minimal stucco, install flashing, and restore the finish.
- Preparation: Inspect the area, gather tools, and put on safety gear. Clear debris from the work zone.
- Safety Checks: Check for structural integrity, moisture issues, and hazards. Set up dust containment.
- Main Work: Carefully remove stucco using controlled techniques, expose lath and WRB, then install flashing following manufacturer’s guidelines.
- Sealing and Patching: Apply compatible primer, seal joints, apply backing, and patch stucco. Feather edges for a smooth finish.
- Final Checks: Inspect the work, perform leak tests, and ensure proper drainage. Clean up tools and workspace.
Prep and Diagnostic Inspection
Before starting, document details and inspect the area to understand runoff, backing condition, and potential issues.
- Document Details: Sketch the area, note existing conditions, and take photos for reference.
- Locate Roof Runoff: Trace water flow from the roof to identify where kickout flashing is needed.
- Remove Trim Selectively: Carefully remove trim pieces around the work area to access stucco and backing.
- Verify Backing Condition: Inspect the lath and water-resistive barrier (WRB) for damage or missing sections. If compromised, repair before proceeding.
- Check Flashing Integrity: Inspect existing flashing for cracks, gaps, or rust. Replace if necessary.
- Moisture Assessment: Check for signs of moisture intrusion behind stucco. If present, address the source before proceeding.
- Hazard Identification: Look for electrical wires, plumbing lines, or other hazards hidden behind stucco.
- Tool Gathering: Collect necessary tools based on your inspection findings and the materials you’ll use.
Quick rule: Always inspect before cutting to avoid surprises and potential damage.
Controlled Stucco Removal Technique
Learn how to remove the smallest possible stucco section to protect lath and WRB while enabling flashing insertion.
Use a utility knife or score-and-snap tool to carefully cut through the stucco layer. Work from top to bottom, following the line of the wall.
Pro tip: Go slow and steady. It’s easier to remove more later than to fix damage caused by rushing.
Once you’ve scored the entire section, use a flat bar or pry bar to gently pry off the stucco. Work from one side of the score line to the other, applying even pressure. If the stucco is stubborn, use a hammer and chisel to carefully chip away small pieces.
Flashing Installation, Sealing, and Finishing
Set, fasten, integrate flashing with WRB/trim, seal transitions, and restore stucco/finish for a weatherproof detail.
Position the kickout flashing at the base of the wall, overlapping existing flashing by at least 4 inches. Ensure it slopes away from the building to prevent water intrusion.
Pro tip: Use galvanized or stainless steel screws designed for flashing. Avoid using nails as they can rust and cause leaks over time.
Apply a compatible primer to the exposed lath and WRB, then seal joints with a high-quality sealant. Integrate the flashing with trim pieces, ensuring proper overlap and drainage. Apply backing material, patch stucco, and feather edges for a smooth finish. Inspect your work and perform leak tests before calling it complete.
Common Failure Points, Testing, and Troubleshooting
Frequent failures include water intrusion at the kickout, poor integration with openings, deteriorated sealants, and cracking near flashings. Visual cues and risk levels help prioritize fixes without major rework. Early attention to these areas saves time and material.
Low-disruption tests like moisture checks and water sprays at the kickout reveal hidden paths. Reseal joints, reflash accessible areas, and provide new drainage paths as needed. Follow a concise workflow to decide when to escalate to larger repairs.
Typical installation mistakes to watch for
To avoid common retrofit failures, familiarize yourself with these typical installation mistakes.
- Poor WRB integration: Inadequate overlap or gaps in the water-resistive barrier can lead to leaks. Ensure proper integration by overlapping the WRB at least 6 inches behind the flashing and tucking it under the stucco.
- Blocked drip path: Debris, paint, or caulk blocking the kickout’s drip edge prevents water from draining away. Keep this area clean and clear during installation.
- Improper fastener placement: Fasteners driven too close to the edge can cause flashing to pull away, leading to leaks. Place fasteners at least 1 inch in from the edges and use them sparingly to avoid damaging the flashing.
- Insufficient sealant: Using too little or incompatible sealant can result in poor adhesion and water intrusion. Apply a generous bead of compatible, flexible sealant along all seams and joints.
By avoiding these common mistakes, you’ll significantly improve your retrofit’s performance and longevity.
How to test and verify the retrofit
After completing your retrofit, it’s crucial to test its functionality to ensure proper water diversion and sealing. Here are simple tests you can perform:
Water spray test: Using a garden hose or spray nozzle, simulate heavy rain conditions by spraying water onto the kickout area. Observe how water drains away from the wall. If water pools or seeps into the stucco, further investigation and repairs may be needed.
Dye test: Apply a food coloring solution to suspected problem areas using a spray bottle or paintbrush. Allow it to sit for a few minutes, then observe if the dye penetrates behind the veneer or through seams. This will help reveal hidden moisture paths.
UV/Flashlight inspection: Inspect the area with a UV flashlight or black light after dark. Many sealants and caulks glow under UV light, helping you identify any missed or failed sealant areas.
Repair tactics without full replacement
Minor leaks or sealant failures can often be addressed with targeted repairs, avoiding the need for full replacement. Here are some repair tactics to consider:
Reseal joints: If sealant has failed, carefully remove any old caulk or sealant using a utility knife or paint scraper. Clean the area and apply a new bead of compatible, flexible sealant.
Reflash accessible areas: If flashing has pulled away or deteriorated in small sections, you can often reflash these areas without removing the entire kickout. Ensure proper integration with existing flashings and seal all seams.
Add drainage paths: If water is ponding due to insufficient drainage, consider adding weep holes or rerouting water to a better draining area. Be sure not to create new paths for water to enter the wall cavity.
Apply waterproof coatings: For minor flashing corrosion or deterioration, applying a waterproof coating can extend the life of the existing flashing and postpone full replacement.
However, if these repairs do not address the issue or if you notice significant stucco cracking, extensive corrosion, or persistent leaks, it may be time to consider a more comprehensive repair or replacement.
Building Codes, Permits, and Inspection Considerations
Local codes and inspector expectations shape scope, with guidance on whether a permit or plan review is needed. Determine if minimal-removal methods meet code definitions or require a more complete approach. Look for thresholds that trigger different review levels.
Documentation to prepare includes product data sheets, installation notes, and photos of existing conditions. Define inspection milestones and what will be verified, such as kickout installation and weather barrier continuity. Outline alternative pathways for code compliance when appropriate.
What to check in local code and permit requirements
Before you start your stucco kickout flashing retrofit, make sure it’s up to code. Here’s a checklist to help.
- Flashing details: Check if your local building codes specify any particular flashing details or dimensions.
- Corrosion ratings: Ensure the flashing material you choose has an appropriate corrosion rating for your area.
- Permit thresholds: Find out if your project requires a permit based on the scope of work and local regulations.
- Energy codes: Check if your retrofit needs to comply with any energy efficiency standards.
- Local amendments: Be aware of any local or state-specific building codes that may apply.
- Wind load calculations: If required, calculate and document the wind loads for your specific location.
- Water resistance: Ensure your flashing system can withstand water intrusion under expected conditions.
- Sealant compatibility: Check if your chosen sealants are compatible with both the existing stucco and new flashing materials.
Quick rule: Always consult local building departments for specific code requirements before starting any exterior alteration project.
Preparing for an inspection
To ensure a smooth inspection process, gather the following documents and prepare your work area accordingly.
- Project drawings: Have clear, legible sketches or blueprints of your retrofit project ready.
- Product data sheets: Gather datasheets for both the stucco and flashing materials you’re using.
- Installation method notes: Document your installation process, including any special techniques or manufacturer recommendations.
- Wind-load calculations: If required, have these calculations ready to show inspectors.
- Water-resistance tests: Perform and document any necessary water-resistance tests before inspection.
- Existing-condition photos: Take ‘before’ photos to establish a baseline for the inspector.
- Work area cleanliness: Keep your work area tidy to facilitate easy inspection.
- Accessibility: Ensure inspectors can safely access all areas of your retrofit project.
Quick rule: Good preparation helps ensure a successful inspection and minimizes delays in completing your project.
When a permit or licensed contractor is recommended
In some cases, it’s prudent or required to hire a licensed contractor or pull a permit for your stucco kickout flashing retrofit. Here are some scenarios to consider.
- Significant alteration: If your project involves significant removal of existing stucco or other major alterations, consider hiring a professional or pulling a permit.
- Complex installation: If the retrofit requires complex flashing details or integration with other systems (e.g., roof-to-wall transitions), consider hiring an expert.
- Commercial properties: Many commercial buildings require permits for exterior alterations, even if they’re minor in nature.
- Historic structures: If your home is historic or in a historic district, you may need to follow specific guidelines and obtain necessary approvals before starting any work.
- Local requirements: Some areas require permits for even small exterior alterations. Always check local regulations.
- Insurance purposes: Hiring a licensed contractor can help ensure your project is covered by insurance in case of accidents or damages during installation.
- Warranty considerations: Some manufacturers require professional installation to maintain product warranties. Check your specific products’ warranty terms.
Quick rule: When in doubt, consult with local building departments and consider hiring a licensed contractor for complex or significant exterior alteration projects.
Cost, Timing, Weather, and Homeowner Skill Influence
Outline major cost elements like materials, tool needs, disposal, and potential inspections, while keeping numbers generic. A simple budget approach helps owners plan without guessing at exact prices. Consider contingency for unexpected findings during retrofit.
Timing depends on assessment, prep, repair, and cure steps, with attention to weather windows. Explain how indoor moisture, humidity, and rain affect work and adhesion. Relate skill level to approach choice, safety gear, and when to seek help for larger or riskier tasks.
Budget components and value decisions
Planning your stucco kickout flashing retrofit budget involves weighing labor, materials, permits, and unexpected repairs. Here’s how to prioritize for best value:
Materials (60%): Stucco, flashing, sealants, and tools are the bulk of your spend. Prioritize quality here – cheap materials can lead to costly re-dos.
Labor (30%): If hiring help, focus on experienced pros who’ve worked with stucco and flashings before. They’ll save you time and potential mistakes.
Permits & Contingency (10%): Allocate funds for permits if required, and keep a contingency for unexpected repairs or delays. It’s better to have it and not need it than vice versa.
Best weather and timing for retrofit work
Timing your retrofit right ensures optimal curing and adhesion. Aim for:
Ideal Temps (50-90°F): This range promotes quick, even curing of stucco patches and sealants.
Low Humidity & No Rain: Moisture can hinder curing and cause leaks. Avoid working in damp conditions or during rainy periods.
Single Weather Window: Plan your project to complete within one dry, warm period to avoid repeated cycles of wetting and drying, which can weaken materials.
DIY skill assessment and when to hire a pro
Assess your skills honestly before starting. Here’s how to decide if you should DIY or hire a pro:
Tools & Experience (70%): If you’re comfortable using ladders, working at eaves, and have experience with flashings/WRB, go for it. Otherwise, consider hiring an experienced contractor.
Time & Comfort (30%): Be realistic about your available time and comfort level. A complex project might be better left to pros to avoid costly mistakes or delays.
When to Hire: If you’re unsure about any aspect, it’s safer to hire a pro. They can assess your situation, provide an accurate quote, and ensure code compliance.
Conclusion
Protecting the wall, the roof line, and your investment starts with a solid plan, careful testing, and work that respects the existing stucco. Focus on a durable, weather-tight retrofit that you can verify with small-area tests and simple checks before you proceed.
To move forward, treat this as a short, practical checklist you can follow in order: confirm you have the right materials and permits, protect nearby surfaces and landscaping, clean and prep the area, verify flashings and kickout placement with the existing wall, perform minimal removal only where needed, install the flashing correctly with proper sealant joints, and then test the system for leaks or staining, repeating checks after weather events and at inspections. Do the work in clear, logical steps, and document each test so you know when you’re ready for inspection or the next stage.
Common mistakes to avoid are cutting corners on flashing continuity, skipping the test-and-inspect step, and letting water reach bare framing or sheathing. Safety rules: wear eye protection and gloves, shut off any nearby utilities as needed, work from a stable platform, and never force parts or pry beyond what the area allows. Always test in a small area first, and don’t proceed if you see signs of water intrusion, loose material, or degraded backing.
If the project feels beyond your comfort zone, or if you encounter uncertain conditions, call a professional sooner rather than later. A pro can confirm permits, ensure proper flashing detail, and handle complex wrap or slope issues that affect durability. With careful steps and good judgment, you’ll end with a clean, reliable retrofit and the confidence to tackle future maintenance. You’ve got this—steady progress now means fewer problems later.
FAQ
What is stucco kickout flashing and why should I care in a retrofit?
Kickout flashing is the step between the wall and the roof edge that directs water away from the stucco. In retrofit installs, proper kickout prevents water from seeping into the wall and damaging the structure. If you’re unsure, check the product instructions or talk to a local supplier for the right profile and placement.
What tools do I need for a minimal-removal kickout retrofit?
Have a sharp chisel or oscillating tool for clean edges, a hammer, a pry bar, a levels and a straightedge, tin snips or a metal brake for aluminum, and water-ready bonding supplies. Keep a drill, screws, and sealant compatible with the chosen flashing material handy. Always follow the manufacturer’s guidance for any power tool use.
What are the common steps for a minimal-removal install?
Mark the kickout location, remove only the shingle or stucco directly where the flashing sits, fit the flashing, seal joints, and re-secure the surrounding material. Attach the flashing to the substrate as per the manufacturer, then check for a tight fit and proper slope. If in doubt, consult the product instructions or a local pro for attention points.
What materials are typically used for kickout flashing and how do I choose between aluminum and PVC?
Aluminum is common due to strength and ease of shaping; PVC is a lighter option and may suit tight spaces. Ensure the chosen material is rated for exterior use and compatible with your stucco system. Check the label or datasheet for corrosion resistance and installation guidance in your climate.