

Introduction
Delamination in stucco paint means the coating is no longer firmly attached to the underlying surface. Testing adhesion before repainting shows whether the surface is ready to be prepped and primed. A quick check helps you plan the cleaning, scraping, and sealing steps.
To test adhesion, use a simple peel or lift test on a small, inconspicuous area with a putty knife or stiff scraper. Another option is a tape pull test: press painter’s tape firmly, then peel away to see if the paint lifts with it. Keep the test small, note what comes off, and choose your prep approach based on the results.
Key takeaways
- Identify paint layers and moisture signs to anticipate delamination causes and risks.
- Use adhesion tests like scrape, tape, and pry, following manufacturer instructions.
- Gather tools and materials: putty knife, scoring knife, masking tape, chalk, brush.
- Document test outcomes with clear notes and photos for scheduling.
- Prepare stucco by cleaning and repairing cracks before primer choice.
- Safety and environmental checks: PPE, dust control, ventilation, and local regs.
Table of Contents
- Introduction
- Key takeaways
- What Causes Stucco Delamination from Paint
- Visual and Tactile Signs That Paint Is Failing on Stucco
- Practical Adhesion Tests to Perform Before Repainting
- Tools and Materials Checklist for Testing and Prep
- How to Prepare Stucco Surfaces When Adhesion Is Poor
- Choosing Primers and Paints Suited for Stucco
- Safety Protocols and Environmental Checks
- Cost and Scheduling Implications of Inadequate Testing
- Conclusion
- FAQ
What Causes Stucco Delamination from Paint
The root causes of paint detaching from stucco involve the condition of the substrate, moisture movement, and coating behavior. Look for cracking patterns, hollow spots, spalling, or friability that signal a weakened bond. Note whether the stucco sits on a masonry substrate or shows hollow areas that raise delamination risks.
Moisture sources and movement are central to failure, including interior leaks, roof drainage issues, condensation, and bulk water intrusion. Explain how moisture elevates capillary rise and causes salts to migrate and push paint away. Consider stucco chemistry and porosity, since high alkalinity and lime content affect adhesion and the choice of primers and coatings.
Moisture and Water Intrusion
Water intrusion weakens the bond between paint and stucco, leading to delamination. Identify and address moisture sources to prevent this.
Rising damp from below-grade or ground-level issues can cause problems. Inspect for leaks in interior walls, roof, or gutters that may allow water penetration.
Condensation can also be an issue, especially in humid climates or poorly ventilated areas. Ensure proper ventilation and insulation to minimize condensation.
Check for signs of bulk water intrusion such as staining, peeling paint, or mold growth. Address these issues promptly to prevent further damage.
Substrate Composition and Condition
The condition of the stucco substrate is crucial for proper adhesion. Inspect your stucco for any signs of deterioration.
Loose or powdery stucco indicates friability, which weakens its ability to hold paint. Check for hollow spots that may signal delamination risks.
Old cementitious layers can also affect adhesion. If the existing stucco is old and crumbling, it may need to be removed before repainting.
Improper curing or previous repairs can also compromise adhesion. Ensure any previous repairs were done correctly and allowed to cure properly.
Paint Selection and Application Errors
Incorrect paint selection and application techniques can lead to delamination. Avoid these common mistakes:
- Incompatible coatings: Ensure the paint you choose is compatible with your stucco substrate. Check manufacturer guidelines for recommended paints.
- Trapped moisture: Allow any existing paint layers to dry completely before applying new coats. Moisture trapped under paint can cause delamination.
- Painting over contaminated surfaces: Ensure the surface is clean and free of contaminants, such as dirt, grease, or mold, before painting.
- Painting in wrong conditions: Avoid painting in extreme temperatures or high humidity. Follow manufacturer guidelines for optimal application conditions.
By avoiding these mistakes, you can help ensure a long-lasting, adherent paint job on your stucco surfaces.
Visual and Tactile Signs That Paint Is Failing on Stucco
Visual indicators of failure include cracks that traverse paint layers, peeling or blistering at edges, and a powdery or chalky surface indicating moisture beneath. Edge behavior is important; lifted edges around outlets or trim can accompany delaminated patches that feel hollow or spongy when touched. Texture and sheen mismatches may reveal trapped moisture or incompatible coatings.
Carry out safe tactile checks by guiding a gloved finger along seams to feel for soft, loose paint or by lifting small flakes to confirm underlying issues. Simple adhesion tests such as light tape pulls or gentle scrapes help gauge edge lift without heavy abrasion. Document findings with photos and note the location and extent to guide next steps.
Visual checkpoints
Before repainting your stucco, perform a thorough visual inspection to identify any signs of paint failure. This will help you decide whether further testing is needed.
- Cracks: Look for cracks that run through multiple paint layers. These can indicate delamination and should be addressed before repainting.
- Peeling or Blistering: Check for areas where the paint peels or blisters, especially at edges. Poor edge adhesion may signal underlying issues.
- Powdery or Chalky Surfaces: Inspect for sections with a powdery or chalky surface. This could indicate moisture problems beneath the paint.
- Lifted Edges: Examine edges around outlets, windows, and ornament details for lifted paint. This can be a sign of delamination.
- Delaminated Patches: Look for areas that feel hollow or spongy to the touch. These may have lost adhesion with the substrate.
- Texture and Sheen Mismatches: Compare gloss levels across surfaces. Differential sheen or dull spots can signal trapped moisture or incompatible paint causing poor adhesion.
- Flaking Paint: Check for small flakes of paint that can be easily lifted off. This is a clear sign of delamination.
- Discoloration: Inspect for stains, efflorescence, or other discolorations. These may indicate moisture intrusion or contamination.
Quick rule: If visible signs of failure are present, proceed with further testing and substrate preparation before repainting.
Simple tactile checks
In addition to visual inspection, perform simple on-site tactile checks to differentiate loose paint from well-bonded layers. This can help you identify areas that need further attention.
Gently Scrape or Tap: Lightly scrape or tap the surface with a putty knife or use a hammer and a block of wood to listen for hollowness or sponginess. These sounds may indicate delamination beneath the paint.
Feel Along Seams: Run a gloved finger or putty knife along seams and edges to feel for soft, loose paint. If found, lift small flakes to confirm underlying delamination.
If tactile checks reveal loose or hollow areas, perform further testing and consider professional assistance before repainting.
Moisture- and contamination-related clues
Look for signs of moisture intrusion or contamination that could be causing adhesion problems. These issues need to be addressed before repainting.
Efflorescence: Check for white, powdery deposits on the stucco surface. This can indicate water-soluble salts being drawn out by evaporation, which may signal a moisture problem.
Mold or Staining: Inspect for signs of mold growth or staining. These can indicate moisture intrusion and should be addressed to prevent further damage.
Salt Deposits: Look for visible salt deposits, which can form when moisture evaporates, leaving behind salt crystals. This is another sign of potential moisture issues.
If moisture or contamination signs are present, address these issues before proceeding with repainting, including moisture remediation and substrate preparation.
Practical Adhesion Tests to Perform Before Repainting
Start with a quick visual and moisture check to flag obvious delamination and decide if DIY tests are appropriate or a professional should intervene. Follow with simple DIY adhesion checks like tape tests, gentle scrapes, and cross cut style scoring to assess edge lift. Use test outcomes to inform surface prep requirements.
Include guidance on how to interpret results and plan repairs, such as whether to recoat after patching or perform full resurfacing. Note safety and environmental considerations when testing on exterior stucco. Decide when to escalate to pro-grade equipment or moisture surveys and how to document results for bids.
Standard tape pull (cross-hatch) test for quick checks
The standard tape pull test is a simple yet effective method to quickly assess paint adhesion before repainting. It helps determine if further testing or professional intervention is necessary.
To perform the test, use a sharp utility knife to score the paint surface into a crosshatch pattern with about 1/8-inch spacing between lines. Then, apply painter’s tape over the scored area and press firmly to ensure good contact. After waiting for a few seconds, pull the tape off quickly at a 90-degree angle.
Inspect the area for any paint removal. If no paint comes off, the test is passed, indicating good adhesion. However, if paint removal occurs, it indicates delamination and further testing or professional intervention may be required.
Probe, sounding, and scrape assessments
Using a knife, scraper, or mallet to probe the stucco surface can help locate loose areas and map the extent of paint failure. This method is useful for understanding the scope of repairs needed.
Gently use a putty knife or scraper to probe the stucco surface. Tap lightly with a mallet while listening for hollow sounds, which indicate delamination. If you find extensive failure, consider hiring a professional for assessment and potential resurfacing.
If loose paint is visible, carefully scrape it off using a sharp tool. Be cautious not to damage the underlying stucco surface. This will help you understand the extent of the problem and plan your repairs accordingly.
Measuring Paint Adhesion Strength
A mechanical pull-off test determines paint adhesion strength in pounds per square inch (psi). This method aids in specifying repairs and repainting.
Use a handheld pull-off gauge or professional pull-off test equipment to measure adhesion. Follow the manufacturer’s instructions when applying the gauge to the surface, then quickly pull it off while noting the required force.
Compare your results with the manufacturer’s recommendations. If they fall below suggested thresholds, consider hiring a professional for further assessment, such as moisture surveys or advanced testing. Extensive failure may necessitate professional intervention and potential resurfacing.
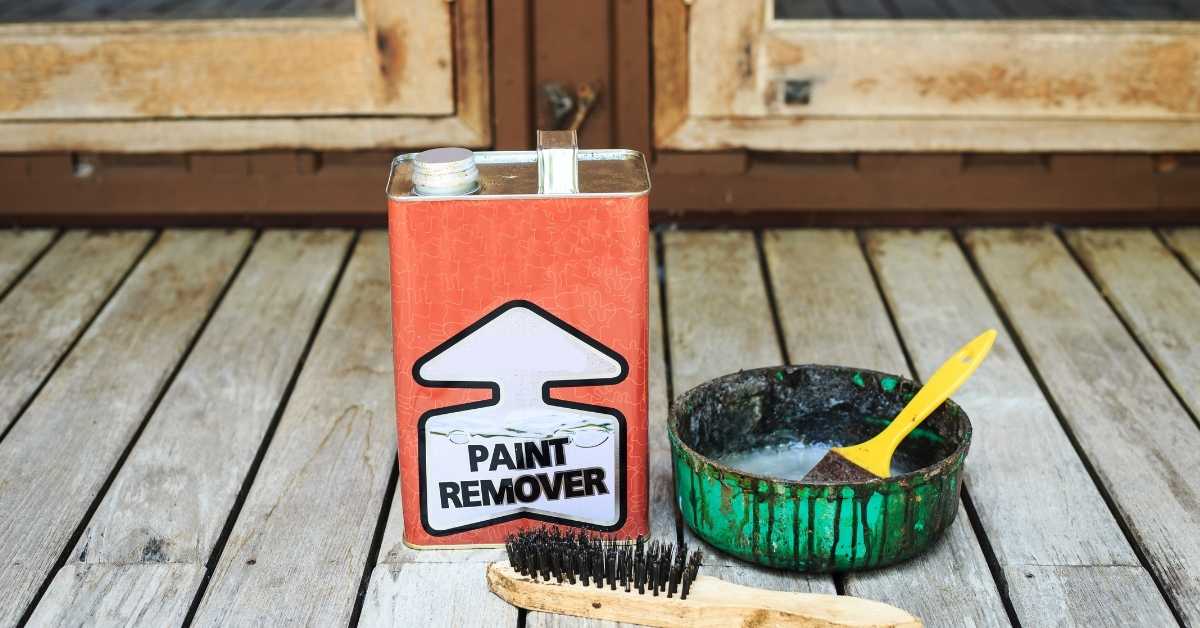
Tools and Materials Checklist for Testing and Prep
Key adhesion testing starts with a field-ready kit: moisture meter, a surface tack or peel test kit, an adhesion pull-off tester, a utility knife, a scraper, and a brush or roller for cleaning and prep. Include coving and masking tape, a calibrated paint scraper, disposable gloves, safety goggles, and a dust mask to protect your hands, eyes, and lungs. A simple gear set helps you assess substrate condition and plan the initial surface prep before repainting.
In addition to testing tools, use a magnet for metal checks, a flashlight or headlamp for edge inspection, and a color-difference card to document any sheen or staining changes after prep. Surface prep supplies include a wire brush, a stiff-bristle brush, a scraper, a heat gun if appropriate and safe, coarse and fine sandpapers, cleaning agents such as alkaline cleaner and degreaser, and a spray bottle or water source for cleaning tests. Documentation gear—like a notepad or mobile app, a camera, measurement tape, a marker for labeling test sites, and protective drop cloths—helps you track results, stay organized, and maintain a clear record for weather and safety checks. Stake, quick checks, and pro tips guide decisions on timing and calibration, while reminders to delay testing if moisture is high and to pause if adhesion tests fail keep the work safe and effective.
Basic DIY Testing and Prep Tools
These common handheld items are essential for initial assessment and surface preparation of your stucco before repainting.
- Utility Knife: Cuts through paint layers and helps in scraping off loose material. Keep blades sharp and replace when dull to prevent damage.
- Scraper: Removes thick paint layers and loose stucco. Use a sturdy, flat-bladed scraper for best results.
- Stiff-Bristle Brush: Cleans the surface by removing dirt, debris, and loose material. Choose one with stiff bristles to handle tough surfaces.
- Moisture Meter: Measures moisture content in stucco. Calibrate it before use according to manufacturer instructions.
- Safety Gear (Disposable Gloves, Goggles, Dust Mask): Protects you from paint chips, dust, and chemicals during prep work.
Professional Testing Equipment and Kits
These specialized tools help diagnose issues accurately and ensure lasting results.
- Adhesion Pull-Off Tester: Measures paint-to-substrate bond strength. Rent or borrow for occasional use to save on costs.
- Calibrated Moisture Meter: Provides accurate moisture readings. Ensure it’s calibrated and certified for use before testing.
- Borescope: Inspects hard-to-reach areas and edges for delamination. Validate functionality with a quick test on known surfaces.
- Paint Scraper (Calibrated): Removes paint layers without damaging the substrate. Ensure it’s calibrated to remove consistent layer thickness.
Recommended Consumables and Repair Materials
Using appropriate materials ensures a successful paint job that lasts. Choose products compatible with stucco and your specific surface condition.
- Alkaline Cleaner: Cleans stucco surfaces effectively without damaging them. Avoid acidic cleaners as they can cause staining or damage.
- Degreaser: Removes grease and oil from the surface, promoting better paint adhesion. Choose one suitable for your specific surface type.
- Lime- or Cement-Based Patching Compound: Repairs minor cracks and holes in stucco. Ensure it’s compatible with your existing substrate to prevent cracking or weak bond.
- Stucco Primer (Acrylic or Latex): Prepares the surface for painting, improving adhesion and coverage. Choose one suitable for your paint type and surface condition.
- Temporary Sealant: Protects repaired areas until final painting. Opt for a sealant that’s compatible with both your patching compound and topcoat.
How to Prepare Stucco Surfaces When Adhesion Is Poor
Identify and remove all failed paint and loose coatings from stucco using safe mechanical methods before applying any bonding primers. Check for moisture indicators and ensure the wall is dry to prevent bonding failures. Create a micro-roughness on the surface to promote mechanical bonding without over-wetting.
Repair cracks, chips, and spalled areas with compatible patching mortars, feathering edges to a smooth profile suitable for re-coating. Plan primer and coating strategy by selecting products compatible with stucco and the existing paint system, noting cure times and recoat windows that support adhesion.
Step-by-Step Process
The following steps ensure optimal paint adhesion and longevity by properly preparing stucco surfaces when adhesion is poor.
- Inspect visually and tactually for signs of failure. Identify loose coatings, cracks, or other defects.
- Protect yourself with appropriate safety gear, including gloves, goggles, and respiratory protection as needed.
- Remove all failed paint and loose coatings using safe mechanical methods such as hand tooling, gentle scraping, or low-pressure washing. Test a small area first to ensure the method does not damage the substrate.
- Assess moisture levels and substrate conditions. Check for staining, dampness, efflorescence, or water intrusion. Ensure the wall is dry before proceeding.
- Repair cracks, chips, and spalled areas using compatible patching mortars. Feather edges to a smooth, continuous profile suitable for re-coating.
- Clean and surface-profile the substrate. Wash with appropriate cleaners, rinse thoroughly, and create micro-roughness to promote mechanical bonding. Avoid over-wetting stucco.
- Apply selected primers and topcoats compatible with stucco and the existing paint system. Follow manufacturer instructions for cure times, humidity/temperature limits, and recoat windows to maximize adhesion.
- Inspect your work visually and tactually after each step to ensure it’s right before proceeding to the next.
Safe removal of loose coatings and contaminants
Removing failed paint and contaminants ensures new coatings bond properly. Start by testing a small area to ensure chosen method does not damage the substrate.
Mechanical methods: Use hand tooling, gentle scraping, or low-pressure washing for safe removal of loose coatings. For stubborn areas, consider using mechanical sanding with dust control measures in place.
Chemical methods: Use appropriate chemicals following manufacturer instructions. Wear appropriate PPE, including gloves, goggles, and respiratory protection when handling chemicals.
Repairing and stabilizing the stucco substrate
Repairing hollows and consolidating powdery surfaces improves paint adhesion. Inspect for cracks, chips, or spalled areas before starting repairs.
Use compatible repair mortars or stabilizers to patch hollows and re-profile the surface. Ensure chosen products are compatible with the existing stucco system.
Feather edges of repairs to a smooth, continuous profile suitable for re-coating. Allow repairs to cure according to manufacturer instructions before proceeding with priming and painting.
Surface profiling and priming before repainting
Creating micro-roughness and using bonding primers promotes mechanical bonding. Ensure the surface is clean, dry, and free of contaminants before priming.
Micro-roughness: Create micro-roughness using appropriate methods such as light sanding or brushing to promote paint adhesion. Avoid over-wetting stucco during this process.
Priming: Apply selected primers and topcoats compatible with stucco and the existing paint system. Follow manufacturer instructions for application, cure times, humidity/temperature limits, and recoat windows to maximize adhesion.
Choosing Primers and Paints Suited for Stucco
Identify primer types appropriate for cementitious stucco, such as masonry or bonding primers, and explain why elasticity and breathability matter for long-term adhesion. Compare exterior paint systems like 100% acrylic latex, elastomeric blends, and masonry paints, noting how each handles moisture and durability. Consider how surface porosity and movement affect primer and coating choices.
Highlight properties to prioritize, including vapor permeability, elongation, UV resistance, and mildew resistance, plus compatibility with existing coatings. Provide surface prep guidelines tied to primer and paint choices and outline acceptable curing conditions. Offer a simple decision flow to match scenarios such as highly porous surfaces or historic restorations with appropriate product categories.
Primer types and selection criteria
Choosing the right primer is crucial for long-term adhesion and durability on stucco surfaces. Primers can be categorized into three main types: bonding, masonry, and breathable.
Bonding primers are ideal when existing paint layers are poorly adhered. They enhance adhesion by creating a strong bond between the substrate and the topcoat. Opt for a bonding primer if you notice loose or peeling paint.
Masonry primers are suitable for porous or new stucco surfaces. They penetrate deep into the substrate, providing excellent adhesion and sealing properties. If your stucco is highly porous or new, consider using a masonry primer with good penetration and adhesion.
Breathable primers allow moisture to escape while preventing water intrusion. They are beneficial for stucco surfaces exposed to varying weather conditions. Always review product labels for intended use and inspect your substrate condition to determine the best primer type.
Paint classes best for stucco
Selecting appropriate paint categories ensures that your stucco’s integrity and appearance are maintained. Here are three suitable paint classes for stucco applications:
Acrylic masonry paints offer excellent color retention, making them ideal for smooth surfaces requiring vibrant colors. They provide good adhesion and durability but may not be the best choice for highly porous or exposed stucco.
Elastomeric/acrylic blends are designed to bridge hairline cracks and withstand extreme weather conditions. These paints are suitable for highly porous or exposed stucco, providing enhanced durability and flexibility.
Breathable coatings allow moisture to escape while protecting the substrate from water intrusion. They are beneficial for stucco surfaces prone to moisture buildup, preventing trapped moisture and mold growth. Always compare product datasheets for relevant properties like elongation and permeability when selecting a paint class.
Compatibility, breathability, and VOCs
Matching primer and topcoat ensures optimal performance on your stucco surface. Additionally, choosing vapor-permeable systems prevents moisture buildup and potential damage to the substrate.
Check product labels for vapor permeability ratings – higher values indicate better breathability. Ensure that your chosen primer and paint are compatible by verifying manufacturer guidelines or testing.
When selecting products, consider volatile organic compounds (VOCs) and their impact on both indoor air quality and the environment. Low-VOC products are available but ensure they meet your performance needs before making a purchase.
If moisture buildup is a concern, prioritize breathable systems to prevent trapped moisture and mold growth. Always review product labels and datasheets for relevant information regarding compatibility, breathability, and VOC content.
Safety Protocols and Environmental Checks
Before exterior stucco work, inspect for signs of lead-based paint or historic coatings and establish PPE, site access controls, and perimeter containment. HazMat steps include surface checks for lead and other coatings, respirator fit considerations, and documenting test results before any scraping or painting.
Know the weather and environmental limits for work—target temperatures, humidity, wind, and precipitation forecasts—and plan curing and recoat windows accordingly. Manage dust, splash, and runoff with primary containment, wash-water collection, and careful cleanup, plus clear access routes, staging, spill kits, and compliant disposal of paint chips and contaminated materials.
Testing for Lead, Asbestos, and Mold Risks
Before starting any exterior stucco work, it’s crucial to test for the presence of hazardous materials such as lead, asbestos, and mold. These substances can pose significant health risks if disturbed during scraping or sanding.
Lead: If your home was built before 1978, there’s a possibility that lead-based paint may be present. Use a professional testing kit to swab suspect areas. If results are positive, follow local abatement rules and consider hiring certified professionals for safe removal.
Asbestos: Asbestos was commonly used in building materials until the 1980s. Inspect any damaged or deteriorating materials for signs of asbestos fibers. Consult a professional if you suspect asbestos is present, as it requires specialized testing and removal.
Mold: Check for visible mold growth or musty odors, especially in damp areas. If found, test the affected area using a DIY kit or consult a professional for further assessment. Address any mold issues before proceeding with exterior work.
Personal Protective Equipment and Dust Control
Protecting yourself and others from hazards associated with scraping, sanding, and power-tool work is paramount. Here’s what you’ll need:
- Respirator: Use a NIOSH-approved respirator with an N95 or P100 filter to protect against dust and contaminants. Ensure proper fit and functionality before starting work.
- Gloves: Wear gloves suitable for the task, providing protection from chemicals and sharp edges. For scraping, consider using heavy-duty work gloves.
- Eye Protection: Use safety glasses or goggles to shield your eyes from debris and splashes. Consider wearing a face shield for added protection when using power tools.
- Coveralls or Long-Sleeved Shirts: Wear clothing that covers your skin, protecting against paint chips, dust, and other contaminants.
- Dust Containment Strategies: For large-scale scraping or sanding, implement dust control measures such as negative-pressure systems, tarps, or plastic sheeting. This helps minimize exposure and contamination for both workers and occupants.
Weather, Timing, and Environmental Considerations
Exterior painting requires careful attention to weather conditions for optimal results and to safeguard surrounding areas.
Temperature: Most paints and primers perform best in temperatures between 50°F (10°C) and 85°F (29°C). Avoid extreme heat or cold, as they can impact adhesion and drying times. Always check product labels for specific temperature guidelines.
Humidity: High humidity can hinder paint drying and lead to poor adhesion. Aim for relative humidity levels below 80% when painting. Monitor weather forecasts and adjust your schedule accordingly.
Wind, Precipitation, and Drying Times: Windy conditions can cause dust and debris accumulation on wet surfaces, while precipitation can wash away paint or cause it to peel. Allow sufficient drying time between coats (as specified by the manufacturer) and avoid painting in windy or wet conditions.
Protecting Surrounding Areas: Cover nearby landscaping, surfaces, and structures with drop cloths or plastic sheeting to protect them from paint splashes, dust, or other contaminants. Remove coverings once the area is dry to prevent damage from prolonged contact.
Cost and Scheduling Implications of Inadequate Testing
Skipping adhesion testing before repainting can lead to hidden delamination, wasted materials, and rework that stretches the project timeline. Without a proper test, coatings may fail after application, requiring additional coats or costly repairs to damaged stucco. Moisture ingress and spreading delamination can also drive longer delays and more work.
A simple on-site pull test or crosshatch check provides a quick read on adhesion and helps you decide whether to proceed. If adhesion fails, pause painting, address issues, and retest before continuing. Upfront testing generally reduces downstream delays and costly fixes, and it supports practical planning with budgeting templates, a clear testing plan, and a timeline aligned with weather and permit considerations. Stakeholders benefit from a pro check that confirms paint will adhere well, while common mistakes—like continuing work after poor adhesion—are avoided by stopping to fix the problem.
Direct costs: rework, repairs, and material waste
Proper adhesion testing and surface preparation can significantly impact your repainting project’s success. Skipping these steps may lead to material waste, increased labor, and additional repair costs.
- Failed Paint Adhesion: Results in peeling or flaking paint, requiring removal and reapplication, increasing material usage and labor.
- Improper Surface Prep: Can lead to weak bond, causing paint to crack or stain, necessitating rework and additional materials.
- Moisture Damage: If not addressed, moisture can cause delamination, mold, or rot, leading to costly repairs or stucco replacement.
- Incorrect Material Selection: Using incompatible primers or paints can result in poor adhesion and premature failure, increasing material waste and labor costs.
- Inadequate Disposal: Improper disposal of failed materials may incur additional fees, further adding to project costs.
Long-term maintenance and lifecycle planning
Selecting the right paint system and performing corrective repairs can extend coating life, reducing overall life-cycle costs.
Compatibility: Ensure primers and paints are compatible with your stucco substrate to prevent delamination and premature failure. Check labels or datasheets for compatibility information.
Breathability: Use breathable paints to allow moisture to escape, preventing trapped moisture from causing damage over time. Low VOCs also contribute to better long-term performance.
Proper surface preparation and adherence to manufacturer’s instructions are crucial for extending coating life and minimizing maintenance costs in the long run.
When to budget for professional assessment
While DIY adhesion testing can be sufficient in many cases, complex issues or high-risk factors may warrant hiring a professional assessor or contractor.
Signs of Delamination: If you notice extensive peeling, cracking, or crumbling, consider hiring a pro to diagnose the underlying cause and recommend appropriate repairs.
Moisture Ingress: Evidence of water damage, such as stains, warping, or mold, suggests professional assessment is needed to prevent further damage and costly repairs.
Unknown substrate conditions, such as hidden damage or incompatible materials, may also necessitate hiring a qualified assessor or contractor to avoid misdiagnosis and costly mistakes.
Conclusion
A careful, staged approach to testing and surface preparation protects both the appearance and the structure of your home. By confirming adhesion before repainting, you reduce the risk of future failures and avoid costly rework.
Begin with a quick, practical check: inspect visually and by touch in a small area, perform the recommended adhesion tests in a logical order, and choose primers and paints that match stucco needs. If any test shows poor adhesion, proceed with the steps for surface preparation and consider safer paint choices or professional input before proceeding further. Always work in a controlled, well-ventilated area and follow safety guidelines for ladders, PPE, and environmental rules.
Common mistakes to avoid include skipping small-area testing, over-priming a poorly prepared surface, and ignoring observed moisture or substrate issues that can undermine adhesion. Remember to work gradually, document findings, and apply safety rules consistently—test first, fix root causes, and verify results after each step. If you encounter uncertain moisture levels, widespread delamination, or structural concerns, or if the project area is large, consider consulting a professional to assess and plan the repaint approach.
FAQ
What are the common causes of stucco delamination from paint layers?
Delamination can occur when moisture penetrates the surface, or when the paint fails to adhere to the stucco due to poor surface preparation. Improperly applied or incompatible primers and paints can also lead to separation over time. Check for underlying moisture issues and compatibility between layers when investigating causes.
What tests can I perform to assess adhesion before repainting?
Perform simple adhesion checks that involve lifting a small piece of paint or testing with a scraper in a hidden area to gauge bond strength. Use manufacturer instructions for any product-specific adhesion tests and follow local guidelines for safe testing practices. Record the results to decide on prep steps and products to use.
What tools and materials are typically needed for adhesion testing?
Common items include a putty knife or scraper, a utility blade, a moisture meter if available, and clean rags. You may also need masking tape and a pencil to mark test areas. Refer to product labels and surface prep recommendations for any additional specialty tools.
What steps should I follow during the adhesion testing process?
Inspect a small, representative area and document existing conditions. Perform a controlled test by gently lifting a corner of the coating to see if it adheres. Based on the result, decide whether to proceed with deeper prep, priming, or repainting with compatible products.