
Introduction
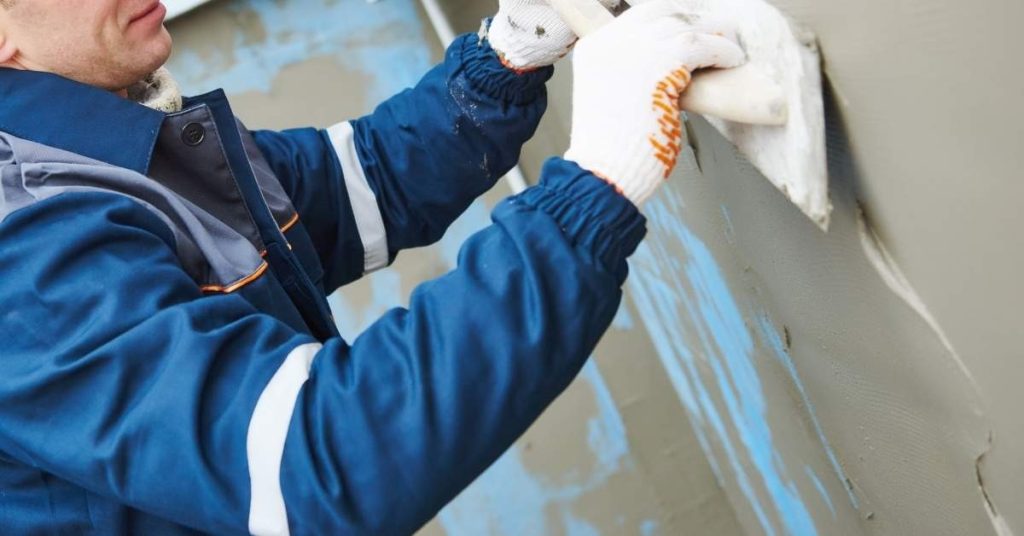
Flashing blocks, sealant joints, and water management around electrical meter bases and service conduits keep moisture from penetrating the wall. This is a hands-on task that combines proper flashing, sealant application, and grading to shed water away from the entry points. Get the basics right before you pull stucco or sealant and check product labels and local rules.
Before you start, turn off power at the main and review any installation guides on the products you plan to use. Follow manufacturer instructions and local rules for flashing and sealant joints, and look for weatherproofing details that apply to meter bases and conduits. Keep it simple: slope water away, press joints tight, and test for gaps with a dry finger or a damp cloth, then seal as directed.
Key takeaways
- Ensure flashing blocks are integrated into stucco to shed water away
- Sealant joints must be continuous around meter bases and conduits
- Use proper drainage and weep provisions to prevent water accumulation
- Follow manufacturer instructions for sealants and flashing compatibility with stucco
- Inspect at completion for gaps, cracks, and moisture intrusion; avoid hazards
- Maintain accessible service area with clearances and future maintenance access
Table of Contents
- Introduction
- Key takeaways
- Why Proper Stucco Detailing at Meter Bases and Conduits Matters
- Applicable Codes, Standards, and Utility Requirements
- Common Configurations and Failure Locations
- Materials and Components Explained
- Tools and Materials Checklist for Installers
- Best-Practice Installation Steps and Detailing Sequences
- Designing and Installing Effective Sealant Joints
- Water Management Integration: Flashing, Drainage, and Weep Provisions
- Conclusion
- FAQ
Why Proper Stucco Detailing at Meter Bases and Conduits Matters
Water intrusion around meter bases and service conduits can lead to corrosion and damage to electrical components. Improper detailing increases the risk of moisture reaching electrical enclosures and creating hazards. A well-executed detail helps prevent stucco cracking and failure that can compromise the wall surface and weather barrier.
When detailing is done correctly, it supports long service life and reduces the chance of costly repairs. It also helps maintain safe electrical clearances and enclosure integrity. A good detailing approach saves time and minimizes rework caused by water-related issues.
Consequences of poor detailing
Poor detailing around electrical meter bases and service conduits can lead to a host of problems. Rot, rust, and stucco delamination are common failure modes that can compromise the integrity of your home’s exterior and potentially cause safety hazards.
Water intrusion can cause wood rot in surrounding framing, leading to structural issues and costly repairs. It can also cause rust on electrical components, posing a fire risk and potentially causing service interruptions or even outages.
Poor detailing can also lead to stucco delamination, where the stucco separates from the wall, creating an unsightly appearance and allowing further water intrusion. In some cases, poor detailing may result in code violations, leading to fines and additional repair costs.
Who is responsible: trades and coordination
The responsibility for proper stucco detailing at meter bases and conduits falls on several parties. Electricians are typically responsible for installing the service conduit and ensuring it’s properly flashed to prevent water intrusion.
Stucco contractors should ensure they’re following best practices when applying stucco around these areas, using appropriate flashing blocks and sealant joints. They should also coordinate with electricians to ensure their work doesn’t compromise the electrical components.
Building inspectors play a crucial role in ensuring all work meets local building codes. Coordination among these parties during design and installation is key to preventing poor detailing and its consequences.
Applicable Codes, Standards, and Utility Requirements
Check the relevant electrical and building codes that apply to meter bases and service conduits in your area. Look for requirements that govern flashing, sealants, and water management near electrical hardware. Always refer to official documents like code books and guidance from authorities having jurisdiction.
Verify specifics with the authority having jurisdiction, the local building department, or the utility company as needed. Also review manufacturer instructions and product data sheets for compatibility with your project. Keep a record of the approved standards you follow for future inspections.
What to check on plans and permits
Before you start, review your plans and permits. This checklist helps ensure everything’s in order.
- Permit approval: Confirm all penetrations are approved.
- Clearances: Check utility clearance rules for meter bases and service conduits.
- Inspection triggers: Note when inspections are required (e.g., before backfilling).
- Stucco thickness: Verify it meets local building codes.
- Flashing details: Ensure plans match manufacturer’s recommendations.
- Sealant types: Check they’re compatible with stucco and other materials.
- Utility coordination: Confirm all utilities are aware of your project.
- Local codes: Ensure your plans comply with local electrical, building, and plumbing codes.
Quick rule: Skipping these checks can lead to delays, rework, or even failed inspections.
Manufacturer warranties and compatibility requirements
Following manufacturer instructions ensures your stucco work is covered under warranty. It also maintains long-term performance.
Warranty void: Incorrect installation can void manufacturer warranties on stucco, sealants, and flashing.
Check compatibility between sealants, stucco, and other materials. Using incompatible products can cause issues like delamination or cracking.
Always follow manufacturer guidelines for installation, cleaning, and maintenance to keep your warranty intact and ensure optimal performance of your stucco work.
Common Configurations and Failure Locations
Most projects involve surface-mounted or flush/recessed meter bases and a single or multiple conduits. Typical installations show where flashing and seals must transition between the wall, lath, and conduits. Common failure points occur at penetrations, joints, and where flashing blocks are not integrated with the wall plane.
Understanding these configurations helps identify likely trouble spots before work begins. It also guides how to plan flashing, sealants, and drainage arrangements around each conduit. This awareness reduces the chance of hidden leaks after completion.
Surface-mounted meter bases
Surface-mounted meter bases stick out from the wall, making them vulnerable to water intrusion. Here’s what you need to know:
Back-drafting is a common issue. Wind and temperature changes can create negative pressure, drawing in water through gaps at the base.
Flashing termination is critical here. Ensure the flashing extends up behind the meter base, terminating properly under the stucco. Sealant joints should be well-maintained to prevent water entry.
Recessed or chase-mounted service conduits
Recessed or chase-mounted service conduits are set back into the wall, but they can still cause problems:
Hidden voids behind the stucco can trap water. Make sure these areas are properly backfilled to prevent this.
Accessing flashings for proper termination can be difficult with recessed units. Ensure your installer uses weep holes or other drainage methods to prevent water buildup.
Materials and Components Explained
Flashing blocks, backer rod, and sealants are used to form a continuous water-managed interface around openings. Metal flashings and lath work with the stucco to control movement and accommodate substrate deflection. Consider material compatibility, movement capability, and耐weather resistance when choosing these components.
Understand the role each part plays: backing to maintain seal integrity, flashing to divert water, and substrate compatibility to prevent bond failure. Performance properties such as elasticity, adhesion, and durability matter for long-term sealing. Evaluate options against your climate and wall assembly details.
Flashing Block Types and Selection Criteria
Flashing blocks are crucial for directing water away from your electrical meter base and service conduits. Here’s what you need to know:
Rigid vs Compressible Blocks: Rigid blocks, like plastic or fiber cement, maintain their shape but may not conform perfectly to uneven surfaces. Compressible blocks, often made of closed-cell foam, can adapt to irregularities but might degrade over time.
Check for these properties when selecting flashing blocks:
- UV Resistance: Ensure they can withstand sunlight exposure without degrading.
- Compression Set: This measures how much a block retains its original shape after being compressed. Lower compression set is better.
- Compatibility with Stucco and Metal: Confirm they won’t react negatively with your stucco and metal components over time.
Sealant Chemistry and Adhesion Basics
Choosing the right sealant is vital for preventing water intrusion. Here are key aspects to consider:
Common Sealant Chemistries: Silicone, polyurethane, and hybrid MS polymers are common. Each has its pros and cons regarding flexibility, durability, and resistance to elements.
Adhesion: Ensure the sealant adheres well to your specific substrates – stucco, metal, and conduit finish. Poor adhesion can lead to seal failures.
To verify compatibility, always check the manufacturer’s approved substrates list. Using a sealant not intended for your surfaces can void warranties and cause premature failure.
Tools and Materials Checklist for Installers
Gather basic hand tools for cutting, shaping, and seating flashing blocks, plus caulking guns for sealants. Have a proper utility knife, sealant smoothing tools, and a meaningfully sized trowel for lath integration. Don’t forget PPE such as gloves and eye protection when working with sealants and metal components.
Keep measuring aids, a level or plumb line, and marking tools on hand to ensure correct alignment. Have backup materials like extra flashing blocks, sealant cartridges, and compatible backer materials available. Prepare a clean workspace to manage dust and debris from preparation and installation.
Consumables and spare parts to have on hand
Before you start, make sure you’ve got these consumables and spares. You’ll need them for touch-ups, repairs, or unexpected issues.
- Sealant: Extra tubes of your chosen sealant for touch-ups and repairs.
- Backer rod: Various diameters to fit different joint sizes. Skip this and you might end up with under-filled joints.
- Flashing tape: Several rolls, different widths for various applications. Missing a spot can lead to water intrusion.
- Fasteners: Extra screws, nails, or other fasteners in case some break or go missing.
- Corrosion-resistant metal: Spare pieces of flashing, drip edges, or other metal components. Rust can cause serious problems down the line.
- Sealant gun: A backup gun in case yours malfunctions mid-job.
- Trowel and knife: For applying sealants and mortars. Don’t get stuck without one!
- Scrapers: Various sizes for prep work and touch-ups. Neglect this and you’ll struggle with surface prep.
Quick rule: Always keep these spares in your toolbox. You never know when you’ll need them.
Visual checkpoints and measurement aids
Use these simple tools to verify joint dimensions, prep quality, and overall workmanship. Don’t rely on guesswork!
- Gap gauges: Check joint widths before applying sealant. Too narrow or wide can lead to failed seals.
- Probe tool: Verify that substrate is sound and free of voids before applying sealants.
- Moisture meter: Ensure there’s no hidden moisture in the substrate. Ignore this at your peril!
- Camera: Take ‘before’ photos for reference, and document any issues found during prep work.
- Tape measure: Confirm dimensions of flashings, sealant joints, and other components. Inaccuracies can cause leaks or poor adhesion.
- Level: Ensure surfaces are level before applying sealants or installing flashings. Irregular surfaces can lead to water ponding.
- Chalk line: Mark out joint locations and flashing positions accurately. Sloppy lines can result in improperly installed components.
- Flashlight: Inspect hard-to-reach areas for any missed spots or hidden issues.
Quick rule: Regular checks with these tools help prevent costly rework and callbacks.
Best-Practice Installation Steps and Detailing Sequences
Begin with surface preparation to remove dust, grease, and loose material from the area around the meter base and conduit. Integrate lath or mesh as required by the substrate and local practice. Install flashing blocks in a way that initiates water deflection away from penetrations.
Detail conduit penetrations before final stucco layers, ensuring movement joints and sealants are properly placed. Sequence the work to align with electrical installation timelines and ensure access for final inspection. Confirm that all components sit flush with the wall plane and are securely fastened.
Substrate prep and lath termination
Start by cleaning the substrate. Remove any rust, dirt, or debris that could interfere with adhesion.
Ensure the surface is flat. Stucco needs a solid base to stick to. Fill any low spots with a leveling compound before you start.
Lay your lath over the prepared substrate. Overlap each sheet by at least 1 inch for strength. Fasten it securely using corrosion-resistant nails or screws, following manufacturer’s recommendations.
Flashing block placement and mechanical attachment
Size your flashing blocks to match the height of your stucco. They should extend at least 2 inches above the finished surface.
Place them strategically. Flashing blocks should be located where water is likely to collect – typically at the bottom and around any openings like conduit penetrations.
Fasten them mechanically using corrosion-resistant screws or nails. Drive them through the lath into the substrate, but don’t go so deep that you compromise the water-resistive barrier.
Remember, don’t bridge drainage paths. Leave a small gap between blocks to allow water to drain away.
Designing and Installing Effective Sealant Joints
Plan joint geometry with appropriate width and depth to accommodate movement and avoid bond failure. Use backing materials to maintain correct joint shape and provide a stable substrate for the sealant. Tool joints to create a consistent finish that deflects water away from the opening.
Consider curing conditions and substrate compatibility to ensure a durable seal. Choose sealants with suitable elasticity and weather resistance for the project climate. Verify that the joint design matches the surrounding stucco system and movement expectations.
Joint sizing, backer rod selection, and installation
The first step to a watertight seal is getting your joint size right. For stucco, aim for 1/4″ to 3/8″ wide joints.
Selecting the right backer rod diameter is crucial. It should be about 70-80% of your gap’s width. This prevents three-sided adhesion and over-compression. For a 3/8″ joint, use a #12 or #14 backer rod.
Installation: Insert the backer rod into the joint using a caulking gun or by hand. Ensure it’s fully seated at the bottom. Avoid compressing it too much; leave some ‘give’ for the sealant to fill.
Sealant application and curing best practices
Before applying sealant, clean the joint surfaces. Remove any dust, dirt, or old sealant residue using a wire brush or compressed air.
If your sealant requires a primer, apply it now. Primers improve adhesion and sealant lifespan. Follow the manufacturer’s instructions for application and drying time.
Application: Load your caulking gun with the sealant cartridge. Apply the sealant in one smooth, continuous bead along the joint. Fill the joint completely, but don’t overfill or create a ‘beak’.
Cure the sealant under the right conditions. Most sealants cure best at temperatures between 50-90°F (10-32°C). Keep the joint dry and free from contaminants during curing.
Water Management Integration: Flashing, Drainage, and Weep Provisions
Explain how the meter and conduit details connect to the building’s water-resistive barrier and drainage plane. Plan flashing and weep provisions so that incidental moisture can escape without wetting interior components. Ensure drainage plans align with the overall wall assembly and slope considerations.
Coordinate with the weather exposure and wall design to prevent trapped moisture near electrical hardware. Confirm that flashing, sealants, and weep paths are continuous across transitions between surfaces. Review the integration with any site-specific water management requirements and inspectors’ expectations.
Connecting details to WRB and flashings
The electrical meter base and service conduit are penetrations through your building’s exterior. They need to be integrated with the water-resistive barrier (WRB) and flashing system to keep moisture out.
Lap flashing tapes from the wall up onto the meter base and conduit. This creates a continuous barrier that directs water away from these penetrations.
Use counterflashing around the base of the meter base and conduit to further protect against water intrusion. Ensure it laps over the primary flashing and extends down to the WRB.
Maintain continuous WRB continuity by extending it up behind the meter base and conduit, then lapping it over with flashing tape.
Managing capillary breaks, slopes, and drainage paths
Water can travel through tiny capillaries in porous materials. To prevent this, create a capillary break at the base of your meter base and conduit using a non-porous material like plastic or metal.
Ensure there’s a slight slope away from the penetration. This encourages water to drain off rather than sitting and potentially finding its way back in. Use shims if needed to create this slope.
Create drainage channels around the base of the meter base and conduit using flashing or other materials. These should direct water away from the penetration and into your building’s drainage system.
Regularly inspect these details to ensure they remain effective. Clogged drainage paths or changes in slope can allow water to build up and find its way back into your building.
Conclusion
Getting the details right at meter bases and service conduits isn’t optional. Proper flashing, sealant joints, and water management keep the stucco durable, safe, and looking right for years to come.
Confirm your local codes and utility requirements, inspect the current configurations, assemble the listed tools and materials, then sequence the work: install flashing at penetrations, prep and prime surfaces, place the joint backer as needed, apply sealant with proper tooling, and verify drainage paths and weep provisions before final finish. Test as you go and document any changes for future maintenance.
Avoid common mistakes: don’t skimp on flashing or backer material, don’t seal over a moisture trap, and don’t skip field testing for drainage. Never work near live service equipment, and shut power off only when you’re sure it’s safe. If the wall or conduit run is buried, if you don’t know the current configuration, or if water is already leaking, pause and reassess rather than guessing.
If the project involves complex wiring, unknown utility requirements, or persistent leaks, it’s smart to call a professional. But for straight-forward setups, follow the steps above with discipline, check your work, and stay focused on safety and durability—that mindset saves time, money, and mischief by water.
FAQ
What are common signs of improper flashing at meter bases and conduits?
Look for water staining, staining that runs down the stucco, or damp spots near the base. Cracks around openings or peeling paint can mean moisture is getting in. If you see efflorescence or soft spots, stop and reassess the detailing.
How do I choose sealant and joints for areas near meter bases and service conduits?
Use sealants rated for exterior stucco and moisture exposure. Follow the manufacturer’s instructions for joint sizes and backer materials. If in doubt, ask the product label or the supplier for compatible substrates and cure times.
What steps should I take to route water away from the meter base and conduits?
Install flashing that directs water away from the openings. Create a small slope or drip edge to shed water from the base. Use weep provisions where applicable and ensure drainage paths aren’t blocked by the stucco finish.
How should I inspect and maintain stucco detailing after installation?
Regularly check for cracks, gaps, or loose flashing around the meter base. Repoint or reseal joints as needed, using the same compatible materials. If you see moisture intrusion, pause further work and verify with the product instructions and local rules before proceeding.