
Introduction
Retrofitting drainage behind barrier stucco means creating a practical path for moisture to escape from behind the stucco without compromising the wall.
Start with a careful visual check of the barrier, flashing, and any visible weep gaps, then plan based on your wall type and conditions.
Always verify with manufacturer instructions and local rules before making changes.
In reality, a DIY retrofit is about preventing ongoing moisture damage rather than making the wall perfect.
Set realistic expectations: you may need to preserve safe drainage paths, avoid leaks, and accept extra labor and trial fits.
If you’re unsure, double‑check product labels and local guidance to choose safe, feasible options.
Key takeaways
- Assess scope realistically: prioritize drainage fixes that stop water intrusion and decay.
- Inspect flashing, drainage plane, and stucco seams for signs of moisture.
- Test moisture behind barrier, verify wall drying potential before major work.
- Choose high-impact options when structural damage is present or warranties require.
- Obtain permits, document inspections, and align with insurance for coverage.
- Wear PPE, follow safe scaffold and ladder practices during retrofit work.
Table of Contents
- Introduction
- Key takeaways
- Scope and Realistic Goals of a Retrofit
- How Barrier Stucco Fails — Common Modes of Deterioration
- Diagnosing the Problem — Inspection and Testing Priorities
- Risk Assessment and Decision Matrix for Action
- Low- and Medium-Impact Retrofit Strategies (When They Make Sense)
- High-Impact Solutions and When to Choose a Full Reclad
- Tools, Equipment, and Materials Checklist
- Codes, Permits, Warranties, and Insurance Considerations
- Conclusion
- FAQ
Scope and Realistic Goals of a Retrofit
A retrofit can address symptoms like moisture intrusion and staining, but it does not magically restore a system that is fundamentally failing. It is about reducing risk and extending life where possible, not eliminating all problems overnight. Expect a measurable but limited improvement that depends on the existing substrate and flashing condition.
Set homeowner expectations around longevity, maintenance needs, and what constitutes a successful outcome. Verify guidance from product data sheets or manufacturer instructions when evaluating performance claims, and consider local practice standards in your area.
What ‘drainage behind barrier stucco’ actually means
The drainage plane behind your stucco is like a secret waterway that should keep your walls dry. It’s not just about the stucco itself, but also the air gap or rainscreen behind it.
Here’s how it works: Water hits the stucco and runs down. The air gap lets this water drain off instead of soaking into the wall. But if that drainage gets clogged or blocked, you’re asking for trouble.
Misconception alert: Stucco isn’t a waterproof barrier. It’s more like a sieve that lets water through but keeps it from getting behind the stucco.
Realistic performance expectations
A retrofit can significantly reduce moisture risk and limit repairs, but it’s not a magic fix that’ll last forever. Think of it as giving your drainage system a tune-up.
Here’s what you can realistically expect: With proper retrofitting, you should see less water damage, fewer leaks, and reduced mold growth. But remember, this isn’t a permanent cure-all. Other factors like extreme weather or poor maintenance can still cause issues down the line.
Bottom line: A retrofit is a smart move to improve your home’s drainage, but it’s not a guarantee against all future water problems.
How Barrier Stucco Fails — Common Modes of Deterioration
Cracking, delamination, and compromised flashing are common entry points for moisture. Substrate decay from ongoing water exposure accelerates deterioration behind the barrier. The failures interact to create hidden leaks that are hard to stop from the exterior alone.
Understand that flashing failures, lack of proper weepage, and improper detailing together drive behind stucco moisture problems. Check manufacturer guidance and local code expectations for how these elements should be installed and maintained.
Typical leak pathways
Barrier stucco systems rely on a continuous, watertight barrier to protect the structure. Any break in this barrier can allow water intrusion. Here are the most common entry points:
Window and door flashings: These are critical areas where water often finds its way behind the stucco. Check for cracks or gaps at these junctions.
Terminations: Where the stucco meets other materials like brick, stone, or siding, it’s crucial to ensure proper sealing and flashing. Water can wick up from these points if not properly protected.
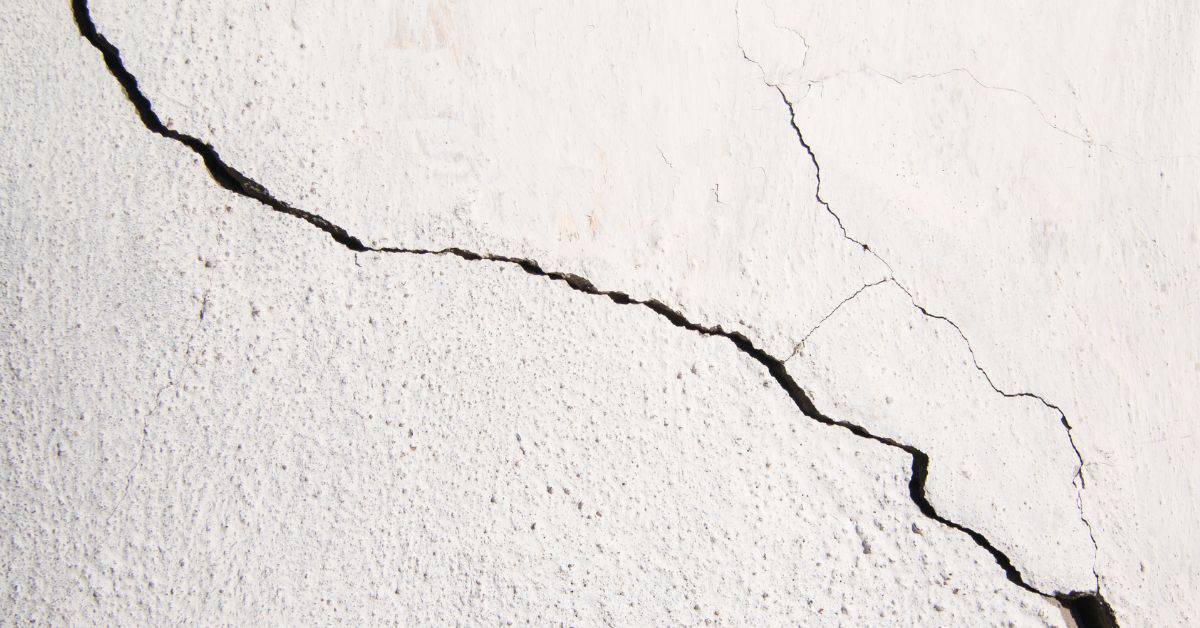
Cracks in the cladding: Even small cracks can allow water to penetrate behind the stucco. Inspect for hairline fractures or larger gaps in the stucco surface.
Hidden damage patterns and progression
Once water gets behind barrier stucco, it can cause a range of issues that aren’t always immediately visible. Here’s how damage progresses:
First, you might notice mold or mildew on interior walls or ceilings. This is a sign that moisture has made its way inside and is promoting fungal growth.
Over time, this moisture can lead to rot in wood framing. You might see warping, swelling, or discoloration of wooden components. In severe cases, you may even notice structural compromise.
Metal components like nails, screws, or anchors can also corrode due to prolonged exposure to moisture, leading to further deterioration of the structure. This corrosion isn’t always visible until it’s quite advanced, so it’s important to address any signs of water intrusion promptly.
Diagnosing the Problem — Inspection and Testing Priorities
Start with a visual exterior survey focusing on cracks, staining, and bonding failures. Look for sagging areas, mismatched patches, and signs of efflorescence that hint at water migration. Create a prioritized defect map to guide the retrofit path.
Use non destructive tests to establish scope: moisture readings at suspected joints and substrate, and any available infrared indications of thermal anomalies. Always cross check findings against product labels or manufacturer instructions for acceptable testing methods.
Visual Inspection Checklist
Use this checklist before and after rain to document visible signs of moisture intrusion.
- Exterior Walls: Cracking, bulging, or discoloration. Skip at your peril – these are often early warning signs.
- Window and Door Frames: Check for gaps, warping, or rotting. Moisture can cause frames to fail, leading to bigger problems.
- Roof Overhangs: Look for peeling paint, stains, or soft spots. These indicate water intrusion from above.
- Gutters and Downspouts: Ensure they’re functioning properly. Clogged or damaged gutters can cause water to back up and seep behind stucco.
- Foundation Cracks: Inspect for hairline cracks or gaps. These can let water in, leading to basement leaks.
- Interior Walls: Check for stains, peeling paint, or musty odors. These indicate moisture has made its way inside.
- Ceilings: Look for water spots, sagging, or discoloration. Skip at your own risk – these can signal serious structural issues.
- Probe Suspect Areas: Use a screwdriver to gently probe any suspect areas. Soft spots indicate rot or damage.
Quick rule: Always photograph and document your findings. This helps track progress and makes it easier to spot new issues later on.
Moisture Diagnostics and Tools
Use these tools and techniques to confirm moisture intrusion and locate hidden damage.
- Moisture Meters: Use pins to probe walls, looking for high moisture content. Ideal for quick, non-destructive checks.
- Infrared Scanning: Detects temperature differentials, helping locate hidden moisture. Best used by professionals.
- Borescopes: Insert into small holes to inspect inside walls without causing damage. Great for checking hard-to-reach areas.
- Specialized Contractors: For advanced testing like radar imaging or nuclear moisture gauges, consider hiring a pro.
Quick rule: Don’t rely on just one tool or method. Combine techniques for the most accurate diagnosis.
Risk Assessment and Decision Matrix for Action
Balance the severity of damage, occupant risk, cost, and expected service life to guide action. Consider how long a patch may hold versus when a full reclad becomes more reliable. Use a simple decision framework to compare patching, partial retrofit, or full reclad.
Document the rationale and verify any design assumptions with local requirements or authority guidelines. Consult with a licensed professional if the risk level or cost impact is unclear.
Prioritizing fixes by urgency and impact
First, let’s sort out what needs fixing right away and what can wait. This keeps your home safe and saves you money in the long run.
Urgent fixes: These are issues that threaten safety or structural integrity. Examples include:
– Active leaks near electrical outlets or wiring
– Sagging or bulging stucco, indicating potential structural damage
Long-term upgrades: These aren’t emergencies but will improve your home’s performance over time. They might include:
– Upgrading insulation behind the stucco
– Improving ventilation to prevent future moisture buildup
Red flags that mandate full replacement
Sometimes, a partial retrofit just won’t cut it. Here are some signs that you might need to replace the entire stucco system.
Widespread substrate rot: If more than 50% of the sheathing behind the stucco is rotted or damaged, it’s usually best to start fresh.
– Why? A small area of rot can often be patched, but widespread damage indicates that water has been getting in for a long time.
Failed flashing everywhere: If every piece of flashing behind the stucco is damaged or missing, it’s a clear sign that your barrier system isn’t working.
– Why? Flashing is designed to direct water away from vulnerable areas. If it’s failed all over, water is getting in where it shouldn’t.
Low- and Medium-Impact Retrofit Strategies (When They Make Sense)
Discuss practical, less invasive options that improve drainage paths or curb localized leaks. Examples include targeted flashing repairs, sealant and caulk strategies, and patching minor cracks where appropriate. These approaches are not universal fixes, but they can buy time in the right spots.
Assess effectiveness by isolating the repaired area and monitoring for moisture return. Always verify compatibility with the existing substrate and follow product labeling and manufacturer instructions for any surface prep and bonding requirements.
Flashing Repairs and Improved Terminations
Properly installed flashings and kick-out details can stop many common leak paths behind barrier stucco. They direct water away from the wall, preventing it from getting trapped.
Check your existing flashings. If they’re damaged or missing, repair or replace them. Use high-quality materials that won’t rust or degrade quickly.
Limitations: Flashing repairs alone can’t fix every leak. They won’t address issues like cracks in the stucco or improperly installed windows and doors.
Targeted Drainage Channels and Localized Removal
For localized leaks, consider removing small sections of stucco to install drains or flashing. This targeted approach can be effective when the damage is limited.
First, identify the exact source of the leak. Then, carefully remove just enough stucco to access the problem area. Install a drain or flashing as needed, ensuring it’s properly sloped and secured.
Feasibility: This method works best when leaks are isolated and not part of a larger system failure. It’s not suitable for widespread damage or when the entire stucco needs replacing.
High-Impact Solutions and When to Choose a Full Reclad
A full rainscreen retrofit or removal and reinstall is a major undertaking that changes drainage and drying dyn