
Introduction
Stringlines are a traditional layout method using taut string and stakes to mark precise lines for concrete and masonry. Lasers introduce electronic sighting and can be faster, but stringlines can be more accurate in limited spaces or on uneven terrain when properly stretched and aligned. The choice depends on accuracy needs, site conditions, and setup practicality.
Getting good results with either method starts with a clear setup: stretch, anchor, and check the line or beam with a level or alignment tool. Consider cost implications, maintenance, and how quickly you can relocate lines versus re-zeroing a laser, without relying on gadgets. Each method has pros and cons, so choose the approach that fits your project, your budget, and the guidelines for your site.
Key takeaways
- Stringlines offer low-cost, simple setup for straight-line layout with watchful tension.
- Lasers provide fast, repeatable layout over long distances but require alignment care.
- Setup process: stringline tension and peg layout vs laser tripod, calibration, and chalk lines.
- Cost implications: initial investment differences, ongoing maintenance, and tool longevity considerations.
- Accuracy depends on tension, surface, and environment; lasers excel with rapid checks.
- Safety and maintenance: inspect pegs or tripod, guard eyes from glare, store away from moisture.
Table of Contents
- Introduction
- Key takeaways
- Quick Overview and Why This Decision Matters
- How Stringlines Work in Concrete and Masonry Layout
- How Laser Layout Tools Work and Practical Setup
- Accuracy Comparison — Controlled Factors and How to Measure Real-World Accuracy
- Ease of Use, Setup Challenges, and Common Mistakes
- Safety, Maintenance, and Durability Considerations
- Cost Implications, Rental Vs Purchase, and Lifecycle Economics
- Application Examples, Decision Checklist, and DIY Troubleshooting Scenarios
- Conclusion
- FAQ
Quick Overview and Why This Decision Matters
Choosing between traditional stringline and a laser for concrete and masonry layout affects accuracy, speed, and potential rework. The decision also shapes upfront costs and long-term savings on the job. Understanding practical stakes helps contractors, masons, and DIYers align tools with project needs.
Different workflows, tolerances, and constraints drive tool selection. This section sets up a framework to evaluate project type, environment, and required precision, so readers can decide which method fits best. It also flags common pitfalls and best practices to reduce rework and maintain progress on site.
Target Audience & Expected Outcomes
This guide is intended for contractors, masons, and DIY enthusiasts involved in concrete and masonry layout work. Regardless of your experience level, understanding the differences between stringline and laser tools can greatly influence your project’s success.
Professionals working on large-scale or complex projects will find detailed comparisons and best practices for laser tools. Meanwhile, DIYers with smaller to medium-sized projects will discover guidance on using stringlines for simplicity and cost-effectiveness.
Upon completing this guide, you’ll be equipped to make informed decisions based on your project’s scale, complexity, and required precision. You’ll understand the trade-offs between traditional stringline methods and modern laser tools, ensuring you select the right tool for your needs.
Quick bottom-line recommendations
Before diving into detailed comparisons, here’s a quick snapshot of where stringlines and lasers typically excel. Keep in mind that these are general guidelines, and individual project specifics may vary.
Large-scale projects requiring high precision and speed often benefit from laser tools. Their faster setup times and reduced user error make them an attractive choice for complex layouts and tight schedules.
On the other hand, small to medium-sized projects with tight budgets or simple layouts may prefer stringlines. Stringlines offer a lower cost, simplicity of use, and adequate accuracy for many DIY and smaller professional jobs.
While these recommendations provide a useful starting point, it’s crucial to delve into the detailed comparisons that follow. Each project is unique, and understanding the specific strengths and weaknesses of each tool will help you make the best decision for your needs.
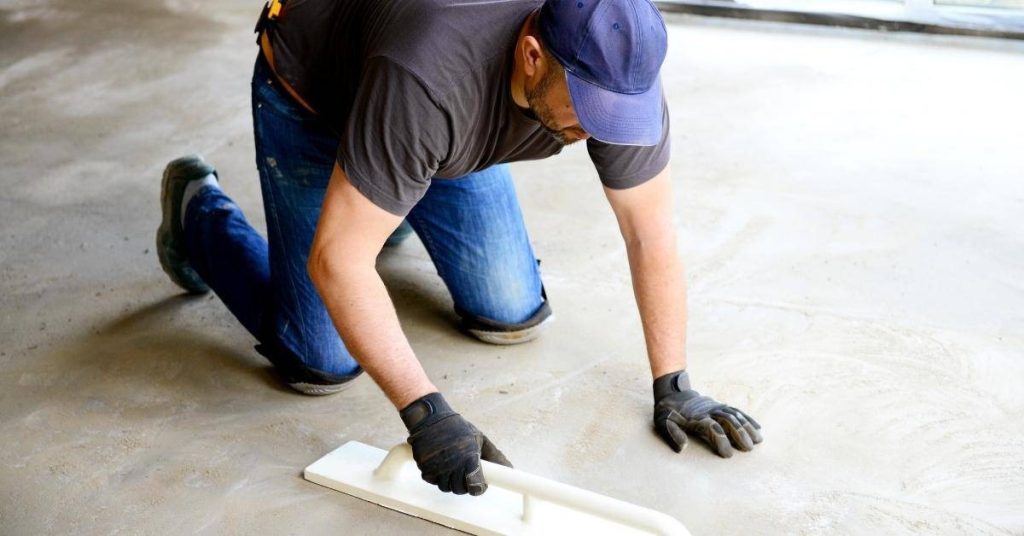
How Stringlines Work in Concrete and Masonry Layout
Stringlines provide a visual reference through tension and predictable sag, creating straight baselines for blocks, forms, and edges. Proper tension and sag management translate into consistent alignment across long runs. This keeps layout points coherent with the structure plan.
Common materials include mason’s line, stakes, chalk lines, and form pins. Anchoring methods secure lines to resist movement from load, moisture, and weather. The workflow centers on establishing baselines and transferring lines to actual building edges with careful checks.
Stringline Anchors and Tensioning
Secure stringlines require robust anchors to maintain tension and accuracy. Common anchor options include stakes, rebar pins, nails, or form boards. Ensure chosen anchors can withstand expected loads and weather conditions by checking manufacturer guidelines or local building codes.
Tensioning: Apply consistent pressure along the line using clamps or knots at anchor points. Regularly verify line tension during setup and throughout layout to ensure consistency.
Line Height: Position stringlines at suitable heights based on their intended use. For formwork or screeding, set lines 3-6 inches above the form base. For masonry courses, place lines at mid-height of units for precise alignment.
Visual Checkpoints and How to Read a Line
Before starting your layout, use this visual checklist to ensure your stringline is correctly aligned. This helps maintain accuracy throughout the masonry layout process.
- Plumb: Inspect each anchor point to confirm the line is vertically aligned.
- Shadow: Observe the shadow cast by the stringline to ensure it’s straight and level.
- Sightlines: Check sightlines along the string for consistent straightness. Use a level or laser if available.
- Sag: If present, adjust tension or move anchors to correct alignment.
- Wavy Line: If the line appears wavy or inconsistent, recheck all anchor points for proper tension and securement.
Quick Rule: Make small adjustments at anchor points where misalignment is detected. Recheck the line after each adjustment to ensure accuracy.
How Laser Layout Tools Work and Practical Setup
Laser layout tools emit lines or crosshairs with self-leveling features and multiple modes. Understanding the reference plane and how to project lines is essential for accurate transfers. Alignment relies on stable mounting and correct line generation before proceeding with layout points.
Visibility and battery life depend on environment and model. Outdoor brightness, beam color, and receiver use influence how easy it is to read lines. Tripod setup, mounting options, and calibration routines are integral to reliable performance on site.
Common laser types and their typical uses
Laser layout tools come in various types, each suited to specific tasks. Understanding these differences helps you choose the right tool for your job.
Line Lasers project straight lines over long distances. They’re ideal for laying out walls, floors, and other linear features. Choose line lasers when you need to transfer layout points along a single plane.
Rotary Lasers emit 360° beams, perfect for transferring points around corners or creating circular patterns. Opt for rotary lasers when you need full-room or site-wide layouts.
Point/Grade Lasers project a single point and can also indicate elevation changes. They’re useful for transferring precise points or establishing grade references. Select these lasers for tasks requiring high-precision point transfers or slope matching.
Best practices for laser setup and verification
Properly setting up your laser tool ensures accurate layout. Follow these best practices to minimize errors:
First, level the laser. Most lasers have self-leveling mechanisms, but you may need to adjust them manually using built-in controls or tripod adjustments.
Next, ensure a clear line-of-sight. Remove any obstacles between the laser and its target. For rotary lasers, establish a reference plane by aligning it with an existing wall or layout point.
Finally, verify accuracy. Use a tape measure or stringline to check that the projected line is true. For rotary lasers, spin the beam around and ensure it’s projecting accurately at all angles. Address any misalignment issues before proceeding with your layout work.
Accuracy Comparison — Controlled Factors and How to Measure Real-World Accuracy
Accuracy definitions for stringline and laser layouts hinge on tolerance, repeatability, and practical acceptability on concrete and masonry, with clear distinctions between old-school line behavior and modern instrument readings. Key controllable factors include distance from the layout plane, line tension, ambient temperature, slope, surface reflectivity, and vibration or shock affecting the instrument. A quick on-site check is to tug gently at both ends of the stringline to verify tautness and uniformity, and a pro will verify tension consistency across the length.
This matters because practical work hinges on consistent results across the job, not just a single measurement, and a structured workflow reduces error, especially when logging results, sampling enough intervals, and noting repeatability checks with simple tools like tape, calipers, or laser receivers. If the stringline feels loose or unevenly tight, adjust tension until consistent, or replace if damaged, and watch for common issues such as surface contamination, dew or fog, misalignment, or improper equipment setup that can skew results.
What affects stringline accuracy on the job
Stringline accuracy can be influenced by several factors that should be considered during layout work.
One key factor is tension loss and sag over span. As tension decreases, the line sags, leading to inaccuracies. Regularly check tension and ensure it’s within the manufacturer’s recommended range.
Anchor movement can also affect accuracy. Secure anchors properly and check them regularly to prevent movement.
Thermal expansion of the string can cause inaccuracies, especially in extreme temperatures. Consider using temperature-compensated string or adjusting layout times accordingly.
Human sighting error is another factor to consider. Double-check measurements and use multiple reference points to minimize errors.
What affects laser accuracy on the job
Laser accuracy can be impacted by various factors that require attention during setup and use.
Calibration drift over time can lead to inaccuracies. Regularly recalibrate your laser according to manufacturer instructions.
Ensure beam visibility is adequate for the working environment. Poor visibility can be improved by adjusting laser power or using a laser receiver.
Reflective surfaces can interfere with readings, causing inaccuracies. Consider using a laser with a different wavelength or adding anti-reflective coatings to minimize reflections.
Maintain receiver alignment and stability of the mounting point. Misalignment or instability can lead to inaccurate readings.
How to verify accuracy and acceptable tolerances
Verifying accuracy ensures that layout work meets project requirements and manufacturer specifications.
Compare results against project tolerance requirements and manufacturer specifications. If results are outside these limits, re-evaluate your setup and perform troubleshooting steps.
Perform simple field checks such as transfer checks (comparing multiple points along the line) and three-point checks (verifying a triangle’s angles). Use cross-measurements to ensure consistency.
If results consistently fall outside acceptable tolerances, consider recalibrating the tool, adjusting layout conditions, or consulting with a professional.
Ease of Use, Setup Challenges, and Common Mistakes
Assessment of setup time considers required tools, prep work, and site conditions. Stringline setup is often quicker in simple layouts, while lasers may require more calibration upfront. Practical time estimates depend on crew experience and project scope.
Common errors include inconsistent tension, sag, miscalibrated readings, and poor mounting. Preventive habits and quick verification routines save time and reduce rework. Address multi-line intersections and corner transfers with straightforward fixes.
Common Stringline Setup Mistakes and Fixes
To ensure accurate layout with a stringline, avoid these common mistakes:
- Inconsistent tension: Inaccurate readings due to loose or taut line. Solution: Maintain consistent tension by regularly checking and adjusting.
- Insecure anchors: Sagging or shifting lines caused by unstable anchor points. Solution: Use sturdy, reliable anchors suitable for your surface.
- Poor sightlines: Obstructions or incorrect line height leading to inaccurate readings. Solution: Perform a quick visual inspection before starting work and adjust stringline height if needed.
- Incorrect stake placement: Misaligned layout due to improper stake positioning. Solution: Follow standard tolerance targets for accurate stake placement.
Regularly check your line during layout, and perform a quick verification routine before pouring to avoid rework.
Common Laser Setup Mistakes and Fixes
Avoid these common errors when using a laser for layout:
- Improper leveling: Inaccurate readings due to unlevel laser. Solution: Ensure the laser is properly leveled before each use.
- Failing to re-check: Drift in accuracy after moving the unit. Solution: Perform a quick verification before starting work and after any movement.
- Incorrect receiver height: Affects accuracy due to improper receiver positioning. Solution: Adjust receiver height according to manufacturer’s guidelines for optimal accuracy.
- Poor mounting: Inaccurate readings caused by unstable laser mount. Solution: Use a secure, stable mount suitable for your surface and laser type.
Following these tips will help you avoid rework and maintain accurate layout with your laser tool.
Safety, Maintenance, and Durability Considerations
Safety on site includes managing trip hazards from lines and stakes and ensuring appropriate eye and PPE for bright environments. Visibility challenges may require color markers or shielding regardless of method. Plan routes to keep pathways clear around layout work.
Maintenance covers pre-use inspections, cleaning, and storage. Durability considerations weigh stringline materials against instrument components under sun, moisture, and abrasion. Quick checks for tension, sag, and calibration drift help maintain accuracy between phases.
On-site safety and hazard mitigation
Safety should be a top priority during layout operations. Here are some common hazards to identify and mitigate:
Tripping hazards: Ensure lines and stakes are secure, taut, and clearly visible. Regularly inspect the work area for any tripping hazards.
Laser beam exposure: Always keep laser beams directed away from eyes or reflective surfaces. Use safety glasses and ensure operators are aware of potential risks.
Unstable tripods: Ensure tripods are stable, level, and secure before using lasers. Regularly inspect them for any signs of instability.
Before starting work, perform a quick walkthrough to identify and mitigate potential hazards. In low-visibility conditions, use brightly colored lines and markers, and consider using shielding for laser beams.
Maintenance, calibration, and storage
Proper care is essential to preserve the accuracy and service life of your layout tools. Here’s how to maintain stringlines and lasers:
Stringlines: Before each use, inspect lines for integrity, knots, and tensioning devices. Regularly replace worn lines and ensure all components are in good working order.
Lasers: Verify calibration before each use. Check battery levels and clean lenses to maintain optimal performance. Store lasers indoors when not in use, protecting them from extreme temperatures and moisture.
Establish a regular maintenance schedule to keep tools clean, dry, and functional. Replace worn components promptly and store tools properly to prevent damage.
Cost Implications, Rental Vs Purchase, and Lifecycle Economics
Cost considerations span hardware purchase, consumables, batteries, and maintenance. Each method has unique ongoing needs that affect total investment. Readers should map these to project frequency and expected usage.
Rental versus purchase involves scenarios with short-term needs or multi-project use and service provisions. A repeatable lifecycle framework helps compare total cost of ownership without fixed price points. Consider durability and replacement cycles when building a budget.
Factors to Consider When Deciding to Rent or Buy
Evaluate the project’s duration, required precision, and long-term equipment needs.
Short-term projects with less demanding accuracy requirements may find renting more cost-effective. It offers flexibility without the commitment of purchasing.
Long-term projects and those requiring high precision might benefit from purchasing. This option provides better control over equipment maintenance, potential resale value, and consistent accuracy.
Hidden costs and time tradeoffs to consider
Evaluate the potential indirect costs and time investments for each approach to make an informed decision.
Renting may have lower upfront costs but could incur higher expenses due to training, downtime for calibration or repair, and rework from layout errors. This is particularly true when frequent recalibration or equipment upgrades are needed.
Purchasing, on the other hand, might require more initial investment but can reduce long-term costs through better maintenance routines and minimal downtime. It also allows for consistent accuracy over time.
Application Examples, Decision Checklist, and DIY Troubleshooting Scenarios
Application scenarios illustrate when stringline is advantageous for long, flat layouts and when a laser supports interior precision or complex shapes. Gear notes and visual cues help identify accuracy in real time. These examples guide practical tool selection on-site.
A concise decision checklist offers yes/no prompts to decide stringline, laser, or a hybrid approach. Troubleshooting steps cover common DIY mistakes with simple remediation flow, plus preventive tips to reduce recurrence. Quick takeaways summarize when to default to each method in practice.
Example project scenarios and recommended method
Use this checklist to determine the best tool for your masonry layout job. It covers various scenarios and their ideal tools: stringline or laser.
- Short runs, confined layouts: Check if the area is small enough that a short stringline can be easily managed. Confirm by measuring the length of the run and comparing it to your stringline’s capacity.
What goes wrong if you skip this: Using a laser in tight spaces may lead to interference with walls or other structures, compromising accuracy. - Long open slabs: Assess if the area is large enough that a laser can maintain consistent sightlines. Confirm by checking for any obstacles that might interfere with the laser’s beam.
What goes wrong if you skip this: Using a stringline in vast, open areas may result in lines sagging due to wind or other factors, affecting accuracy. - Reflective masonry: Evaluate if surfaces are non-reflective. Confirm by checking the material’s reflectivity and ensuring it won’t interfere with laser sightlines.
What goes wrong if you skip this: Using a laser on reflective surfaces may cause inaccurate readings due to beam reflection. - High-precision coursing: Consider if tight tolerances are required. Confirm by checking the project’s specifications and comparing them to your chosen tool’s precision capabilities.
What goes wrong if you skip this: Using a stringline for high-precision work may result in slight variations due to human error or line sagging.
Quick rule: For short, confined spaces and reflective surfaces, prefer a stringline. For long, straight layouts and high-precision work, opt for a laser.
Decision checklist and planning steps
Before starting any layout work, use this checklist to ensure you have the right tools and conditions for a successful job.
- Site Conditions: Inspect the site for levelness, obstructions, and hazards. Confirm it’s safe and suitable for your planned activity.
- Tolerance Needs: Check project plans or specifications to determine acceptable error margins. This helps select appropriate tools.
- Line-of-Sight: Verify that you can clearly see from the starting point to the ending point of your layout line. Obstructions may require adjustments.
- Crew Skill: Assess your team’s familiarity with the task and tools. If needed, provide training or allocate more time for setup.
- Equipment Access: Ensure all necessary equipment is on-site, in working order, and easily accessible to your crew.
- Backup Checks: Have a backup plan for each critical tool (e.g., extra stringline or laser level) in case of malfunctions.
- Stringline Tensioning: Check that the stringline is properly tensioned. A loose or sagging line can lead to inaccurate readings.
- Tool Selection: Based on your checks, select the right tool for the job. For high tolerances and real-time adjustments, consider a laser level. For long lines on uneven substrates, use a stringline.
Quick rule: Always double-check your tools’ functionality before starting work to avoid costly rework.
Tools and materials checklist plus quick workflows
The following tools and materials will help you efficiently complete your layout task. Having the right equipment ensures accurate results and minimizes common mistakes.
- Chalk line: Used to snap straight lines on surfaces. Key spec: Choose a chalk line with a durable cord and adjustable tension for precise snapping. Tip: Keep the chalk line clean and well-maintained to ensure longevity.
- Tape measure: Essential for accurate distance marking. Key spec: Use a tape measure with a locking mechanism and clear markings for easy reading. Tip: Regularly calibrate your tape measure to maintain accuracy.
- Carpenter’s square: Helps create right-angle lines. Key spec: A 12-inch or 24-inch carpenter’s square is versatile for most layout tasks. Tip: Use a square with a magnetic edge for easy attachment to metal surfaces.
- Level: Ensures lines are horizontal or vertical. Key spec: Choose a level with clear vials and a length suitable for your task. Tip: Regularly check and adjust your level’s accuracy using a known plumb surface.
- Stringline (optional): For long, straight layouts or environments with laser interference. Key spec: Use a stringline with adjustable tension and durable line material. Tip: Rent or borrow a stringline if you don’t need it frequently to save on costs.
- Laser level (optional): For high-precision interior slabs, tight tolerances, complex angles, or rapid real-time adjustments. Key spec: Choose a laser level with the appropriate beam type (red, green, or line) for your task. Tip: Consider renting a laser level if you don’t need it frequently to avoid the higher purchase cost.
Pro tip: Combining tools like a chalk line and carpenter’s square can help verify accuracy when working with long lines or complex layouts. Always double-check your work using multiple methods to ensure precision.
Conclusion
Both stringline and laser layout have a place in concrete and masonry work, and choosing the right approach now helps protect safety, durability, and a clean final appearance. When accuracy matters most and you’re working with uneven forms or rough terrain, a well-set stringline can offer reliable, repeatable results with fewer fragile setup steps.
To translate the idea into action, follow this practical flow: assess the project needs, select the method you’ll use, verify calibration or pencil-line accuracy, set up a straight reference with appropriate stakes or tripod alignment, test the layout on a small area, document measurements, then proceed with the full layout and recheck before any pours or finishing work.
Avoid these common missteps: rushing setup or neglecting to recheck after moving lines, ignoring surface irregularities that throw off straightness, and assuming a single method covers all conditions without validation. Safety rules to keep in place: wear eye and hand protection, confirm utilities and structural constraints before cutting or pouring, keep tools and lines secure to prevent trips, and double-check level and plumb before anchoring anything permanently.
If the project involves unusual geometry, tight tolerances, or active construction sites with changing conditions, consider timing a professional consultation rather than pushing ahead alone. With careful planning and disciplined checks, you can achieve solid results and keep the work safe and durable—confident steps that protect both your project and your time.
FAQ
How do stringlines and lasers compare in accuracy for concrete and masonry layout?
Stringlines can be very accurate when properly taut, properly anchored, and kept clear of shifting supports. Lasers offer repeatable reference lines over longer distances with minimal sag, provided they are calibrated and the line of sight remains clear. Check the manufacturer guidance, tool calibration procedures, and your site conditions to determine which method will meet your project needs.
In practice, accuracy depends on setup discipline and environment more than the tool type alone. Look for guidance on tension, anchor stability, and how to verify accuracy at key reference points on site.
What is the typical setup process for stringlines and laser tools?
For stringlines: establish two or more fixed reference points, run the line taut between them, and secure at each anchor to hold position. Transfer the line to the desired layout points and mark references along the line. Regularly check tension and re-tighten if there is any movement.
For a laser: place the laser on a stable, level surface or mount it on a tripod, calibrate or level the tool, and project the reference line(s) at the required height. Align the laser to the target marks and verify alignment at multiple points to confirm the layout. Consult the manual for mounting height recommendations and calibration steps.
How do the costs compare and what affects lifecycle costs?
Stringlines have very low ongoing costs after initial purchase, with minimal maintenance and no power needs. Lasers have higher upfront costs and ongoing costs for batteries, calibration checks, and occasional maintenance or replacement parts. Consider rental versus purchase based on how often you perform layout work and the expected tool lifespan.
When evaluating, check the tool label or manual for expected battery life, maintenance intervals, and any service recommendations. Local rental rates and long-term ownership cost can influence the decision for larger or recurring projects.
What are the main advantages and disadvantages for different project sizes and complexities?
Stringlines are robust, simple to use, and effective on smaller or straightforward layouts with limited access. They are less dependent on power and electronics and can tolerate rough conditions. Disadvantages include slower setup for complex layouts and potential line sag or movement if anchors are disturbed.
Lasers offer fast setup, easy reuse across large or repeated layouts, and good visibility over long distances. They can reduce human error in alignment and work well for complex or large sites. Disadvantages include sensitivity to ambient light, line-of-sight requirements, potential drift if not calibrated, and higher maintenance and cost considerations.