

Introduction
Sprayers for concrete curing compounds are tools used to apply liquid sealers evenly over fresh concrete to control evaporation. When selecting a sprayer, choose one compatible with curing compounds and pay attention to tip size and spray pattern to minimize clogs. Follow the manufacturer’s guidance for setup and maintenance to support even coverage and consistent results.
To avoid clogs, keep the tip clean, clear jams promptly, and flush the system according to the product instructions. Use appropriate cleaner or water according to the curing compound label, and inspect hoses and seals for wear before a job. Practice even application to prevent puddling or overlapping areas, and test your spray on a sacrificial area before moving to the actual surface.
Key takeaways
- Select a sprayer compatible with curing compounds and frequent cleaning.
- Use the recommended tip size to balance spray coverage and clog risk.
- Apply in even passes, overlapping slightly to avoid thin spots.
- Avoid puddling by adjusting flow and pass timing; monitor surface.
- Regularly clean components during and after spraying to prevent clogs.
- Wear proper PPE and follow label instructions; verify local requirements.
Table of Contents
- Introduction
- Key takeaways
- Why Curing Compounds Matter and Types You’ll Spray
- Choosing the Right Sprayer and Budget Considerations
- Spray Gun and Tip Selection (Preventing Clogs)
- Tools and Materials Checklist Before You Spray
- Application Technique: Coverage, Passes and Avoiding Puddles
- Weather, Temperature and Site Considerations
- Cleanup, Maintenance and Preventing Clogs
- Safety, Common Mistakes, Troubleshooting and Durability Tips
- Conclusion
- FAQ
Why Curing Compounds Matter and Types You’ll Spray
Curing compounds protect concrete during the early hardening period, helping it achieve strength and durability. Proper curing minimizes cracking and improves long-term performance. Quick, effective curing also supports surface quality and reduces moisture-related issues.
Film-forming products create a surface film, while penetrating types work below the surface. Each type offers distinct advantages and limitations for different projects. Spray suitability depends on timing, surface prep, and environmental conditions, as well as the compound’s formulation.
Film-forming vs Penetrating Compounds
Curing compounds for concrete can be categorized into two main types: film-forming and penetrating. The primary difference lies in their working mechanism, appearance outcomes, and viscosity.
Film-forming compounds create a protective surface film that evaporates over time, providing immediate protection against moisture loss. They are ideal for projects where a visible protective layer is desired, such as new slabs or high-traffic areas.
Penetrating compounds, on the other hand, soak into the concrete’s surface, forming a chemical reaction that enhances its internal curing process. They do not leave a visible layer and are suitable for projects where an invisible protective barrier is sufficient, such as overlays or textured surfaces.
When choosing a sprayer, it’s crucial to consider the compound’s viscosity. Film-forming compounds tend to have higher viscosities than penetrating ones. Therefore, ensure your sprayer can handle the specific compound’s viscosity to avoid clogging issues.
Project Use Cases and Spec Checks
Before selecting a curing compound, it’s essential to consider your project’s requirements and check product labels as well as local or specification requirements.
For new slabs or floors, both film-forming and penetrating compounds can be used effectively. However, for projects involving overlays or textured surfaces, consider using a penetrating compound to avoid layering issues that could compromise the final finish.
Always review product labels and datasheets to ensure the chosen curing compound meets your project’s specific requirements. Additionally, check local building codes and specification requirements to guarantee compliance with relevant standards.
If curing failures occur, recheck your project requirements and ensure you’ve selected a suitable curing compound that aligns with these needs.
Choosing the Right Sprayer and Budget Considerations
Key decision factors include flow rate, spray pattern, and nozzle compatibility to match the compound’s viscosity. Different rigs suit different job sizes and frequencies of use. Consider how each system handles film-forming versus penetrating formulations.
A quick matching matrix helps guide rentals versus purchases based on job scale and dwell time. Durability, maintenance needs, and downtime influence total cost of ownership. Balance upfront price with operating costs and long-term value.
Matching sprayer capability to material
The choice of curing compound significantly impacts the type of sprayer required. Material viscosity and solids content determine pump type and flow requirements.
- Film-forming compounds: These have higher viscosity and solids content, requiring airless or diaphragm rigs with high flow rates to ensure even coverage and prevent cracking.
- Penetrating sealers: With lower viscosity, these can be applied using handheld sprayers with appropriate nozzle compatibility. Check the sprayer’s capability to handle the material’s solids content to avoid clogging.
- Water-based compounds: These typically have lower viscosity and require sprayers with adjustable flow rates to control application rate and prevent over-application, which can lead to staining or weak bond.
- Solvent-based compounds: With varying viscosities, ensure the sprayer’s pump type and flow rate match the material’s properties to avoid clogging or poor coverage.
- High-solids content materials: These require airless or diaphragm rigs with high flow rates to maintain consistent application and prevent material buildup in the sprayer, which can cause clogs.
Budget and rental vs buy decisions
Understanding cost drivers helps determine whether to rent or purchase a sprayer. Key factors include pump type, hose length, and accessories.
For occasional small jobs with varied compounds, renting may be more cost-effective. Handheld or piston-pump sprayers are suitable for these situations, offering flexibility without the long-term investment of purchasing.
However, for frequent large-scale projects with consistent compound types, purchasing an airless or diaphragm rig could offer better long-term value. These rigs typically have higher upfront costs but lower operating expenses over time.
When considering renting larger rigs, assess the job frequency and size to ensure it’s a cost-effective solution. Renting may become more expensive than purchasing for frequent, large-scale projects.
Spray Gun and Tip Selection (Preventing Clogs)
Compound viscosity guides whether to use a standard spray gun or a more advanced system. Real-world ranges influence whether you choose airless, hydraulic, or other configurations. Manufacturer guidance should always drive tip and gun choices.
Plan for backups on hand, including extra tips, seals, and a spare gun. Read label specs and translate them into practical onsite settings. A simple approach helps reduce clog risk and downtime.
Nozzle/orifice selection strategy
Selecting the appropriate nozzle or orifice size for your spray gun is crucial to prevent clogs and ensure proper application of concrete curing compounds. Start by following the recommendations provided by both your sprayer and product manufacturers.
For thicker, film-forming compounds, choose larger orifices to ensure smooth flow and even coverage. These compounds typically have higher viscosities, requiring wider openings to pass through without clogging.
For lower-viscosity penetrating liquids, opt for finer orifices to achieve precise application. Smaller openings help control the liquid’s spread, preventing over-application and potential clogs.
Filters, strainers, and inline protection
Proper filtration is essential to prevent clogs caused by contaminants in your curing compounds. Implement a balance of filtration stages (tank, inline, gun) to minimize clog risk while maintaining adequate flow.
If manufacturer guidelines advise against fine filtration, use coarse filters or remove them altogether to prevent unnecessary restriction. Over-filtration can lead to increased pressure and potential clogs.
When using sensitive spray equipment, such as airless sprayers, consider inline protection to safeguard the pump and motor from damage caused by contaminants. Regularly inspect and clean or replace filters as needed to maintain optimal performance.
Tools and Materials Checklist Before You Spray
Before spraying, verify sprayer compatibility with the curing compound and set the correct nozzle sizes. Assemble strainers and prepare PPE, including ventilation considerations. Have a clear checklist to ensure readiness.
Keep essential spare parts ready, such as tips, seals, and brushes for smoothing. Prepare a labeled cleaning kit for immediate post-spray cleanup. Include SDS-compliant cleaners and proper disposal steps.
Mixing, thinning and loading best practices
Before you start spraying, ensure your curing compound is properly mixed and thinned to avoid clogs and maintain application quality.
- Check product label: Follow manufacturer’s guidelines for mixing and thinning ratios.
- Work in small batches: Mix and thin only what you can use within a short time to prevent settling.
- Avoid over-agitation: Gentle agitation is sufficient; excessive stirring can introduce air bubbles that cause clogs.
- Use clean tools: Ensure your mixing paddle, container, and other tools are clean to avoid contamination.
- Pre-wet strainers: Before loading the sprayer, wet strainers to prevent material from sticking and causing clogs.
- Prime the pump: After mixing, prime your sprayer’s pump to remove air and ensure smooth operation.
- Load slowly: Gradually load the mixed compound into the sprayer to avoid overfilling and spills.
- Check for leaks: Before spraying, inspect all connections for leaks to prevent waste and maintain pressure.
Quick rule: Always follow product labels and work in small batches to ensure optimal mixing and loading.
Visual checkpoints and test panels
Before applying curing compounds to your entire project, perform visual checks on test panels to confirm application quality and behavior.
- Prepare test panel: Set up a small, representative area of the surface you’ll be spraying.
- Spray test panel: Apply curing compound using your chosen sprayer and tip setup.
- Inspect spray pattern: Check for even coverage, overspray, or arcing to ensure proper nozzle selection and technique.
- Evaluate wet film appearance: Assess the appearance of the applied compound; it should be smooth, uniform, and free of defects.
- Check cure behavior: Allow the test panel to dry according to manufacturer’s recommendations, then inspect for proper curing and adhesion.
- Perform touch test: Gently touch the cured film to ensure it is dry and adheres well to the surface.
- Inspect edges: Check the edges of your test panel for proper coverage, drip-free application, and adhesion.
- Document results: Record your findings to inform adjustments in sprayer setup, technique, or product selection.
Quick rule: Always perform visual checks on test panels before proceeding with full-scale application to ensure optimal results and minimize waste.
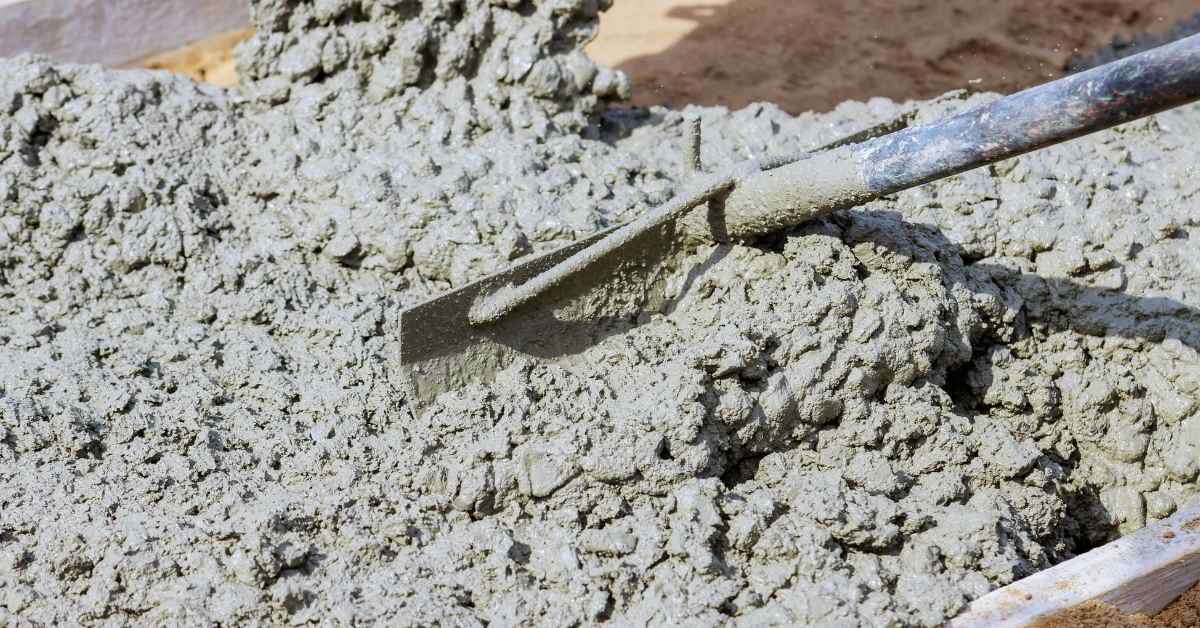
Application Technique: Coverage, Passes and Avoiding Puddles
Plan the coverage pattern with consistent overlap and steady motion. Avoid heavy buildup that can cause puddles or uneven cure. Set spray distance and angle to promote uniform distribution.
Choose a nozzle and pressure suited to the product, favoring a wide pattern for even coverage. Maintain straight, overlapping passes and address edges and corners carefully. Keep a steady pace to prevent thin or thick patches.
Controlling Application Thickness and Number of Coats
To ensure even curing and minimize waste, follow the manufacturer’s recommended film thickness and coat counts. Applying multiple thin coats is more effective than one heavy coat.
Check the surface after each pass for consistent coverage. If the previous coat is still wet or tacky, wait before applying the next coat to avoid runs.
If runs occur, lightly sand and recoat once the surface is dry to achieve a smooth finish.
Feathering Overlaps and Troubleshooting Runs
For even coverage, feather at lap joints by slightly overlapping each pass. Maintain a wet edge to prevent streaks or gaps.
Inspect lap joints during application for consistent coverage. If puddles form, immediately correct with a brush or back-spray to maintain the wet edge and prevent uneven curing.
Practice your feathering technique on test panels before application. If runs occur, lightly sand and recoat once the surface is dry to fix any imperfections.
Weather, Temperature and Site Considerations
Hot conditions accelerate evaporation and can alter droplet behavior. Adjust nozzle selection and spray pressure to maintain even coverage. Check product guidance and verify surface temperature during application.
Cold conditions slow curing and may require warming measures or alternative products. Consider shielding surfaces from rapid temperature swings and delaying spray if needed. Wind and sun exposure can drive drift and affect film formation.
Hot-Weather Precautions
High temperatures and direct sunlight can speed up evaporation, shortening cure times. To ensure even coverage:
- Avoid peak heat hours, typically between 11 am and 3 pm, applying curing compounds during cooler parts of the day.
- Monitor ambient temperature and sun exposure. If it’s excessively hot (>40°C/104°F) or sunny, shorten open times to prevent blistering and rapid skinning. Always check your product’s high-temperature limits before application.
Cold-weather Application Tips
Low temperatures can impact material curing, potentially freeze components, and harm surfaces. To safeguard your application:
Monitor substrate and ambient temperatures. If below 5°C (41°F), delay spraying until conditions improve.
Use heated storage or in-line heaters to maintain materials and lines at suitable temperatures, adhering to product guidelines. Thaw frozen materials gradually, reapplying if curing is compromised due to cold exposure. Always verify your product’s minimum application temperature before use.
Cleanup, Maintenance and Preventing Clogs
Regular cleanup after spraying is essential to prevent nozzle and pump clogs. Use a clear step-by-step routine for water-based and solvent-based curing compounds, including rinsing, flushing, and visual checks for residual film.
This routine supports longer sprayer life, reduces downtime, and helps identify wear or clog risk early. It relies on daily post-job rinses and weekly nozzle and pump inspections, with proper disposal of residues and attention to PPE when handling solvents, and following label guidance for cleaners and solvents.
Immediate post-job flush and safe cleaners
After each use, promptly drain, purge, and flush your sprayer’s lines to prevent clogs and maintain optimal performance. Remove tips and filters for separate cleaning.
For water-based compounds: Flush with clean water until no residual material is present. Ensure all parts are thoroughly rinsed before storage.
For solvent-based compounds: Use the cleaner recommended on the product’s Safety Data Sheet (SDS) to flush lines, tips, and filters. Always follow safe disposal rules for chemical waste.
Routine maintenance and between-job care
Daily and weekly checks are crucial to keep your sprayer in top condition. Regular upkeep ensures optimal performance, minimizes downtime, and extends the lifespan of your equipment.
Daily post-job: Rinse lines with clean water, remove tips and filters for cleaning, and lubricate the pump if required according to manufacturer’s guidelines.
Weekly between jobs: Inspect and replace filters as needed, lubricate the pump, and store parts properly following manufacturer instructions. This may include soaking or winterizing parts during off-seasons.
Safety, Common Mistakes, Troubleshooting and Durability Tips
Identify essential PPE, ventilation needs, and safe handling of curing compounds. Follow solvent and flammability guidelines to minimize hazards during spraying and cleanup. Store materials according to manufacturer recommendations.
Common mistakes include improper dilution, wrong spray distance, and inadequate surface prep. Use quick diagnostics to restore even coverage without compromising cure. Adopt practices that protect film integrity and extend equipment life.
Common Concrete Curing Compound Application Mistakes
Ensure a consistent cure and appearance with your concrete curing compounds by avoiding these common pitfalls:
- Incorrect Tip Size: Using the wrong tip size can result in uneven application. Check the product label or manufacturer’s instructions for the recommended tip size based on your compound and desired film thickness.
- Poor Surface Preparation: A dirty, damp, or poorly prepared surface can cause clogs and affect appearance. Ensure the surface is clean, dry, and free of contaminants before spraying.
- Over-Thinning: Over-thinning your compound can lead to inadequate protection and increased risk of clogs. Follow the manufacturer’s guidelines for thinning ratios to maintain proper coverage and consistency.
- Inadequate Spraying Distance: Spraying too close or too far from the surface can cause uneven application. Maintain a consistent distance, typically within 6-12 inches, to ensure even coverage.
Regularly inspect your tip condition, surface preparation, and mix consistency to avoid these common mistakes. If issues arise, adjust your tip size, re-prepare the surface, or remix your compound as needed to restore uniform application.
Long-Term Performance and Post-Application Care
To preserve the durability and finish of your concrete curing compounds, follow these post-application care tips:
Verify Cure: Allow sufficient time for the compound to cure completely before exposing it to traffic or sealing. Follow the manufacturer’s recommendations for cure times based on temperature and humidity conditions.
Periodic Inspection: Perform regular visual inspections and touch tests to monitor the condition of the cured film. Check for signs of wear, damage, or compromised finish. If issues are detected, address them promptly to maintain long-term performance.
If traffic or sealing is required before the compound has fully cured, delay these activities until cure is complete to prevent compromising the finish. Reapply or touch up as necessary based on your inspection findings to ensure optimal durability and appearance over time.
Conclusion
Taking care with spray choice, technique, and cleanup protects safety, durability, and the final look of the concrete. A reliable process reduces clogs, avoids waste, and prevents costly rework.
Proceed with a clear plan: verify the sprayer and tip are appropriate for the product, test on a small area, load and mix per instructions, maintain a steady distance and consistent passes, watch weather and surface conditions, and clean the equipment immediately after use. Keep runoff controlled and follow all label directions to protect people and surfaces.
Common mistakes to avoid include rushing through passes, overlapping too aggressively, or applying too thick a coating in one pass. Never spray when temperatures are at or below the product’s minimum or when wind can carry droplets onto unintended areas. Wear appropriate PPE, de-energize and clean equipment after use, and store materials safely. If in doubt about sprayer compatibility, product compatibility, or local rules, consult the manufacturer or a professional before proceeding; when you follow the steps safely, you can achieve a smooth, durable cure with minimal risk.
FAQ
How do I choose a sprayer for concrete curing compounds?
Look for a sprayer that is compatible with the curing compound’s viscosity and the spray pattern you need. Check the manufacturer’s instructions for recommended sprayer types and any tip or nozzle guidance. Verify compatibility with your surface and local site conditions before purchase.
What tip size is appropriate for even application?
Use a tip size recommended by the curing compound manufacturer for your sprayer. Avoid tips that are too small for the product, as they can clog or reduce flow. If unsure, start with a mid-range tip and test on a small area to gauge coverage.
How can I apply evenly and avoid puddling and overlaps?
Maintain a consistent distance and speed during passes, and use a deliberate overlap between passes as directed by the product instructions. Perform a test area first to confirm coverage and adjust gaps, speeds, or passes as needed. Do not exceed the product’s recommended coverage area per pass.
How do I clean the sprayer after use and what safety precautions should I take?
Rinse or flush the sprayer according to the product label or manufacturer instructions. Disassemble and clean the nozzle and fittings to remove residue. Wear appropriate PPE, depressurize the system, and follow local rules for disposing rinse water and any leftover product.