

Introduction
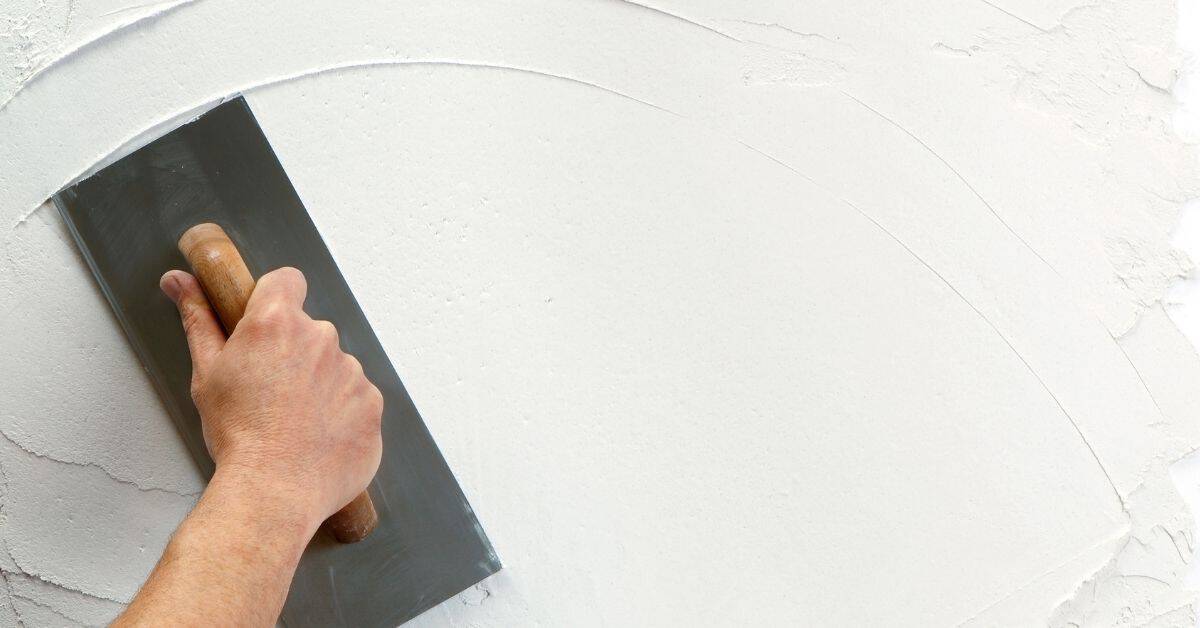
Smoothing interior concrete block walls means applying a skim coat to create a flat, paint-ready surface. It’s a light, even layer that fills small voids and helps the wall accept finish coats. The key is good bonding and proper moisture handling before you start.
Lean on simple steps: clean and rough up the surface, choose a bonding method supported by the product label, and mix per instructions with attention to curing and environmental conditions. Keep an eye on moisture and follow manufacturer directions to prevent issues once you seal and paint. If any spec matters for your project, check the product label or local rules and adjust accordingly.
Key takeaways
- Check moisture sources and substrate condition before starting skim coats or bonding.
- Clean surface thoroughly, remove efflorescence, and repair cracks to avoid trapping moisture.
- Use compatible bonding agents and primers; check label for substrate and film compatibility.
- Skim coats should be applied in thin, even passes with proper curing conditions.
- Test for moisture migration after cleaning; proceed only if tests show acceptable readings.
- Ventilate work area during application and drying to reduce vapor buildup.
- Personal safety matters: wear eye protection, mask dust, and follow site safety rules.
Table of Contents
- Introduction
- Key takeaways
- Understanding the Substrate: Concrete Block Characteristics and Failure Modes
- Moisture Assessment and Diagnostic Testing
- Surface Preparation, Cleaning, and Repairs
- Bonding Agents, Primers, and Compatibility
- Skim Coat Materials, Mix Options, and Material Specs Explained
- Tools and Materials Checklist and Mixing Guidance
- Application Techniques: Step-by-Step Approach and Visual Checkpoints
- Drying, Curing, Ventilation, and Long-Term Moisture Management
- Conclusion
- FAQ
Understanding the Substrate: Concrete Block Characteristics and Failure Modes
Concrete block walls come with a variety of textures and joint profiles. The type of block, surface roughness, and how the joints were laid all influence how a skim coat will grab on. Watch for common deterioration like efflorescence, salts, spalling, or loose mortar, as these affect adhesive choice.
Adhesion strategy should reflect the substrate condition. A rough, sound surface may take a simple skim coat, while damaged joints or friable mortar often requires additional surface prep or different bonding approaches. Consider how each factor could steer the skim coat method you choose.
Block types and surface profiles
The first thing to understand is the type of concrete block you’re dealing with. There are four main types:
Solid blocks have no voids, providing better thermal mass but less insulation. Their smooth surfaces need more primer for adhesion.
Hollow blocks have cavities that can fill with moisture or debris. They require thorough cleaning before priming.
Glazed and painted blocks have a smooth, sealed surface. They need a special primer to ensure skim coat adhesion.
Common moisture-related and structural defects
Before you start skim coating, inspect your walls for any signs of moisture intrusion or structural issues:
Efflorescence – a white, powdery substance on the surface indicates moisture. Remove it before priming.
Salt migration can cause pitting and delamination. Scrub with a wire brush and rinse thoroughly.
Hairline cracking and delamination weaken adhesion. Repair using a suitable filler and sand lightly before priming.
Moisture Assessment and Diagnostic Testing
Start with a visual inspection for signs of moisture migration, staining, or damp patches. Use non-destructive meters to get a sense of moisture presence across the wall. Reserve invasive tests for when non-destructive results are inconclusive.
Remember that test thresholds vary by product and manufacturer. Always verify the specific criteria on labels or manufacturer data sheets before proceeding with any bond or skim coat. When in doubt, consult the product instructions for acceptable moisture levels.
Visual cues and hygroscopic indicators
Before you start testing, look for visible signs of moisture. These can tell you where to focus your efforts.
Staining on the walls or efflorescence – a white powdery deposit – are clear indications that moisture is present. A musty odor might also be noticeable, especially in hidden areas like behind furniture or under insulation.
If you see peeling paint or wallpaper, it’s another sign of excess moisture. These visual cues don’t give you the full picture, but they’re a good starting point and can help guide your testing.
Moisture testing methods and interpreting results
Now that you’ve identified potential problem areas, it’s time to test for moisture. There are a few methods to choose from.
The quickest is using a non-invasive moisture meter. These are easy to use but aren’t always the most accurate. They’re great for getting a rough idea of where moisture might be hiding.
For more precise readings, consider probing. This involves drilling small holes into the wall and inserting a probe. It’s invasive but gives you a better idea of how much moisture is present deep within the block.
Contractors often use calcium chloride tests. These are more involved, requiring you to place a sealed cup of calcium chloride on the wall and wait for it to react with any moisture present. The change in weight tells you how much water was absorbed.
Always remember that these results are only useful if you compare them with your skim-coat product’s acceptable moisture limits. Too much moisture, and your skim coat won’t stick properly.
Surface Preparation, Cleaning, and Repairs
Begin with a thorough cleaning to remove dust, grease, and loose material using brushing and detergent washing as needed. Remove efflorescence or salt deposits so the surface can bond properly. Address any structural repairs or joint repointing necessary to create a solid substrate.
Prioritize fixes that stabilize the wall before applying any skim coat. Ensure all damaged areas are sound and firm to avoid bond failures later. Confirm that the prepared surface meets the coating manufacturer’s prep requirements.
Efflorescence and Salt Management
Before you start, deal with efflorescence – that white powdery stuff on your block walls. It’s salt from the concrete migrating to the surface.
Never seal or finish over active efflorescence. Here’s how to clean it:
1. Safety first: Wear gloves, goggles, and a mask. 2. Use a stiff-bristle brush to scrub off loose powder. 3. Apply a solution of muriatic acid (1 part) mixed with water (10 parts). Let it sit for 15 minutes, then scrub again. 4. Rinse thoroughly with clean water.
Patching Voids, Loose Mortar, and Delamination
Your walls need a solid base for skim coats. Here’s how to fix common issues:
1. Voids: Mix a thick mortar (same as your blocks). Apply with a trowel, pushing it into the voids. Let it cure.
2. Loose Mortar: Remove loose bits with a chisel and hammer. Repoint using fresh mortar, pressing it firmly into place.
3. Delamination: If faces are peeling off, use a bonding agent (like thinset) to reattach them. Apply the agent, press the face back onto the wall, and secure with screws if needed.
Mechanical Profiling and Surface Preparation Options
Sometimes, you need to roughen up your walls for better adhesion. Here’s how:
1. Light Abrasion: If blocks are sound but smooth, use a wire brush or sandpaper (80-grit) to lightly abrade the surface.
2. Scarifying: For rougher surfaces or when adhesion is an issue, use a scarifier – a tool with rotating blades that remove material. Be careful not to damage the blocks.
3. Bonding Primers: If your walls are dusty or have poor suction, use a bonding primer before skim coating. It improves adhesion and seals the surface.
Bonding Agents, Primers, and Compatibility
Bonding primers and adhesion promoters are used to improve the initial grab on block surfaces. They can help different skim coat chemistries adhere more reliably. Select primers based on both the substrate and the skim coat being used.
Compatibility testing is important to avoid delamination. Follow product guidance for surface prep, application, and drying times. If unsure, check the label, data sheet, or manufacturer instructions for compatibility notes.
Types of bonding agents and when to use each
Bonding agents are crucial for a successful skim coat on concrete block walls. Here’s what you need to know:
Cement Polymer Modifiers: These are ideal for new or clean surfaces with minimal defects. They enhance the bond between the substrate and the skim coat.
Acrylic Primers: Use these on surfaces with minor imperfections, efflorescence, or light moisture issues. They create a better surface for adhesion and seal minor defects.
Silicate Systems: These are best suited for surfaces with moderate to severe moisture problems or where a waterproof barrier is needed. They penetrate deep into the substrate and create a chemical bond.
Testing compatibility and adhesion checks
Before applying any bonding agent, it’s vital to test its compatibility with your substrate and skim-coat material. Here’s how:
Perform spot-bond tests. Apply a small amount of the bonding agent on an inconspicuous area. Let it dry, then try to scratch or peel it off. If it sticks well, it’s likely compatible.
If needed, do adhesion pulls. Follow the same process as spot-bond tests but use a pull-off adhesion tester to measure bond strength.
Always check the technical data sheets of your chosen products. They should list approved substrate types and application conditions.
Skim Coat Materials, Mix Options, and Material Specs Explained
Common skim coats include cementitious thin layers, polymer-modified patches, and gypsum-based finishes. Each type offers different performance in durability and permeability. Your choice should align with the wall conditions and indoor environment.
Be mindful of the material’s vapor permeability and strength characteristics. Do not mix or apply materials beyond what the product data recommends. When in doubt, verify specs on the manufacturer site or product label before proceeding.
Mortar-based vs gypsum vs proprietary premixes
When it comes to skim coat materials, you’ve got options. Let’s break down the main types:
Mortar-based mixes are traditional, using cement and sand. They’re durable but can be less flexible. They’re great for high-traffic areas or where impact resistance is needed.
Gypsum-based finishes are lighter, easier to sand, and hide imperfections well. But they’re not as tough and may not be suitable for damp areas due to their lower moisture tolerance.
Then there are proprietary premixes. These are formulated by manufacturers with specific additives for enhanced performance. Always follow the manufacturer’s installation limits for best results.
Additives, polymer modifiers, and anti-microbial options
To boost your skim coat’s performance, consider these additives:
Polymers improve flexibility and adhesion. They’re great for areas with movement or vibration.
Bonding agents enhance adhesion to the block surface. Use them when you’ve got poor suction or suspect delamination issues.
Anti-microbial additives can help prevent mold growth. Specify these in damp areas or where moisture problems have been identified.
Tools and Materials Checklist and Mixing Guidance
Assemble a practical DIY toolbox: trowels, mixing buckets, a margin trowel, and a level or straightedge. Include PPE like gloves and eye protection for safe handling. Have clean water and a means to mix thoroughly on site.
Follow the product’s mixing instructions closely and avoid overwatering. Mix in small batches to maintain workable consistency. If instructions are unclear, consult the label or packaging for the recommended ratios and steps.
Tools and PPE
Before you start mixing your concrete for a skim coat application, make sure you have all the necessary tools and safety equipment on hand. This checklist will help you ensure everything is ready to go.
- Trowels ( various sizes ): Check you have trowels in different sizes (e.g., 6″, 12″, 18″) for spreading and finishing the concrete. Trowels should be straight, not warped or bent.
- Hawk: Ensure your hawk is sturdy and large enough to hold a good amount of concrete mix. Check it’s free from cracks or damage.
- Floats ( various sizes ): Have floats in different sizes (e.g., 12″, 18″) for smoothing and leveling the concrete. Floats should be straight and have no missing or loose tines.
- Straightedges: Check you have straightedges of varying lengths to strike off excess concrete and create smooth, even surfaces.
- Mixing Paddle: Ensure your mixing paddle is in good condition with no cracks or damage. It should fit securely onto your drill.
- Safety Glasses: Check they provide adequate protection and are free from scratches or damage.
- Work Gloves: Ensure they’re durable, comfortable, and protect against concrete irritants. Check for any holes or tears.
- Ear Protection: Check your earplugs or earmuffs are in good condition and provide adequate noise reduction.
- Respirator: Ensure it fits properly and provides the necessary protection against concrete dust. Check the filter is clean and undamaged.
Quick rule: Always check your tools and PPE before starting work to avoid delays or safety hazards during the job.
Mixing best practices and batch control
Use this checklist before each mixing cycle to ensure consistent, high-quality concrete.
- Check water-to-cement ratio: Aim for 0.45-0.60 by weight. Too much water weakens the mix, too little makes it hard to place.
- Verify aggregate size and type: Check labels or ask supplier. Wrong aggregates can cause strength issues or finishing problems.
- Pre-wet aggregates (if dry): Prevents water absorption that could weaken the mix.
- Check admixtures (if using): Follow manufacturer’s guidelines for dosage and compatibility with cement type.
- Slump test: After mixing, perform a slump test. Target 3-5 inches for general-purpose concrete. Too much slump causes segregation, too little makes placing difficult.
- Check pot life: Follow manufacturer’s guidance on working time. Don’t rely on arbitrary timings to avoid setting issues.
- Batch consistently: Keep batch sizes small and consistent (e.g., 3 cubic feet) for better control over mix quality.
- Clean equipment between batches: Prevents contamination that can affect the next batch’s strength or workability.
Quick rule: Always perform a slump test and check pot life to avoid costly rework due to setting or segregation issues.
Application Techniques: Step-by-Step Approach and Visual Checkpoints
Start with priming or bonding as recommended, then address any deeper voids or defects. Apply a thin base layer to fill irregularities and establish an even surface. Use feathering and floating to blend transitions for a uniform plane.
Use visual checkpoints to verify adhesion and evenness before finishing. Look for consistent texture, absence of voids, and a uniform surface. If something looks off, pause and re-check prep or product compatibility.
Step-by-Step Process
Use this checklist before, during, and after your concrete work to ensure a strong, durable finish. Follow these steps for any DIY concrete project, from patios to driveways.
- Preparation: Check local weather forecast. Concrete needs temperatures between 50-90°F (10-32°C) for at least 72 hours after pouring.
- Safety first: Wear appropriate PPE: safety glasses, gloves, and steel-toed boots. Keep a first aid kit nearby.
- Site preparation: Clear the area of debris. Ensure the ground is level and well-compacted to prevent settling.
- Formwork setup: Install forms accurately using straight edges and levels. Check corners for square using a 3-4-5 triangle method.
- Reinforcement placement: Lay rebar or wire mesh in the base of the form, following manufacturer’s guidelines for spacing and overlap.
- Concrete mixing: Follow mix design instructions. Check water-cement ratio; too much water weakens concrete.
- Pouring: Pour concrete into forms in manageable layers (no more than 8″ at a time). Vibrate each layer to remove air pockets.
- Finishing: Strike off the surface with a straight edge, then use a bullfloat to smooth and compact. Check for level and proper slope using a laser level or string line.
- Curing: Keep concrete moist for at least 7 days to allow proper hydration. Cover with plastic sheeting if necessary.
Quick rule: Always check local building codes and manufacturer instructions before starting any concrete project.
Applying the first coat and establishing a key
Use this checklist when applying your first layer of concrete to ensure proper bonding and even coverage. This step is crucial for a strong, durable finish.
- Check substrate cleanliness – Ensure the surface is free from dirt, grease, and loose materials. A quick visual check should suffice.
- Moisten the surface – Lightly dampen the block before application to help prevent suction and ensure proper bonding. You can use a spray bottle or hose with a fine mist setting.
- Mix concrete correctly – Follow the manufacturer’s instructions for mixing ratios. A quick test by dropping a small amount into water should result in a firm ball that holds its shape.
- Apply initial layer evenly – Use a shovel or a concrete rake to spread the mix evenly, ensuring no thick spots or voids. A visual check from above should show an even surface.
- Manage joints and corners – Pay extra attention to these areas as they are prone to cracking if not properly filled. Use a corner trowel or jointing tool to ensure full coverage.
- Consider a scratch coat – For vertical surfaces, apply a thin first layer (scratch coat) and use a broom or brush to create grooves that improve bonding for the final layer. Check the product label for recommendations.
- Check for proper slump – The initial layer should have a slight slump but not be so wet that it loses its shape. A quick test with your trowel or shovel should give you an idea of the consistency.
- Establish control joints – Before the concrete sets, use a groover to create control joints at regular intervals (usually every 10-20 feet). This helps direct where cracks will form due to shrinkage.
Quick rule: Always check your work visually from different angles. If it looks right, it probably is. But remember, concrete doesn’t lie – if there’s a problem, it’ll show up eventually.
Building up to a smooth finish and float techniques
Use this checklist after applying the first coat (key) to ensure a smooth, defect-free concrete surface. Follow these steps for each subsequent layer until you achieve your desired finish.
- Check mix design: Ensure your concrete mix is suitable for the final finish. Check product labels or manufacturer instructions for recommended mixes.
- Apply thin layers: Apply multiple thin coats (around 1/4″ to 1/2″ each) instead of one thick coat. This helps prevent trowel marks and promotes a smoother surface.
- Use appropriate tools: For smooth finishes, use steel trowels with wider blades (e.g., 36″ or 48″) for the first few passes, then switch to narrower blades (e.g., 12″ or 18″) for final finishing.
- Initial smoothing: After each layer sets slightly, use a bullfloat to remove excess water and level the surface. Check for any low spots or ridges.
- Edge screeding: Use an edging tool to strike off excess concrete at the edges of your pour, ensuring a smooth transition to adjacent surfaces.
- Final troweling: Once the surface is level and free of major defects, use a steel trowel with a narrow blade for final finishing. Check for any remaining trowel marks or ridges.
- Avoid over-troweling: Be careful not to over-trowel, as this can cause the concrete surface to become too smooth and lose its ability to bond with subsequent layers.
- Float technique: After final troweling, use a magnesium or wooden float to lightly skim the surface. This helps to expose any remaining aggregates and creates a non-slip texture.
Quick rule: Always follow the “3-2-1” rule for concrete finishing: three passes with a bullfloat, two passes with a steel trowel, and one pass with a float to ensure a smooth, durable finish.
Visual checkpoints and quality acceptance criteria
Before applying the final coat or proceeding with any subsequent steps, use this checklist to ensure your concrete surface is ready. Perform these checks under good lighting and from different angles.
- Check for hollow spots: Tap the surface with a hammer. Listen for a dull thud, indicating solid concrete. A high-pitched sound signals a hollow spot, which needs to be repaired before proceeding.
- Inspect adhesion: Scrape a small area with a trowel or screwdriver. The surface should not flake or peel off easily. Poor adhesion may indicate contamination or inadequate preparation.
- Look for cracks: Inspect the entire surface for hairline cracks. These can widen over time and compromise the finish. Seal and repair as necessary.
- Check for laitance: Laitance is a weak, cement-rich layer that forms on the surface during mixing or placing. Remove it using a stiff-bristle broom or wire brush before applying the next coat.
- Ensure consistent finish: The surface should have a uniform appearance with no visible variations in color or texture. Inconsistencies may indicate improper mixing, placement, or finishing techniques.
- Verify proper curing: Check that the concrete has been cured properly according to manufacturer instructions or local rules. Improper curing can lead to weak, dusty surfaces and increased susceptibility to damage.
- Inspect for efflorescence: Efflorescence is a white, powdery deposit that can form on the surface due to moisture migration. Remove it using a wire brush or acid solution before applying the next coat.
- Check for contamination: Ensure the surface is free of dirt, debris, oil, or other contaminants. These can compromise adhesion and cause discoloration or other defects in the final finish.
Quick rule: If in doubt, perform a simple water test. Sprinkle water onto the concrete surface. If it beads up and doesn’t absorb, the surface is likely contaminated or not ready for the next step.
Drying, Curing, Ventilation, and Long-Term Moisture Management
Drying and curing follow the product guidance and indoor conditions. Humidity and ventilation during and after application influence the quality of the skim coat. Plan for adequate air movement to support proper cure.
Maintain control of moisture levels to prevent future damage. Implement a long-term plan for moisture management and indoor climate control. When choosing curing or sealing steps, verify that they align with the coating’s instructions and your space requirements.
Verifying dryness and curing indicators
After applying your skim coat, it’s crucial to confirm that it’s properly cured and dry before proceeding. Here are some reliable methods:
Moisture Meter Check: Use a moisture meter to measure the moisture content in the concrete block wall. Aim for readings below 18% for most skim coats.
Surface Appearance: The surface should feel cool and firm to touch, with no signs of tackiness or softness. It should also look uniform and matte, not glossy or wet.
Always refer to the product-specific acceptance criteria for precise guidelines.
Ventilation, dehumidification, and environmental controls
Controlling temperature and humidity is key to a successful skim coat application and drying process.
Ventilation: Ensure your workspace has adequate ventilation. Open windows or use fans to maintain air movement. This helps to evaporate moisture quickly and prevents condensation.
Dehumidification: If humidity levels are high (above 50%), consider using a dehumidifier. This is especially important in humid climates or when working in enclosed spaces.
Temperature Control: Maintain a consistent temperature between 60-77°F (15-25°C) during application and drying. If temperatures dip below this range, consider using temporary heating to prevent slow curing and potential issues.
Conclusion
Protecting the wall and your investment comes down to getting the basics right: safety first, solid moisture management, and a careful, repeatable process that won’t rinse away your work later. When you respect the substrate, testing, and drying times, you’ll see a durable finish that looks good and lasts.
First, check moisture levels and substrate condition, then confirm you’re using compatible bonding agents and skim coat materials. Mix and apply only as specified, clean and repair damaged blocks before you coat, follow the step-by-step application with clear visual checkpoints, keep ventilation during drying and curing, and track moisture afterward to prevent regrowth or signing of failure.
Common mistakes to avoid include skipping moisture testing, mismatching bonding systems, and overworking skim coats or rushing curing. Always follow safety rules: wear eye protection and a respirator where needed, work in a ventilated area, mix only in small batches to avoid waste, and never rework a coat after it has set beyond its initial tack.
If moisture is persistent, or you’re unsure about substrate condition or coating compatibility, it makes sense to call a professional rather than push ahead. Stay deliberate, document your steps, and you’ll end with a smooth, durable surface that stands up to use and time.
FAQ
How do I know if a skim coat will adhere to my concrete block wall?
Check the wall for a clean, dust-free surface and any loose material. If the block is rough or old, you may need a bonding agent recommended for concrete block and your skim coat product. Always follow the product label and manufacturer instructions for surface prep and compatibility.
What should I do first if I suspect moisture is seeping through the block before skimming?
Identify sources of moisture and dry the area as much as possible. Use a diagnostic test or simple moisture check per your chosen products’ guidance, then pick a moisture-compatible primer or barrier system specified by the manufacturer. If in doubt, consult the product label and local guidelines before proceeding.
Can I skim coat over existing paint or plaster on block?
Only if the surface is sound and compatible with the skim coat system you’re using. In most cases you’ll need to remove or abrade coatings to reach a good substrate. Always verify compatibility with the primer and skim coat instructions before applying.
What are red flags that mean I should pause and re-evaluate before finishing the wall?
If the wall shows ongoing dampness, efflorescence, cracking, or spalling after prep, stop and address moisture and substrate issues first. Re-check bonding product compatibility and follow the manufacturer’s cure and ventilation guidance. When in doubt, revert to the manufacturer instructions and local rules.