
Introduction
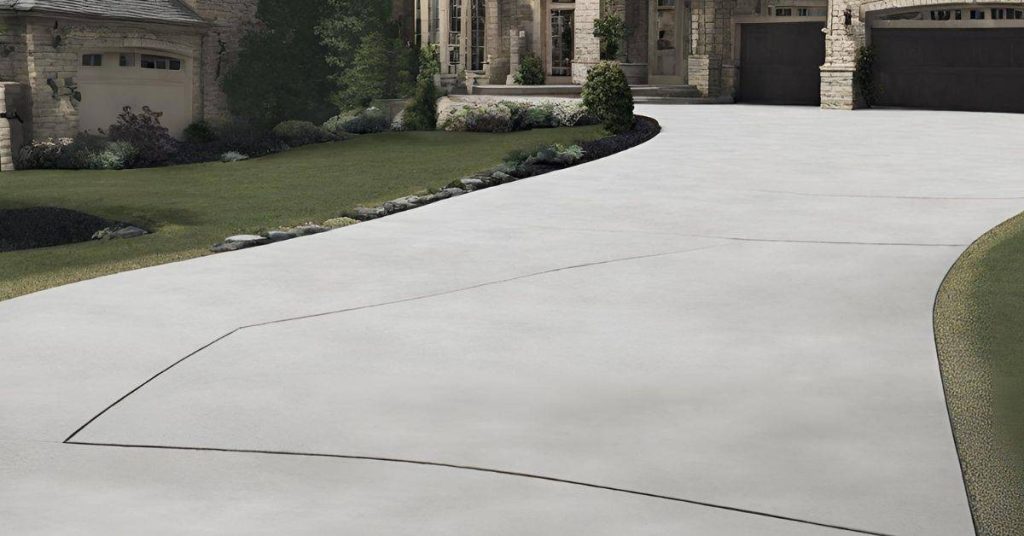
Sealing concrete with high moisture means choosing systems that can protect the surface while allowing water vapor to escape. This is not about making a completely watertight barrier, but about selecting materials and methods that tolerate damp conditions. In practice, you’ll look for products and application plans that address vapor transmission and moisture management.
Common myths mislead DIYers into using top coatings that dry too fast or seal in moisture. Check product labels and manufacturer guidance for humidity tolerance and curing times, and adjust prep accordingly. If in doubt, test on a small area and follow local rules or consult the instructions to avoid trapping moisture.
Key takeaways
- Verify slab moisture before sealing using manufacturer guidance and local code requirements.
- Choose vapor-tolerant systems appropriate for anticipated moisture levels and substrate.
- Test methods matter—use approved tests and document results for trades.
- Prepare surfaces thoroughly: proper cleaning, dust removal, and substrate repairs.
- Follow installation best practices and safety protocols to minimize bond failures.
- Understand warranties and cost implications; plan for potential repairs on slabs.
Table of Contents
- Introduction
- Key takeaways
- Why High Moisture in Concrete Matters for Sealers and Coatings
- Types of Systems That Tolerate Vapor (and When to Use Each)
- How to Test and Quantify Concrete Moisture Before Sealing
- Surface Preparation When Moisture Is Present
- Installation Best Practices for Vapor-Tolerant Systems
- Troubleshooting Failures and Planning Repairs on Moist Slabs
- Selecting Materials, Standards, Warranties, and Cost Considerations
- Conclusion
- FAQ
Why High Moisture in Concrete Matters for Sealers and Coatings
Moisture moves through concrete in ways that sealers can’t ignore. Vapor drives pull water toward the surface and into coatings that aren’t designed to breathe. This pressure can create adhesion loss and blisters over time.
When moisture remains trapped, coatings fail faster, and you may see peeling, cracking, or delamination. Indoor air quality can also be affected as moisture carries odors or contaminants from the slab. Understanding this helps protect the system and the space it serves.
How moisture moves and creates failure modes
Concrete is porous. Moisture inside it wants to escape, driven by vapor pressure – like how steam rises from a kettle.
Imagine tiny water molecules moving through those pores, pushed by this pressure. This is capillary action, similar to how a paper towel soaks up liquid.
If your slab’s surface isn’t perfectly dry when you apply a sealer or coating, these moisture movements can cause problems. They push the coating off from underneath, creating blisters and adhesion loss. You might see these as bubbles under your finish, or it could peel away entirely.
Risk factors that increase vapor problems
Some jobsites are more prone to moisture issues than others. Thinner slabs, for instance, let moisture move through faster and escape quicker.
Newly poured concrete is another risk factor. It’s full of water from the mixing process, which needs time to evaporate naturally before sealing.
External water sources can also cause trouble. If your slab sits over a damp area, or water pools on top, it increases the chance of moisture-related failures.
Types of Systems That Tolerate Vapor (and When to Use Each)
Vapor-permeable systems are designed to let some moisture escape while still providing a protective layer. These work best when the slab is consistently damp but not actively leaking.
Moisture-tolerant epoxy or polyaspartic formulations aim to stay attached under higher moisture conditions, but they come with specific application limits. Surface membranes and moisture mitigation primers offer another path, each with its own setup and performance trade-offs that you should verify on the label or with the manufacturer.
Vapor-permeable coatings and breathable membranes
Some sealers let moisture pass through, preventing delamination. These are great for interior slabs with lingering moisture.
How they work: They have tiny pores that allow vapor to escape while keeping liquids out.
Use them when you’ve got high moisture content in the slab – up to 95% relative humidity. They’re ideal for indoor concrete like basements or garages.
Moisture-tolerant primers and epoxy variants
Some primers and epoxies can handle moisture. They’re designed to bond even when there’s some dampness in the substrate.
Chemistries: These use special formulations like polyaspartics or certain epoxy blends that tolerate moisture better than standard products.
Use them on concrete with moderate moisture levels – up to 80% relative humidity. They’re good for both interior and exterior surfaces, but check the product’s specific limits.
Sub-slab membranes and active mitigation options
Sometimes you need to tackle moisture at its source. That’s where sub-slab membranes and active systems come in.
Sub-slab membranes: These go underneath your concrete, preventing moisture from coming up. They’re used when you’ve got high groundwater levels or other severe moisture issues.
Active mitigation: Systems like vapor barriers or depressurization can actively reduce moisture levels. They might be needed if you’ve got serious problems with vapor drive – when moisture is really pushing hard against your slab.
How to Test and Quantify Concrete Moisture Before Sealing
Start with a plan to confirm moisture levels using reliable tests. Lab methods give a clear picture of moisture movement and total content, while field tests are quick checks of surface conditions.
Interpret results against the system’s requirements and avoid guessing. Always check the product label and manufacturer instructions, and consider formal test reports from an independent lab for high‑risk jobs.
Step-by-Step Process
Follow these steps to accurately test and quantify concrete moisture before sealing, ensuring a successful job.
- Preparation: Clear the area, ensure safety with proper PPE, and gather your tools (moisture meter, plastic sheeting, etc.).
- Surface Moisture Test: Use a surface moisture meter to measure the top layer. This tells you if there’s immediate surface moisture.
- Plastic Sheet Test (ASTM F2170): Tape down plastic sheets, wait 72 hours, then check for condensation. This reveals in-slab moisture movement.
- Relative Humidity Measurement: Drill small holes, insert probes to measure in-slab RH at various depths. This shows long-term moisture content.
- Cleanup and Final Checks: Remove test materials, document results, and compare them to system requirements before proceeding with sealing.
Common Field Tests and What They Actually Measure
Field tests are quick, but understand their limitations:
Surface Moisture Meters measure immediate surface moisture (0-1/8″ depth), useful for detecting recent water exposure.
Plastic-Sheet Tests (ASTM F2170) reveal in-slab moisture movement over 72 hours, indicating potential long-term issues but not the exact moisture content.
Relative Humidity Measurements provide a snapshot of in-slab moisture at specific depths and times, giving insight into long-term conditions but not overall averages.
When to Send Samples for Lab Testing
Lab tests provide deeper insights. Here’s when to request them:
If field test results disagree, send samples to resolve discrepancies.
For high-value floors or projects with warranties, lab testing confirms moisture levels meet system requirements.
Request moisture equivalent (ME) and in-situ relative humidity (RH) tests from the lab to get comprehensive data.
Documenting and Communicating Moisture Risks to Stakeholders
A moisture report ensures everyone’s on the same page:
Include test methods, results, and interpretations, along with system recommendations based on manufacturer limits.
Share this report with owners, contractors, and other stakeholders to approve system choices and mitigate risks.
Surface Preparation When Moisture Is Present
Mechanical profiling and thorough cleaning remove debris that can trap moisture and hinder bonding. Focus on removing contaminants that can interfere with adhesion, such as oils or curing compounds.
Avoid acid etching or aggressive moisture-aggravating methods unless the system explicitly allows them. Proper profile and cleanliness are essential for moisture-tolerant systems to perform as intended.
Mechanical profiling and visual checkpoints
Before applying any moisture-tolerant system, ensure the surface is properly profiled. Use this checklist during inspection.
- Surface Profile: Aim for a minimum Concrete Surface Profile (CSP) of 1-2. This means the surface should have a visible texture with peaks and valleys that can hold the sealer.
- Visual Inspection: Check for any smooth, shiny, or flat areas. These won’t bond well with the sealer.
- Cracks: Ensure all cracks are clean and wide enough to accommodate the sealer. Narrow cracks may not hold the sealer properly.
- Holes and Indentations: Fill any holes or indentations with a suitable repair material before profiling.
- Contaminants: Remove any visible contaminants like paint, grease, or rust. These can prevent adhesion.
- Efflorescence: Check for white powdery deposits. If present, treat them as they can interfere with bonding.
- Moisture Marks: Look for dark spots or damp areas. These indicate high moisture content that needs addressing.
- Uneven Surfaces: Ensure the surface is relatively even. Severe unevenness may cause application issues.
Quick rule: If in doubt, profile more. It’s better to have a rougher surface than one that’s too smooth.
Cleaning, degreasing, and efflorescence treatment
Even with moisture-tolerant systems, a clean surface is crucial for good adhesion. Here’s how to prepare your concrete:
Efflorescence: If you see white powdery deposits (efflorescence), treat them before applying any sealer. Use an efflorescence treatment product or a mixture of muriatic acid and water (1 part acid, 20 parts water). Apply, let it sit for 15-30 minutes, then rinse thoroughly.
Oils and Grease: Use a degreaser to remove any oil or grease stains. Follow the manufacturer’s instructions for application and safety precautions.
General Cleaning: Sweep and clean the surface to remove any dirt, dust, or debris. A pressure washer can help with this, but be careful not to damage the surface.
Temporary drying measures and when they help
While moisture-tolerant systems can handle some moisture, it’s still beneficial to reduce moisture levels before application. Here are some temporary drying measures:
Ventilation: If possible, open up the area to allow for air circulation. This can help to dry out the concrete.
Dehumidification: Use a dehumidifier in enclosed spaces to reduce humidity levels. This can help to speed up the drying process.
When They Help: These measures are most effective when moisture levels are not extremely high, and you have some time before application. They won’t fully mitigate in-slab moisture but can make a difference in reducing surface dampness.
Installation Best Practices for Vapor-Tolerant Systems
Follow a logical sequence from substrate checks to final curing, pausing only as needed for environmental controls. Maintain appropriate ambient conditions and use the correct pot life and mixing procedures.
Pay attention to coverage rates, joint details, and edge work that can seal in moisture or expose weaknesses. Always prioritize manufacturer instructions and jobsite verification over shortcuts.
Tools and materials checklist
Before you start, make sure you have everything you need for a consistent application in moist conditions.
- Trowels: Various sizes to ensure proper spreading and leveling.
- Notched trowel: For creating grooves to control the amount of material applied.
- Gloves: Disposable gloves for handling materials and protecting your hands.
- Safety glasses: To protect your eyes from debris and splashes.
- Respirator: For protection against dust and fumes, especially when grinding or sanding.
- Ear protection: When using power tools like grinders or vacuums.
- Drop cloths: To protect surrounding areas from spills and splashes.
- Mixing paddle: For mixing epoxy and other materials to ensure proper consistency.
- Epoxy pump: Optional, but helpful for easy application of epoxies and other liquids.
- Vacuum: To remove excess moisture from the surface before application.
Quick rule: Always double-check your materials and tools before starting. Missing something can lead to poor results or delays.
Detailing joints, saw cuts, and transitions
Proper detailing of joints, saw cuts, and transitions is crucial to prevent moisture-related issues.
Movement Joints: Fill them with a flexible sealant or backer rod before applying your system. This prevents moisture from wicking up through the joint.
Saw Cuts: Ensure they’re clean and dry before applying any material. Use a vacuum to remove excess moisture if necessary.
Transitions: Seal transitions with a flexible sealant or use a transition strip to prevent moisture from getting underneath your system.
Quality-control checks during and after application
Regular checks ensure your installation is successful. Here’s what to look for:
Adhesion Pulls: Perform adhesion pulls using tape or a pull-off tool to check the bond strength of your system.
Visual Inspections: Regularly inspect the surface for any signs of delamination, blisters, or other defects. Use a flashlight at different angles to help spot issues.
Post-Install Inspection: After the system has cured, perform a final inspection to ensure it’s performing as expected and there are no signs of moisture-related problems.
Troubleshooting Failures and Planning Repairs on Moist Slabs
Diagnose whether failures are adhesive, cohesive, or substrate-related by inspecting debris, lift patterns, and moisture sources. Triage severity to decide between repair options and whether full replacement is needed.
Choose repair methods compatible with the original system and consider sub-slab mitigation if moisture remains high. A practical decision tree helps you map scenarios to safer, long‑lasting fixes.
Diagnosing failure types and common visual clues
First, identify the type of failure. Blistering shows as bubbles on the surface. Adhesion loss means the coating or sealer is peeling off. Substrate deterioration looks like cracks or crumbling.
Blisters often indicate moisture trapped beneath the sealant. Peeling suggests poor adhesion, possibly due to contamination during preparation. Cracks and crumbling might signal a weak substrate or excessive movement.
Use a magnifying glass for close-up inspection. Check edges where failures often start. Document findings with photos.
Interim fixes vs. permanent solutions
Temporary remedies buy time, preventing further damage while planning permanent repairs. Interims include: covering the area to stop water ingress, applying a temporary sealer, or even just cleaning and drying.
Permanent solutions depend on root cause. If it’s moisture, consider sub-slab mitigation. For adhesion loss, remove failed material and reapply compatible products. For substrate issues, repair or replace affected areas before reinstalling the system.
Move to permanent repairs when you’ve identified the cause, have the right materials, and conditions are suitable for long-term fixes. Always test first to ensure your interim fix hasn’t caused further damage.
Preventing recurrence after repair
After repairs, recheck moisture levels using field tests mentioned earlier. If you sent samples for lab testing, wait for results before declaring the issue resolved.
Monitor the area visually over time. Keep an eye on edges and transitions where failures often recur. Document changes with photos or notes.
If conditions allow, retest after a period of heavy rain or snow melt to ensure your repair holds up under real-world conditions. If tests show moisture levels remain high, consider sub-slab mitigation or other long-term solutions.
Selecting Materials, Standards, Warranties, and Cost Considerations
Read technical data with an eye for moisture limits and performance claims. Compare warranties by how they address damp conditions and surface preparation.
Balance upfront cost against lifecycle risk by consulting manufacturers and labs for project‑specific limits. Ensure procurement language requires moisture test data and formal manufacturer approval before buying.
What to check on technical data sheets and warranties
Before you buy, use this checklist to ensure the product suits your high-moisture scenario.
- Moisture limits: Check the maximum moisture content (MC) the sealer can handle. Skip this, and you might end up with a failed seal.
- Adhesion test methods: Verify the adhesion tests were done under conditions similar to yours. Ignoring this could lead to poor bonding.
- Recommended primers: Check if a primer is needed and which one. Skipping this might affect adhesion and performance.
- Installation conditions: Ensure the product can be applied under your site’s temperature, humidity, and other conditions. Overlooking this could result in application issues.
- Warranty coverage: Check what’s covered and for how long. Some warranties require specific installation procedures or maintenance.
- Moisture-related exclusions: Look out for moisture-related exclusions. These can void the warranty if not addressed properly.
- Compatibility with other materials: Ensure it plays nice with your substrate and other materials in contact with it.
- Cleanup and maintenance: Check how to clean up spills, remove stains, and maintain the seal over time. Neglecting this can lead to premature failure.
Quick rule: Always compare warranties based on your specific project conditions to avoid nasty surprises later on.
Cost vs. performance trade-offs and lifecycle thinking
When comparing products, consider the long game, not just upfront costs.
Short-term savings: Cheaper options might seem attractive, but they often come with hidden costs like reduced durability or increased maintenance.
For instance, a cheaper sealer might require more frequent reapplication, costing you more in the long run. It could also lack the protection needed to prevent moisture-related damage, leading to expensive repairs.
Long-term performance: Investing in a higher-quality product upfront can save you money and headaches down the line. A better sealer might last longer, require less maintenance, and provide superior protection against moisture intrusion.
When to bring in a moisture mitigation specialist
A moisture mitigation specialist can help you tackle tough high-moisture situations. Here’s when to call one.
High test values: If your moisture tests show high MC levels (above 4 lbs/1000 sq ft for most sealers), it might be time to consult a specialist. They can help you understand the results and recommend appropriate solutions.
Warranty requirements: Some warranties require consultation with a moisture mitigation specialist as part of their installation conditions. Don’t ignore this; it could void your warranty if not followed.
High-value floors: If you’re sealing high-end or expensive flooring, don’t take chances. A specialist can help ensure the best possible outcome and protect your investment.
Conclusion
Keep moisture from sneaking into the slab and you protect the finish, the look, and the long life of the seal. Handle it with care, test first, and follow solid installation steps to avoid costly repairs later.
Check the moisture level and test results in a small, low-traffic area first; choose a vapor-tolerant system only after you’ve confirmed the concrete’s moisture profile; prep the surface aggressively but safely; apply materials per manufacturer guidance and cure exactly as directed; and document standards, warranties, and costs before you start the full job.
Common mistakes to avoid: skipping proper moisture testing, rushing surface prep, and ignoring manufacturer limits or warranty requirements. Safety rules: wear eye protection and a respirator when needed, work in a ventilated area, and never seal over damp or questionable slabs. If in doubt about moisture, or if the slab is large and complex, pause and plan a professional assessment before proceeding.
If the slab is highly moisture-sensitive, or if your tests show uncertain or variable readings, call in a professional to outline a proven plan and verify compatibility with local codes and warranties. Stay disciplined, follow the steps, and you’ll finish with a durable, safe, and lasting seal.
FAQ
Can I seal concrete with high moisture right after it’s poured?
No. If moisture is still high, sealers can fail or peel. Check the product label or manufacturer instructions for moisture limits and wait times before applying anything.
Do vapor-tolerant systems really work on damp slabs, or is that a myth?
They can work, but results vary by product and conditions. Read the label for what moisture range they tolerate and follow the installation steps exactly. If in doubt, verify with the manufacturer’s guidance or local rules.
Why do I see coating bubbles or blistering on a damp slab?
Bubbles form when moisture vapor tries to escape under the coating. Ensure you’re using a system that tolerates vapor and that surface prep isn’t forcing moisture into the coating. Double‑check product instructions and test results before continuing.
What should I do if I’ve already applied a sealer and moisture is still present?
Stop and assess. Remove or recoat only after the surface dries to the product’s recommended range and per the instructions. If you’re unsure, consult the manufacturer or a local pro for guidance.