
Introduction
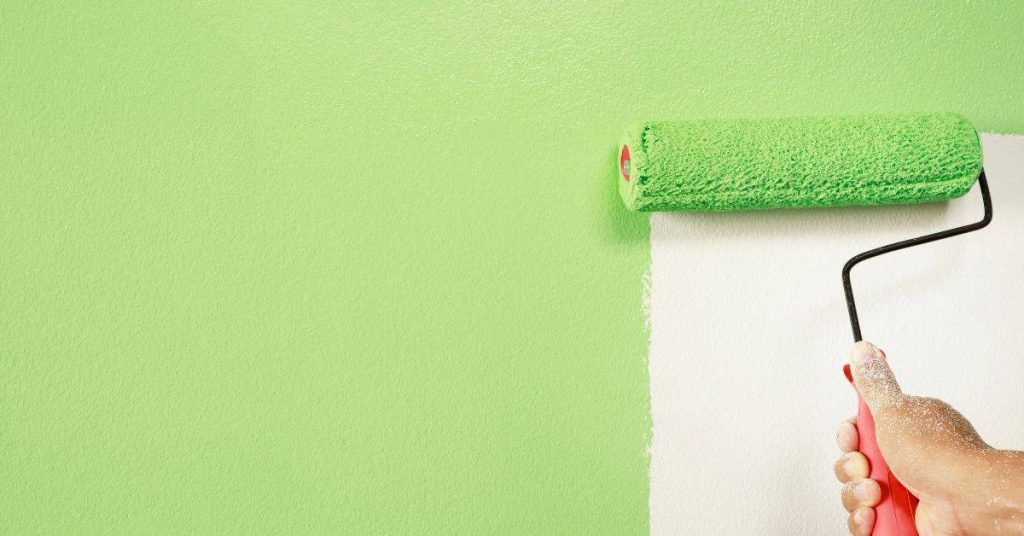
Roller-applied base coats are thin plaster coats spread with a roller to help flatten and level a wall before the final skim.
This approach is done after the substrate is prepped and dampened as needed. It gives you a smoother starting surface, but it isn’t a substitute for proper substrate prep or final finishing.
Apply in light passes, moving the roller to catch any high spots and feathering edges as you go. Let the coat set according to the product instructions, then reassess flatness and plan the next steps for the skim coat.
Key takeaways
- Roller-applied base coats can improve flatness on waviness and repaired areas.
- Compare rolling to trowel systems for different substrates and finish requirements.
- Choose formulations with appropriate skim density and open time for flatness.
- Prepare tools and rollers safely; wear PPE and guard against dust.
- Apply with even passes, overlap properly, and treat joints to avoid ridges.
- Control thickness during rolling and monitor drying to prevent distortions.
Table of Contents
- Introduction
- Key takeaways
- What Roller-Applied Base Coats Are and How They Differ from Trowel-Applied Systems
- Conditions and Substrates Where Rolling Can Improve Flatness
- Material Selection and Formulations That Influence Flatness
- Tools, Rollers, and a Practical Tools and Materials Checklist
- Application Technique: Rolling Method, Overlap, and Joint Treatment
- Thickness Control, Drying, and How They Affect Final Flatness
- Visual Checkpoints, Inspection Methods, and Acceptance Criteria
- Troubleshooting, Remediation, and When to Revert to Trowel Work
- Conclusion
- FAQ
What Roller-Applied Base Coats Are and How They Differ from Trowel-Applied Systems
Roller-applied base coats are designed for quick, even distribution across a substrate using a roller or sprayer. They typically consist of a cementitious mix with binders and possibly aggregates, chosen to level and prime before skim coats. The application method changes texture by leaving a more uniform, sometimes smoother, surface than hand-troweled mixes.
Compared with traditional trowel methods, rolling can alter drying and curing patterns due to the way the material settles and fills small surface irregularities. Always check the product label or manufacturer instructions to confirm recommended application, cure times, and any restrictions for your substrate and climate. Understanding these specs helps you judge potential flatness advantages for your project.
Key physical differences and performance trade-offs
Roller-applied base coats create a different surface profile than trowel-applied systems. Instead of the smooth, uniform finish from troweling, rollers leave a textured surface with peaks and valleys.
This texture affects how plaster skims bond to the base coat. It provides more mechanical keying points for the skim to grab onto, which can improve adhesion. However, it also means there’s less surface area in contact, potentially reducing overall bond strength compared to a smooth trowel finish.
The texture also influences finish uniformity. While rollers can provide a consistent coverage, they may not achieve the same level of flatness as troweling. This is because the peaks and valleys created by rolling can still be visible under the final skim coat, affecting its overall smoothness.
Common use cases and limitations
Roller-applied base coats are typically used in residential projects where a high degree of flatness isn’t critical. They’re great for applying base coats on large, flat walls or when repairing damaged areas that need to blend seamlessly with existing surfaces.
However, they may not be suitable for projects requiring a very smooth finish, like skim coating over newly installed drywall or creating ultra-flat surfaces for painting. In these cases, trowel-applied systems might be more appropriate.
Another limitation is that roller-applied base coats can take longer to cure compared to trowel-applied systems due to their textured surface. This means you’ll need to plan your project timeline accordingly to allow for proper drying and curing before applying the final skim coat.
Conditions and Substrates Where Rolling Can Improve Flatness
Substrates with fine joints, slight imperfection chatter, or uneven roughness are prime candidates for roller-applied coats. Rolling tends to bridge small deviations and produce a more uniform base for subsequent skim coats. Environmental factors like humidity and temperature can influence how the base coat flows and cures.
Consider where rolling shows the most benefit by reviewing manufacturer guidance and local rules for substrate compatibility. If in doubt, verify substrate suitability, surface preparation requirements, and any environmental limits with the product data sheet or instructions from the maker.
Suitable substrates and problematic surfaces
Roller-applied base coats work best on even, well-prepared surfaces. Here’s what you should look for:
Good candidates:
- Even gypsum board or plasterboard
- Well-bedded plasterboard joints
- Smooth, level masonry
Problematic surfaces:
- Very uneven masonry
- Heavy texture or imperfections
- Wavy or bowed substrates
Job scale, crew skill, and time constraints
The size of the job, your team’s skills, and the schedule all play a part in whether rolling will give you better flatness.
Large jobs:
- Rolling can be faster than troweling for large areas
- But it requires more setup time for equipment
Crew skill:
- Experienced applicators can achieve better results with rolling
- Less skilled teams might struggle with consistency
Time constraints:
- Rolling can speed up application time, helping meet deadlines
- But curing times may extend the overall process
Material Selection and Formulations That Influence Flatness
Base coat formulations vary in binders, aggregate grading, retarders, and additives that affect sag, open time, and leveling. A formulation with finer aggregates and appropriate binders can help minimize texture ridges after rolling. Retarders can extend workable time, influencing how evenly the coat lays out before setting.
When choosing materials, compare labeling and manufacturer instructions to understand how the formulation will behave on your wall, and how it might impact final flatness. If you’re unsure, consult the data sheet, talk to a supplier, or check local guidance before committing to a specific mix.
Material specs and standards explained
The materials you choose for your base coat directly impact the flatness of your plaster skim. Here are key factors to consider:
- Pot Life: Check this to ensure enough working time before the material sets. Too short, and you’ll struggle to achieve a smooth finish.
- Recommended Coverage: This tells you how much material is needed per square foot. Get it wrong, and you might end up with an uneven surface.
- Substrate Compatibility: Ensure the base coat adheres well to your substrate. Incompatibility can lead to cracking or peeling.
- Consistency: Check the material’s consistency. Too thick, and it won’t level out; too thin, and it may sag.
- Dry Film Thickness (DFT): This indicates how thick the coat will be once dry. Too thick, and it might crack as it dries.
Additives and mix adjustments to enhance leveling
Adding specific chemicals can improve your base coat’s leveling properties. Here are some common additives:
Plasticizers: These make the material more flexible, helping it bridge minor substrate imperfections.
Retarders: These slow down the setting time, giving you more open time to achieve a smooth finish.
Anti-sag Agents: These help prevent the material from sagging or dripping, especially on vertical surfaces. Always follow the manufacturer’s guidelines for mixing and adding these additives.
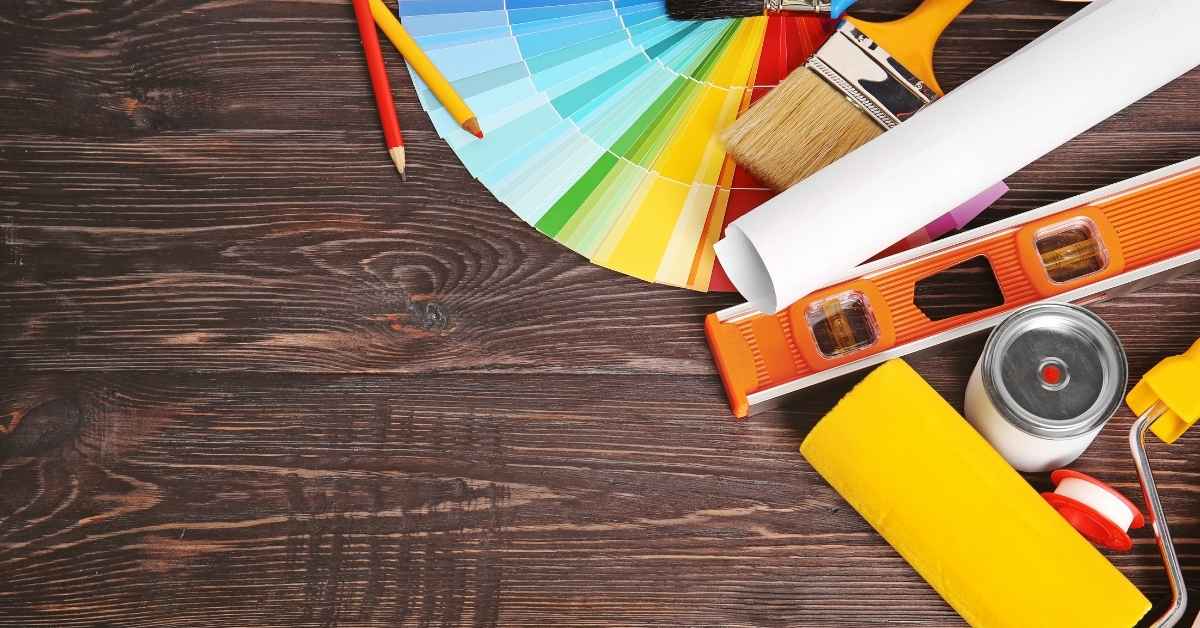
Tools, Rollers, and a Practical Tools and Materials Checklist
Prepare a workshop-ready set: rollers, roller frames, mixing tools, and gauges, plus safety gear like eye protection and gloves. Include a clean pail, mixing drill with a paddle, and something to test consistency. Keep a damp cloth handy for quick cleanups and a small hoe or darby for minor surface scribing if needed.
Test a small area before full application to confirm tackiness, evenness, and transfer. Always verify that your tools are rated for the base coat product you’re using and follow the manufacturer’s cleaning and safety recommendations.
Choosing the right roller type and nap for flatness
Before you start, ensure your roller is fit for purpose. The right roller cover material and pile depth can significantly impact flatness.
- Material: Choose between synthetic (polyester or polyamide) or natural (animal hair) covers. Synthetics are better for leveling, while naturals are good for texture.
- Nap length: Longer naps (3/4″ to 1″) pick up more material and provide better leveling but may leave marks. Shorter naps (1/2″ to 3/8″) are faster but may not cover as well.
- Test patches: Before rolling, test on a small area to confirm the roller’s performance with your chosen material.
Quick rule: Longer naps for better leveling, shorter for speed. Test before you roll.
Accessory tools and measurement aids
To control thickness and verify flatness, you’ll need these essential accessories.
- Straightedges: Use 4′ or 6′ straightedges to check for leveling and remove excess material.
- Wet film gauges: Measure the applied coat’s thickness. Aim for consistent readings across the surface.
- Sanding tools: Lightly sand between coats to remove any imperfections and improve adhesion.
Quick rule: Regular checks with these tools ensure a smooth, even finish.
Application Technique: Rolling Method, Overlap, and Joint Treatment
Plan a steady rolling workflow that keeps a wet edge to minimize lap lines. Overlap tips and consistent pass widths help maintain uniform thickness across the surface. Keep the roller at a steady pace to avoid picking up too much material in one spot.
Edge and joint handling matters: feather joints, maintain transitions, and avoid heavy ridges at corners. Use light passes to smooth ridges and minimize roller stipple, checking progress frequently as you move along.
Wet-edge control and minimizing lap lines
To avoid lap marks that degrade flatness, maintain a wet edge while rolling. Here’s how:
Start at the farthest corner from your exit point. Roll out a 3′ to 4′ wide strip along one wall.
Without stopping, roll back over this strip with the next pass, slightly overlapping it by about an inch or two. This ensures full coverage and no dry edges.
Continue in this manner, working your way across the room and out the door. If you stop mid-stroke, start the next pass from that point to keep a wet edge.
Integrating rollers with hand or trowel finishing
Rollers are great for large areas, but they can’t reach into corners or tight spots. That’s where hand tools come in.
After rolling, use a wide-blade trowel to push material into corners and along edges. This ensures full coverage and prevents drips.
For a knockdown finish, use a steel trowel with a straight edge or a magnesium float. Work these tools in small sections at a time, following the roller’s direction of travel.
If you’re using a skim coat, follow up with a light trowel pass to smooth out any remaining imperfections and ensure a consistent finish.
Thickness Control, Drying, and How They Affect Final Flatness
Understand how applied thickness interacts with drying and curing to set up the skim coat for a flat finish. Too thick a layer can sag or slump, while too thin a layer may require extra passes or coats. Use testing methods or gauges to compare wet-film and dry-film expectations with the manufacturer’s guidance.
Plan the number of layers and drying intervals based on your environment and product instructions. Verify acceptable wet-film thickness and layer counts with the product label or data sheet before proceeding.
Layering strategy and time between coats
Applying multiple thin layers is key to a smooth finish. Thicker layers can shrink more, leading to cracks or unevenness.
Start with a thin layer, around 1/8″ to 1/4″. Let it dry until it’s no longer tacky but still flexible. This could take anywhere from a few hours to overnight, depending on the climate and material.
Apply subsequent layers at the same thickness, waiting the same amount of time between each. Test areas first to set your wait times. Too little drying time can lead to excessive shrinkage, while too much can cause the next layer to not bond properly.
Climate and ventilation impacts
The weather plays a big role in how your base coat dries. High temperatures and low humidity speed up drying, while cool temps and high humidity slow it down.
High heat and low humidity can cause the surface to dry too quickly, leading to cracks or uneven shrinkage. Conversely, low heat and high humidity can prevent the surface from drying at all, leading to mold or mildew growth.
Proper ventilation is crucial. Open windows and doors, use fans if necessary. But be careful not to create drafts that could disturb the wet surface.
Visual Checkpoints, Inspection Methods, and Acceptance Criteria
Create a staged inspection plan: assess the base coat for uniformity, texture, and bonding after initial set. Use simple tactile checks by running a gloved hand over the surface to feel for ridges or hollows. Look for consistent reflectivity and sheen as a rough guide to flatness.
Record and compare to a baseline visual checklist, and quantify issues with straightforward methods such as string or straightedge checks where permitted. If you’re unsure how to measure acceptance, verify with project specs or local code guidance before proceeding.
Lighting and viewing angles for detecting flatness defects
Use this checklist after rolling the base coat to spot any imperfections before they dry.
- Low-angle lighting: Shine a light at a low angle (around 45 degrees) to cast shadows and reveal bumps, ridges, or waves. Skipping this can hide issues until it’s too late to fix.
- View from multiple angles: Inspect the surface from different positions – standing, kneeling, and even lying down – to catch any flatness defects that might be missed from one angle. Overlooking these can lead to uneven plaster skim coats.
- Straightedge check: Place a straight edge (like a level or ruler) on the surface to confirm suspected bumps or waves. Mark with a pencil if it doesn’t sit flat. Skipping this can lead to inaccurate corrections.
- Measure and mark dimensions: Use a tape measure to note down the size and location of defects, marking them clearly with a pencil or marker. Without clear markings, you might struggle to find these areas again.
Quick rule: The best time to catch flatness issues is right after rolling, so don’t skip this step!
Simple measuring and marking workflow for corrections
Use this checklist immediately after detecting defects to mark areas for remediation.
Quick rule: Marking defects immediately helps prioritize corrections and ensures you tackle the most prominent issues first!
Troubleshooting, Remediation, and When to Revert to Trowel Work
For common defects like lap lines, roller stipple, or bonding concerns, follow a stepwise approach: assess, spot-fill, or re-apply as required. Sanding or aggressive compaction may be needed in some cases, but know when to stop and rework rather than chase a poor result.
Set criteria for switching back to trowel work if the base coat won’t achieve the desired flatness or if adhesion or texture is compromised. Always verify the decision against product instructions, local rules, and the practical realities of your substrate before proceeding with a major correction.
Quick fixes versus full remediation
Not every defect needs a major overhaul. Knowing when to do a quick touch-up and when to remove and reapply is crucial.
Temporary touch-ups: Minor lap lines or roller stipple can often be addressed with a light sanding and spot-filling. This works best for small, isolated defects.
Full remediation: Bonding failures, large areas of poor flatness, or multiple defects require removal and reapplication. It’s like starting over but with the knowledge gained from the initial attempt.
Remember, quick fixes are just that – quick. They buy you time to plan a proper repair, but they’re not permanent solutions.
Preventive steps to avoid rework
Before you start rolling, take these steps to minimize the chance of needing remediation later on.
- Check your substrate: Ensure it’s clean, dry, and free from contaminants. A dirty surface can lead to bonding failures.
- Inspect your tools: Make sure your roller is in good condition with no loose fibers that could cause stipple.
- Mix thoroughly: Properly mixed base coat reduces the risk of lap lines and other defects.
- Control humidity: Too much moisture can affect drying time and final flatness. Keep your work area as dry as possible.
- Plan your application: Know where you’re starting, ending, and turning. This helps minimize lap lines.
These steps won’t guarantee a perfect job every time, but they’ll significantly reduce the chance of needing major remediation.
Conclusion
A roller-applied base coat can deliver real flatness gains when the work is planned, tested, and executed with discipline—spot checks, proper material choices, and careful drying matter as much as the first pass.
Start by inspecting the substrate, selecting the right formulation, and mixing to spec; prep the surface, seal edges, and choose the correct roller nap; apply in thin, even coats with a steady, overlapping pattern, monitor the thickness as you go, let each coat dry fully, then re-check flatness with the visual checkpoints and make light, targeted touch-ups if needed, and only revert to trowel work if you fail to hit the desired results after controlled attempts. Test in a small area first and keep safety at the front: ventilate well, wear eye protection and a mask, and don’t rush through edges or joints where problems will show up later.
Common mistakes to avoid are laying on coats that are too thick, skipping a proper test area, ignoring edge and joint treatment, and using the wrong roller nap or formulation for the substrate; follow the safety rules by mixing only to the label, cleaning tools soon after use, and keeping the work zone clear of trip hazards and moisture—these guard against irreversible damage and costly rework.
If the substrate is fragile, moisture is high, or you’re fighting persistent warp or cracking, it makes sense to call a professional rather than push on; otherwise, follow the steps, stay methodical, and you’ll finish with a smooth, durable skim that stays flat and looks right from a distance and up close. You’ve got this—stick to the plan, test often, and you’ll see the results.
FAQ
Can roller-applied base coats ever be a bad choice for a plaster skim?
Yes. If the substrate is unstable, dirty, or not properly primed, rolling on a base coat can trap issues. Always test a small area first and fix any adhesion or substrate problems before scaling up.
How do I know if I should use a roller-applied base coat on my project?
Check the substrate condition, the desired flatness, and the specific product instructions. If the job is large, or you’re aiming for a rapid first-pass flattening, rolling can help; for tricky edges or hard-to-reach areas, plan some hand-trowel touch-ups as needed.
What practical steps can improve flatness when rolling without turning a skim into a runny mess?
Keep a consistent pass with a medium-nap roller, and overlap each stroke slightly. Maintain a steady pace, don’t oversaturate the roller, and back-roll lightly to blend ridges before the coat stiffens.
What should I confirm on product labeling or instructions before starting?
Read the label for substrate compatibility, curing times, and recoat windows. If anything isn’t clear, call the manufacturer or check local guidelines, and follow their directions precisely to avoid bonding or drying problems.