
Introduction
Rock pockets on formed faces are voids left behind when concrete doesn’t fully fill the form, showing up as visible dimples or craters. Prevention starts at form setup, proper vibration, and keeping the form clean so the pour fills evenly. Check for tight joints, correct slump, and adequate consolidation during the pour.
For durable cosmetic repairs, chisel or grind the pocket clean, then use a matching patch mix pressed flush. Texture and cure times depend on the patch product, so always read the label and follow local rules. If you’re curious about the bigger picture, a quick note is that some researchers look at surface cleanliness and biofilms in similar materials, but you should focus on following the patch instructions for a solid finish.
Key takeaways
- Understand rock pockets: identify formed-face distress, plan repairs before finishing.
- Prevent during pour: ensure proper consolidation, formwork, and sequencing to minimize defects.
- On-site QC: inspect forms, roughness, and pocket depth before curing starts.
- C cosmetic repair: use compatible patches, feathered edges, seal to stop moisture ingress.
- Safety: wear eye/respiratory protection and follow formwork safety during repairs.
- Biofilm concerns are not typical; monitor moisture, cleanability, and consult manufacturer guidance.
Table of Contents
- Introduction
- Key takeaways
- Understanding Rock Pockets and Formed-Face Defects
- Root Causes: Materials, Mix, Placement, and Formwork
- Prevention During Pour — Planning, Sequencing, and Consolidation
- On-Site Quality Control and Inspection During Pouring
- Durable Cosmetic Repair Strategies for Formed Faces
- Step-by-Step Repair Workflows by Defect Size and Depth
- Long-Term Performance, Testing and Maintenance of Repairs
- Tools, Materials Checklist and Visual Checkpoints for Field Crews
- Conclusion
- FAQ
Understanding Rock Pockets and Formed-Face Defects
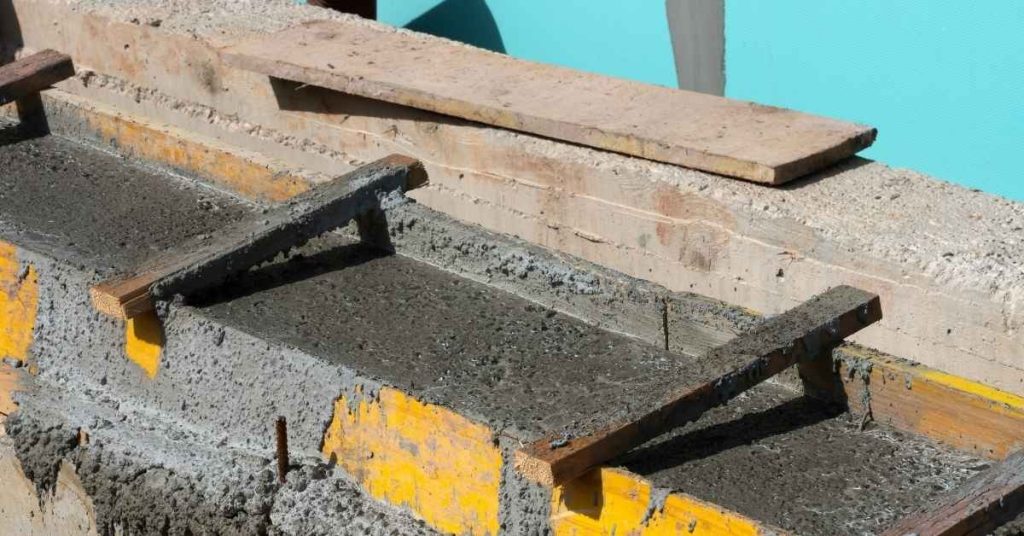
Rock pockets, or honeycombing, are voids that show up as uneven texture and recessed pockets on formed faces. They differ from minor surface voids in depth and size, and they can affect both look and performance. Visual cues include a pocked surface and irregular textures that grab the eye when the form is stripped.
In poured concrete, these defects come from segregation, improper vibration, or incomplete consolidation, plus form leakage, bleed water, or mix quality issues. Distinguish cosmetic surface voids from deeper pockets that may compromise cover and rebar safety. The durability impact includes poorer freeze-thaw resistance and higher moisture ingress, which can lead to maintenance costs over time.
What rock pockets look like and common terms
Rock pockets, also known as honeycombing, are visible defects on formed concrete faces. They appear as:
- Uneven texture, with a pocked surface.
- Small to large recessed pockets, ranging from pea-sized to golf ball-sized or larger.
You’ll often find them in corners, near embeds like rebar or anchors, and at lift joints. Industry terms for these defects include:
- Honeycombing
- Bug holes
- Pinholes (for smaller voids)
Mechanisms of formation during placement
Rock pockets form due to several physical processes during concrete placement:
- Air entrapment: Air gets trapped between the aggregate and formwork, creating voids.
- Segregation: Inadequate mixing or vibration causes coarse aggregates to separate from the cement paste, leaving voids behind.
- Bleed water escape: Water rises to the surface during setting, escaping through formwork gaps and leaving voids as it dries.
- Aggregate blocking form apertures: Large or improperly shaped aggregates can block formwork openings, preventing concrete from filling those areas.
- Poor consolidation: Insufficient vibration allows concrete to settle unevenly, creating voids at the surface.
Root Causes: Materials, Mix, Placement, and Formwork
Each category—materials, mix design, placement, and formwork—contributes to rock pockets, and their effects interact. For example, aggregate size can drive water demand and slump, while tight formwork can magnify consolidation issues. Understanding these relationships helps target the right fix.
Materials and mix design involve acceptable aggregate grades, fines content, and water/cement targets, along with admixtures that influence air and workability. Pay attention to common precursors like oversized aggregate or low cement hydration that can seed pockets, then connect this to placement and formwork actions for a holistic plan.
Concrete mix and admixture influences
The concrete mix plays a significant role in preventing rock pockets. Start by checking your project specs for the required aggregate gradation.
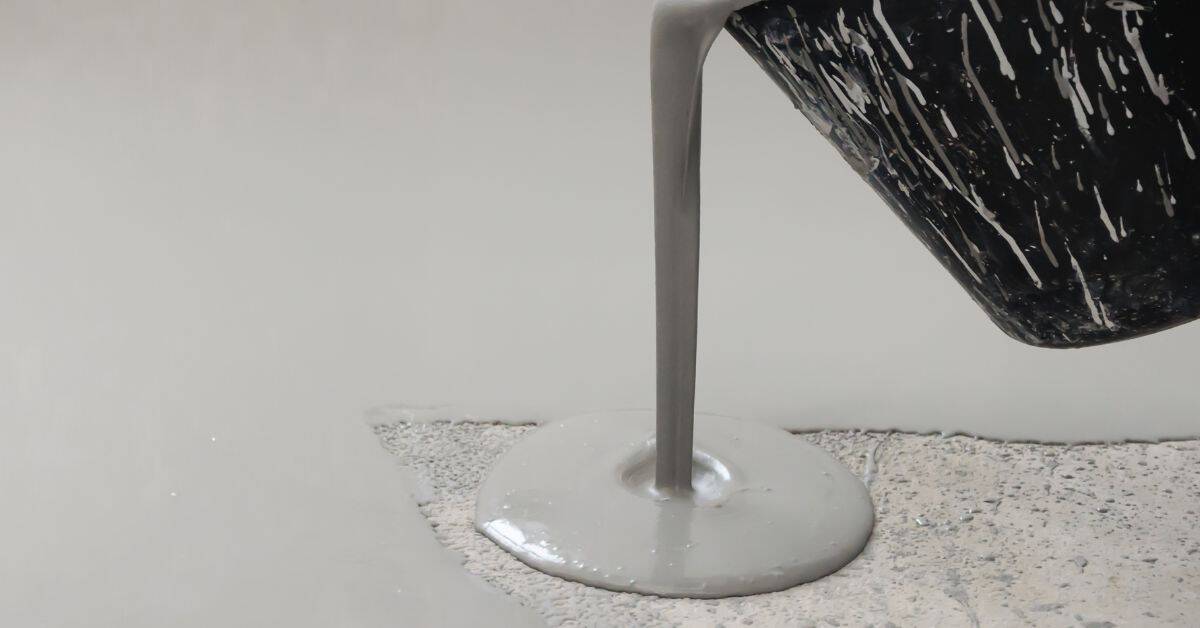
Too much coarse aggregate or not enough fines can lead to poor flowability, creating voids where water collects and forms pockets. Air-entraining admixtures help minimize this risk by introducing tiny bubbles that reduce bleed water and improve workability.
Plasticizers enhance flow without adding extra water, reducing segregation and improving surface finish. Retarders slow down setting time, allowing for better consolidation and fewer voids. But beware – too much water or improper admixture usage can cause more harm than good.
Formwork design, fit-up, and release agents
The formwork’s design and setup greatly impact the quality of your concrete surface. Ensure forms are tight-fitting with no gaps or leaks that could trap water.
Properly aligned seams and ties prevent cold joints and help distribute pressure evenly, reducing the likelihood of rock pockets. Chamfers at edges help direct flow and reduce stress concentrations.
Use compatible release agents sparingly to avoid interfering with concrete bonding. Too much or incompatible agents can leave a film that prevents proper adhesion, concealing voids beneath the surface. Before pouring, inspect forms for any issues, and clean them thoroughly to ensure a smooth, pocket-free finish.
Prevention During Pour — Planning, Sequencing, and Consolidation
Start with a solid pre-pour plan: verify formwork integrity, reinforcement, joints, weather, and access for consolidation equipment. Address logistics to minimize drop heights and delays that create voids. A clear plan helps keep the pour moving smoothly.
Sequencing should define pour order, use of chutes or pump lines, staging points, and timing to avoid stagnant zones near formed faces. Architectural-face considerations deserve mockups and surface consolidation planning to reduce surface voids and color inconsistencies.
Pre-pour checklist and mockup verification
Before every pour, it’s crucial to ensure your forms are ready. This checklist helps you catch issues early.
- Form cleanliness: Remove all dirt, debris, or previous concrete remnants. Dirty forms can cause adhesion problems and surface defects.
- Tie alignment: Check that reinforcement ties are properly aligned and not blocking form surfaces. Misaligned ties can create voids.
- Release agent test: Apply release agent to a small area, let it dry, then try to remove it. If it doesn’t come off easily, reapply or use a different type.
- Mix trial: Pour a small amount of mix into a bucket, vibrate, and let it set. Check for proper slump and finish.
- Vibration access: Ensure consolidation equipment can reach all areas without obstruction. Blocked access leads to unconsolidated concrete.
- Mockup appearance: Before production pours, create a mockup using the same materials. Check for desired finish and color match.
- Consolidation approach: Practice consolidation techniques on the mockup. Adjust if necessary to avoid surface voids or discoloration.
- Form fit-up: Ensure forms are properly aligned, plumb, and level. Poor fit-up can cause leaks, misalignment, and other defects.
Quick rule: If you skip these checks, you risk poor surface quality, voids, or even structural issues.
Placement and consolidation best practices
Proper placement minimizes rock pockets. Here’s how:
Use pumps or chutes: Whenever possible, use concrete pumps or chutes to control drop height. Free-fall can cause segregation and voids.
Target internal consolidation: Aim your pump lines or chute openings at the form faces. This pushes paste against forms, reducing voids.
Vibrate strategically: Use internal vibrators to consolidate concrete around reinforcement and near formed faces. External vibration can help in constrained areas like corners or around embeds. Be mindful of over-vibration, which can cause segregation.
Strategize for tight spaces: In corners or around embeds, use a combination of external and internal vibration. Push paste against forms with your vibrator to minimize voids.
On-Site Quality Control and Inspection During Pouring
Assign real-time roles so decisions to pause or adjust pours are quick and clear. The foreman, QC inspector, or pump operator should coordinate with the formwork crew to maintain steady progress. Quick decisions keep pockets from forming as pours progress.
During the pour, inspect form alignment, joint seals, rebar placement, and the consistency along the formed face. Use hammer sounding to confirm uniform compaction and document any anomalies as the work unfolds.
Visual and Tactile Checkpoints for Formed Faces
Conduct these checks at critical moments during the pour to catch forming voids early.
- First lifts: Inspect for rock pockets or honeycombing. They’re easier to spot when concrete is still wet.
- Near ties and reinforcement: Check for voids around rebar. Use a chain drag or your hands to feel for gaps.
- After vibration: Tap the surface with a hammer to listen for hollow spots indicating voids.
- Form stability: Ensure forms aren’t bulging or leaking. Check for signs of movement.
- Joint seals: Inspect for proper sealing to prevent rock pockets from forming at joints.
- Rebar placement: Verify rebar is properly placed and not causing voids.
- Form alignment: Check that forms are aligned and plumb. Misalignment can cause rock pockets.
- Surface laitance: Look for excessive laitance, which could indicate segregation or poor concrete quality.
Quick rule: Regular tactile checks help catch forming voids early, saving time and money in the long run.
Escalation Criteria and When to Involve an Engineer
Use this checklist to determine when a defect may be structural and requires engineering consultation.
- Deep honeycombing: Honeycombing more than 1/2 inch deep could indicate a structural issue. Consult an engineer if you see this.
- Exposed rebar: Rebar exposed due to loss of cover may compromise the structure’s integrity. Stop work and consult an engineer immediately.
- Loss of cover: Concrete less than 1 inch thick over rebar is considered a loss of cover. Consult an engineer if you find this.
- Cracking: Cracks wider than 1/8 inch or running through the entire depth of the concrete may indicate structural issues. Stop work and consult an engineer.
- Form movement: Significant form movement during pouring could cause structural defects. Consult an engineer if you suspect this.
- Voids behind forms: Large voids behind forms, especially near reinforcement, may compromise the structure’s integrity. Stop work and consult an engineer.
Quick rule: If a defect looks structural, stop work and involve an engineer immediately to prevent further damage or safety risks.
Durable Cosmetic Repair Strategies for Formed Faces
Begin by defining whether a repair is cosmetic or structural. Cosmetic repairs should restore look and surface texture without altering structural performance. Identify when a repair plan can stay purely cosmetic and when it needs stronger intervention.
Prepare the substrate with thorough cleaning, moisture checks, and edge bonding to ensure adhesion. Select compatible repair mortars, breathable sealants, and color-matched patches that align with the formed-face finish and curing regime.
Surface Preparation and Bonding Protocols
Before you start patching, you’ve got to prepare the surface right. This means getting rid of any loose material, dirt, or contaminants.
Use a wire brush, scraper, or even sandblasting/shot-blasting for tough spots. Water-jetting can help too. The goal is a clean, profile-matched surface that’s ready to bond.
Why’s this important? A clean, rough surface lets repair materials stick better and last longer. The right prep ensures your patch won’t pop off or crumble over time.
Repair Materials and Selection Guidance
Choosing the right repair material makes all the difference. It’s got to stick, blend in, and hold up against freeze-thaw cycles.
- Polymer-modified Mortars: These are great for adhesion and flexibility. Look for ones with good color retention and freeze-thaw resistance. Avoid cheap ones that lack these specs.
- Micro-concretes: These are strong, but they can be tricky to match in color. Check the datasheet for color options and make sure it’s compatible with your substrate.
- Cementitious Patching Compounds: These are easy to use and affordable. But they might not have the best freeze-thaw resistance or color retention. Make sure you get one that’s right for your climate.
- Epoxy Agents: Epoxies are strong and durable, but they can be sensitive to moisture. Check the datasheet for proper use with your substrate and avoid ones without good reviews on moisture resistance.
Step-by-Step Repair Workflows by Defect Size and Depth
Define defect size and depth with practical, measurable categories to choose the right workflow. Small shallow pockets require a lighter touch, while large or deep honeycombing may need more involved repairs. Use clear criteria to guide your approach.
Assess the surface, remove loose material, and consolidate voids before applying patches. Feather edges to blend repairs, match texture, and finish flush or just inset as needed for formed faces.
Step-by-Step Repair Process
Follow these practical steps to repair defects on formed faces, ensuring a durable and cosmetically pleasing result.
- Inspect the area: Check for loose material, form-release residue, and moisture. Ensure safety before starting any work.
- Clean the surface: Remove laitance, dust, and dirt using a wire brush or scraper. Ensure the surface is clean and dry for bonding.
- Apply bonding agent: Use a bonding primer or adhesive to promote strong bond between the repair material and existing concrete. Follow manufacturer’s instructions for application and open time.
- Prepare patch material: Mix epoxy or cementitious mortar according to package instructions, ensuring proper workability for your defect size and depth.
- Remove loose material: Carefully chip out any loose concrete using a chisel and hammer, keeping the edges neat and square.
- Consolidate voids: Fill any voids with the prepared patch material, using a trowel or putty knife to ensure complete coverage. Allow it to set slightly before moving on.
- Apply patch: Place the repair mortar into the defect, ensuring it’s well-consolidated and flush with the surrounding surface. Use a trowel or float to smooth the surface.
- Feather edges: Blend the repaired area into the existing concrete using a trowel or float, ensuring no sharp transitions remain.
- Cure properly: Follow manufacturer’s instructions for curing the repair material. Keep it moist and covered as directed to ensure proper strength development.
- Perform final checks: Inspect the repair for any missed areas or defects. Ensure the texture matches the surrounding concrete before moving on to finishing.
Small/Shallow Pocket Repair (Spot Patches)
Repair small, shallow pockets with these steps, ensuring a visually blended result with the formed face.
Start by cleaning the pocket thoroughly to remove any form-release residue or contaminants. Use a bonding agent suitable for your repair material and apply it evenly across the pocket surface. Allow it to set as per manufacturer’s instructions.
Mix your repair mortar according to package instructions, ensuring proper workability. Place the mortar into the pocket using a trowel or putty knife, consolidating it well to remove any air pockets. Use a wood float or steel trowel to replicate the existing texture on the formed face, working quickly before the mortar sets.
Cure the repair material properly, following manufacturer’s instructions. Keep it moist and covered as directed to ensure proper strength development and adhesion. Inspect the repaired area once cured to ensure a visually pleasing match with the surrounding concrete.
Large/Deep Pockets and Structural Honeycombing
Repair large, deep pockets and structural honeycombing with these steps, ensuring the integrity of your concrete structure.
First, assess the damage. If the pocket is large or structurally compromised, consult a structural engineer before proceeding. Cut out any loose or unsound concrete using a chisel and hammer, chasing to sound concrete as needed. Ensure you expose any rebar present for inspection.
Prepare your repair formwork if necessary, ensuring it’s properly fitted and supported. Mix your repair mortar according to package instructions, ensuring proper workability and consolidation. Place the mortar into the pocket or chase in stages, consolidating well with a trowel or putty knife after each stage. Allow the material to set slightly before moving on.
Once the repair is complete, ensure proper curing as per manufacturer’s instructions. Keep the repair moist and covered as directed to ensure proper strength development. Inspect the repaired area once cured, checking for any signs of weakness or delamination. If rebar was exposed during repair, confirm its integrity and cover before proceeding with final finishing.
Long-Term Performance, Testing and Maintenance of Repairs
Discuss durability risks like freeze-thaw cycling, carbonation, and chloride ingress that affect repaired formed faces. Tie these risks to exposure conditions and the repair’s substrate compatibility. Plan for monitoring and verification over time.
Verification testing may include bond or moisture checks and non-destructive evaluations aligned with standards. Regular maintenance, resealing, and texture re-matching help extend service life and preserve appearance.
Testing methods and acceptance guidance
To ensure the durability of your repairs, it’s crucial to test both original defects and repaired areas. Here are some common testing methods:
Non-destructive tests: These include sounding (using a hammer), rebound hammer for hardness, infrared or ground-penetrating radar (GPR) for subsurface issues.
Destructive tests: Cores and pull-off adhesion tests are used to assess the strength of repairs. Always consult contract acceptance criteria and relevant standards like ASTM or ACI when performing these tests.
Maintenance, sealing, and environmental exposure management
Proper maintenance is key to extending the life of your repairs. Here’s how you can manage environmental exposure:
Seal repaired areas with a suitable sealant as soon as possible after repair. Reapply sealants or protective coatings according to product guidance or project requirements to prevent moisture ingress and staining.
Regular visual inspections are essential. Check for signs of cracking, delamination, or other damage. Address any issues promptly to prevent further deterioration.
Tools, Materials Checklist and Visual Checkpoints for Field Crews
Keep a practical core tool set on hand for both pours and repairs, including mixing tools, trowels, chisels, grinders, floats, and portable vibrators. Ensure you have patching compounds and bonding agents ready for immediate use. PPE should always be at hand.
Use on-form references and texture templates to guide matching. Carry quick reference boards, color swatches, and a lighting plan to ensure texture reads correctly. Create portable mockup kits to compare texture and color during the workday.
Essential tools and safety items
Before starting any repair work, ensure you have the right tools and safety gear. This checklist helps prevent injuries and ensures a smooth process.
- Hard hats: Protect against falling debris.
- Safety glasses: Shield eyes from dust and particles.
- Ear protection: Reduce noise exposure from power tools.
- Dust masks/respirators: Guard against concrete dust inhalation.
- Steel-toe boots: Safeguard feet from heavy objects.
- Gloves: Protect hands from cuts and burns.
- Grinders/blasters: Remove damaged concrete efficiently.
- Vibrators: Settle fresh concrete to prevent voids.
- Mixers: Ensure consistent, lump-free repair material.
- Trowels (kapp and margin): Smooth and finish repaired surfaces.
- Chisels: Remove damaged concrete and formwork.
- Portable vibrating tool: Settle pockets in hard-to-reach areas.
Quick rule: Always prioritize safety first. Use appropriate PPE and tools for each task.
Visual reference samples and texture-matching aids
Having visual references on-site helps maintain consistency in finish quality and texture. Use this checklist to keep track of essential samples.
- Form-face samples: Small pieces of formed concrete showing desired finish.
- Color swatches: Ensure consistent color throughout the repair.
- Texture templates: Match original texture for seamless repairs.
- Portable mockup kit: Create a quick test patch to approve finish before production.
- Plug-and-template texture mats/stamps: Achieve consistent textures across large areas.
- Lighting plan: Ensure samples and repairs look right under site conditions.
- Reference boards: Keep track of approved finishes and textures.
- Curing compounds: Test how they affect the final finish.
Quick rule: Regularly update visual references to maintain consistency as materials and conditions change.
Conclusion
Keep this work safe and durable by addressing rock pockets and formed-face defects at the source and with solid, on-site repairs. If you stay disciplined about planning, inspection, and controlled repairs, you’ll protect the appearance and long-term performance of the surface.
When you move forward, verify the plan and formwork, check for debris and proper access, confirm mix and placement timing, practice clean consolidation, follow through with the right repair workflow for the defect size, and finish with a careful, tested cosmetic repair. Do a quick visual check after curing and document any tweaks for future pours to keep everything consistent and predictable.
Common mistakes to avoid are rushing the pour, skipping consolidation, and attempting repairs without testing on a small area first. Follow strong safety norms, keep loads off fresh sections, and never force a repair that still shows movement or mismatch. If the defect is large, affects structural intent, or you’re unsure about the repair feasibility, call a professional rather than pushing ahead—your time and money are saved by stopping early when in doubt. Stay methodical, stay safe, and you’ll finish with a clean, durable surface you can be proud of.
FAQ
Can bacteria or biofilms affect formed-face rock pockets or repairs?
Biofilms don’t usually form on cured concrete, but moisture and organic debris can create a slimy film on surfaces that are not kept clean. For DIY repairs, keep the formed faces clean and dry before applying patch materials, and follow product instructions for curing and sealing.
Are enzymes, nanoparticles, or phages recommended to treat rock pockets or biofilms in concrete?
No—these methods aren’t standard for DIY concrete repairs. Check product labels, manufacturer instructions, and local rules before trying any biotech treatment. For typical repairs, focus on proper cleaning, surface prep, and compatible patch materials.
What about using CcpA inhibitors or quorum-sensing related tech in formed-face repairs?
That stuff is not part of DIY concrete practice. It’s specialized science far outside normal patch work. If you’re curious, consult a materials engineer or local supplier for guidance and safety data.
What practical steps reduce biofilm risk and rock pockets during a pour?
Keep formwork clean and dry, cover and protect the surface from moisture intrusion, and ensure proper curing conditions per the patch product. Use fresh, compatible patch material and follow curing times exactly; if in doubt, check the label or manufacturer instructions.