
Introduction
Ring-anode spalls are corrosion damage around a ring-shaped anode where nearby metal starts spalling due to accelerated attack. In plain terms, you’re seeing how the ring setup can push galvanic action into surrounding metal. It’s a local deterioration issue that can spread if the ring current isn’t balanced or protected from moisture.
For a hands-on check, start with plain-field observations: coating integrity, moisture exposure, and the ring installation itself. If you need deeper checks, follow the manufacturer’s instructions for any test methods and keep clear records, then remember that professionals use electrochemical tools to gauge potential changes or aging effects—only with proper gear, safety, and local rules.
Key takeaways
- Identify ring-anode spalls early by visual cues and confirm with basic electrical testing.
- Understand how repairs can trigger adjacent corrosion through altered current paths and moisture.
- Apply OCP, impedance, and cyclic polarization cues as starting diagnostics.
- Prioritize minimal metal disturbance during repair to limit collateral corrosion risk.
- Include safety measures during anode work and lockout procedures to prevent shocks.
- Document testing results and integrate findings for lifespan prediction and risk scoring.
Table of Contents
- Introduction
- Key takeaways
- What Are Ring-Anode Spalls: Definition, Types, and Root Causes
- How Repairs Can Accelerate Corrosion Next Door — Mechanisms and Failure Chains
- Testing and Diagnostics to Detect Spalls and Neighbor Risk
- Interpreting and Integrating Results for Lifespan Prediction and Risk Scoring
- Best Practices for Repairs to Minimize Collateral Corrosion
- Safety Precautions During Anode Repair and Maintenance
- Cost Implications and Risk Assessment for Adjacent Equipment
- Conclusion
- FAQ
What Are Ring-Anode Spalls: Definition, Types, and Root Causes
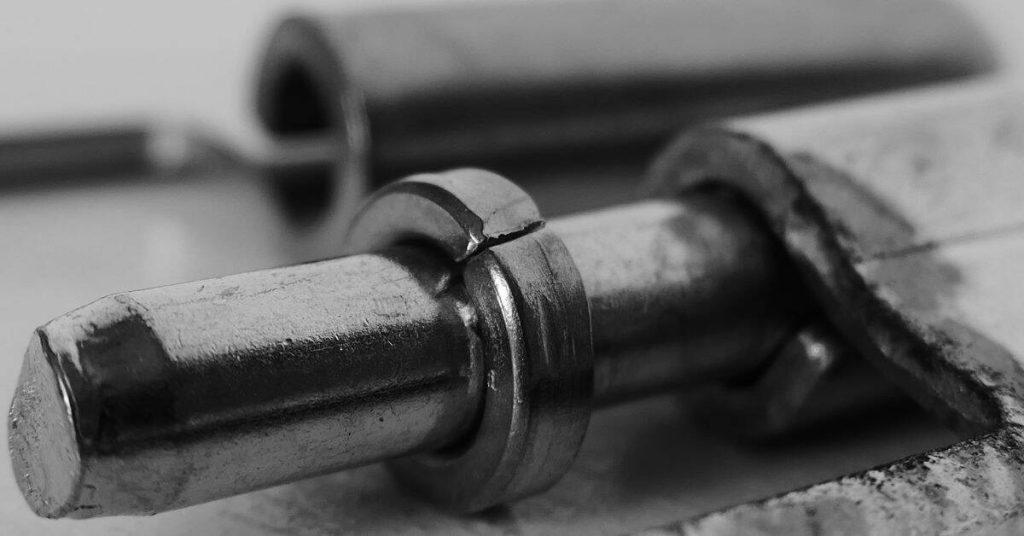
Ring-anode spalls are concrete breaks that form a ring around a cathodic protection anode. They differ from typical spalls by outlining the anode geometry and exposing the substrate beneath the coating. You’ll often see a distinct rim and corrosion halos around the anode area.
Common spall types include peripheral rings, clusters at multiple anodes, and varying depths from shallow to deeper exposures. Environmental context matters, with marine, utility, bridge deck, and buried structures each showing different patterns. Root causes span mechanical/installation issues, thermal cycling, chemical interactions, and coating problems that trap moisture or fail to bond properly.
Definition and visual checkpoints
A ring-anode spall is a specific type of concrete damage, distinct from other spalls. It’s caused by the deterioration around cathodic protection (CP) anodes in reinforced concrete.
- Cracks: Look for radial cracks around the anode, indicating active spalling.
- Delamination: Check for lifting or peeling of the concrete cover, exposing the steel reinforcement.
- Loose fragments: Inspect for loose pieces of concrete that could fall off easily.
- Ring-like rim patterns: These are common visual cues around anodes where spalling is active or has occurred.
- Pitting at the ring: Small holes or indentations around the anode indicate ongoing corrosion.
- Spall depth: Measure the depth of the spall to gauge its severity. Deeper spalls require immediate attention.
- Substrate exposure: If you see exposed steel, it’s a sign of advanced spalling and active corrosion.
- Corrosion halos around anodes: Discoloration or efflorescence around the anode indicates ongoing chemical reactions due to corrosion.
Quick rule: If you spot any of these signs, it’s time to investigate further and consider professional help.
Root causes (mechanical, thermal, coating failure)
Mechanical shock can initiate spalls. Loose fasteners or improperly installed anodes cause stress on the surrounding concrete.
Thermal cycling and expansion/contraction can lead to cracking and delamination around anodes due to differing coefficients of thermal expansion (CTE) between concrete and steel.
Coating defects: Poor adhesion, moisture traps, or incompatible coatings can accelerate corrosion under the coating, leading to spalling. Always check the condition of the coating around anodes.
Substrate corrosion is another primary cause. Corrosion of the steel reinforcement can lead to expansive products that cause cracking and spalling of the surrounding concrete.
Environmental factors that accelerate spall formation
Chlorides in marine environments or deicing salts can accelerate corrosion, leading to spalls. Check local standards and manufacturer data for chloride threshold levels.
pH: Low pH levels can increase the rate of concrete deterioration. Regularly check the pH of the concrete pore solution around anodes.
Temperature fluctuations can cause thermal expansion/contraction, leading to cracking and spalling. Monitor temperature changes in your specific environment.
Flowing water or other liquids can carry chlorides or other corrosive agents to anodes, accelerating corrosion and spall formation. Inspect for any sources of flowing liquids around the CP system.
Microbiological activity can also contribute to concrete deterioration. Check for signs of microbial activity, such as efflorescence or discoloration, around anodes.
How Repairs Can Accelerate Corrosion Next Door — Mechanisms and Failure Chains
Repair actions can shift local moisture, ionic strength, and alkalinity, which changes galvanic relationships with nearby concrete and metals. These shifts can promote unintended coupling between repaired zones and adjacent reinforcement. The net effect is a higher risk of corrosion spreading beyond the patch.
Material choices and geometry matter: porous repair mortar, moisture in aggregates, and the size and location of the anode influence current paths. Contact between dissimilar metals can create pockets of accelerated corrosion nearby. Look for crevices, moisture traps, and carbonation fronts that form around or next to repaired areas.
Electrochemical mechanisms: stray currents and shifted potentials
Repair actions can alter local electrochemical conditions, creating stray current paths that accelerate corrosion next door. Here’s how:
First, anode geometry changes. When you repair a section of concrete, you’re essentially changing the size and shape of the anode (the part that loses electrons). This can create new current paths, diverting electrons away from nearby structures.
Second, exposed substrate. Repair work often exposes rebar or other metal components. These exposed surfaces can act as new anodes, drawing currents and shifting local potentials. This can cause adjacent structures to become cathodes, where corrosion is accelerated due to the increased current flow.
Lastly, temporary connections. During repairs, tools or equipment may create temporary electrical connections between the repair site and nearby structures. These connections can allow stray currents to flow, again shifting local potentials and accelerating corrosion next door.
Physical and contaminant mechanisms (debris, exposed metal, geometry changes)
Repair work can also alter physical conditions and introduce contaminants that promote corrosion in adjacent structures. Here’s how:
First, repair debris. Repair work often leaves behind debris like concrete dust or mortar particles. These can accumulate in crevices or on nearby surfaces, trapping moisture and creating ideal conditions for corrosion to start or accelerate.
Second, exposed metal. As mentioned earlier, repair work can expose rebar or other metal components. These exposed metals can act as new anodes, drawing currents and shifting local potentials. Additionally, metal particles from tools or equipment can act as catalysts for corrosion in nearby concrete.
Lastly, geometry changes. Repairing a section of concrete changes the shape of that part of the structure. This can alter hydrodynamics, causing water to flow differently and potentially concentrate corrosive species on nearby surfaces. It can also disrupt existing protective coatings or barriers, leaving adjacent structures more vulnerable to corrosion.
Common failure chains and real-world examples
Repair actions can trigger a series of events that lead to accelerated corrosion in adjacent structures. Here are some common failure chains:
Repair → Local potential change → Pit initiation → Rapid growth. A repair action changes local electrochemical conditions, shifting potentials and creating stray currents. These currents initiate pits on nearby rebar, which then grow rapidly due to the increased current flow.
A common mistake is not properly isolating the repair site. Without isolation, temporary connections can form, allowing stray currents to flow and accelerate corrosion next door. Another mistake is using incompatible materials for repairs. Different metals can create galvanic couples, accelerating corrosion in adjacent structures.
For example, a homeowner might repair a small spall on their driveway, exposing rebar. If they don’t properly isolate the site or use compatible materials, stray currents could flow to nearby garage walls, accelerating corrosion and leading to rapid spalling and cracking downstream.
Testing and Diagnostics to Detect Spalls and Neighbor Risk
Start with non-destructive inspection: visual survey, infrared thermography, and ultrasonic thickness can reveal hidden delaminations without disturbing the ring-anode system. Ground-penetrating radar helps map anomalies beneath the surface. Acoustic sounding adds another layer of detection.
Electrochemical tests like half-cell potential mapping and LPR give insight into active corrosion zones and rates near spalls. Spall characterization should include moisture and chloride profiling. Data from these tests feed into risk assessment and maintenance planning.
Fundamental Electrochemical Characterization (OCP, EIS, CV)
Electrochemical tests are crucial for understanding your ring-anode system’s health. Here’s what each test reveals:
Open Circuit Potential (OCP): Measures the natural potential of the steel in concrete. A shift towards more negative values indicates active corrosion.
Electrochemical Impedance Spectroscopy (EIS): Assesses coating integrity and resistance to corrosion. High impedance values suggest a robust barrier against corrosion.
Cyclic Voltammetry (CV): Detects early signs of degradation by measuring current responses to potential changes. Peak currents indicate active corrosion processes.
Cyclic Polarization, Thermal Cycling, and Accelerated Corrosion Tests
These tests simulate real-world conditions to assess your ring-anode system’s long-term performance:
Cyclic Polarization: Measures pitting corrosion risk. A wide hysteresis loop indicates a high resistance to localized attack.
Thermal Cycling: Reveals bond fatigue by subjecting samples to repeated temperature changes. Cracking or delamination suggests a weak system.
Accelerated Corrosion Tests: Simulate long-term degradation under controlled conditions. Comparing results with fresh samples helps predict future performance.
Visual, Mechanical, and NDT Inspections
Regular inspections help catch spalls early. Use this checklist to confirm test findings:
- Visual Checkpoints: Look for cracks, delamination, or exposed steel. Skipping this can miss early signs of deterioration.
- Ultrasonic Thickness Tests: Measure concrete cover loss. Low readings may indicate exposed steel and active corrosion.
- Adhesion Tests (e.g., Pull-off Test): Assess bond strength between concrete and coating. Low values suggest delamination and potential spalling.
- Acoustic Sounding: Detects loose fragments by listening for changes in sound waves. Ignoring this can lead to sudden, dangerous spalls.
- Reinforcement Corrosion Mapping: Locates active corrosion zones using half-cell potential measurements. Skipping this may miss active corrosion sites.
- Infrared Thermography: Identifies heat patterns caused by active corrosion. Overlooking this can miss hotspots and accelerate spall growth.
- Ground-Penetrating Radar (GPR): Detects voids, cracks, or delamination beneath the surface. Neglecting GPR may miss hidden damage.
Quick rule: Regular inspections are key to catching spalls early and preventing neighbor risk.
Interpreting and Integrating Results for Lifespan Prediction and Risk Scoring
Adopt a standardized framework to translate test outputs into a ranked severity and a usable lifespan projection. This helps decide when to escalate repairs or adjust monitoring. Normalize diverse data so different tests speak the same language for comparison.
Produce service-life ranges (best, typical, worst) and attach probability to each scenario. Use a risk-scoring approach for adjacent assets that accounts for moisture, electrical continuity, and environmental factors. A clear workflow ties data quality checks to a final maintenance decision.
Data integration and predictive approaches
The key to predicting lifespan lies in combining test results. We’ll take OCP, EIS, CV, and mechanical tests, then blend them for a clear picture.
Trend analysis: Look at how readings change over time. Steady or increasing corrosion rates? That’s trouble.
Uncertainty factors: Consider test variability, data gaps, and assumptions. Be conservative in your estimates.
Common mistakes in testing and evaluation
Don’t let these common pitfalls trip you up. Here’s what to avoid:
- Poor sample selection: Ensure your samples are representative of the whole structure.
- Ignoring environment variability: Test under conditions similar to your site.
- Over-relying on one test: Use multiple tests for a well-rounded view.
- Misinterpreting results: Understand what each test tells you. Don’t read too much or too little into them.
Learn from these mistakes, and your predictions will be stronger.
Influence of environmental and operational factors on degradation rates
Temperature, salinity, flow, and operational cycles aren’t just background noise. They drive corrosion.
Temperature: Warmer temps speed up chemical reactions, boosting corrosion.
Salinity and flow: Higher salt content and faster flow increase corrosion rates. Slower flow lets deposits build up, too.
Operational cycles: Frequent start-ups and shut-downs can cause rapid degradation. Account for these in your predictions.

Best Practices for Repairs to Minimize Collateral Corrosion
Begin with a quick pre-repair map of affected rings: identify moisture and chloride paths and likely current flow routes. Choose materials with proven compatibility, such as low-permeability repair mortars and bonding agents that won’t bridge electrical paths. Use appropriate coatings or sealants to limit unintended conduction.
Follow a disciplined workflow: isolate the repair zone, prep surfaces cleanly, and place barriers where needed. Control curing to avoid moisture gradients and verify thickness tolerances. Maintain documentation of materials, batch details, and inspection results for traceability.
Tools and materials checklist; material specs and standards explained
Before you start your repair, make sure you have the right tools and materials. This checklist helps ensure you’re prepared.
- Tape measure: To accurately measure the spall size for material calculation.
- Chipping hammer: For controlled removal of damaged concrete.
- Vacuum or broom: To clean the repair area and prevent debris from affecting adhesion.
- Wire brush: For surface preparation to remove loose material and expose sound concrete.
- Repair mortar: Low-permeability, compatible with existing concrete. Check manufacturer’s data sheet for specifics.
- Bonding agent: Compatible with both repair mortar and existing anodes. Follow manufacturer’s guidelines.
- Coating or sealant: Resistant to unintended electrical bridging. Again, check the data sheet.
- Trowel or squeegee: For applying materials evenly and smoothly.
- Moisture meter: To ensure surface is dry before application (below 4%).
- Chloride test kit: To measure chloride content in the concrete. High levels can accelerate corrosion.
Quick rule: Always check manufacturer’s specs or standards when unsure about material properties and compatibility.
Repair sequencing and isolation strategies
To minimize collateral corrosion, repairs should be done in a specific sequence and isolated areas should be temporarily disconnected from the rest of the system.
Isolation: Before starting any work, isolate the repair area electrically. This prevents stray currents from flowing through the repair zone.
Use temporary isolation devices or disconnect the affected anodes if possible. Always follow safety procedures to avoid electrical shocks.
Once isolated, perform repairs in stages, reconnecting only after each stage has cured and been tested. This staged reconnection helps prevent potential shocks to neighboring components.
Post-repair monitoring and verification
After repairs, it’s crucial to monitor the area to ensure stability and detect any unintended current paths early. Here are some simple checks you can perform.
Potential mapping: Use a high-impedance voltmeter to map out corrosion potentials across the repair area. This helps identify any areas with increased activity that may need further attention.
Perform localized EIS (Electrochemical Impedance Spectroscopy) tests at critical locations, such as edges of repairs or near reinforcement. This helps confirm that the repair is performing as expected and not introducing new corrosion risks.
Visual inspection: Regularly inspect the area for any signs of recurring spalls, cracks, or other indications of ongoing degradation. If detected early, these issues can be addressed before they cause significant damage.
Timing: Perform these checks immediately after repair, then at regular intervals (e.g., monthly for the first year, then annually) to ensure long-term stability and detect any changes in corrosion activity early.
Safety Precautions During Anode Repair and Maintenance
Adhere to electrical safety practices specific to anode work: lockout/tagout, de-energize circuits, proper grounding, and arc-flash risk assessment. Handle live components with care during inspection and repair. Use safe work procedures to minimize exposure to energized parts.
Equip workers with appropriate PPE for electrical, chemical, and abrasive dust hazards. Follow chemical hazard management practices for electrolytes and coatings, including storage, disposal, and spill response. Ensure environmental controls and containment to protect soil and water from leaks.
Electrical safety, lockout/tagout, and safe work practices
First things first: isolate power. Before you start any anode repair or maintenance, lock out and tag out all electrical circuits connected to the system.
Check for stray currents too. Use a multimeter to ensure no current is flowing before you touch anything. Safety first, buddy.
Now, proper grounding. Ground yourself and your tools to prevent any nasty shocks. And remember, arc-flash risk assessment? Do that before you start working on live components during inspection or repair.
Lastly, safe handling of live components. If you must work on live parts, use insulated tools and wear appropriate PPE. Safety glasses, gloves, the works.
Chemical handling, ventilation, and PPE
You’ll be dealing with electrolytes, coatings, and cleaning agents. Know what you’re working with. Read the labels, identify chemicals, and understand their hazards.
Now, safety gear. Wear rated PPE for electrical, chemical, and abrasive dust exposure. That means gloves, goggles, maybe even a face shield or apron. Protect your skin and eyes, pal.
Ventilation’s key too. If you’re sanding or grinding, wear a respirator. And if there’s fume generation, use local exhaust ventilation to keep the air clean.
Spills happen. Be ready. Have spill kits on hand for quick containment and cleanup. And remember, no skin or respiratory contact with chemicals.
Environmental containment and waste disposal
Keep it clean, keep it contained. Use drop cloths, tarps, or other barriers to catch debris and prevent it from spreading.
Wash water too. Contain it, don’t let it run off into the soil or surface water. Electrolytes can harm the environment if they leak.
Now, waste disposal. Don’t just toss it in the trash. Follow local regulations and material safety data sheets. Some waste might need special handling or recycling.
Spills happen, but we can minimize the impact. Have a plan for containment, neutralization, or cleanup. And always report incidents to your supervisor or local authorities.
Cost Implications and Risk Assessment for Adjacent Equipment
Develop a clear cost taxonomy that separates direct repair costs from indirect costs tied to accelerated corrosion of nearby equipment. Consider maintenance, downtime, and safety incident implications. Use a framework that ties corrosion risk to monetary outcomes over a planning horizon.
Quantify adjacent-system risk by identifying exposed assets and plausible damage scenarios. Build decision criteria and a simple decision tree to guide when repairs are cost-effective or when monitoring suffices. Include sensitivity analyses to show how results change with key variables and document governance for risk decisions.
Comparing frequent repairs vs. proactive monitoring and replacement
When faced with recurring ring-anode spalls, it’s crucial to weigh the costs of frequent repairs against proactive measures like monitoring or replacement.
Frequent repairs rack up labor costs each time. Downtime adds up too, affecting productivity. Plus, there’s always a risk of collateral damage accelerating corrosion on adjacent equipment.
Proactive monitoring lets you catch issues early, reducing repair frequency and downtime. Replacement might seem steep, but it could be cheaper in the long run if repairs keep piling up. Consider these factors when deciding which route to take.
Risk assessment for adjacent equipment and business impact
To protect your investment, assess the risk of accelerated corrosion on nearby assets. Here’s how:
- Identify exposed assets: List all neighboring equipment that could be affected.
- Estimate corrosion rate impacts: Use data from previous repairs or predictive models to gauge how fast corrosion might spread.
- Probability of accelerated damage: Consider factors like asset age, maintenance history, and environmental conditions. A Risk Matrix tool can help score likelihood (low, medium, high).
- Potential failure modes: Brainstorm possible consequences if adjacent equipment fails due to accelerated corrosion.
- Consequences and business impact: Score each consequence’s severity. Multiply likelihood by consequence for an overall risk score. Prioritize maintenance based on these scores.
Decision framework and maintenance planning
A clear decision framework helps you prioritize repairs and maintenance. Here’s a practical approach:
Inspection frequency triggers: Set intervals for inspecting anodes based on their condition, age, and environmental factors. Quarterly or semi-annually is common.
Escalation criteria: Define when to escalate repairs or maintenance. For instance, if more than 20% of anodes are spalling in a single inspection, consider full replacement or additional mitigation measures.
Regularly review and update your framework as conditions change. Communicate decisions and plans clearly with all stakeholders to ensure everyone’s on the same page.
Conclusion
Ring-anode spalls pose a real safety and durability risk if you push repairs without a plan. Start with a clear, tested approach so you protect nearby equipment and keep the look and life of the structure intact.
Check in this order: confirm the area is safe to work, review any adjacent components for collateral risk, perform targeted testing or diagnostics to locate spalls and their neighbors, interpret the results for a practical lifespan and risk score, and then apply repairs with methods that minimize repeat damage and corrosion growth. Work in small areas first, document what you find, and build your plan step by step before advancing to the next spot.
Common mistakes to avoid are taking shortcuts with cleaning or protection, skipping fresh testing after repairs, and failing to isolate or shield nearby equipment. Always observe basic safety rules: de-energize or isolate as required, wear protective gear, and keep nonessential people away from the work zone. If any part of the assessment shows widespread or uncertain risk, or if you’re unsure about the diagnostics or repair method, call a professional. With a careful, methodical approach, you can limit damage, extend lifespan, and stay confident in the result.
FAQ
What electrochemical tests should I know about (OCP, EIS, CV) and what do they tell me?
OCP shows the natural metal potential without forcing a current. EIS helps map how the system resists charge and transports ions over time. CV looks at how the metal responds to sweeping voltages to spot corrosion tendencies. Check manufacturer instructions or labels for test availability and safety notes.
How can cyclic polarization testing help with ring-anode spalls, and what should I look for?
Cyclic polarization tests reveal at what potential the metal shifts from passive to active corrosion. Look for a wide passive region and any sudden breakpoints or hysteresis that suggests pitting risk. If you don’t see clear guidance from the label, rely on the manufacturer’s test interpretation and local rules.
Are thermal cycling or accelerated aging tests important for this situation?
Thermal cycling can stress coatings and interfaces, which affects corrosion risk next door. Accelerated aging tests simulate long-term effects in shorter time, but results depend on setup and materials. If you’re considering them, check tool manuals or manufacturer instructions for permitted ranges and conditions.
How do I combine test results to predict lifespan and guide repairs?
Combine the readings to form a risk picture: higher corrosion indicators plus weaker protective behavior means shorter expected life. Use the data to prioritize repairs and monitor next-door components. If you’re unsure how to synthesize results, consult the test labels, manufacturer docs, or local guidance for how to weigh each metric.