
Introduction
Concrete Slab Edge Insulation Retrofit
Retrofitting concrete slab edge insulation enhances thermal performance by adding insulation around exposed edges of existing slabs. This improves comfort in small patios and entryways year-round by reducing heat loss. Before proceeding, assess current edges, drainage, and any moisture concerns.
Integrate chosen edge insulation with surrounding framing, slabs, and foundations for long-term durability and termite resistance as needed. Refer to product labels and manufacturer instructions, and consult local rules for relevant code requirements or foundation details. If unsure, prioritize practical options emphasizing proper installation, moisture control, and clear access for future maintenance.
Key takeaways
- Conduct site framework check to ensure insulation fits existing slab edge geometry.
- Choose termite-resistant materials and proper vapor barrier placement per local code guidelines.
- Integrate air and vapor controls without trapping moisture near footings.
- Pre-inspection for termite signs and implement sealing to deter colonies.
- Wear protective gear and follow manufacturer instructions during retrofit.
- Document termite prevention steps and foundation details for code reviews.
Table of Contents
- Introduction
- Key takeaways
- Project Overview and Goals
- Codes, Permits, and Standards to Check
- Site Assessment and Pre-Retrofit Checklist
- Materials, Tools, and Material Specs Explained
- Step-by-Step Retrofit Method That Actually Fits Small Patios
- Integrating Control Layers: Thermal, Water, Air, and Vapor
- Pest Resistance and Termite Prevention Details
- Costs, Scheduling, Safety, and Common Mistakes
- Conclusion
- FAQ
Project Overview and Goals
Retrofitting slab-edge insulation for small patios and entries focuses on improving edge performance without replacing the entire slab. It covers materials, methods, and acceptable finishes that work with tight spaces and visible edges. Outcomes include more comfort, reduced temperature swings, and better moisture control.
The approach helps distinguish retrofit from full replacement. It’s suitable when the budget is limited, the edge exposure is modest, and access is workable. When a full slab or wall replacement is needed, consider the broader scope and long-term implications before proceeding.
Scope and limitations
Retrofitting slab-edge insulation on small patios and entries typically involves areas with dimensions up to 10′ x 10′. It focuses on improving comfort, reducing heat loss/gain, managing moisture, and deterring pests. However, severe damage or instability may require full replacement for safety and structural integrity.
Before starting, verify dimensions and accessibility. If the slab size exceeds typical small patio/entry dimensions, consider full replacement or additional foundation work.
When to choose retrofit vs. rebuild
Choosing between retrofitting and rebuilding depends on several factors. A tight budget may favor retrofitting, but consider the existing slab condition, drainage, and pest issues.
If the existing slab is structurally sound with minor edge exposure, retrofitting is likely the best option. However, if there are drainage issues or pest problems, full replacement might be necessary to address root causes.
Always assess budget constraints and compare costs of retrofit vs. full replacement. Evaluate existing slab condition, drainage, and pest issues according to industry standards.
Codes, Permits, and Standards to Check
Identify the core codes that affect edge retrofit work, including local building codes and energy codes. Also review pest-control regulations that could impact materials or practices in contact with soil. Manufacturer guidelines can reveal compatible finishes and edge details.
Determine which permits or plan approvals are typically required and what triggers review. Use municipal portals or the building department to verify requirements and gather documentation. Have diagrams, product specs, and energy calculations ready for review.
Energy and Insulation Code Considerations
Before starting your retrofit project, it’s crucial to understand the energy codes that apply in your area. These codes, such as the International Energy Conservation Code (IECC) or the International Residential Code (IRC), regulate insulation performance characteristics to ensure energy efficiency.
Commonly regulated aspects include R-value (thermal resistance), emissivity, and air infiltration rates. To confirm required values for your project, consult local code officials or product documentation.
Stake: Ensuring compliance with energy codes maintains energy efficiency and helps avoid potential penalties.
Quick check: Visit your local building department’s website or contact them directly to understand the energy code requirements for your project’s location.
Local Pest and Termite Regulations
In some jurisdictions, specific pest-control measures are mandated during construction. These can include termite-resistant details or inspections to prevent structural damage and maintain a healthy living environment.
To confirm requirements in your area, visit your county’s agricultural department website or contact them directly. You may also consult local extension services or building departments for guidance.
Stake: Adhering to local pest-control regulations helps prevent structural damage and maintains a healthy living environment.
Pro check: Inquire about required termite-resistant details or inspections, such as using treated lumber or installing termite shields. Obtain necessary certificates or reports once these measures are implemented.
Site Assessment and Pre-Retrofit Checklist
Define the evaluation scope by inspecting the slab surface and edge access. Note any cracks, spalling, or heaved edges that affect retrofit feasibility. Record close-out conditions that influence the installation sequence.
Evaluate drainage and grading to ensure slope away from the structure. Check downspout discharge and identify areas prone to standing water. Document moisture and pest indicators for baseline reference.
Inspecting Slab Edge and Soil Conditions
Before you begin retrofitting your concrete slab edge insulation, it’s crucial to assess the current condition of your patio or entryway. This checklist will help you identify any issues that may affect the success of your project.
- Slab cracks: Inspect for hairline fractures or larger gaps. Cracks wider than 1/4 inch may require professional attention.
- Spalling: Check for flaking or peeling concrete, which could indicate structural issues.
- Heaved edges: Look for uneven surfaces or edges that have lifted. This could be due to soil expansion or other underlying problems.
- Soil level: Ensure the soil is below the slab edge to prevent moisture intrusion.
- Muddy areas: Inspect for signs of standing water, which can indicate poor drainage.
- Structural integrity: If you find significant cracks, spalling, or heaving, consult a contractor or structural engineer before proceeding.
Quick rule: Address any identified issues before installing insulation to ensure the longevity and effectiveness of your project.
Drainage, Grading, and Adjoining Assemblies
Proper drainage and grading are crucial for the performance and longevity of your concrete slab edge insulation. This checklist will help you identify any issues that may affect your project.
- Surface drainage: Ensure water drains away from the slab edge to prevent moisture buildup.
- Slope: Confirm that the patio or entryway slopes gently away from buildings to facilitate water runoff.
- Downspouts: Check that downspouts discharge water far enough away from the slab edge to prevent moisture intrusion.
- Planters: Ensure planters are well-drained and do not hold standing water, which could seep into the slab.
- Thresholds: Inspect thresholds for proper sealing and leveling to prevent water from entering the building.
- Areas prone to moisture: Identify any areas where water tends to pool or stand, such as low spots in the ground.
Quick rule: Remediate any drainage or grading issues before installing insulation to prevent moisture problems and ensure the longevity of your project.
Materials, Tools, and Material Specs Explained
Suitable edge-retrofit insulation options include rigid foam boards such as XPS, polyiso, and EPS, plus mineral wool and termite-resistant coatings or additives. Each type has strengths at the edge: foam boards offer dimensional stability at corners, while mineral wool provides moisture tolerance and some termite resistance, and coatings can add barrier performance. Pair these with appropriate sealants, moisture-control coatings, and compatible finishing materials, and select fasteners and anchors designed for concrete edges to hold insulation securely in place.
Read product specs and manufacturer guidance to interpret R-values, temperature ranges, humidity and curing requirements, warranties, and substrate compatibility. In damp edge conditions, use moisture-curing adhesives and edge-cap seal details that survive exposure to water and freeze-thaw cycles, and choose corrosion-resistant fasteners suited to concrete substrates. For termite-prone areas, consider barriers or treated substrates alongside compatible finishes, and note where built-in termite resistance or treated materials are recommended. Stake: Skipping termite-resistant measures may lead to infestations near the slab edge; quick checks on packaging help verify claims before purchase. Pro install guidance ensures all materials meet local termite resistance expectations.
Insulation types and selection criteria
Choosing the right insulation type is crucial for energy efficiency, durability, and termite resistance. Here are some options:
Rigid foam boards (XPS/Polyiso, EPS): These offer high compressive strength, making them ideal for areas with high foot traffic or heavy loads. They also provide good moisture resistance, especially closed-cell varieties.
Mineral wool: This is a suitable option where fire resistance and sound absorption are priorities. However, it may not be the best choice in moist environments due to its lower moisture resistance.
Termite-resistant and compatible materials
Integrating termite-resistant materials with insulation is vital to prevent pest pathways. Consider the following:
- Treated substrates: These have termiticides incorporated during manufacturing, providing long-term protection.
- Barriers: Physical barriers like stainless steel mesh or termite shields can be integrated with insulation to block entry points.
- Compatible finishes: Use finishes that do not create gaps or pathways for termites, such as seamless coatings or properly installed pavers.
- Insulation with termite-resistant additives: Some insulations have termite-resistant additives. Ensure they are compatible with other materials and follow manufacturer guidelines for integration.
Tools and materials checklist
A well-equipped DIYer or contractor can efficiently retrofit concrete slab edge insulation. Here’s a practical checklist:
- Circular saw: For cutting foam boards to size. Rent or purchase depending on project scale.
- Drill and driver set: Essential for installing fasteners and anchors. Consider cordless for convenience.
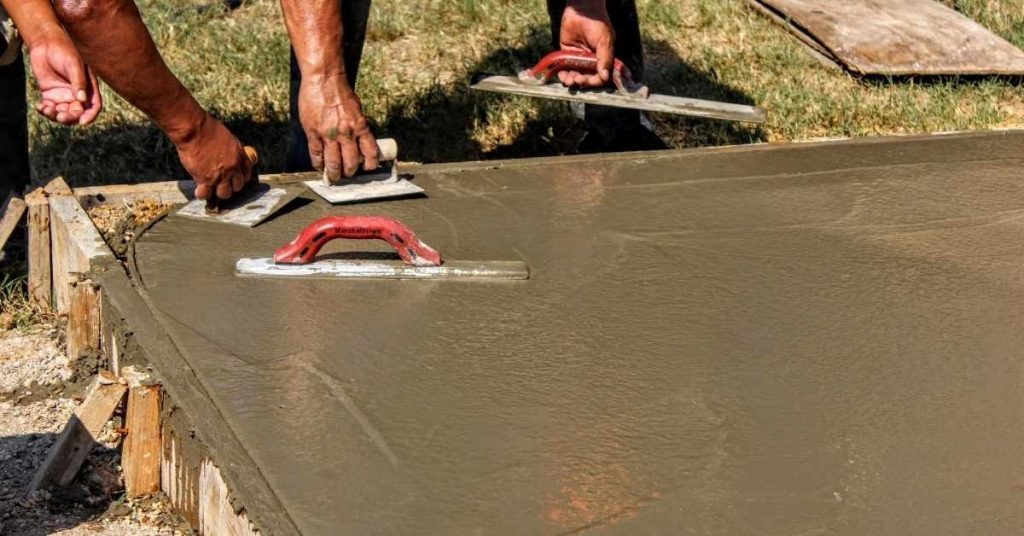
- Trowel and notched trowel: For applying adhesives and leveling surfaces. Choose the right size for your project.
- Levels (bubble, laser): Ensure accurate installation and alignment. Laser levels can be rented or purchased.

Step-by-Step Retrofit Method That Actually Fits Small Patios
The method presents a modular sequence for small patios and entry thresholds, from prep through finish so the work can fit tight spaces. Plan and stage prep, insulation fit, attachment, edge detailing, and sealant cure in short, scalable tasks that respect door thresholds and drainage. Focus on keeping the footprint and transitions clean to prevent water pooling.
For DIY readers, the plan prioritizes low-profile insulation, thin membranes, flexible sealants, and compact cutting tools to work around doors and thresholds. Check surfaces are clean and dry before applying adhesive, and decide which tasks require a professional, such as threshold work or changes that affect load paths. If existing edge insulation must come out, use a utility knife or fine-tooth tool with care, trim thick boards with a compact cutter, and verify the fit around thresholds to maintain drainage.
Step-by-Step Process
The following steps outline a practical sequence for retrofitting concrete slab edge insulation on small patios. This process focuses on realistic DIY actions and jobsite habits to ensure a successful, efficient installation.
- Preparation and safety checks: Review tools, materials, and safety equipment. Consult local codes and standards before starting work.
- Main work – Excavation: Carefully excavate along the slab edge, removing loose soil or deteriorated concrete as needed.
- Substrate preparation: Clean and prepare the substrate for insulation attachment. Patch any holes or cracks.
- Insulation installation: Fit insulation boards against the slab edge, ensuring a tight fit. Use thin epoxy or adhesive membranes to attach the insulation.
- Edge detailing and finishing: Apply flexible caulk along edges and corners. Trim thresholds and steps as needed to maintain proper drainage.
- Sealant application and curing: Apply sealant to joints and seams. Follow manufacturer instructions for curing and restriction timelines.
- Final checks and cleanup: Inspect the installation for any air or moisture infiltration. Clean up the work area, removing all debris and temporary protections.
Preparation and Temporary Protections
Before starting any cutting or excavating, protect existing finishes and maintain safety throughout the project. Reroute foot traffic away from work areas to prevent damage.
Use drop cloths or temporary barriers to protect delicate finishes. Ensure all necessary tools and materials are on hand before beginning work.
Safety first: Wear appropriate personal protective equipment (PPE), including safety glasses, gloves, and sturdy footwear.
Excavation, Cleaning, and Substrate Prep
Carefully excavate along the slab edge using a shovel or small pickaxe. Remove any loose soil or deteriorated concrete to ensure a stable surface for insulation attachment.
Clean the substrate thoroughly to remove dirt, debris, and any contaminants that could hinder adhesion. Use a wire brush or pressure washer as needed.
If loose soil or deteriorated concrete is present, remove and dispose of affected material appropriately. Patch any holes or cracks in the substrate using a suitable repair mortar.
Installing Insulation, Joints, and Edge Details
Fit insulation boards tightly against the slab edge, ensuring a snug fit. Use thin epoxy or adhesive membranes to attach the insulation, following manufacturer instructions.
Seal gaps and voids at joints using appropriate sealant or foam to prevent air and moisture infiltration. Apply flexible caulk along edges and corners to protect the insulation from physical damage.
Trim thresholds and steps as needed to maintain proper drainage and prevent water pooling. Inspect the installation for any defects or issues before moving on to the next step.
Integrating Control Layers: Thermal, Water, Air, and Vapor
Integrating insulation with existing control layers requires careful coordination to prevent new moisture or air paths. Align slab edge insulation with waterproofing, flashing, and the drainage plane, and ensure continuity of air and vapor barriers at joints and terminations.
Assess how the slab edge, wall assemblies, and nearby framing interact with thermal, water, air, and vapor barriers before installing insulation. Ensure surfaces are clean and dry, and use compatible materials while planning terminations to avoid moisture buildup and thermal bridging. A pro check helps verify barrier continuity and identify any damage to repair before retrofit.
Waterproofing and flashing at the slab edge
Proper waterproofing and flashing are crucial to prevent moisture intrusion, protecting both your insulation and nearby assemblies from damage. Begin by inspecting existing waterproofing membranes for gaps or tears.
Ensure that flashing extends beyond the termination point of your insulation. This helps direct water away from the insulation interface, preventing freeze/thaw cycles or rot problems in adjacent assemblies.
If you find any damage or incompleteness in existing waterproofing, repair or replace it before installing new insulation. Use a compatible sealant to address any gaps in membranes and ensure flashing is properly installed.
Air and vapor considerations for entries
Controlling air and vapor movement at door thresholds is essential to prevent moisture buildup, condensation, and mold growth. When adding insulation near these areas, ensure it does not block drainage paths behind flashing or under threshold covers.
Verify that existing air/vapor barriers are continuous and intact. Check for any penetrations or gaps near door thresholds, as these can compromise the barrier’s effectiveness.
If you find a compromised air/vapor barrier, repair or replace it before installing new insulation. Use a compatible sealant to address any gaps in the barrier and ensure proper ventilation where needed to minimize condensation risk.
Pest Resistance and Termite Prevention Details
Identify termite risk factors at the slab edge, including soil contact and moisture intrusion. Avoid gaps that could allow ingress and plan for accessible inspection zones. Keep insulation away from direct soil contact where possible.
Use physical barriers and termite-resistant detailing, such as shields or mesh at the slab edge and non-wood stabilization. Encapsulate edges with appropriate non-wood barriers to minimize concealed galleries. Maintain clear access for inspections without disturbing the barrier.
Detailing to prevent concealed access
To minimize termite risk when retrofitting concrete slab edge insulation, it’s crucial to seal potential entry points. Termites can exploit gaps, cracks, and material junctions to gain access to your structure.
Seams: Ensure that insulation boards fit tightly together without leaving gaps. Use an appropriate sealant to fill any small gaps or cracks at the seams.
Material junctions: Where different materials meet, such as insulation and concrete, flashing, or other barriers, ensure there are no gaps or voids. Seal these junctions with a suitable sealant to prevent termite ingress.
Treatments, barriers, and inspection zones
Integrating termite barriers and maintaining accessible inspection points are essential for effective termite prevention and regular inspections.
- Install termite shields or steel mesh: At the slab edge where soil meets concrete, install a physical barrier to prevent termites from entering. Check local codes and manufacturer instructions for suitable products.
- Maintain clear barrier between earth and insulation: Ensure that the insulation material does not directly contact the soil. This can be achieved by using a non-cellulose stabilizer or maintaining a small gap between the insulation and the ground.
- Design accessible inspection zones: Plan for unobstructed access to the slab edge for annual termite inspections. Use removable or serviceable trim, and ensure clear paths for inspectors.
- Consider moisture management: Ensure proper grading and drainage to keep the slab edge dry. Avoid using mulch directly against the edge, and consider a gravel or stone veneer that resists termite feeding while allowing airflow.
- Regular visual checks: Periodically inspect for signs of tunneling, damaged barriers, gaps behind insulation, and re-seal joints after seasonal weathering. Check local guidelines for recommended inspection frequencies.
- Plan for re-inspection: After heavy rains or soil movement, schedule a follow-up inspection to ensure that the termite barrier remains intact and effective.
Quick rule: Always maintain clear, continuous barriers and unobstructed inspection zones. Regularly inspect and repair any compromised areas to keep your structure protected from termites.
Costs, Scheduling, Safety, and Common Mistakes
Outline cost categories like materials, labor, permits, and contingencies. Provide guidance on budgeting without listing exact prices. Consider lead times and potential delays when scheduling work.
Highlight essential safety practices such as PPE and fall protection. List common mistakes to avoid, including improper edge geometry and moisture neglect. Include simple workmanship checks and quick verification methods for local code or permit compliance.
Cost Components and Budgeting Tips
Retrofitting concrete slab edge insulation involves several cost categories. Understanding these helps plan your project effectively.
Materials include insulation, sealants, fasteners, and any necessary tools. Prices vary by type and quality, but expect to spend around $2-$5 per square foot. Check product labels for specific pricing.
Labor costs depend on the size of your project and local rates. Excavation, cleaning, and installation can range from $10-$30 per square foot. Permit fees and inspections add to the total cost. Consult local contractors for precise estimates.
To budget accurately, compare quotes to ensure they include all necessary items, review local prices, and obtain multiple quotes. If your budget exceeds expectations, re-evaluate material choices or project scope based on manufacturer instructions and local rules.
Safety Practices and When to Hire Pros
Prioritizing safety ensures a successful, injury-free project. Here are key safety steps and when to hire professionals:
Protective gear includes gloves, goggles, and a hard hat. Always wear appropriate PPE during excavation and installation.
Safe cutting and excavation practices prevent injuries. Never cut into utility lines or remove soil too quickly, which can cause cave-ins.
Some tasks require licensed contractors. For example, gas or electrical work should be done by professionals to ensure safety and compliance with local codes. If your task involves heavy machinery or hazardous materials, hire a licensed professional.
Common Mistakes and Visual Checkpoints
Identifying and avoiding common errors ensures a durable, effective retrofit. Here are frequent installation errors and visual checkpoints:
- Insulation gaps: Inspect for any spaces between insulation boards or at joints. Gaps allow heat transfer and moisture intrusion.
- Poor drainage: Ensure the slab edge has proper slope to direct water away from the structure. Check for low spots where water could pool.
- Missing flashing: Verify that all edges have been flashed to prevent water penetration behind the insulation.
- Improperly installed components: Check that sealants, fasteners, and other details are correctly installed according to manufacturer instructions.
Regularly inspect work throughout the project. If visible issues are present, address them promptly to prevent further damage.
Conclusion
A successful retrofit keeps the edge insulation durable, visually clean, and safe to use. Prioritize safety, follow the established standards, and test changes in a small area before wide application to avoid costly mistakes.
Begin with a simple, workable checklist: confirm the local codes and permits, do a site check and pre-retrofit assessment, verify material specs and tool readiness, plan the installation step by step and install the control layers in the proper order, address water and pest considerations, and schedule curing and final checks with clear milestones while testing moisture and insulation performance along the way.
Common mistakes to avoid include skipping moisture testing and edge detailing, rushing the installation without following manufacturer instructions, and neglecting proper edge sealing or drainage. Always wear basic PPE, ventilate as needed, and work only within your comfort and skill level; if anything seems risky or unclear, pause and recheck the instructions and local rules before proceeding.
When to call a professional: if you encounter unfamiliar codes, structural concerns, or complex moisture paths, or if the project requires significant remediation beyond a straightforward retrofit. In any case, proceed carefully, document progress, and keep safety and long-term durability at the forefront. With careful steps, you’ll gain a solid, lasting edge insulation that fits small patios and entries.
FAQ
What design features help resist termites in foundations, walls, and slabs?
Choose materials and details that minimize gaps and moisture traps under the slab. Look for edge detailing that blocks soil contact with the interior and uses a continuous barrier where practical. Check manufacturer guidance for acceptable configurations and compatible flashing or sealants.
What should be considered to reduce termite risk when retrofitting slab edge insulation for small patios or entries?
Ensure the insulation strategy maintains a dry base and prevents soil-to-slab contact where possible. Use drainage and moisture control features to reduce attractive conditions for termites. Always follow the product label and local rules for installation around foundations and edges.
What steps are included in a termite-resistant slab edge insulation retrofit for small patios?
Plan to install edge insulation along the perimeter with proper clearance to allow water drainage and air flow. Seal joints and protect vulnerable edges from contact with soil or mulch. Verify installation methods match manufacturer instructions and do not violate any local requirements.
How can I verify code compliance and avoid common mistakes in termite-related retrofit work?
Consult the project’s applicable guidance and ensure all components are installed per the label or manufacturer instructions. Document materials and methods in line with local rules. If in doubt, confirm details with a building professional or inspector before proceeding.