
Introduction
Resealing only traffic lanes means applying a seal coating to just the lane surfaces to protect them and restore color, without sealing adjoining areas. Do the prep, mask the edges, and keep the sealer off markings and shoulder while you work. Check the product label for surface prep steps, cure time, and any local restrictions before you start.
Use the SEE process—Search your plan, Evaluate the site safety, then Execute with controlled passes to avoid roller bands. Keep lane travelers visible, watch blind spots, and plan for safe turning and separation when you work. Prioritize collision avoidance and finish by inspecting edges for uniform gloss and proper adhesion.
Key takeaways
- Apply the SEE process: Search lane condition, Evaluate surface, Execute with safety plan.
- Schedule reseal during low traffic windows and lane isolation for safer work.
- Lane-splitting techniques: create narrow work bands and clearly mark edges to reduce overlap.
- Watch blind spots and maintain visibility with signs and cones throughout the job.
- Collision avoidance: plan passes, maintain safe distances, and communicate with flaggers.
- Prep: edge treatment to avoid roller bands and lap marks during application.
Table of Contents
- Introduction
- Key takeaways
- Why Reseal Only Traffic Lanes?
- Planning and Scheduling the Job
- Surface Assessment and Preparatory Testing
- Tools and Materials Checklist
- Prep Work: Cleaning, Repairs, and Edge Treatment
- Application Techniques to Avoid Roller Bands and Lap Marks
- Quality Control and Visual Checkpoints
- Common Problems, Troubleshooting, and Remediation
- Conclusion
- FAQ
Why Reseal Only Traffic Lanes?
Resealing only the lanes makes sense when the wear is confined to wheel paths, with light to moderate cracking or isolated surface oxidation. It helps avoid a full-width rebuild when broader distress is not evident. Check the label or manufacturer guidance to confirm suitability for lane-focused work.
weigh the tradeoffs between lower cost and faster turnarounds versus potential texture or gloss mismatches at lane boundaries. Consider long-term maintenance cycles and whether the selected sealer will address active issues without creating new edge problems. Use criteria like traffic volume, lane width, and observed cracking patterns to decide if a partial reseal is appropriate and compatible with adjacent sections.
When lane-only is the right choice
Lane-only resealing is your best bet when you’ve got isolated wear, light to moderate cracking, or oxidation confined to traffic lanes. It’s also great for budget-conscious projects or staged maintenance plans.
But remember, lane-only isn’t always the answer. If you see signs of broader pavement distress – like alligator cracks, rutting, or depression – it’s time for full-width resurfacing. Patching those up won’t cut it in the long run.
Another no-no is resealing lanes with active issues like oil spills, vegetation growth, or pump-scar damage. You’ll just be covering up problems that’ll come back to bite you later.
Trade-offs and performance expectations
Lane-only resealing gives you a quick, cost-effective fix. But it’s not without its trade-offs. You might see some texture or gloss differences at lane boundaries compared to adjacent full-width sections.
The lifespan of your partial reseal depends on how well you prep the surface and the traffic volume. Expect around 3-5 years under moderate traffic, less with heavy trucks. Keep in mind, you might need touch-ups before a full resurface down the line.
As for looks, lane-only reseals won’t match the gloss of new asphalt. But they’ll still improve traction and reduce water intrusion. And hey, it’s better than letting your lanes crumble away!
Planning and Scheduling the Job
Develop a traffic control plan that specifies when lane closures are permitted, signage, cones, barriers, and flaggers. Identify who signs off on plans and what approvals are needed from the local authority. Verify documents and ensure the plan aligns with agency requirements.
Look for ideal weather windows and surface conditions before work begins. Note temperature, humidity, dew point, and sun exposure as guidance for prep and sealing. Plan for curing, re-opening times, and any stakeholder communications to keep the project orderly.
Traffic Control and Lane Closure Strategies
Planning traffic control is crucial to keep everyone safe and minimize disruption. Here’s how:
Signs and Cones: Use clear, visible signs and cones to guide traffic around the work zone. Place them well in advance of lane closures to give drivers time to prepare.
Phasing Work: Break down your job into phases. Close lanes one at a time if possible. This keeps traffic flowing while you work safely.
Communication: Keep road users informed. Use variable message signs, local media, or social media to alert drivers about lane closures and delays.
Timing and Environmental Conditions
Weather and surface conditions play a big role in successful resealing. Here’s what to check:
Temperature: Ideal application temperature is typically between 50°F (10°C) and 90°F (32°C). Check the forecast and plan accordingly.
Humidity and Dew Point: High humidity or dew point can affect curing. Aim for conditions below 85% relative humidity and a dew point below 60°F (15°C).
Surface Moisture: Check the surface before you start. It should be dry to the touch. If it’s wet or damp, wait until it dries out.
Surface Assessment and Preparatory Testing
Start with a frontline condition survey of current pavement, existing sealant, texture, and high-traffic wear zones to establish a compatibility baseline. Record substrate type and the state of the binder to determine bonding expectations. This helps decide if the planned resealant will perform as intended.
Perform adhesion tests in representative zones and evaluate porosity to predict gloss behavior and penetration. Check moisture, dew point, and ambient conditions to outline drying and profiling steps. Document results and outline precautions and contingencies for possible rework.
Identifying existing sealers and substrates
Before you start, figure out what’s already on your pavement. This helps avoid incompatibilities.
Sealer type: Look for telltale signs – glossy or matte finish, color, or manufacturer stamps. A quick internet search can help identify unknown sealers.
Emulsions: Check for any soap-like residue or water-based smell. These indicate an emulsion sealer that might not bond well with others.
Contamination: Inspect for oil stains, rust, or other contaminants. These can prevent proper bonding and should be removed before resealing.
Simple field tests to assess readiness
Before you dive in, do some quick checks to ensure your surface is ready for a new sealant.
Adhesion test: Apply a small amount of your planned sealer on a hidden or inconspicuous area. Let it cure, then try to scratch or peel it off. If it sticks well, you’re good to go.
Water absorption test: Pour water onto the surface. If it beads up and doesn’t soak in, your surface is ready. If it absorbs quickly, you might need to address porosity first.
Small patch test: Apply a small patch of sealer in a hidden area. This helps preview the final finish and detect any potential lap or gloss issues before committing to the whole lane.
Tools and Materials Checklist
Gather core tools like a flat squeegee, long-nap or microfiber roller, roller frame, mixing sticks, painter’s tape, drop cloths, gloves, and solvents for prep. Include surface prep gear such as a grinder or scarifier, vacuum or blower, cleaner, and etch solution. Keep a plan for safe cleanup and work area containment.
Choose sealers with low to matte gloss targets and verify compatibility with existing concrete, color, and anti-slip requirements. Consider breathable formulas and appropriate additives to control gloss and edge behavior. Have a patch-testing plan to gauge gloss and roller-band outcomes before full-surface work.
Sealer types and gloss characteristics
Choose the right sealer for your traffic lanes to avoid roller bands and gloss variation.
- Film-forming sealers: Create a protective layer on top of concrete. Good for high-traffic areas, but can show roller marks if not applied correctly.
- Penetrating sealers: Soak into the concrete surface. Less visible seams, but may not last as long in heavy traffic.
- Sheen and viscosity: Lower sheen means less gloss; higher viscosity can lead to roller bands if not applied carefully.
- Check sealer data sheet: Ensure the sealer’s gloss level matches your target (low to matte).
- Avoid high-gloss sealers: They show every imperfection and are harder to apply evenly.
- Test viscosity: Thicker sealers need different application techniques. Check manufacturer guidelines.
- Consider lane width: Narrow lanes may require spray application for even coverage.
- Check compatibility: Ensure the sealer works with your existing concrete, color, and any anti-slip requirements.
Quick rule: Lower sheen, right viscosity, and correct application technique minimize roller bands and gloss variation.
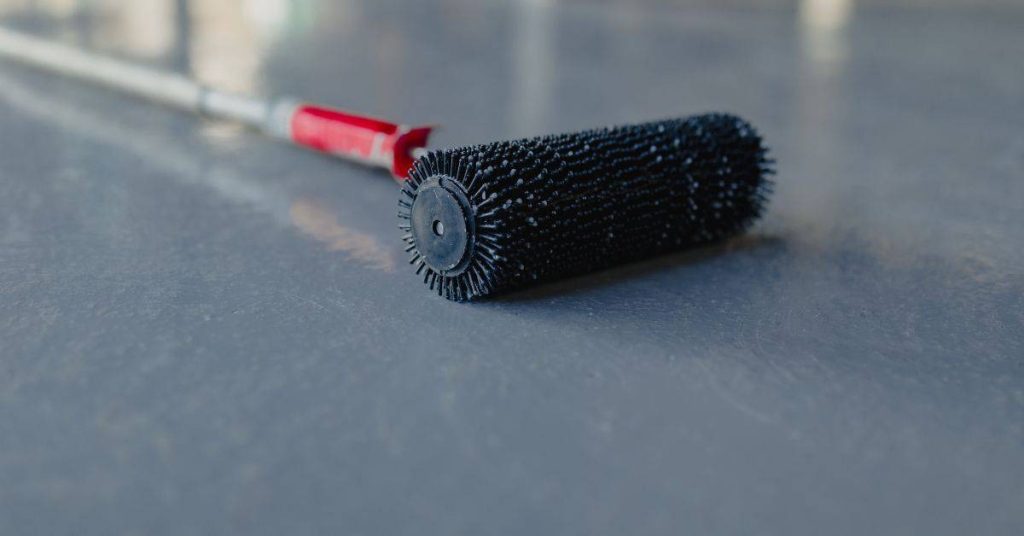
Equipment choices: rollers, squeegees, sprayers
Select the right tools for your sealer type and lane width to minimize roller bands.
- Roller choice: Long-nap or microfiber rollers provide uniform film; shorter naps leave visible marks.
- Roller size: Match roller width to lane width for even coverage. Too narrow leaves stripes, too wide overlaps and causes bands.
- Squeegee or gauge rake: Use for back-rolling technique to minimize roller marks; ensures even film thickness.
- Sprayers (optional): For narrow lanes or penetrating sealers, use airless sprayers for even coverage. Avoid high-pressure sprayers that can cause overspray and waste.
- Avoid cheap rollers: They shed fibers, leave marks, and ruin the finish.
- Check roller condition: Inspect rollers before use; replace if worn or damaged.
- Masking tools: Use painter’s tape and drop cloths to protect surrounding areas from overspray or drips.
Quick rule: Match roller size to lane width, use back-rolling technique, and maintain equipment in good condition for minimal roller bands.

Prep Work: Cleaning, Repairs, and Edge Treatment
Outline the cleaning protocol to remove debris and oils without harming the pavement, listing suitable detergents and safe equipment for concrete surfaces. Include a sequence that protects edge zones from damage during cleaning. Ensure the cleaning step leaves a solid base for repairs.
Specify crack and pothole criteria and repair options such as polymer-modified grout, epoxy injections, or cold-mix asphalt, with process notes for surface prep. Describe edge strategies like feathering or tapering and the tools needed to achieve a seamless transition. Plan timing and traffic control for each step to maximize bonding and longevity.
Cleaning and contaminant removal
The first step is to remove all debris, dirt, and contaminants from the traffic lanes. Use a stiff-bristled broom or a power sweeper for this.
Oils and grease are your biggest enemies here. They prevent sealers from bonding properly. Use a concrete degreaser specifically designed for oil stains. Apply it, let it soak for 15-30 minutes, then scrub with a stiff-bristled brush.
Power washing is next. Use a pressure washer with a wide-angle nozzle (40° or more) to avoid damaging the surface. Start at the top of the lane and work your way down. Ensure the surface is completely dry before moving on to repairs.
Repairing defects and feathering transitions
Inspect the lanes for cracks, potholes, or other defects. Repair these before sealing to prevent them from showing through.
Cracks wider than 1/4 inch should be filled with a polymer-modified grout or epoxy injection. For deeper potholes, use cold-mix asphalt. Always follow the manufacturer’s instructions for surface preparation and application.
For a seamless transition, feather the edges of the lanes where they meet the adjacent pavement. This can be done with a saw or grinder equipped with a rasp blade. The goal is to create a smooth taper that blends into the existing pavement.
Remember, repairs need time to cure before sealing. Follow the manufacturer’s recommended curing times and keep traffic off the lanes during this period.
Application Techniques to Avoid Roller Bands and Lap Marks
Set a target gloss and uniform appearance for all lanes and plan how to verify it visually during and after application. Keep the workflow consistent to prevent texture differences. Establish clear criteria for acceptable results before proceeding.
Detail the overlap sequencing with a lane-specific workflow and define starting and ending points to minimize roller bands. Select tools and specify hand technique, grip, angle, and pressure to maintain even film build. Outline speed and lift-off timing to prevent laps and ensure edge control.
Sequencing and wet-edge maintenance
Start at the farthest point from your exit. Work backwards to avoid stepping on applied sealer.
Keep a wet edge. Don’t let the sealant dry out before applying the next pass. This prevents lap lines and ensures uniform gloss.
Maintain a consistent speed. Too fast, you’ll leave gaps; too slow, you’ll over-apply.
Wait 5-10 minutes between passes for optimal blending.
Roller and applicator technique tips
Use a 6-inch nap roller for most surfaces. For textured or porous surfaces, use an 18/20 nap.
Apply light pressure. Too much, you’ll leave marks; too little, you won’t cover evenly.
Maintain a consistent stroke length and angle. Short strokes at edges, longer in the middle.
Switch to a squeegee or brush for tight corners and edges.
Blending and edge-diffusing tactics
For feather coats, thin the sealer at edges. This reduces buildup and blends with adjacent lanes.
Use a blending pass. Apply a thin coat over dried edges to smooth transitions.
At corners, apply sealer in an ‘M’ or ‘W’ pattern to ensure full coverage and avoid ridges.
If you see a mismatch, touch up immediately. Let it dry, then blend with a light pass.
Quality Control and Visual Checkpoints
Define a standard gloss range and a consistent measurement method to detect differential sheen. Use the same instrument and procedure to compare lanes. Schedule checks during application and after cure to catch issues early.
List visual indicators such as bands, streaks, or tint shifts and document corrective actions. Keep field logs with batch numbers, substrate conditions, and environmental data. Include photo records to support warranty or QA decisions.
Visual and Tactile Inspection Points
After application, perform a quick visual and tactile check to ensure quality. Here’s what to look for:
- Streaks: Look for any visible lines or marks left by the roller.
- Texture differences: Feel the surface with your hands; it should be smooth and even.
- Sheen variation: Check if the gloss is consistent across the area.
- Pinholes: Small craters or holes indicate bubbles trapped under the sealer.
- Splotches: Uneven application can leave splotchy areas with different sheen.
- Color tint shifts: Check for any discoloration that might indicate contamination.
- Uneven sheen: Gloss should be consistent; variations may indicate roller bands or improper curing.
- Mark problem areas: Use chalk or tape to flag issues for immediate attention.
Quick rule: If you find any of these issues, address them promptly to prevent warranty claims.
Simple Field Measurements and Records
Track curing progress and decide if touch-ups or recoats are needed with these simple checks:
- Dry to touch: Check if the surface feels dry. It should not leave residue on your fingers.
- Cure time: Follow manufacturer’s guidelines for full cure time at given temperature and humidity.
- Traffic exposure: Limit foot or vehicle traffic until fully cured to prevent damage.
- Gloss consistency: Use a gloss meter to check if readings are within target range (see earlier section).
- Document results: Keep records of date, time, batch/kit numbers, substrate conditions, ambient conditions, and gloss readings.
- Photograph findings: Take pictures with a scale to document results for warranty or QA purposes.
- Temperature and humidity: Monitor these factors as they affect cure time and final gloss.
- Traffic exposure: Keep records of when traffic (foot or vehicle) was allowed on the surface.
Quick rule: Regular checks help ensure a quality job and prevent costly rework.
Common Problems, Troubleshooting, and Remediation
Identify issues like roller bands, gloss mismatch, lap marks, and adhesion problems, and perform quick checks to gauge severity. Determine which lanes need attention versus full rework based on observed symptoms. Use this quick triage to prioritize your next steps.
Map out likely causes such as prep gaps, product mismatch, or cure timing, and plan remediation from least to most invasive. Include options like spot cleaning, surface profiling, bonding primers, or re-application, and set reasonable recoat windows and curing expectations.
Fixing roller bands and lap lines
Fresh defects can be addressed by lightly buffing the area with a random orbital sander to remove excess sealant. Use fine grit (e.g., 120-grit) sandpaper and work in small sections.
For cured defects, use a targeted reapplication technique. Apply a thin coat of sealant along the affected line using a small roller or brush. Feather out the edges to blend with the surrounding area.
Note: Always wear appropriate PPE when sanding and working with sealants. Ensure proper ventilation and follow manufacturer’s guidelines for safe handling.
Addressing gloss mismatch after curing
For minor gloss mismatches, apply a thin blending coat of sealant over the entire lane. This can help even out the sheen and provide a consistent finish.
If the mismatch is significant, consider using a matte additive to reduce the gloss level of the affected area. Follow the manufacturer’s instructions for proper mixing and application.
Note: If partial fixes are insufficient or the mismatch is severe, a full-lane reseal may be necessary. Always perform a test patch first to ensure compatibility with the existing sealant.
Conclusion
Getting this right keeps the lanes looking good, lasting longer, and it protects your investment when traffic starts again. The core idea is simple: prep thoroughly, apply in controlled passes, and watch for edge integrity and uniform coverage to prevent future maintenance headaches.
Before you start, verify the forecast and your window, map out the lanes, clean and assess the surface, test a small edge area, mix and apply per label instructions, work in thin, continuous passes with a wet edge, avoid puddling or lap marks, and check for roller bands or color variation as you go. Keep the area safe by shutting down traffic, wearing eye protection and gloves, ventilating well, and keeping kids and pets away until the sealant cures.
Two common mistakes to avoid are skipping proper edge treatment and rushing coats or drying times, plus applying too thick a single pass. Always stop and re-check your prep, use clean tools, and follow the curing times. A simple safety rule: never work in temperatures outside the recommended range or when rain is imminent, and never expose fresh material to traffic until it is fully cured.
If you encounter damaged substrate, large cracks, or unpredictable edges that won’t stay put, or if you’re unsure about the weather window, call a professional rather than forcing it. Stay disciplined, stay safe, and you’ll finish with a smooth, durable surface that resists future problems and keeps your lanes looking sharp.
FAQ
How do I use the SEE process when resealing traffic lanes?
Search the road for any salt, debris, or loose edges. Evaluate the lane’s edge lines, surface condition, and traffic flow before you start. Execute with a clear plan: creases and gaps first, then the center, and keep the area dry and clear as you work.
What should I consider for lane splitting and safety while resealing?
Split the work area into manageable segments and keep vehicles away from the fresh seal as long as the manufacturer suggests. Use dark nicks or cones to create a safe buffer and never extend work into active traffic lanes. If you can’t secure a safe path, defer the job until traffic is lighter or use a certified contractor.
How do I handle blind spots and remaining visible on the road during prep and sealing?
Plan your lane gaps so you’re not bottlenecking drivers behind you. Use visible edge markings or contrasting tape to keep the lane boundary clear until the seal dries. Keep your lookout steady and don’t rely on guesswork—watch traffic and be ready to pause if someone veers near.
What should I check if weather or surface conditions change while sealing?
Check the manufacturer instructions for surface temp and moisture guidelines. If conditions shift, pause and reassess; end results depend on proper curing and adhesion. When in doubt, consult the label and local rules before continuing.