
Introduction
Repairing stucco control joints means deciding whether to reseal the joint or replace the accessory. This article helps you assess condition and choose the practical path for a DIY project. You’ll find plain-language steps to reseal or replace without guesswork.
Watch for signs like wide cracks, loose trim, or staining that suggest movement or moisture issues. Based on what you see, resealing is often used for minor gaps while replacement is needed for damaged, twisted, or nonfunctional joints. Always check product labels and local rules or instructions from the manufacturer to pick the right sealant or joint type.
Key takeaways
- Identify signs of stucco control joint damage: cracks, gaps, bending, moisture staining, loose accessories.
- Choose reseal vs replace: reseal if joint remains aligned; replace if deformed or compromised.
- Use compatible sealants: weatherproof, flexible, paintable; follow manufacturer and substrate specs.
- Prepare joint properly: clean, dry, remove old sealant, and prime as required.
- Step-by-step resealing: cut tip, load cartridge, seal in straight lines, tool, cure per label.
- Safety and maintenance: wear PPE, avoid wind-blown dust, inspect quarterly, recheck after storms.
Table of Contents
- Introduction
- Key takeaways
- Why Control Joints and Their Accessories Matter
- Diagnosing: When to Reseal Vs Replace the Accessory
- Tools, Materials, and Material Specs Explained
- Preparing the Joint for Resealing or Replacement
- How to Reseal Stucco Control Joints: Step-by-Step
- How to Replace a Control Joint Accessory: Step-by-Step
- Cost, Scheduling, and Scale Considerations
- Common Mistakes, Safety Considerations, and Long-Term Maintenance
- Conclusion
- FAQ
Why Control Joints and Their Accessories Matter
Control joints in stucco are designed to absorb movement from temperature changes, wind, settling, and other structural shifts. Accessories like backer rods, sealants, and flashing work as a system to seal joints and manage moisture. When any part of the system fails, cracking and moisture intrusion become real risks to the substrate.
This section explains how joints control cracking by allocating movement and guiding it away from the cladding. It also covers the role of accessories in preventing water entry and protecting insulation and air barriers. Common failure modes to look for include degraded sealant, joint debonding, and signs of substrate moisture that hint at bigger problems ahead.
What a control joint accessory does
A control joint accessory’s job is to manage movement and moisture at your stucco’s joints. It’s not just about looks, it’s about performance.
First off, backer rods fill the joint gap. They absorb seasonal and structural movement, keeping cracks minimal and random. Without them, you’d see more force transferred to the cladding, causing unwanted cracks.
Then, sealants come in. They bond with the backer rod and stucco, creating a flexible barrier that keeps water out. The right sealant is compatible with stucco, bonds well, and can handle joint movement without tearing.
Lastly, flashing diverts water away from joints. It’s like a tiny roof over your joint, preventing water intrusion and substrate damage. Without it, water could seep in, leading to all sorts of problems.
Common failure modes and consequences
Control joint accessories fail for various reasons. Here are some common ones:
Adhesive failure happens when the sealant doesn’t bond properly with the stucco or backer rod. This lets water in, leading to moisture intrusion, mold growth, and efflorescence.
Tearing occurs when the sealant can’t handle joint movement. It tears, creating gaps that let water in, accelerating finish failure, and causing more cracks.
Rust on flashing indicates water’s been getting in. This weakens the flashing, leading to further water intrusion and substrate damage.
Substrate delamination happens when moisture gets behind the stucco, breaking its bond with the substrate. This can cause the stucco to peel off, leaving your home vulnerable to more water damage.
Diagnosing: When to Reseal Vs Replace the Accessory
Develop a clear diagnostic framework that categorizes condition as resealable or replace-worthy based on visible damage, movement behavior, and water intrusion indicators. Establish practical inspection priorities to guide the decision process. Document findings to support the chosen path.
Focus on movement patterns, crack width changes over seasons, and signs of moisture behind the accessory. Look for staining, efflorescence, mildew, or musty odors that influence whether resealing suffices or a full replacement is needed. Create a plan with photos and measurements to justify the path.
Visual and tactile inspection checklist
Before you decide to reseal or replace an accessory, use this checklist to thoroughly inspect its condition. This will help you identify any underlying issues that could cause expensive rework down the line.
- Check for adhesive loss: Look for areas where the sealant has pulled away from the surface. Run your finger along these spots to feel for voids or gaps.
- Inspect for gaps: Visually check all corners and joints for any gaps that could allow water intrusion. Use a straight edge to confirm they’re tight.
- Look for mold or staining: Discoloration, especially green or black spots, indicates moisture trapped under the sealant, which can lead to further damage if left untreated.
- Examine accessory deformation: Check for any warping, cracking, or other signs of physical damage that could compromise the seal’s integrity.
- Test bond strength: Gently pull on the sealant with your fingers to ensure it’s securely bonded to the surface. If it feels loose, there may be a problem with the adhesion.
- Feel for voids: Run your finger along the sealant, pressing gently. Any soft spots or areas that feel hollow could indicate hidden damage or improper installation.
- Check for efflorescence: A white, powdery substance on the surface can signal water trapped beneath the sealant, which can cause it to fail over time.
- Inspect for movement: Gently push and pull on the accessory to ensure it’s securely attached. Any movement could indicate a problem with the installation or the accessory itself.
Quick rule: If you find any of these issues, don’t just reseal over them. Addressing the underlying cause is crucial for a lasting repair.
Signs that indicate replacement is required
After your visual and tactile inspection, here’s what to look out for that tells you it’s time to replace, not reseal:
Detached or loose accessory: If the accessory (like a flashing or drip edge) is no longer securely attached, it can’t do its job. Check for any screws or nails that have popped out or are missing.
Corrosion or rust: Once you see red or orange flakes, it’s usually too late to save the accessory with just a reseal. Corrosion weakens metal and can cause leaks.
Continuous leakage: If water keeps coming in despite your best efforts to reseal, it’s time for a replacement. Check under the accessory and around it for signs of persistent water entry.
Substrate loss or damage: If the underlying surface (like plywood or OSB) is missing, damaged, or rotted, no amount of resealing will fix the problem. You’ll need to replace both the accessory and the substrate.
When to call a structural or moisture specialist
If you’ve spotted any of these red flags during your visual and tactile inspection, don’t DIY – it’s time to bring in the pros:
Widespread substrate decay: A few cracks here and there? No big deal. But if you’re seeing extensive damage or crumbling throughout your accessory, that’s a sign of serious trouble. It could indicate structural issues or moisture problems that need expert attention.
Interior moisture: Water inside your accessory is never a good sign. If you’re finding dampness, mold, or mildew, it’s time to call in a moisture specialist. They can diagnose the cause and recommend appropriate repairs.
Structural cracks: Hairline cracks are normal. But if you’re seeing large, diagonal, or stair-step cracks, that’s a sign of serious structural issues. Don’t wait – call a structural engineer right away.
Remember, it’s always better to err on the side of caution. If you’re unsure about any damage, don’t hesitate to consult with a professional. They can provide peace of mind and prevent small problems from becoming big, expensive ones.
Tools, Materials, and Material Specs Explained
Assemble essential tools and PPE before starting, including appropriate eye, skin, and respiratory protection, along with knives, caulking guns, and trowels. Note when ventilation or dust control is required. This prep reduces field surprises and protects you and the work.
Choose sealants, backer rods, and replacement accessories by understanding joint width, exposure, and substrate condition. Always consult manufacturer datasheets and relevant standards to confirm compatibility and curing requirements. Remember to verify local code or warranty implications before proceeding.
Tools and PPE checklist
Before starting any repair work, ensure you have the right tools and personal protective equipment (PPE) to keep yourself safe and get the job done efficiently.
- Safety glasses: Protect your eyes from debris and chemicals.
- Respirator or dust mask: Required when grinding, sanding, or disturbing old sealant. Prevents inhaling harmful particles.
- Work gloves: Essential for handling materials and protecting hands from cuts and irritants.
- Utility knife: For trimming backer rods and cutting sealant tubes.
- Caulking gun: To apply new sealant.
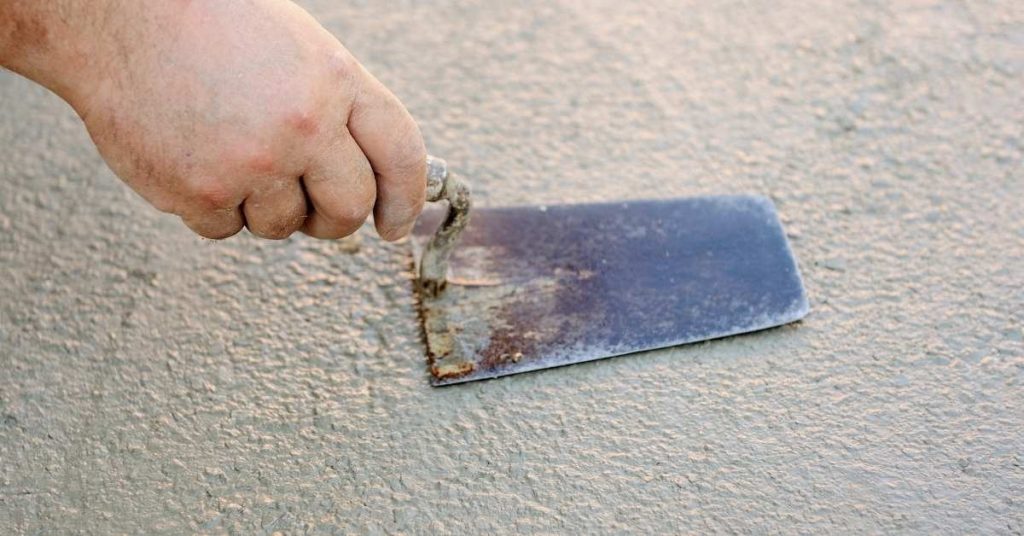
- Putty knives (various sizes): For scraping off old sealant, preparing edges, and smoothing out new sealant.
- Trowels (small to medium): Useful for applying sealant and spreading it evenly in the joint.
- Solvent wipes or rags: To clean hands, tools, and surfaces as needed.
- Measurement tape: Essential for determining joint width and accessory size.
- Heat gun/torches (optional): For softening old sealant to facilitate removal.
- Grinders or oscillating tools (optional): To remove stubborn old sealant or prepare edges quickly.
- Pry bars: Helpful for removing damaged accessories and preparing the substrate.
Quick rule: Always wear appropriate PPE when working with chemicals, sharp tools, or during tasks that generate dust.
Choosing sealants, backer rods, and accessories
Selecting the right materials is crucial for a successful repair. Consider these factors when choosing sealants, backer rods, and replacement accessories.
Sealant: Choose based on joint width (1/8″ to 1/2″), exposure conditions (interior/exterior), UV and weather cycles, and compatibility with stucco and existing finishes. Avoid solvent-based sealants that can interact with paint or damage stucco.
Backer rods: Opt for foam or compressible tape backer rods based on joint width. Ensure they’re compatible with your chosen sealant and provide the required depth and width for proper sealant performance. Use backer rods when replacing accessories to maintain joint integrity.
Accessories: Select deadload trim, control joint covers, or inserts that match your existing finish and are compatible with your stucco thickness. Ensure they’re properly sized and have the right profile to fit seamlessly into your wall’s design.
Preparing the Joint for Resealing or Replacement
Start with a clear decision framework based on joint condition, substrate integrity, movement, and sealant compatibility. This guides the prep work and reduces rework if you choose reseal or replacement.
Next, remove old sealant thoroughly, clean and dry the surface, and inspect the substrate for damage. Repair the lath or substrate as needed, then prepare backing and priming according to the manufacturer instructions. Document moisture test results and condition notes to justify the repair path.
Removing old sealant and cleaning the joint
Start by scoring the existing sealant with a utility knife to break its bond. Then, use a heat gun to soften it for easy removal. Be careful not to damage the stucco or accessory.
Once softened, scrape off the sealant using a flathead screwdriver or a wide-blade putty knife. Work from one end of the joint to the other, ensuring all old sealant is removed.
After removing the old sealant, clean the joint thoroughly. Use a degreasing agent to remove any dirt, oil, or residue. Rinse with water and let it dry completely before proceeding. A clean bonding surface ensures better adhesion of the new sealant.
Pro tip: Avoid using high-pressure washers as they can damage the stucco or accessory.
Substrate and lath repairs before sealing or installing accessory
Inspect the substrate and lath for any damages. If you find torn lath, loose fasteners, or delaminated base coat, repair them before proceeding.
For torn lath, cut out the damaged section and replace it with a new piece. Secure it using appropriate fasteners. For loose fasteners, tighten them or replace if necessary. If the base coat is delaminating, remove the loose material and apply a fresh layer of stucco patching compound.
If the damage is extensive, full replacement might be necessary. Patching is only acceptable for minor damages. Always ensure the substrate and lath are in good condition before sealing or installing the accessory to prevent future failures.
Pro tip: When in doubt about the extent of repairs needed, consult a professional to avoid costly mistakes.
How to Reseal Stucco Control Joints: Step-by-Step
Resealing is typically appropriate for small cracks, minor movement, and intact joint geometry. Large gaps or ongoing water intrusion usually warrants replacement. Use your judgment based on observed movement and moisture clues.
Install a suitable backer rod to control sealant depth, then apply the sealant with careful, low-pressure extrusion in manageable increments. Tool for a clean finish and protect edges with masking as needed. Follow cure-time guidelines and avoid exposure to rain during curing.
Step-by-Step Process
This section guides you through the practical steps to reseal your stucco control joints, from preparation to final checks.
- Inspect and prepare the joint: Remove any loose material, contaminants, or old sealant. Ensure the joint is clean and dry for proper adhesion.
- Choose the right backer rod: Select a backer rod with an appropriate diameter (usually 1/4″ to 3/8″) based on your joint width. It should be slightly smaller than the joint to allow for sealant expansion.
- Install the backer rod: Insert it into the joint, ensuring it’s flush with the surface and evenly seated without gaps or skip spaces. Use a flat tool like a trowel or putty knife to press it in.
- Apply masking tape: Place tape along both sides of the joint to create a clean edge for your sealant bead. This helps maintain the desired joint profile and prevents sealant from sticking to the wall.
- Apply sealant: Using a caulking gun, apply sealant at a low pressure, filling the joint completely. Work in manageable increments to avoid air entrapment and ensure proper curing.
- Tool the sealant: Use a damp sponge or your gloved fingers to smooth out the bead, creating the desired joint profile (fully-filled or flushed). Be sure to work quickly before the sealant skins over.
- Allow for initial cure: Follow the manufacturer’s guidelines for initial curing time. Keep the area protected from precipitation and contamination during this period.
- Perform a post-cure inspection: After the initial cure, inspect your work for any missed spots or imperfections. Perform a water test if appropriate to ensure proper sealing.
Installing backer rod and correct joint geometry
The backer rod is crucial for creating the proper sealant depth-to-width ratio and preventing three-sided adhesion. Here’s how to size and seat it correctly.
First, choose a backer rod with an appropriate diameter based on your joint width. The ideal size allows the rod to fit snugly within the joint without leaving gaps or being too tight.
Next, insert the backer rod into the joint using a flat tool like a trowel or putty knife. Ensure it’s flush with the surface and evenly seated without any skip spaces or gaps. This creates a uniform base for your sealant bead.
Proper seating of the backer rod is essential to prevent three-sided adhesion, which can lead to sealant failure. It also ensures that your sealant has enough space to expand and contract with temperature changes.
Sealant application and tooling tips
Proper application and tooling of the sealant are crucial for a successful resealing job. Here are some key tips to keep in mind.
- Application rate: Apply sealant at a low pressure, filling the joint completely. Work in manageable increments to avoid air entrapment and ensure proper curing. A 1/4″ bead is typically sufficient for most joints.
- Tooling technique: Use a damp sponge or your gloved fingers to smooth out the sealant bead, creating the desired joint profile (fully-filled or flushed). Work quickly before the sealant skins over. This helps ensure proper adhesion and prevents an uneven finish.
- Curing time monitoring: Follow the manufacturer’s guidelines for initial curing time. Keep the area protected from precipitation and contamination during this period to prevent premature failure of the sealant.
- Temperature considerations: Apply sealant at temperatures between 40°F and 80°F (4°C and 27°C) for optimal adhesion and cure. If temperatures are outside this range, consider using a sealant specifically designed for low or high-temperature applications.
- Moisture concerns: Ensure the joint is dry before applying sealant. Moisture can interfere with adhesion and cause premature failure of the sealant. If moisture is present, address the underlying issue before resealing.
How to Replace a Control Joint Accessory: Step-by-Step
Pre-checks should confirm the exact joint location, stucco type, and any flashing or moisture issues that could affect replacement. Plan for proper access and protection of surrounding finishes.
Carefully remove the old accessory, inspect attachment points, and assess substrate condition. Choose a compatible replacement that preserves drainage and movement, then install with correct fasteners and sealant, ensuring flush alignment and proper tie-in to the stucco system. Finish and cure as required, and test for leaks.
Step-by-Step Process
This section guides you through replacing a control joint accessory, from preparation to final checks.
- Pre-checks: Identify the exact location, stucco type, backfill condition, and moisture issues. Gather tools and materials.
- Safe removal: Follow the checklist below to remove the old accessory without damaging the substrate.
- Substrate assessment: Inspect attachment points, substrate stability, weep paths, and tie-ins as outlined in the next subsection.
- Replacement decision: Select a compatible replacement based on material, profile, size, sealant compatibility, and color/texture match.
- Installation sequence: Clean, prime, install the new accessory, ensure seamless alignment, restore drainage/tie-in, apply sealant, finish joints, and allow cure time. Perform a water test or inspection.
Safe removal and substrate inspection
Use this checklist when removing the old accessory to avoid further damage and inspect for hidden issues.
- Protect adjacent finishes: Cover with drop cloths or plastic sheeting.
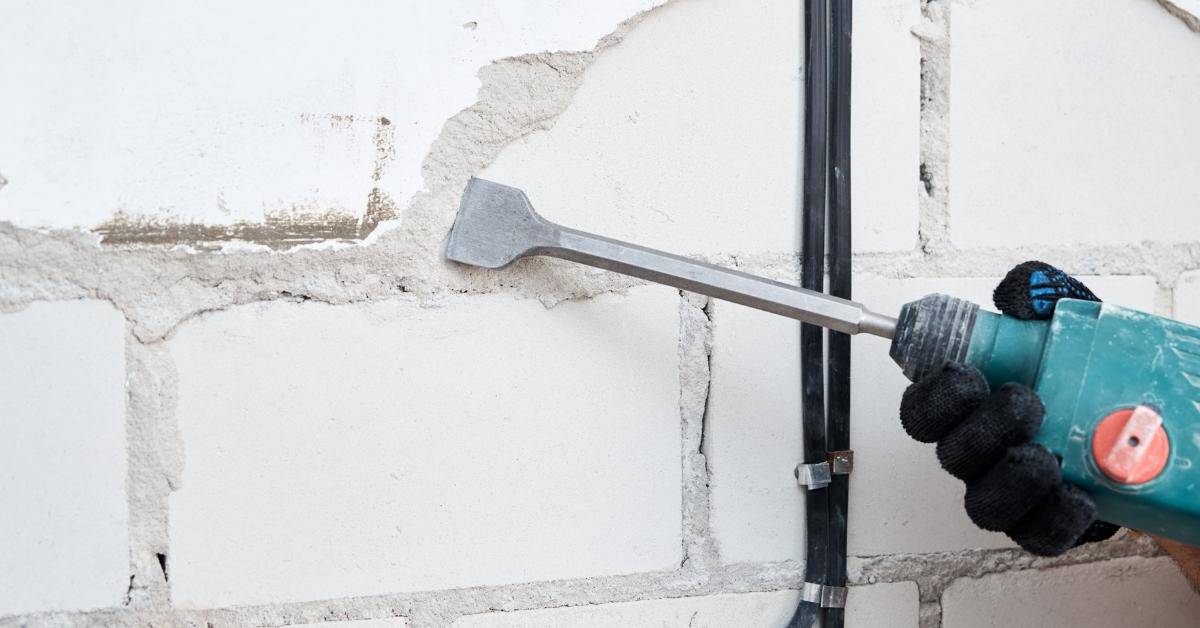
- Carefully remove old accessory: Use a utility knife, chisel, or reciprocating saw. Work slowly to minimize substrate damage.
- Check fasteners: Inspect for corrosion or failure. Replace if necessary.
- Inspect for moisture: Look for signs of water damage, rot, or mold. If present, call a moisture specialist before proceeding.
- Verify substrate stability: Gently probe the substrate around the joint with a screwdriver. It should feel solid and stable.
- Check weep paths: Ensure they’re clear and unobstructed to maintain proper drainage.
- Inspect tie-ins: Check that the existing control joints and wall assemblies are properly tied in and aligned with the joint being repaired.
- Document findings: Note any signs of substrate failure, corrosion, or moisture issues for future reference.
Quick rule: If you find significant substrate damage, rot, or moisture intrusion, stop work and consult a structural or moisture specialist before proceeding.
Installing and integrating the new accessory
The new accessory should be anchored securely to maintain drainage continuity and joint movement. Here’s how:
Anchor methods: Use appropriate fasteners or sealants as recommended by the manufacturer. Ensure they’re compatible with your stucco type.
Sealant integration: Apply a compatible sealant around the accessory to prevent water intrusion and maintain joint flexibility. Follow the manufacturer’s instructions for application and tooling.
Flashing/tie-in details: Ensure the new accessory ties in seamlessly with the existing stucco and wall assemblies. Flashing may be required at the top or bottom of the joint to prevent water intrusion behind the stucco.
Finishing: Tool the sealant to create a smooth, flush finish with surrounding stucco. Allow the sealant to cure according to manufacturer’s instructions before exposing it to moisture or heavy use.
Cost, Scheduling, and Scale Considerations
Reseal projects are generally smaller in scope and faster to complete than full accessory replacements, affecting labor and material timelines. Replacement projects involve larger components or structural considerations and may require more planning. Use these distinctions to set expectations for your project.
Identify cost drivers such as material type, joint dimensions, substrate condition, access, and containment needs. Consider weather windows and curing times when planning, and check local rates for a realistic budget. Include safety measures and potential warranty implications in your schedule.
Cost drivers and rough planning guidance
Repairing stucco control joints varies in scope, affecting labor, materials, and timelines. Resealing is smaller, surface-level work, while accessory replacement involves larger, structural changes.
Labor: Resealing takes less time than replacing accessories. Access difficulty may increase labor costs for both tasks.
Materials: Urethane sealants are cheaper but less durable; epoxy is pricier but longer-lasting. Substrate repairs can add to material costs.
Get multiple quotes and check local price ranges. Don’t rely on fixed figures as they vary by region.
Scheduling, phased work, and large-project logistics
Large projects require phasing work to manage time and resources effectively. Weather windows are crucial for optimal curing.
For resealing: Phase work by sectioning the façade. Allow 24-48 hours drying time between sections. Coordinate with other trades to avoid conflicts.
For accessory replacement: Follow a similar phasing approach, but consider longer curing times (up to 7 days) and potential substrate repairs before installing new accessories.
Always check the weather forecast before starting work. Containment may be needed for safety and cleanliness on larger projects.
Common Mistakes, Safety Considerations, and Long-Term Maintenance
Avoid common errors like poor surface prep, choosing the wrong sealant for movement, or over- or under-sealing. Weather and temperature windows should guide timing, and large movements may require replacement rather than resealing. Don’t overlook substrate moisture or flashing problems that can undermine the repair.
Prioritize safety with fall protection, proper ladder or scaffold use, ventilation, and protective apparel. Establish a maintenance plan with regular inspections and clear visual checkpoints to catch issues early and plan reseal or replacement as needed.
Top mistakes and how to avoid them
Knowing what not to do is half the battle. Here are common errors and how to steer clear.
- Improper joint geometry: Incorrect backer rod size or no backer rod at all can lead to sealant failure. Use the right-sized backer rod for your joint width.
- Poor surface prep: Dirt, grease, or moisture on the substrate can cause sealant adhesion issues. Clean and degrease the area before applying new sealant.
- Wrong sealant choice: Using a sealant with insufficient movement capability can result in cracking. Match your sealant to your joint’s expected movement.
- Inadequate drainage detailing: Water trapped behind the sealant can cause damage. Ensure proper drainage and slope away from the joint.
These mistakes are easy to make but costly to fix. Keep these tips in mind for a successful repair.
Safety best practices
Safety should always be your top priority, especially when working at heights or with chemicals.
Fall protection: Always use a secure ladder or scaffold and wear a harness when working above ground level. Tie off to a secure anchor point.
Respirators and ventilation: Wear a respirator when dealing with dust or solvent-heavy products. Ensure proper ventilation in the work area to avoid inhaling harmful fumes.
Safe tool use: When cutting or removing accessories, use sharp tools and follow manufacturer guidelines to prevent injury. Always wear appropriate eye protection.
Maintenance plan and visual checkpoints
Regular inspections help catch problems early. Use this checklist every quarter to keep your control joints in tip-top shape.
- Cracking or gaps: Visible cracks or gaps indicate sealant failure. Inspect for movement and reapply as needed.
- Joint edge lift or separation: Lifting edges mean the sealant is pulling away from the substrate. This could be due to improper adhesion or excessive joint movement.
- Peeling or blistering sealant: Peeling or blistering indicates moisture intrusion or poor adhesion. Inspect for water damage and reapply if necessary.
- Discoloration or mold: Discoloration or mold growth suggests water penetration. Check for leaks and address any found.
- Water trails or leaks: Water trails or leaks indicate a breach in the sealant. Inspect and reapply as needed.
- UV degradation of coatings: Sun exposure can cause coatings to degrade over time. Inspect for signs of UV damage and recoat if necessary.
Quick rule: If you notice any of these issues, don’t wait – address them promptly to prevent further damage and costly repairs down the line.
Conclusion
Safety, durability, and appearance hinge on making the right call now. If you reseal, you keep the joints flexible and watertight; if you replace, you reset the system for longer life. Either way, steady progress wins over quick fixes that fail under weather or movement.
Make the plan in one clear pass: inspect the joint and accessory condition, assess movement and cracks, confirm compatibility of sealant and accessory, gather the proper tools and materials, prep the joint thoroughly, perform a small test in a hidden spot, then seal or replace following the step-by-step approach, allow proper cure time, and document maintenance for future checks.
Avoid common missteps: never skip joint prep or test patches, don’t use the wrong sealant or an incompatible accessory, and don’t rush cure times or overwork joints. Always wear eye protection and gloves, keep the work area dry, and keep power tools away from wet surfaces. If you’re unsure about moisture intrusion, hidden damage, or structural movement, pause and call a professional—safety and long-term durability come first.
If conditions signal professional help, don’t push ahead alone. When in doubt about scope, or if the project involves large-scale cracks, significant movement, or complex flashing, bring in a pro and keep your project on schedule. Stay methodical, stay safe, and you’ll protect the stucco and its joints for years to come.
FAQ
How can I tell if the stucco control joint or its accessory is damaged?
Look for cracks around the joint, loose or misaligned pieces, and gaps that let water in. If you push on the accessory and it moves, or you see staining or efflorescence nearby, note it as a damage sign.
When should I reseal a joint vs replace the accessory?
Reseal if the joint and surrounding surface are sound and the accessory is firmly in place. Replace if the accessory is cracked, torn, loose, or the sealant consistently fails after cleaning and reapplication.
What types of sealants or materials are appropriate for resealing?
Use a sealant compatible with exterior stucco and the accessory material. Check the product label for weather resistance, cure time, and compatibility. If in doubt, compare options on the manufacturer instructions or ask for a label from the store.
What are the basic steps to reseal or replace a control joint accessory safely?
For resealing, clean the joint, remove old sealant, apply fresh sealant following the bead guidance, and tool it smooth. For replacement, remove the old accessory, clean the joint, install the new accessory per its instructions, and reseal as needed. Always follow the manufacturer instructions and local guidance for any fasteners or flashing concerns.