
Introduction
Mulch dye stains are color residues left on concrete after mulch pigments dry.
Key takeaways
- Act quickly on fresh dye stains; blot, rinse, and avoid spreading.
- Identify stain type before treatment: dye stain, discoloration, or finish film.
- Test cleaner on a small area first to prevent damage.
- Use least-aggressive methods in sequence; wear eye/skin protection, pressure washing may spread dye.
- Neutralize residues after cleaning and RINSE thoroughly before resealing the surface.
- Prevent future staining by removing mulch dye promptly and applying proper sealant.
Table of Contents
- Introduction
- Key takeaways
- How Mulch Dye Stains Concrete: Chemistry and Mechanics
- Identifying the Stain: Fresh Vs Set, Dye Vs Discoloration
- Safety, Precautions, and Preparing the Work Area
- Step-by-Step Removal Methods, from Least to Most Aggressive
- Treating Stubborn or Aged Stains
- Rinsing, Neutralizing, and Verifying Stain Removal
- Preventing Future Mulch Dye Stains and Maintenance
- Resealing, Restoring Appearance, and Long-Term Solutions
- Conclusion
- FAQ
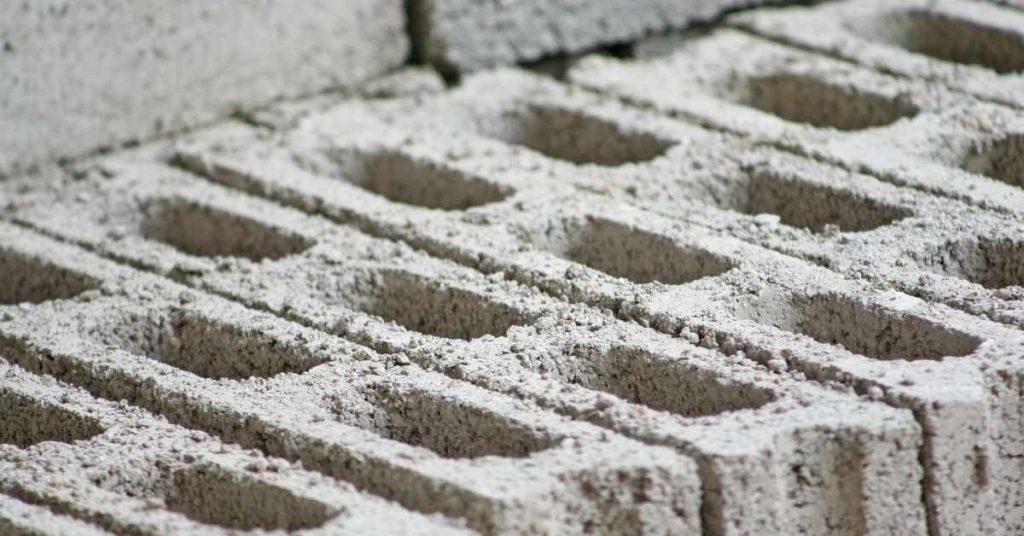
How Mulch Dye Stains Concrete: Chemistry and Mechanics
Mulch dyes use pigments and soluble colorants that transfer to concrete surfaces through contact and moisture. The binders help pigments cling to the surface and within the tiny pores of the concrete.
When dye meets the concrete, color can sit on the surface or soak into the capillary pores. Understanding how pigments and binders interact with the pore structure helps you choose gentler removal steps first and avoid grinding into the substrate.
Types of mulch dyes (water-based, solvent-based, powdered)
Mulch dyes come in three main types: water-based, solvent-based, and powdered. Each type has its own cleaning challenges.
Water-based dyes are soluble in water, making them easier to clean off concrete. But they can still penetrate pores if left too long.
Solvent-based dyes use chemicals like acetone or alcohol as carriers. These can dissolve into concrete’s surface, making removal tougher. They’re also flammable and toxic.
Powdered dyes are the trickiest. They need water to activate, soaking into concrete if not cleaned promptly. Plus, they often contain binders that make them stick like glue.
How concrete composition and porosity influence staining
Concrete’s makeup and age affect how it takes on stains. Newer, uncured concrete is more porous, soaking up dyes like a sponge.
Older, well-cured concrete has fewer pores, but what’s there can still hold dye. Sealed surfaces resist staining better, but no sealer lasts forever.
Porosity isn’t uniform either. Some areas may be denser due to variations in mixing or curing, making stains patchy and harder to remove.
In short, the more porous your concrete and the longer dye sits, the tougher it is to clean.
Role of surface contaminants and weathering
Organic debris like leaves or pollen can trap dyes on concrete’s surface. Moisture helps dyes penetrate, while UV exposure breaks down sealers, letting stains in.
Oxidation – when dye reacts with oxygen – can fix stains deeper into the surface. This makes them harder to remove and may make them look worse than they initially were.
Weathering also wears away at concrete’s surface, exposing new pores for dyes to fill. So, even if you clean a stain, weathering might bring it back.
That’s why regular cleaning and sealing are key to keeping your concrete looking good.
Identifying the Stain: Fresh Vs Set, Dye Vs Discoloration
Look for recent transfer versus old staining by noting how easily the color comes off with a light wipe or rinse. Fresh dye is more likely to lift with simple cleaning if left on the surface.
Deeper discoloration or chemical reactions may require a different approach. If you notice texture changes, staining that persists after cleaning, or uneven color, verify the cause by checking manufacturer guidance or labelling on the product you used.
Visual checkpoints and simple tests
Before you start scrubbing, use these quick checks to understand your stain.
- Fresh vs. set: Fresh stains are still wet or damp; set stains have dried.
- Dye vs. discoloration: Dyes are vibrant colors; discoloration is faded, grayish.
- Blot with water: If stain lifts, it’s mobile and likely removable.
- Rub with alcohol: If color transfers to cloth, it’s dye-based.
- Check edges: Sharp edges mean recent transfer; blurred edges are older.
- Feel the surface: Rough or pitted? Might need repair.
- Look for patterns: Random = random contact; lines = equipment tracks.
- Check weathering: Cracked, peeling stain is old and may be harder to remove.
Quick rule: If unsure, test a small hidden area first.
When the concrete itself has chemically changed
Some stains aren’t just on the surface. Here’s how to spot them.
Etching: Looks like frosted glass, feels rough. Concrete’s been eaten away by acid.
Rusting: Red or orange stains, metallic smell. Steel reinforcement is corroding.
Efflorescence: White, powdery deposits. Salt from within the concrete has leached out.
Chemical reaction: Unusual colors, pitting, or crumbling. Concrete’s reacting with something in the stain.
Safety, Precautions, and Preparing the Work Area
Put on eye protection, gloves, and a respirator or mask as needed for dust or chemical fumes. Ensure good ventilation when using cleaners or solvents indoors or in enclosed spaces.
Contain runoff and protect nearby plants and drains with plastic sheeting or bags. Check local rules for wastewater disposal and never rinse dirty water into storm drains without treatment.
Tools and materials checklist
Before you start, make sure you’ve got everything you need. This list covers the basics.
- Stiff-bristled brush: For scrubbing. Don’t skip; soft bristles won’t cut it.
- Cleaners: Choose one suitable for your stain (see earlier sections).
- Absorbents: Kitty litter or sawdust to soak up liquid spills.
- Neutralizers: For acid-based cleaners, use baking soda to neutralize.
- Pressure washer (optional): For heavy stains. Be careful not to damage the surface.
- Protective gear: Gloves, goggles, and a mask for safety.
- Tarps or drop cloths: To protect nearby surfaces from cleaner splashes.
- Trash bags: For disposing of used absorbents and cleaners.
Quick rule: Always have your safety gear on before handling chemicals.
Spot-testing and protecting adjacent surfaces
Before diving in, test your cleaner on a small, hidden area. This ensures it won’t damage the concrete or discolor it further.
To test, apply a small amount of cleaner to an inconspicuous spot, let it sit for the recommended time, then scrub and rinse. Check for any adverse reactions.
Next, protect nearby surfaces. Use painter’s tape and plastic sheets to shield paintwork, and cover plants or landscaping features that could be harmed by cleaner runoff. Also, consider diverting water away from drains to prevent blockages or contamination.
Pro tip: Always test cleaners on a small area first. It’s better to find out they don’t work before you’ve spent hours scrubbing.
Step-by-Step Removal Methods, from Least to Most Aggressive
Start with the gentlest option possible, such as water rinsing and a mild detergent with mechanical agitation. Use a soft-bristle brush and avoid harsh scrubbing that could scratch the concrete.
If the stain persists, consider optimized cleaning products per label instructions, then attempt repeated light passes. Escalate only if necessary and in small, controlled increments to preserve the surface integrity.
Step-by-Step Cleaning Process
Follow this clear sequence to safely and effectively remove mulch dye stains from your concrete, starting with preparation and ending with final checks.
- Wear safety gear: gloves, goggles, and old clothes. Keep a first aid kit nearby.
- Prepare the area: wet down surrounding plants and cover adjacent surfaces to protect them from cleaner splash.
- Choose your cleaning method based on stain type (see previous sections).
- Apply cleaner, scrub gently but firmly, let it soak (as per product instructions), then rinse thoroughly with clean water.
- Inspect the result. If needed, repeat or escalate to a stronger method. If unsure, consult a professional.
Mild cleaners and scrubbing
Start with gentle cleaning methods to lift fresh or surface-level dye stains without harming your concrete. Mild detergents and manual agitation are your friends here.
Mix a solution of warm water and mild dish soap. Dip a stiff-bristled brush into the solution, then scrub the stain in circular motions. Work from the outer edges towards the center to avoid spreading the stain.
Tip: For tougher stains, let the soapy water sit on the stain for 15-30 minutes before scrubbing. Rinse thoroughly with clean water afterwards.
Oxidizing and alkaline cleaners
For set-in stains, consider using oxygen-based cleaners or alkaline detergents to break down dye molecules. These work best on older, dried-out stains.
Follow the product instructions for mixing and application. Typically, you’ll apply the cleaner, let it soak (usually 15-30 minutes), then scrub gently before rinsing off with clean water.
Safety note: Always wear protective gear when handling chemicals. After use, rinse your tools thoroughly to prevent damage from prolonged contact with the cleaner.
Solvent-based and specialty stain removers
When mild cleaners aren’t cutting it, consider solvent-based or commercial dye removers. These are stronger but also risk damaging concrete if not used correctly.
Before application, test the cleaner on a small, hidden area to ensure it doesn’t damage your concrete. Follow the manufacturer’s instructions for mixing and application. Ventilate the area well during use and dispose of the cleaner responsibly.
Pro tip: Solvents can be flammable. Keep them away from heat sources and open flames.
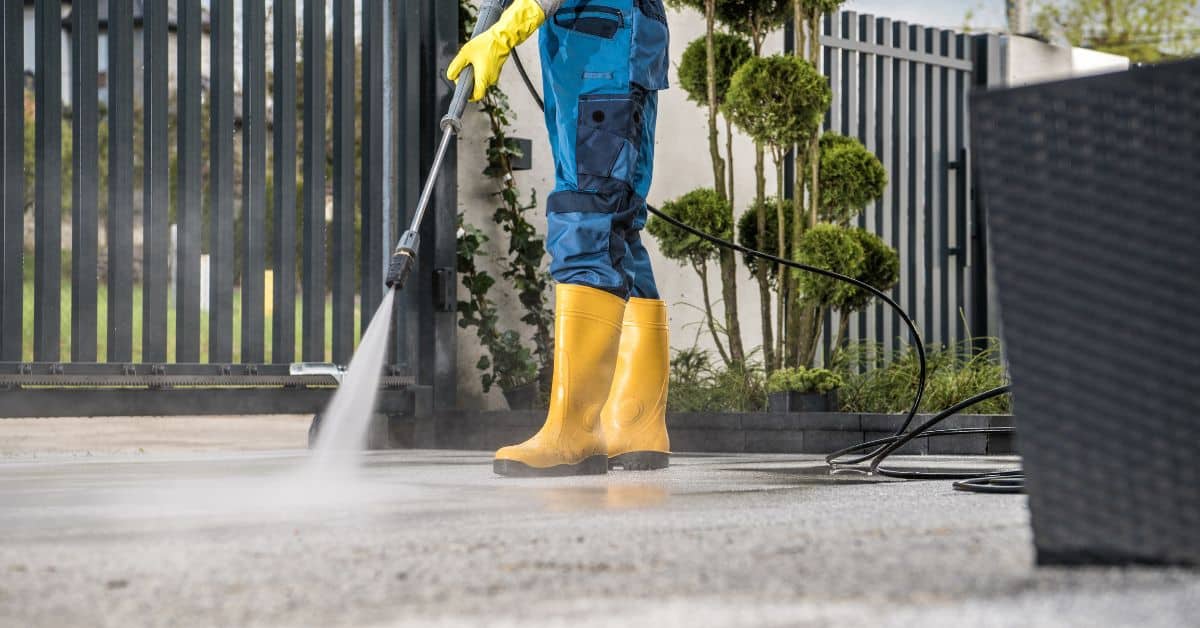
Pressure washing and mechanical abrasion
For stubborn stains, pressure washing or light abrasion might be necessary. But be cautious – these methods can also damage your concrete if not done right.
When pressure washing, use a wide-angle nozzle (40°) to avoid etching the surface. Keep the wand moving at all times and maintain a consistent distance from the surface (about 6-12 inches).
Warning: Never use a pressure washer with a zero-degree tip on concrete. It can strip away the surface layer, leaving your concrete vulnerable to further damage.
Treating Stubborn or Aged Stains
For deep-set dye, apply a cleaner formulated for tough stains and allow it to dwell per the product instructions. Use light agitation and multiple passes rather than aggressive scrubbing.
Consider methods that pull dye from the pores, such as poultices or specialty cleaners, after confirming compatibility with your concrete. Always verify product guidelines and test a small area first.
Poultices and Absorbent Lifts
A poultice is like a sponge for your stain. It pulls dye out of the concrete’s pores.
Here’s how to use it: Mix a powdered poultice with water until it’s the consistency of peanut butter. Spread it thick on the stain, about 1/4 inch. Cover it with plastic and let it sit for 24 hours.
Caution: Poultices can leave residues. Remove it carefully after 24 hours, then rinse and scrub the area clean. Let it dry completely before applying another treatment.
Combining Methods Safely
Different stain removers have different chemical compositions. Some can react badly with others, making a mess or even damaging the concrete.
Here’s how to combine them safely: After using one type of treatment (like a solvent), always rinse and neutralize the area before applying another (like an oxidizer). Use clean water and a mild detergent to rinse, then let it dry.
Neutralizing involves using a counteracting chemical. For example, if you’ve used an acid-based cleaner, use a basic one like baking soda dissolved in water to neutralize it.
When to Call a Professional
DIY has its limits. If you’ve tried everything and the stain persists, it’s time to consider professional help.
Here are signs that DIY has failed: The stain is still visible after multiple treatments; the concrete looks damaged or weakened; or the stain keeps reappearing despite your efforts.
Professionals have specialized tools like grinders and microabrasion equipment. They can also apply overlays to resurface the concrete entirely. Don’t hesitate to call a professional restoration service if you’re in over your head.
Rinsing, Neutralizing, and Verifying Stain Removal
Rinse thoroughly to remove cleaner residues and avoid leaving a film that could disguise the true result. Use clean water and repeat as needed until the surface looks and feels clean.
Neutralize if the cleaner requires it, and allow the surface to dry completely. Inspect the area under good light to confirm the stain is gone or determine if further action is needed.
How to check for residual dye and repeat treatments correctly
After each treatment, let the area dry completely. Use consistent lighting to inspect it closely.
Why? Residual moisture can hide remaining stains or give you a false sense of progress.
Perform a small test in an inconspicuous spot before repeating treatments. This ensures your chosen method is working and won’t cause further damage.
Preventing post-cleaning halos and residue
Start cleaning at the outer edges of the stain. This helps prevent cleaner residue or ‘halos’ from forming around the stain.
Why? Halos can make your concrete look worse, not better.
Use appropriate neutralizers to counterbalance strong cleaners. Thoroughly rinse with clear water afterwards to remove any remaining residues.
Preventing Future Mulch Dye Stains and Maintenance
Choose mulch or dyes with lower transfer potential and keep mulch away from freshly cleaned concrete to minimize recontamination. Use barrier mats or drop cloths during landscaping projects to protect the slab.
Establish a routine of quick rinses after exposure and seal the surface when appropriate to reduce porosity and dye uptake. Check sealant compatibility with any nearby landscaping products.
Mulch selection and installation tips
First off, pick undyed mulch. It’s your best bet to avoid stains.
Use barriers or edging around your concrete. Keeps the mulch in place and stops it from bleeding onto your concrete.
Position your mulch beds away from direct contact with your concrete slabs. The less they touch, the less likely you are to see those pesky stains.
Seasonal maintenance and quick-response cleaning
Sweep your concrete regularly. It’s a must to keep it clean and stain-free.
Spot-clean any spills right away. Don’t let those dyes set in and cause trouble later on.
Inspect after storms. Heavy rain can shift mulch around, so check for any new potential stain areas.
Resealing, Restoring Appearance, and Long-Term Solutions
Decide if a cosmetic repair is needed after cleaning, such as color uniformity touch-ups or a fresh sealant layer. Resealing can help restore a uniform look and protect against future staining.
If stains remain uneven, consider options for restoring appearance that align with your concrete use and environment. Always follow manufacturer instructions and verify any compatibility with existing finishes before proceeding.
How and when to reseal concrete safely
Before you reseal, check your concrete’s surface. It should be clean, dry, and free of any residue or moisture.
Choose a breathable sealer. This lets water vapor escape while keeping liquid water out. It prevents trapped moisture from causing damage.
Apply the sealer evenly using a roller or sprayer, following the manufacturer’s instructions. Work in manageable sections to avoid over-application and ensure even coverage.
Cosmetic repairs and color-matching options
If stains persist after cleaning, consider cosmetic repairs. These can help restore a uniform appearance.
Concrete stains are an easy DIY option for small areas. They’re available in various colors to match your existing concrete. Apply them according to the manufacturer’s instructions, using a sprayer or brush.
For larger areas or more significant discoloration, consider concrete overlays. These can be applied over existing concrete and stained to match. For extensive damage, it might be best to consult a professional. They can assess the situation and recommend the most suitable repair method.
Conclusion
You can lift mulch dye stains with steady work, but safety, patience, and following the right order are key to protecting the concrete and your footing. Start with the gentlest method, test a small area first, and don’t rush the process; a thorough rinse and neutralizing step helps prevent ongoing staining.
To finish, think of your plan as a single routine: inspect the stain and identify if it’s fresh or set, choose the least aggressive removal method that could work, test a patch, apply step by step, rinse completely, neutralize, verify the stain is gone, and then seal and maintain the surface to keep it from returning. Check the work area for safety hazards, wear goggles and gloves, keep water and cleaners away from your eyes, and never mix chemicals unless the product instructions say it’s safe.
Common mistakes to avoid include skipping the patch test, using harsh cleaners or scrubbers that etch the concrete, and rinsing poorly so residues linger. Always rinse thoroughly after each step, and neutralize as directed to stop the action of cleaners. Keep the area dry when required and follow the product timing strictly; if in doubt, pause and reassess rather than forcing a result.
If the stain resists multiple methods, or if the concrete has decorative finishes, wide cracks, or you’re unsure about the sealer compatibility, call a professional. They can assess porosity, dye permanence, and appropriate sealer choices without risking damage. With careful steps and the right precautions, you’ll restore appearance and confidence to tackle future cleanups.
FAQ
Can I tell if the dye stain is oil-based or water-based before choosing a cleaner?
Look at the stain and the mulch product label for hints. If the stain spreads with water or soap, it’s likely water-based; if it smears with oil-like residue, it may be oil-based. When in doubt, start with a milder cleaner and follow label directions.
What should I do if the dye stain remains after the first cleaner treatment?
Reassess the stain and try a slightly stronger cleaner or a different method from the step sequence. Always follow product labels and local guidance, and consider a second, shorter application rather than a long, aggressive run.
Are there any mistakes that will lock the stain in or damage the concrete?
Avoid letting cleaners sit too long on the surface, and don’t mix cleaners unless the label says it’s safe. Rinse thoroughly and neutralize if the product requires it, then test a small area before full treatment.
How can I protect adjacent surfaces and plants during treatment?
Cover nearby grass, pavement edges, and any plants if possible. Use plastic sheeting or barriers, and follow the cleaner’s instructions for runoff and dilution. Cleaning up spills quickly reduces risk to surrounding areas.