
Introduction
Rebuilding lost plaster keys means restoring the grip between plaster and lath so loose or cracked plaster stays put again. It’s a targeted repair that avoids tearing out a whole wall when only the edge bond is failing. Think of it as re-securing the surface so it can be patched cleanly.
Start with basic checks of lath and plaster construction and identify where the keying has failed, such as edges that lift or cracks that run along the wall. Use careful, localized methods to reattach and resecure the plaster without full demolition, and verify that you follow the manufacturer instructions for any patch or bonding products you choose. If unsure, check labels and local rules to pick a safe, compatible repair approach for historic or multi-layer walls.
Key takeaways
- Rebuild plaster keys saves wall integrity without full demolition and major dust.
- Inspect lath condition, identify key loss, and test plaster bite before repairs.
- Use proper joint compound matching for hairline cracks and historic plaster.
- Targeted repairs reduce moisture issues; seal gaps and avoid overworking edges.
- Professionally repair loose plaster when substructure shows movement or delamination.
- Plan around access, ventilation, safety gear; wear eye protection and dust mask.
Table of Contents
- Introduction
- Key takeaways
- Why Rebuild Plaster Keys Instead of Full Demolition
- Lath-and-Plaster Fundamentals and How Keys Form
- Diagnosing Lost Keys — Symptoms, Inspection, and Testing
- Tools, Materials, and Specs for Key Rebuilding
- Step-by-Step Targeted Repair Techniques
- DIY Vs Professional Repair — Decision Matrix and Common Mistakes
- Cost Factors, Timeframes, and Project Planning
- Finishing, Maintenance, Safety, and Hiring the Right Contractor
- Conclusion
- FAQ
Why Rebuild Plaster Keys Instead of Full Demolition
Targeted key rebuilding focuses on the actual failure behind the plaster, not the entire wall system. This approach helps preserve texture, decorative work, and historic character while avoiding needless removal. It offers a practical balance between performance and preservation.
Choose reconstruction when lath remains solid, bond is acceptable, and moisture damage is not pervasive. The idea is to restore grip while keeping as much original fabric as possible. Consider partial repairs when condition warrants, and avoid full demolition unless the underlying structure demands it.
Preservation, performance, and value
Rebuilding lost plaster keys preserves the original wall’s acoustic properties, reducing echo and noise transfer. It also maintains thermal mass, helping regulate indoor temperatures naturally.
Historic decorative work, like stenciling or texturing, is retained, keeping your home’s unique character intact. Reattaching original plaster often costs less than full replacement, as it avoids the labor and material expenses of installing new drywall.
Targeted key rebuilding focuses on fixing the actual failure mechanism, unlike full demolition that replaces an entire wall system. This approach respects your home’s history while addressing immediate issues.
When replacement is the better option
Full demolition and rebuild may be necessary if plaster keys are lost due to extensive water damage. Prolonged exposure can weaken lath, compromise structural integrity, or cause mold growth.
Significant moisture damage, structural failure of framing members, or repeated collapse of plaster indicate that a partial repair won’t suffice. In these cases, it’s safer and more cost-effective in the long run to gut and reinstall drywall.
Consider full replacement if preserving historic fabric becomes too costly or impractical due to extensive damage. However, weigh this decision carefully, as demolition can alter your home’s character and may not always be the best solution.
Lath-and-Plaster Fundamentals and How Keys Form
The lath-and-plaster assembly combines lath, plaster, and a keying surface that grips as it cures. Understanding this setup helps you plan repairs that respect the original build. The key behind the surface locks the plaster in place as it hardens.
Keys form from lath patterns, trowel texture, and layered plaster that interlock under load. Failures can come from cracks, moisture, or framing movement. A clear diagnostic view guides targeted, non-demolition repairs that still restore grip.
Traditional three-coat system and substrates
The traditional lath-and-plaster assembly uses a three-coat system to create strong, durable walls. Each coat serves a specific purpose:
Scratch (Base) Coat: Applied directly onto the lath, this layer provides the initial grip for subsequent coats. It’s called ‘scratch’ because it’s roughened with a comb or trowel to create keying surfaces.
Float (Lay) Coat: This middle coat evens out the surface and covers any imperfections from the scratch coat. It’s ‘floated’ smooth using a wide trowel.
Brown (Finish) Coat: The final layer provides the finished wall surface. It’s applied thinly and smoothly, often with a fine comb or trowel to create a uniform texture.
How plaster keys form and fail
Plaster keys are formed as the coats cure behind the lath. Here’s how:
The coarse indentations or gaps in the lath pattern, along with any imperfections in plaster troweling, create mechanical interlocks. When subsequent coats are applied, they interlock with these gaps, creating shear resistance and binding the entire assembly together.
Keys can fail due to various reasons:
Mechanical Vibration: Prolonged vibration from nearby machinery or traffic can cause keys to loosen over time.
Moisture: Excessive moisture can weaken the plaster, causing keys to deteriorate.
Poor Original Keys: If the initial keying surfaces were inadequate, the entire assembly’s strength is compromised.
Diagnosing Lost Keys — Symptoms, Inspection, and Testing
Lost keys show up as hollow spots or soft patches behind the plaster, not just surface cracks. Tapping and probing help separate delamination from finish damage. Moisture indicators can corroborate the underlying issue.
Develop a simple inspection map documenting suspect zones, overt damage, and area boundaries. Non-destructive tests guide decisions on whether invasive checks are needed. Solid notes keep your repair plan focused and traceable.
Visual and tactile warning signs
Before you start poking and prodding, use your eyes and hands to spot obvious signs of lost keys.
- Hollow-sounding areas: Tap the plaster. If it sounds hollow, there might be a void behind it.
- Mapped hairline cracks: Look for fine cracks radiating from lath lines or corners. They could indicate key loss.
- Sagging: Check for any drooping or wavy areas in the plaster. This is a clear sign of lost keys.
- Localized delamination: Gently press on the plaster. If it feels spongy or moves, there might be delamination.
- Crack patterns: Look for cracks that follow a pattern, like a spiderweb or a map. This could indicate key loss.
- Moisture stains: Check for water stains or efflorescence on the plaster surface. Moisture can cause keys to fail.
- Uneven surfaces: Feel for any unevenness or bumps under the plaster. This could indicate a void behind it.
- Discolored areas: Look for stains, discoloration, or dark spots on the plaster. These can indicate moisture issues.
Quick rule: If you find any of these signs, don’t ignore them. They’re your first warning that keys might be lost.
Non-destructive testing methods
Before you start making holes, use these non-invasive methods to confirm key loss.
- Sounding/tapping: Tap the plaster with a hammer or knuckle. A dull thud could indicate a void behind it.
- Moisture meter: Use a moisture meter to check for excess water in the plaster. Too much can cause keys to fail.
- Borescope checks: Drill small holes (1/4″ or less) and insert a borescope to see behind the plaster without causing major damage.
- Sound resonance checks: Use an ultrasound device to listen for voids behind the plaster. A professional may be needed for this.
- Gentle depth probing: Use a thin probe (like a needle) to poke into the plaster at suspect areas. If it goes in too easily, there might be a void.
Quick rule: Always try these non-destructive methods first. They can save you from making unnecessary holes and damage.
When to bring in a specialist
Sometimes, the job is too big or complex for DIY. Here’s when to call in a pro.
- Large delaminations: If you find large areas of delamination (more than 2 sq ft), it’s time to call a specialist.
- Suspected rot or structural concerns: If you suspect there’s rot behind the plaster, or if there are signs of structural damage, bring in a structural expert.
- Historic finishes: If your home has historic finishes, it’s best to call a plaster conservator. They can preserve the original look and feel.
- Complex repairs: If the repair seems too complex for you (like rebuilding entire sections of lath), bring in a pro.
- Unusual symptoms: If you’re seeing unusual symptoms, like strange crack patterns or discoloration, it’s best to get a professional opinion.
Quick rule: When in doubt, don’t hesitate to call a specialist. It could save you from making costly mistakes.
Tools, Materials, and Specs for Key Rebuilding
Organize tools by phase: site prep, removal of loose material, key rebuilding, and finishing. Include safety gear and accurate measurement tools for clean work. Proper planning reduces disturbance and mistakes.
Choose compatible patch mortars, bonding agents, and lath or mesh that fit the existing wall. Look for material characteristics that support durable adhesion and finish compatibility with the original texture.”
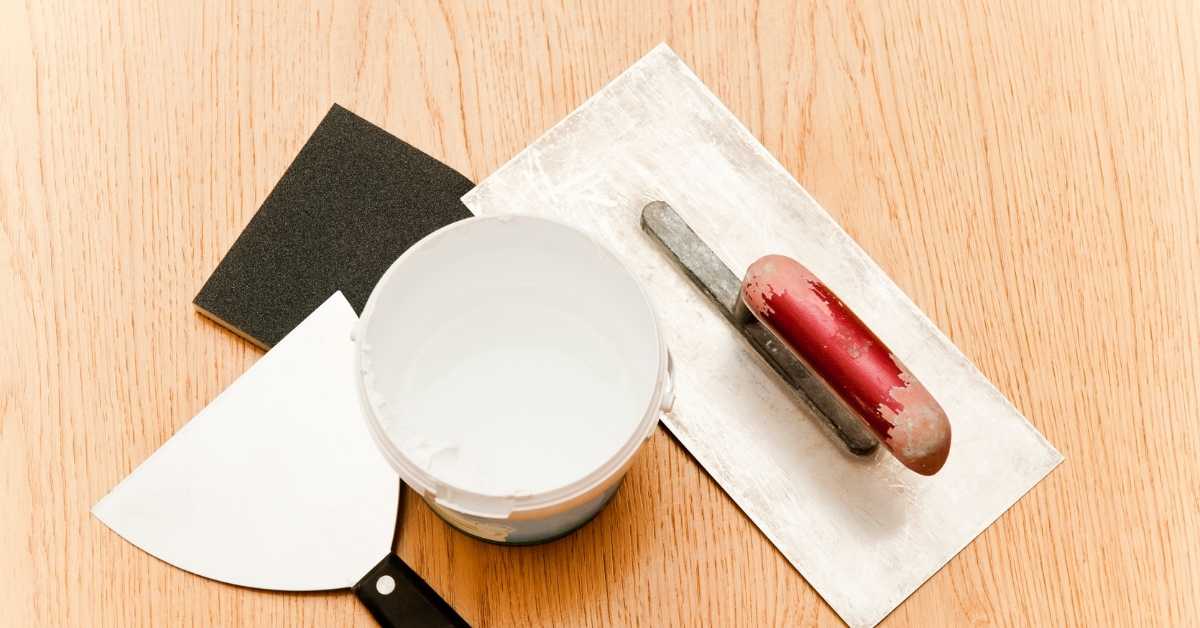
Tools and equipment checklist
Use this checklist to gather the right tools for each phase of your key rebuilding project. Skipping items can lead to poor results or safety hazards.
- Safety gear: Dust mask, goggles, gloves, and ear protection. Protect yourself from dust and debris.
- Measuring tools: Tape measure, level, and straight edge. Ensure accurate measurements for a professional finish.
- Hand tools: Putty knife, trowel, and hawk. For applying and smoothing plaster.
- Injection equipment: Syringe or caulking gun. For applying bonding agents and consolidants.
- Washers and screws: Plaster washers, drywall screws. For securing lath and reinforcing repairs.
- Vacuum: HEPA vacuum or shop vac with filter. Clean up dust for a safe work environment.
- Moisture meter: Non-invasive moisture meter. Check for hidden moisture before starting repairs.
- Protective gear (optional): Drop cloths, painter’s tape. Keep your work area clean and protect surfaces.
Quick rule: Always prioritize safety gear and accurate measurements for a successful repair.
Material choices and compatibility
Choosing the right materials ensures durable repairs that match your existing plaster. Incompatible materials can lead to weak bonds, cracking, or staining.
- Repair mortar: Compatible with existing plaster (lime/cem-based). Match the base material for best results.
- Bonding agent: Suitable for your substrate (gypsum/lime). Promotes strong adhesion to old plaster.
- Consolidant: Suited to your plaster type. Strengthens weak or crumbling areas.
- Lime-based vs gypsum: Match existing plaster. Gypsum for modern plasters, lime for historic.
- Finish coat: Compatible with texture and sheen of existing plaster. Avoid mismatched finishes.
- Wash-off agent: Suitable for your climate. Prevents efflorescence in humid conditions.
- Lath/mesh: Compatible with existing lath (metal/stud). Avoid mixing incompatible materials.
- Moisture tolerance: Suitable for your climate. Prevents issues in damp or humid conditions.
Reinforcement hardware and adhesives
Use the right reinforcement methods to ensure strong, lasting repairs. Mechanical anchoring may be preferable in some cases.
Plaster washers: Use with drywall screws for securing lath. Avoids tearing or pulling through old plaster.
Epoxy/acrylic injections: Ideal for filling deep cracks or voids. Provides strong, flexible bond.
Mechanical anchoring: Preferable when adhesive-only solutions are insufficient. Use with hollow walls or weak substrates.
Step-by-Step Targeted Repair Techniques
Begin with clear criteria to identify lost or damaged keys and delaminated layers through visuals and gentle tapping. This sets the stage for focused repairs. Document findings before you start.
Use targeted injections to re-anchor delaminated plaster and recreate keys where needed. Plan the sequence to avoid over-adhesion or cracking and finish with feathered patches that blend in. Aftercare should include curing and inspection steps to verify adhesion and texture match.
Step-by-Step Repair Process
Follow these practical steps to repair lost plaster keys with minimal disturbance. Safety, preparation, and proper sequencing ensure lasting results.
- Inspect and prepare: Identify damaged areas, clear the space, and put on safety gear.
- Diagnose issues: Use visual checks and gentle tapping to confirm loose or delaminated layers.
- Prepare surfaces: Clean, prime, and seal surfaces for optimal adhesion.
- Perform repairs: Follow targeted repair techniques outlined below, such as injection, key recreation, or patching.
- Inspect and finish: Check your work, touch up if needed, and allow proper curing before final finishing.
Recreating keys and injection methods
Drill access points in damaged areas. Use a masonry bit and keep holes small (around 1/4″ to 3/8″).
Inject adhesives or grout: Apply your chosen material, ensuring it reaches the lath. Use a caulking gun or syringe for precision.
Confirm reattachment: Gently tap repaired areas after injection. Listen and feel for solidity. If unsure, consult a professional.
Mechanical reattachment and stitching
When injection alone isn’t enough, use screws with washers, cleats, or stainless-steel pins to pull plaster back to lath.
Drill pilot holes: Keep them small (around 1/8″ to 3/16″) and slightly deeper than the screw head.
Attach hardware: Screw in place, ensuring a tight fit. Use a screwdriver or drill with a low-speed setting.
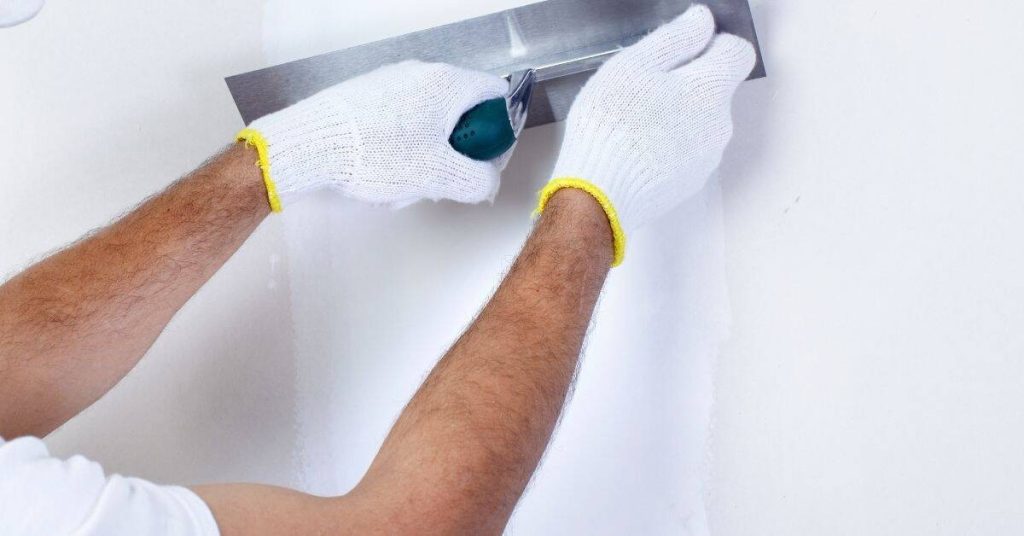
Patching and blending repaired areas
Rebuild base layers if needed: Apply fresh plaster, matching the existing substrate. Use a trowel or hawk for even application.
Apply skim coats: Once base is set, apply thin layers of finish plaster to match texture and color. Allow each coat to cure before sanding lightly.
Blend edges: Feather transitions between repaired and original areas to minimize visibility. Use a damp sponge or trowel for blending.
DIY Vs Professional Repair — Decision Matrix and Common Mistakes
Develop a practical decision guide that separates DIY-appropriate tasks from professional needs. Consider plaster type, loss depth, and risk factors when choosing a path. Use clear criteria to reduce guesswork on the job.
Identify common mistakes such as ignoring moisture sources, mismatching plaster types, or rushing cures. A deliberate workflow helps readers avoid pitfalls and set realistic expectations. When in doubt, consult a professional for validation of your plan.
Repairs suitable for experienced DIYers
If you’re comfortable with basic home repairs and have the right tools, here are some targeted plaster key repairs you can tackle:
Small-scale injections: For minor cracks or small missing keys, use a plaster injection gun to fill voids. This requires precision but minimal effort.
Localized key recreation: If a few larger keys are lost, recreate them using a trowel and fresh plaster mix. Ensure the new keys match the existing ones in size and shape.
Cosmetic patching: For surface-level damage like hairline cracks or minor bulging, use a joint compound to fill and sand smooth. This won’t restore lost keys but can improve appearance.
Common homeowner mistakes to avoid
Even with the best intentions, DIY repairs can go wrong. Here are some common mistakes to steer clear of:
- Over-sanding: Sanding too much can remove necessary key material and weaken the plaster.
- Incompatible materials: Using different plaster types or incompatible bonding agents can lead to poor adhesion and further damage.
- Ignoring moisture: Without addressing underlying moisture issues, your repairs will fail over time. Always identify and fix water sources before patching.
- Major ceiling reattachments: Attempting to reattach entire ceilings alone is dangerous. This requires professional assessment and equipment.
Take your time, follow best practices, and don’t hesitate to call a pro if you’re unsure. It’s better to do it right the first time than risk further damage or injury.
Cost Factors, Timeframes, and Project Planning
Break projects by scope and severity to shape the repair strategy. Decide how much of the wall will need attention and how that affects the schedule. Planning should reflect the real condition rather than preconceived timelines.
Assess access, materials, and potential delays that influence cost and timing. Include contingencies for hidden damage and weather, and map out the sequence of tasks from assessment to finish. Clarify roles for DIY steps versus professional work in the plan.
Cost drivers by damage type
The cost of plaster key repairs varies greatly depending on the extent and nature of the damage. Let’s break it down:
Small Key Repairs: These are typically the most affordable, as they involve minimal material use and labor.
Large Delaminations: Here, costs increase due to more extensive material usage and potential need for additional support or reinforcement.
Sagging Ceilings: These require careful structural assessment and may necessitate additional framing work, driving up costs.
Full Three-Coat Rebuilds: These are the most expensive as they involve stripping back to bare lath, replacing damaged materials, and applying new coats of plaster.
Timeline, prep, and seasonal considerations
Plaster key repairs follow a series of phases:
Inspection & Stabilization (1-2 days): Identify damage, secure loose keys, and prevent further deterioration.
Repair (3-7 days): Remove damaged plaster, prepare surfaces, rebuild keys, and apply new coats.
Drying & Finishing (5-14 days): Allow plaster to cure, sand, prime, and paint.
Interior work is typically best done in spring or fall, avoiding extreme temperatures that can affect curing. Factors lengthening schedules include:
– Extensive damage
– Complex decorative elements
– Inclement weather (during exterior prep)
Finishing, Maintenance, Safety, and Hiring the Right Contractor
Finish work should restore texture and moisture resistance while matching color and sheen. Consider skim coats, texture replication, and proper sealing to protect the wall. Plan for compatible paints and long-term maintenance touchpoints.
Safety comes first with lead or asbestos awareness where relevant, plus dust control and proper PPE. Vet contractors with clear scopes, warranties, and references, and outline milestones from prep to final inspection. A practical process keeps expectations aligned with reality on site.
Surface finishing and long-term preservation
After repairing your plaster, it’s crucial to finish the surface properly to ensure longevity. Start by applying a high-quality primer to seal the patched area and improve paint adhesion.
Select a paint that matches the existing finish – flat, eggshell, or semi-gloss. For texture matching, use a paint with similar sheen and color. Consider using a skim coat approach for minor imperfections before painting.
To prevent moisture ingress, seal all patched areas. Use a flexible sealant to accommodate any slight movement in the wall. Regularly monitor your walls for signs of moisture or cracking. Conduct annual inspections and perform timely minor repairs to avoid bigger failures.
Maintain optimal humidity levels – between 30-50% – using ventilation, dehumidifiers, or humidifiers as needed. This helps control mold growth and prevents plaster from drying out and cracking.
Safety, contamination, and worksite controls
Safety is paramount when working with old plasters. If your home was built before 1978, test for lead paint. Use a certified lab or hire a professional to ensure accurate results.
If your plaster contains asbestos – common in transite or older homes – engage a licensed abatement specialist. Wear appropriate PPE, including gloves, goggles, and a respirator with HEPA filter.
Contain dust during repairs using plastic sheets and tape. Seal off other rooms to prevent dust migration. Regularly clean up work areas to minimize exposure to harmful particles.
Always handle materials safely. Follow manufacturer guidelines for mixing adhesives and applying compounds. Keep work areas well-ventilated, and consider working in cooler months to avoid excessive heat buildup.
How to vet and hire a specialist
When hiring a contractor for plaster restoration, ask for their licensing and insurance. Ensure they carry liability and workers’ compensation coverage.
Request references from past clients. Contact them to inquire about the quality of work and professionalism. Inspect the contractor’s project portfolio – look for examples of historic plaster repair and restoration.
Obtain a written estimate outlining scope of work, materials, timeline, and warranty. Ensure the contract includes dispute-resolution clauses. Be wary of contractors offering significantly lower prices than others – it could indicate subpar work or hidden fees.
Hire based on experience, professionalism, and comfort level. A good contractor will listen to your concerns, provide clear explanations, and offer practical solutions tailored to your specific needs.
Conclusion
Mastering targeted plaster-key repairs means you protect safety, keep the wall stable, and preserve the look without the mess and cost of full demolition. Stay disciplined with testing and finishing so you won’t chase hidden damage later.
First, inspect and test in a small area to confirm the keys are the real issue, gather the right tools and materials, choose a repair approach that fits the specific lathe-and-plaster setup, then proceed in measured steps: drive the plan from diagnosing to rebuilding, pinning and bedding the key, curing, and finally finishing and rechecking for stability.
Common mistakes to avoid include forcing loose keys back into place, using the wrong plaster mix or mix ratio, skipping moisture and rot checks, and neglecting proper ventilation and safety gear. Always wear eye protection, guard against falling debris, and shut off nearby utilities if you’re near electrical or plumbing. Test in a small area first and stop if you see new cracks or movement.
If moisture, extensive rot, or structural concerns show up, or you’re unsure about the bearing capacity of the wall, it’s time to call a professional. With careful planning and steady execution, you can finish with a durable, invisible repair and the confidence to move forward. Stay steady, stay safe, and keep the job tight until the last coat sets.
FAQ
What are the basic differences between lath-and-plaster and modern drywall methods?
Lath-and-plaster uses a wood or metal lath with plaster that binds to it. Modern drywall uses gypsum boards screwed to studs with joint compound. The repair approach and moisture behavior are different, so choose methods that respect the original system.
What common problems show up in plaster walls that signal lost keys?
Look for loose patches, cracks that widen, or plaster that moves when you poke it gently. If there’s hollow sound behind the surface or visible bulges, keys may be failing. These symptoms mean targeted repairs rather than full removal may be enough.
How do pros approach loose plaster and cracks without full demolition?
Pros often address loose areas by reattaching or pinning with appropriate lath supports and patching with compatible plaster. They may consolidate cracks with controlled notch or key repairs to reestablish a solid key. Always follow manufacturer instructions for patch materials and check for moisture issues first.
How can you tell what type of historic plaster you’re dealing with?
Inspect the finish coats and binders, such as lime or gypsum, and note any hair or fiber inclusions. Check with the label or datasheet if you have product packaging, and compare to common historic plaster types. When in doubt, ask a professional or reference manufacturer guidance and local historic guidelines.