
Introduction
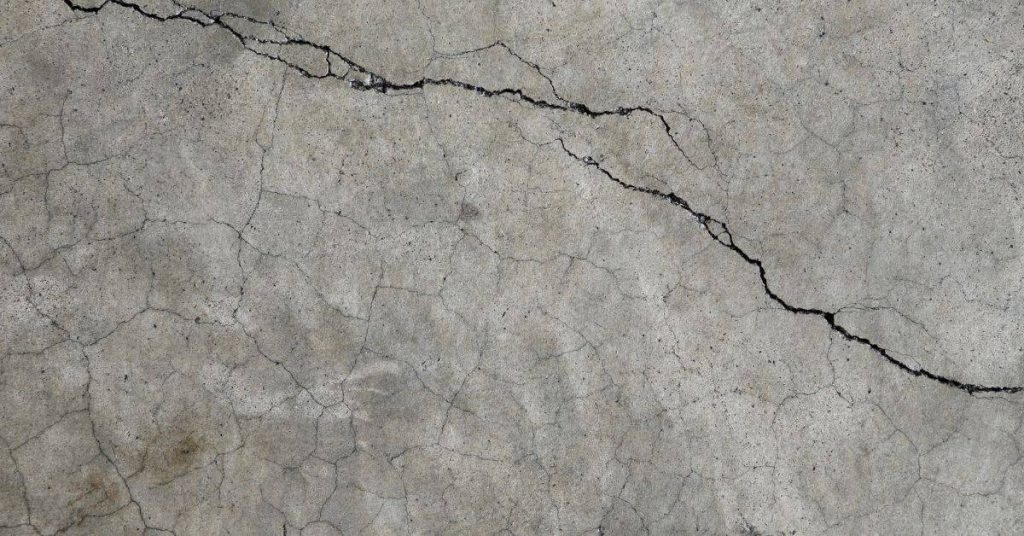
Random cracks on slabs are irregular cracks that appear across a concrete slab without a clear joint pattern.
Reading the pattern means looking at how long the crack is, where it runs, and whether it follows edges or joints. This helps you spot likely causes and what to check next when planning a fix.
Look for how the cracks form: hairline shrinkage cracks vs. larger gaps that may indicate settlement or heavy loading. Patterns over time—whether cracks stay the same, widen, or move—help you separate causes and plan fixes. To prevent future cracking, use proper control joints, ensure good curing, and verify base and drainage conditions, while checking manufacturer instructions or local guidance for best practices on joints and spacing.
Key takeaways
- Read crack patterns for timing: linear vs clustered signals shrinkage vs settlement.
- Inspect joints, edges, and compensating features to flag design or load issues.
- Document environment and moisture swings, as they drive expansion and random cracking.
- Perform simple surface checks and tap tests to spot hollow sounds.
- Prioritize repairs by root cause: poor design, poor curing, or drainage.
- Do not place heavy loads on cracked slabs until inspected.
- Proper curing, joint layout, and moisture control prevent future random cracking.
Table of Contents
- Introduction
- Key takeaways
- Why Slab Cracking Matters and When to Act
- Common Crack Types and Visual Identifiers
- How to Read Crack Patterns: Visual Checkpoints
- Material and Mix-Related Causes of Random Cracking
- Construction and Environmental Causes to Check First
- Field Diagnostics: Checklist and Simple Tests
- Case Studies: from Pattern to Root Cause
- Repair, Maintenance, and Prevention Strategies
- Conclusion
- FAQ
Why Slab Cracking Matters and When to Act
Cracks in a slab don’t just look bad; they signal how the slab will perform over time. Small, stable cracks might be cosmetic, but many patterns point to underlying movements that affect durability and safety. Water entry through cracks can lead to moisture-related problems, mold, and potential damage to finishes or installed systems. For homeowners and builders, understanding the practical consequences helps prioritize action and accountability. Immediate attention is warranted when movement is active, cracks widen suddenly, or leakage is observed, while stable, non-widening cracks with no moisture can often be monitored with a clear plan.
Different signs tell different stories. Hairline cracks in aging slabs suggest shrinkage or settlement other than active movement, while wide, vertical, or highly oblique cracks near openings may indicate more significant stress or differential settlement. Edge cracks and those following joints can reveal joint-related issues or subgrade conditions. Establishing an action ladder helps you decide what to seal, test, or escalate to a structural pro. Keep documentation handy to communicate deterioration, maintenance history, and observed changes to inspectors or contractors.
Cosmetic vs. Structural Cracks
Cracks on your slab can be surface-level (cosmetic) or signs of deeper structural problems. Here’s how to tell the difference:
Cosmetic cracks are usually thin, hairline, and don’t run deep. They’re often found near control joints – intentional gaps cut into new slabs to allow for natural shrinkage.
Structural cracks, on the other hand, are wider (usually more than 1/8 inch), irregular, or diagonal. They may run deep and could indicate serious issues like settling, shifting, or even structural failure.
If you’re unsure, err on the side of caution and consider it a structural crack until proven otherwise.
Safety and Liability Concerns
Cracks in your slab can pose safety hazards and liability issues:
Tripping hazards: Wide or uneven cracks can cause people to trip and fall. As a homeowner, you’re responsible for maintaining safe conditions on your property.
Water ingress: Cracks allow water to seep in, potentially causing mold, rot, or freeze damage (in colder climates). This could lead to costly repairs and health issues.
Contractors’ responsibilities: If you hire someone to work on your slab, they’re responsible for their own safety. However, if a crack causes an accident due to negligence in maintenance or repair, liability may fall back on you as the property owner.
When to Call a Professional
Certain signs indicate it’s time to engage an engineer or forensic concrete specialist:
Widening cracks: If cracks are getting wider over time, it could signal serious underlying issues.
Step cracks: These are diagonal cracks that form steps or stair-stepped patterns. They often indicate settlement or movement beneath the slab.
Settlement indicators: Sagging, sloping, or uneven surfaces can point to settling foundations, which require professional assessment and repair.
Don’t wait until it’s too late. If you notice any of these signs, call a pro right away.
Common Crack Types and Visual Identifiers
Slabs show distinct crack types, and recognizing them helps narrow down probable causes. Hairline shrinkage cracks are common in new concrete, while map or pattern cracks suggest movement across the slab. Settlement cracks often thread from edges toward the center, and random spider cracks can indicate stress or restrained shrinkage. Knowing these categories helps you plan appropriate evaluation steps without jumping to conclusions. Always cross-check pattern with context such as weather, loading, and joint layout.
Visual clues come next: crack width, orientation (longitudinal vs transverse), edge raggedness, and any staining or efflorescence. Do cracks align with joints or appear independent? Look for nearby damage like spalling or rebar exposure, which can shift your assessment from cosmetic to structural. A simple field checklist can help you differentiate non-structural from potential structural concerns and guide you toward the right professional or remediation approach.
Shrinkage and Plastic (Map) Cracking
These cracks show up early, like when the concrete’s still fresh. They’re random, look like a map, and can spread out from one spot.
Check base compaction. If it’s not right, these cracks will follow. Make sure your base is solid before pouring.
Plastic shrinkage happens when the surface dries too fast. It’s usually due to wind or hot weather. Keep an eye on the forecast and protect your pour if needed.
Settlement and Subgrade-Related Cracks
These cracks are caused by your concrete settling into weak or unstable soil (subgrade). They often follow the edges of slabs or show differential offsets, indicating support issues.
Check base compaction: If you’re seeing these cracks, it’s likely that the soil beneath wasn’t properly compacted before pouring. This is a common DIY mistake. You can check this by digging down to the base and checking if it’s solid or crumbles easily.
If the subgrade is weak, you might need to remove and replace it with well-compacted material. If the cracks are minor and haven’t worsened over time, they can be repaired using a concrete crack filler and proper sealing. But remember, this is just a band-aid; the underlying issue still needs addressing.
Structural or load-induced cracks
These are serious cracks that run through the full thickness of your concrete. They’re wide or single-line and suggest big problems like bending, overload, or reinforcement issues.
Check base compaction. If it’s not done right, your concrete can’t take the load and will crack. Also, look for any signs of overloading – too much weight on one spot can cause these cracks.
If you see reinforcement corrosion or rust stains, that’s a big red flag. It means your rebar is exposed to air and water, which causes it to weaken and lose its strength. You need to fix this ASAP before the whole structure collapses.
How to Read Crack Patterns: Visual Checkpoints
Reading crack patterns starts with identifying typology and shape. Random patterns often point to shrinkage or settlement, while grid-like or straight lines can indicate formwork or joint-related constraints. Stair-step patterns may reveal differential movement along a structural plane. Recognizing pattern shape helps set expectations for movement direction and potential drivers. On-site, map each crack and note how it relates to joints, rebar, and openings to build a story of what happened and why.
Another layer is measuring spacing and width. Intersections and clustered networks can differentiate shrinkage from structural concerns. Consider the on-site context: soil moisture, drainage, recent loading, or root intrusion can all influence crack development. Establish a routine for documentation with scale photos, dates, and follow-up checks to track progression or stabilization over time.
Step-by-Step Process
Use this checklist before, during, and after reading crack patterns to ensure accurate assessment and prevent costly rework.
- Preparation: Ensure the area is clean and free of debris. Remove any loose material with a wire brush or chisel.
- Safety first: Wear appropriate PPE, including safety glasses and gloves. Check for any hidden hazards like live wires or unstable structures.
- Lighting check: Ensure the area is well-lit to see cracks clearly. Use a flashlight if needed, but avoid casting shadows that can obscure details.
- Crack width measurement: Use a crack gauge or feeler gauge to measure crack widths. Check at multiple points along the crack’s length.
- Crack direction and pattern: Observe and record the direction of cracks (horizontal, vertical, diagonal) and their patterns (straight, stepped, branching).
- Crack depth assessment: Use a small pick or chisel to gently tap along the crack. Listen for changes in sound that may indicate varying depths.
- Moisture check: Look for signs of moisture around cracks, such as efflorescence (white powdery deposits) or dampness. Check local rules for moisture testing if required.
- Photographic record: Take clear, well-lit photos of cracks from different angles. Include a scale in the photo to show size relative to other objects.
Quick rule: Always recheck your measurements and observations from multiple angles and after rain or snow melt to ensure accuracy and catch any changes over time.
Pattern mapping and spacing interpretation
Use this checklist after you’ve identified cracks (as explained in the step-by-step process) to better understand their causes.
- Clustered cracks: Check if cracks are grouped together. Confirm by measuring the distance between cracks; less than 150mm apart indicates clustering.
- Random cracks: Look for cracks that seem scattered and unpatterned. Verify by drawing an imaginary grid over the area; random cracks won’t follow any lines.
- Parallel cracks: Inspect if cracks run in straight, parallel lines. Confirm by measuring their angle; within 5 degrees of each other indicates parallelism.
- Radiating cracks: Check if cracks fan out from a single point or small area. Verify by tracing the cracks back to their origin; they should converge at one spot.
- Crack width: Measure crack widths using a feeler gauge or similar tool. Narrower than 0.3mm suggests hairline cracks, while wider than 1mm indicates significant damage.
- Crack depth: If accessible, measure crack depths using a probe or similar tool. Shallow cracks (less than 25mm deep) may not require immediate repair, but deeper ones do.
- Crack age: Estimate the age of cracks by looking for signs of weathering or other aging effects. Newer cracks will appear fresher and sharper.
- Crack movement: Check if cracks are active (still moving) or dormant (stable). Gently tap the area around cracks; active ones may open slightly wider.
Quick rule: Always remember that crack patterns and spacing can change over time, so regular inspections are crucial to prevent expensive rework.
Width, length, and depth cues
Use this checklist when you’re inspecting cracks to understand their severity and likely cause. It’ll help you prioritize repairs and avoid expensive rework.
- Check crack width: Use a crack gauge or a penny (19mm) to estimate the width. If it’s wider than a coin, it’s an urgent repair.
- Measure length: Estimate the total length of the crack using a tape measure. Long cracks (>3m) often indicate structural issues.
- Check depth: Use a flathead screwdriver to gently probe the crack’s depth. If it goes deeper than 1/4″ (6mm), it might need immediate attention.
- Look for pattern changes: Cracks that change direction or width suddenly may indicate underlying structural problems.
- Check both sides: Inspect the crack on both sides of the structure. If they don’t line up, it could be a sign of settlement.
- Feel for movement: Gently push and pull on either side of the crack. Any movement indicates instability.
- Check for recurring patterns: If you see similar cracks nearby or in other parts of the structure, it could indicate a widespread issue.
- Consider age and history: Older structures may have settled over time, but new cracks in old buildings could signal ongoing problems.
Quick rule: If a crack is wider than a coin, longer than 3m, or deeper than 1/4″, it’s an urgent repair. Always consult with a professional if you’re unsure about any crack’s severity or cause.
Direction, connectivity, and junctions
Use this checklist when you’re inspecting cracks to understand the underlying stress paths. It’s crucial before making repairs or planning further work.
- Check crack direction relative to joints: Cracks aligned with joints suggest shrinkage or drying. If not, there might be other issues like excessive loading.
- Observe crack direction vs. edges: Cracks perpendicular to edges indicate pressure from outside. Parallel cracks may suggest settlement or thermal movement.
- Examine crack direction relative to loads: Cracks under heavy loads often start at the bottom, moving upwards. Check if loads are evenly distributed.
- Look for isolated cracks: Single cracks might be due to local issues like a rock in the mix or minor settlement. What goes wrong if you skip this: Overlooking localized problems can lead to further damage and costly repairs.
- Check crack connectivity: Cracks connected to each other often share a common cause. If not, they might have different origins. What goes wrong if you skip this: Misdiagnosing the cause can result in ineffective repairs.
- Inspect crack junctions: Where cracks meet, look for changes in direction or width. This can reveal stress concentrations and potential weak points.
- Measure crack spacing: Tightly spaced cracks suggest widespread distress. Wide spacing might indicate localized problems. Refer back to your pattern mapping for context.
- Compare crack widths: Narrow cracks may be early signs of distress. Wider cracks need immediate attention. What goes wrong if you skip this: Delaying repairs on wide cracks can lead to structural damage and higher repair costs.
Quick rule: If cracks are widespread, connected, or growing wider over time, consider it a red flag. Don’t wait; consult with a professional engineer or architect.
Material and Mix-Related Causes of Random Cracking
Concrete composition influences early-age shrinkage and cracking risk. Cement type, cement content, and water-to-cement ratio affect how much the slab will shrink as it sets. Air-entrainment also plays a role in how the mix handles drying and temperature changes. Understanding these factors helps you evaluate whether cracking is a material issue or something else, and what to verify on labels or data sheets from the batch. If you’re unsure, check the manufacturer instructions and local guidance for acceptable ranges and recommendations.
Batching, mixing, and curing practices matter just as much as the mix itself. Inconsistent proportions, rough sequencing, or poor mixer cleanliness create weak zones that are prone to microcracking. Aggregate selection and moisture content influence workability and internal friction, which can drive differential shrinkage. Admixtures and supplementary cementitious materials can mitigate cracking, but misused products may worsen it. Verify curing methods and protection against premature evaporation using product labels and code guidance, then plan for proper curing after placement.
Water-cement ratio and mix design issues
The water-cement ratio is a critical factor in concrete cracking. Too much water weakens the cement paste, making it more susceptible to shrinkage and cracks.
Excessive water reduces the strength of the concrete and increases the likelihood of random cracking. It also leads to higher shrinkage as the concrete dries, creating tensile stresses that can cause cracks.
Poor mix design, like using too much or too little cement, can also lead to cracking. Too much cement makes the concrete stiffer and harder to place, while too little leaves it weak and prone to cracking.
Aggregate, batching, and contamination
Inconsistent batching can lead to variations in concrete strength and durability, increasing the risk of random cracks. Ensure your batches are accurate and consistent.
Weak or poorly graded aggregate can also cause problems. Large, angular aggregates provide better strength, while small, round ones can lead to excessive bleeding and segregation, causing weak zones that crack under stress.
Contamination in the mix, like dirt or other foreign materials, can create weak points that are prone to cracking. Always ensure your aggregate is clean and free of contaminants.

Construction and Environmental Causes to Check First
Site practices and environmental conditions at pour time have lasting effects. Poor subbase prep, inadequate compaction, and improper backfill can create shifting that stresses slabs. Moisture in the soil, drainage issues, and grading that directs water toward the slab increase the risk of movement and cracking. Inspecting the subgrade before and after pour helps you distinguish settling from other causes and guides the remedy. This is a good starting point for conversations with contractors and inspectors alike.
Weather and curing conditions during and after placement are critical. Extreme temperatures, wind, and humidity affect evaporation rates and curing strength, which in turn influence crack formation. Rapid day-to-night temperature swings can exacerbate plastic cracks and map cracking. Review recent weather and site conditions against the pour record, and use labels or instructions to confirm recommended curing and joint strategies with the supplier or local codes.
Curing, Temperature, and Drying Conditions
Inadequate curing, hot or windy conditions during pour, and rapid evaporation can lead to early-age cracking. Curing is crucial for concrete’s strength development. Insufficient water during this period causes the slab to dry out too quickly, leading to cracks.
Temperature plays a significant role. High temperatures speed up evaporation and hydration, causing rapid drying and cracking. Wind also accelerates moisture loss, so protecting the slab from wind is essential during curing.
Rapid temperature changes can cause thermal stresses. Night/day swings can lead to expansion and contraction, resulting in cracks. Keep an eye on weather forecasts and adjust your schedule accordingly.
Subgrade Preparation and Drainage
A poorly prepared subgrade is a common cause of random cracking. Soft spots or inadequate compaction allow the slab to settle unevenly, creating stress and cracks.
Water movement beneath the slab can also cause problems. Inadequate drainage allows water to accumulate, softening the soil and causing settlement. Ensure proper grading away from the slab and install adequate drainage systems if necessary.
Moisture intrusion from below or around the slab can also lead to cracking. Inspect for any signs of water seepage or leaks, especially near plumbing fixtures.
Joint Layout, Reinforcement, and Finishing Errors
Missing or poorly located control joints, improper reinforcement placement, and overworking the surface can create stress concentrations that lead to cracking.
- Control Joints: These are intentionally created cracks to control where random cracking occurs. Ensure they’re properly spaced (every 24-36 inches) and cut deep enough (at least 1/3 the slab’s thickness).
- Reinforcement: Inadequate or improperly placed reinforcement can’t hold the slab together under stress. Ensure rebar is properly distributed and follows a logical pattern.
- Finishing: Overworking the surface, especially with power trowels, can cause excessive bleeding and segregation of aggregates, leading to cracking. Avoid over-troweling and keep an eye on the concrete’s consistency during placement.
Regularly inspect your work for any signs of these errors. If you spot any, address them promptly to prevent further cracking.
Field Diagnostics: Checklist and Simple Tests
A practical field approach starts with documenting the crack map. Record location, length, width, orientation, and whether movement is active. Take timestamped photos with a scale reference to accompany your notes. This baseline helps you see changes over time and communicate findings clearly to a pro. A simple map becomes the backbone of any professional evaluation later on.
Next, run through a basic on-site workflow: safety check, drainage and grading review, and look for plumbing leaks or moisture issues that might impact cracks. Quick in-slab tests like a tap test, hollow-sound check, or simple moisture readings near cracks can reveal moisture-related causes or hidden voids. Document all results with dates and conditions to guide decisions on escalation and remediation.
Visual documentation and mapping checklist
Use this checklist to document cracks effectively. It helps track their evolution over time.
- Take timestamped photos: Capture images of each crack with a scale reference. This helps monitor changes in length, width, and pattern.
- Create a grid map: Draw a simple grid on the slab or use an existing one to locate cracks precisely. Note their positions within the grid.
- Record crack characteristics: Measure length, width at multiple points, orientation, and pattern (stair-step, map, random).
- Note active vs dormant movement: Check if cracks are widening or moving with changes in temperature or humidity.
- Log environmental factors: Record ambient temperature, humidity, slab exposure, and recent grinding or saw-cut activity.
- Measure crack width at regular intervals: Use a crack gauge to monitor any changes. This helps identify active cracks.
- Document crack direction and connectivity: Note if cracks intersect, branch out, or run parallel to each other.
- Record any visible settlement or water ingress: These can indicate more serious issues.
Quick rule: Regular documentation helps identify trends and changes in crack behavior over time.
Basic field tools and tests to use
These simple tools help homeowners assess cracks’ severity and cause.
- Tap test: Use a rubber mallet or screwdriver tip to tap along the crack. A hollow sound indicates delamination, which could mean moisture damage.
- Pinless moisture meter: Take readings at multiple points near cracks. High readings suggest excess moisture.
- Plastic sheet test: Place a plastic sheet on the slab overnight to check for ongoing moisture movement. If it’s wet in the morning, there’s a moisture issue.
- Straightedge test: Use a straightedge to check if cracks are misaligned or offset. This can indicate settlement issues.
- Check for efflorescence: White powdery deposits on the surface can indicate water ingress and potential moisture problems.
- Inspect joints: Check if joints are properly aligned, filled, and maintained. Poorly designed or maintained joints can lead to cracking.
- Check for plumbing leaks: Inspect pipes and fittings above and below the slab for any signs of water leakage.
- Observe drainage patterns: Note how water drains away from the slab. Poor drainage can lead to moisture issues.
Quick rule: Regular testing helps identify potential problems early, allowing for timely repairs.
When to order lab tests or instrumentation
These advanced diagnostics help when basic field tests aren’t conclusive.
- Soil reports: Order if you suspect subgrade issues. Tests include soil compaction, strength, and moisture content.
- Concrete cores: Drill cores from the slab to test concrete quality, aggregate size, and mix design. This helps identify material-related causes of cracking.
- Moisture/strain monitoring: Install sensors to monitor ongoing moisture movement and strain in the slab. This is useful for active cracks or when basic tests are inconclusive.
- Thermal imaging: Use infrared cameras to detect temperature differentials, which can indicate heat loss or gain through the slab, potentially causing expansion/contraction issues.
- Ground-penetrating radar (GPR): Use if you suspect voids or other subsurface issues. GPR can image beneath the surface without excavation.
- Structural monitoring: Install inclinometers, extensometers, or other devices to monitor structural movement over time.
- Non-destructive testing (NDT): Use techniques like ultrasonic pulse velocity (UPV) or impact-echo to assess concrete quality without drilling cores.
Quick rule: Order advanced diagnostics when basic tests don’t provide clear answers, or when cracks are severe and structural integrity is a concern.
Case Studies: from Pattern to Root Cause
Case studies help translate patterns into action. Each starts with a visible crack and follows a logical path to the root cause through observable evidence and measurements. The goal is to show how patterns align with shrinkage, settlement, moisture, or other drivers, and how that informs the chosen fix. Realistic, evidence-based reasoning reduces guesswork and helps you plan effectively.
Use a compact data checklist in the field: measure crack width at multiple points, note direction, check whether the crack follows joints or rebar, and record moisture readings and slab type. Tie patterns to likely causes with minimal jargon, and show how the diagnostic steps led to corrective actions such as sealing, moisture management, or joint adjustments. This keeps stories grounded and actionable.
Example: early-age map cracking from rapid drying
Map-like cracks appearing soon after pouring? Blame it on rapid drying. Here’s how:
Pattern-to-hypothesis: Observe tiny, interconnected cracks all over the slab. They’re too widespread and random to be settlement or movement. Timing’s crucial here – they show up early, before the slab’s fully cured.
Diagnostic actions: Check curing methods. Was the slab left exposed to direct sunlight or strong winds? Were moisture readings taken during curing?
Corrective decisions: Seal cracks with a flexible sealant. Re-wet and re-cover the slab if needed. Adjust future curing practices to prevent rapid drying.
Example: random cracks from poor compaction and voids
Random, localized cracks? Voids in the subgrade might be to blame. Here’s how we found out:
Pattern-to-hypothesis: Cracks are scattered, not following any pattern. They’re wider at some points, indicating underlying issues. Check for popped tiles or spalling – that’s a sure sign of voids.
Data collection: Measure crack width at multiple points. Check if cracks follow joints or rebar. Take moisture readings to confirm void presence.
Remediation approach: Excavate and remove the affected subgrade. Compact properly before replacing with new material. Consider adding a layer of foamglas or other void-filling material for extra protection.
Example: load- or thermal-related cracking
Cracks aligning with structural loads or temperature gradients? Here’s how we diagnosed and fixed that:
Pattern-to-hypothesis: Cracks follow the direction of loads (beams, columns) or align with temperature changes (edges, corners). They’re often long, continuous, and may widen over time.
Diagnostic actions: Check load history. Were there any sudden or heavy loads applied to the slab? Inspect for thermal cracks – are they wider on one side?
Corrective decisions: If loads are causing the issue, reinforce the slab where needed. For thermal cracks, consider using expansion joints or adding insulation to reduce temperature differentials. Seal all cracks with a flexible sealant.
Repair, Maintenance, and Prevention Strategies
Short-term measures focus on stabilization and moisture management, while long-term strategies aim for durable fixes. Cosmetic fixes may suffice for dormant cracks, but active or widening cracks often require professional intervention. Clearly define when to escalate to a specialist and what outcomes you should expect from each option. This distinction helps homeowners budget and plan with confidence.
Compare cost-effective DIY methods with professional-grade solutions. Epoxy or polyurethane injections, surface sealants, and moisture barriers can be practical for minor issues, but larger or structural concerns typically need higher-grade materials and skilled application. Establish a maintenance plan with a regular inspection cadence, record-keeping, a basic tool kit, and safety notes, and keep cost ranges in mind to aid budgeting and scheduling with pros.
Repair methods and suitability
When it comes to repairing random cracks on slabs, there are several methods you can consider. The choice depends on the type, size, and cause of the crack.
Sealants: These are best for small, inactive surface cracks. They’re cheap but won’t last as long as other options.
Epoxy Injection: This method is ideal for larger, deeper cracks that are still stable. It’s more expensive than sealants but provides a stronger, longer-lasting repair.
Routing and Sealing: For wider cracks or those caused by settlement, routing (widening the crack) followed by sealing can be effective. This method is more involved and costly.
Slab Replacement: In severe cases where the slab has failed structurally, replacement may be necessary. This is the most expensive option but ensures a solid foundation moving forward.
Preventative measures for future pours
To reduce the risk of random cracks in future concrete pours, consider these planning steps:
Joint Design: Properly spaced and oriented control joints help concrete shrink evenly as it cures. Avoid spacing joints too far apart.
Mix Control: Use a consistent, high-quality mix design. Avoid overworking the concrete or adding too much water during mixing.
Curing Regime: Keep the concrete moist and cool during the first few days after pouring to allow it to cure properly. This helps prevent rapid drying and cracking.
Subgrade Compaction: Ensure the base material is well-compacted before pouring. Poor compaction can lead to voids that cause cracks over time.
Managing safety, costs, and lifecycle expectations
When choosing repairs, it’s important to balance immediate safety fixes, budget constraints, and realistic service-life improvements.
Safety: Always prioritize safety. If a crack poses an immediate risk, address it first, even if it means temporarily patching until a permanent repair can be made.
Costs: Consider the upfront cost of each repair method, as well as long-term maintenance costs. Cheaper options may not last as long and could end up costing more in the long run.
Lifecycle Expectations: Understand that no repair will last forever. Regular inspections and maintenance are key to extending the life of your repairs. Keep records of all repairs made, including dates, methods used, and any follow-up work needed.
Conclusion
Cracking in slabs isn’t just about looks. It matters for safety, long-term durability, and cost, so tackle it with a clear plan and steady steps rather than guesswork.
Start by checking what matters most: look at the pattern and location, note crack width or movement, identify any material or environmental clues, test small, safe patches if you can, and use those findings to decide whether to repair now or monitor and recheck. Read the pattern, verify the material and mix clues, and verify any construction or weather factors before you start. Keep the work zone tidy, take measurements with a ruler, and document what you see so you can compare later.
Common mistakes to avoid are pushing repairs before you know the cause, using the wrong repair method for the crack type, and skipping safety checks like turning off utilities or wearing eye and hand protection. Basic safety rules are firm: test a small area first, don’t overheat or overwork concrete, avoid aggressive cleaners near fresh repairs, and follow the guidance from the field checks and simple tests.
If the crack shows active movement, wide openings, or spans critical edges, or if you’re unsure about moisture, structural links, or load effects, call a qualified professional rather than pushing on alone. You can handle many stepwise checks and small repairs safely, but the right help protects your home, your wallet, and your time. Stay steady, follow the observed pattern and test results, and you’ll keep the slab durable and looking solid.
FAQ
What are the main types of cracks I should recognize in slabs?
Look for shrinkage cracks that form as concrete dries, small hairline lines that don’t go deep, and wider cracks that may widen with temperature changes. Expansion cracks happen when slabs push against obstacles or joints, while settlement cracks show up where the ground shifted under the slab. Note the location, width, and whether cracks run parallel or cross joints to guide the next step.
What commonly causes random slab cracking, beyond obvious impact damage?
Cracks can come from loading that’s heavier or more cyclic than the slab was designed for, poor design or edge support, and environmental changes like temperature swings, moisture loss, or ground movement. Poor curing, weak mix, or improper joint placement can also set up cracking patterns. Check the label or manufacturer notes for recommended practices and local conditions that affect your slab.
How do crack patterns tell me the root cause and the right fix?
Pattern clues matter: uniform, evenly spaced cracks often point to shrinkage or joint issues; random, isolated cracks can hint at settlement or localized loading. Observe if cracks align with control joints, edges, or structural loads. Use simple tests and compare with what the manufacturer or local guides say before deciding on repair steps.
What preventative steps can reduce future cracking and keep it safe?
Proper joint placement and spacing, adequate subgrade prep, and correct concrete mix and curing help. Keep soil moisture stable near the slab and avoid heavy loads on new concrete until it’s cured. If you see widening cracks, trips, or signs of settlement, address them now rather than waiting for a bigger problem. For any repair plan, verify options with product labels, manufacturer instructions, or local guidance.