
Introduction
Rain during concrete finishing is when rain hits the surface while concrete is still finishing, risking a poor surface. This article shares practical steps to limit damage and keep the finish looking even. It covers how weather affects curing and what to check before you proceed.
If rain arrives, assess the surface and consider delaying final finishing if you can. Provide shelter for the area and adjust your plan to avoid completing in heavy or ongoing rain. Check for signs of streaking or scaling and follow safe repair or rework steps as advised by local guidance and the product instructions.
Key takeaways
- Rain accelerates surface drying and can cause surface scaling if untreated.
- Protect exposed concrete with approved covers and timing to avoid precipitation exposure.
- Have a Go/No-Go decision checklist ready before pouring in forecasted rain windows.
- Immediate rescue steps include tarp coverage and edging to prevent puddling on surface.
- After rain exposure, begin proper curing with kept temperatures and moisture control.
- Watch for slips on wet slabs; use PPE and established site protocols.
Table of Contents
- Introduction
- Key takeaways
- Why Rain During Finishing Matters — Effects on Concrete Quality
- Go/No‑go Decision Checklist Before a Pour
- Tools, Materials, and Setup Checklist for on-the-Spot Protection
- Immediate Rescue Steps When Rain Starts During Finishing
- Proper Curing and Covering After Rain Exposure
- Identifying and Assessing Damage — Visual Checkpoints
- Repair and Remediation Options After Finishing Damage
- Planning, Risk Reduction, and Safety Protocols to Avoid Rain Damage
- Conclusion
- FAQ
Why Rain During Finishing Matters — Effects on Concrete Quality
The presence of water during finishing changes how the surface looks and behaves. Wet areas can appear dull, uneven, or mottled, and water can lift some surface texture as work continues. Small losses in surface strength may occur from increased porosity, which influences how the slab wears over time.
Water exposure promotes scaling, streaking, and micro-cracking that are visible after curing. Consider how different finish types react to moisture, such as troweled, broomed, or stamped surfaces, and anticipate risk when rain is possible. When in doubt, check the concrete mix specs or the manufacturer instructions for moisture guidelines and tolerances.
How fresh-hydrated paste and fines react to rain
When rainwater comes into contact with freshly poured concrete, it can alter the surface in detrimental ways. The additional water dilutes the cement paste, weakening its strength and increasing the likelihood of scaling and discoloration.
Signs of dilution include a loss of sheen and a softened surface. If you notice these signs, delay finishing until the paste regains strength.
To prevent this, ensure your concrete mix design has an appropriate water-cement ratio. After rain, consider re-curing and re-finishing affected areas to restore surface quality.
Weather factors that increase risk (intensity, duration, temperature)
The severity of rain’s impact on concrete finishing depends on several weather factors. Intense and prolonged rain can cause more significant damage than light, brief showers.
High winds and low temperatures can exacerbate the problem by accelerating moisture loss or preventing proper curing. On-site, assess wind and temperature conditions. Monitor weather forecasts for intensity and duration to plan accordingly.
If intense or prolonged rain is expected, consider sheltering the slab, delaying finishing, or using protective measures. After rain, implement controlled curing methods to minimize damage.
Go/No‑go Decision Checklist Before a Pour
Set clear go/no-go criteria based on forecasted rainfall and the time window around finishing. Use reliable sources such as local weather services or trusted apps and apply a practical lead time for decisions. Document the forecast that triggered the choice to proceed or delay.
Assess site drainage, surface porosity, and nearby water sources to ensure ponding or runoff is minimized. For indoor pours, verify humidity and heating conditions as needed. Align the decision with project schedule, crew readiness, and finish requirements before moving forward.
Job-critical questions to ask before starting
Before proceeding with a concrete pour, it’s crucial to align expectations and prepare for potential challenges. Use this checklist to ensure all parties are on the same page.
- Finish expectations: What is the desired final appearance? How will rain impact it?
- Contingency plans: What are the backup strategies if rain occurs during finishing?
- On-site cover availability: Are there materials (plastic sheeting, tarps) to protect the pour from rain?
- Client acceptance: If aesthetics are compromised due to rain, will the client accept the finished product?
- Rain protection measures: What steps can be taken to minimize rain damage if it occurs?
- Curing environment: Is the site prepared for proper curing in case of rain (adequate heating/humidity control, minimal ponding/runoff)?
- Crew readiness: Are crew members trained and ready to implement protective measures if needed?
- Pour duration: Can the pour be completed before expected precipitation? If not, what are the contingency plans?
- Schedule constraints: Will delays due to rain impact other project timelines or tasks?
Quick rule: Address any misunderstandings or gaps in preparation immediately to avoid delays or rework.
When postponing is the better choice
In some cases, delaying a concrete pour can yield a better finished product. Use this checklist to assess when postponing might be the wiser option.
- Finish requirements: Are high-quality aesthetics critical for the final appearance?
- Rain intensity and duration: Is heavy or prolonged rain expected? How long will the concrete be exposed to it?
- Protection measures: Are there adequate measures in place to protect the pour from rain (covering, curing compounds)?
- Schedule pressures: Are there significant time constraints that might justify proceeding despite rain risks?
- Mitigation strategies: Can protective measures minimize the impact of rain if the pour proceeds as planned?
- Temperature and humidity: Are heating or humidity controls available to aid curing in cool conditions?
Quick rule: If rain is heavy or prolonged, finish expectations are high, and adequate protection is unavailable, delay the pour. However, if schedule pressures are significant and mitigation measures can minimize rain impact, proceed with caution.
Tools, Materials, and Setup Checklist for on-the-Spot Protection
Prepare a practical inventory of covers such as tarps, plastic sheeting, and canvas, plus films or sealants suitable for the surface type. Choose protection based on weather severity and expected exposure. Always follow manufacturer recommendations for any protective product used.
Secure coverings with stakes, sandbags, weights, or painter’s tape, avoiding over-tightening that could damage the surface. Keep absorbents, brooms, mops, and squeegees ready for quick moisture control. Include PPE and a simple on-site protection workflow so the crew can respond to changing weather efficiently.
Covers and Fastening Methods
Use this checklist when rain threatens fresh concrete to protect it from damage.
- Plastic Sheeting: Ideal for light rain. Check material thickness; thinner sheets may tear or rip in wind.
- Tarps: Suitable for moderate rain. Ensure they are clean and free of debris that could imprint onto concrete.
- Canvas Sheets: Good for heavy rain but can absorb water, so use weighted edges to prevent sagging.
- Weighted Edges (Sandbags, Weights): Necessary in heavy rain to prevent cover lift-off. Distribute weights evenly along all edges.
- Stakes: Use for securing covers in windy conditions. Avoid over-tightening; check regularly to ensure they aren’t pulling on the cover.
- Painter’s Tape: For light rain with wind. Apply along edges to secure covers and prevent lift-off.
- Temporary Fasteners: Use for quick setup/removal. Ensure they won’t damage concrete upon removal.
- Secure from Top-Down: Start at the highest point, working downwards to avoid trapping water under the cover.
Quick Rule: Inspect all fasteners before use and check covers regularly to prevent water entrapment or damage.
Improvised Tools for Water Diversion
When standard equipment is absent, use these low-cost improvisations to protect your slab from rainwater damage.
- Sandbags: Fill with sand or soil. Stack along perimeter to create a temporary berm, diverting water away from the slab.
- Tarps: Use as makeshift channels. Fold and place along edges to direct water flow away from the slab.
- Soil Berms: Mound soil along edges to create a natural barrier against water. Ensure it’s compacted well to prevent erosion.
- Temporary Channels: Dig shallow trenches around the slab using available tools. Fill with gravel or sand for better drainage.
- Rentable Tools (optional): Consider renting small excavators, trenchers, or pumps if water diversion is extensive. Check local rental prices and availability.
Pro Tip: Regularly inspect improvised tools to ensure they’re functioning properly and not causing new issues like trapping water.
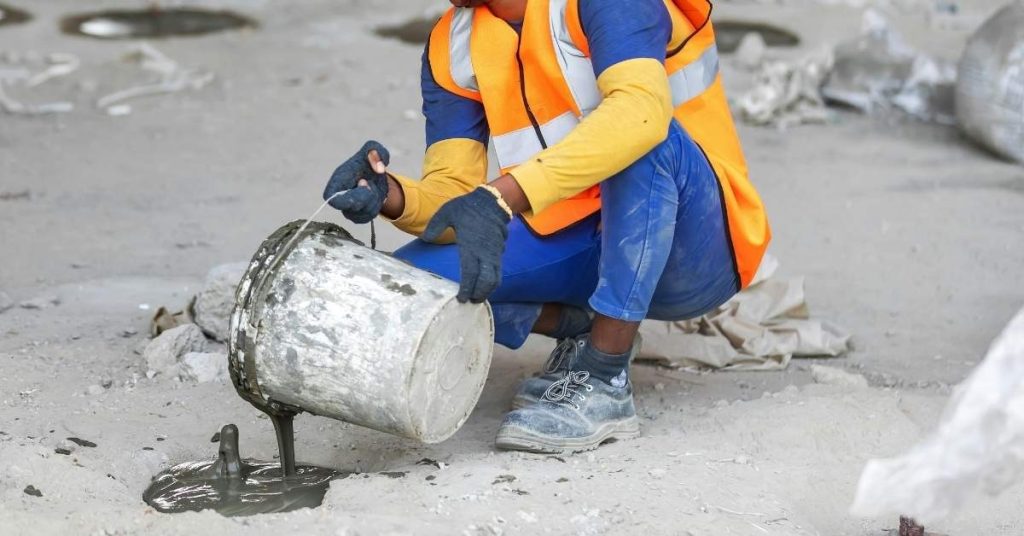
Immediate Rescue Steps When Rain Starts During Finishing
Stop finishing operations immediately when rain is detected and secure the work area to minimize slip hazards. Evacuate nonessential crew if surfaces become slippery, and secure tools and electrical gear. Reassess wind, lighting, and drainage while preserving forms and bars from disturbance.
Quickly assess the surface for loss of sheen or roughness and deploy protective measures such as plastic sheeting or a temporary shelter. Avoid dragging equipment across the wet surface and do not resume aggressive troweling until conditions improve.
Fast actions for active finishing operations
If rain begins during active concrete finishing, stop all finish operations immediately to prevent overworking the surface. Lift floats and trowels from the surface gently to avoid dragging marks.
Inspect the surface for signs of water impact such as sheen loss or roughening. Brush off pooling water gently without dragging equipment across the wet surface, which can create streaks or mottling.
Protect edges using appropriate materials like plastic sheeting or tarps to prevent water from seeping in and causing damage. Control bleed water by adjusting your finishing techniques or using temporary drainage aids to avoid creating visible defects on the concrete surface.
If cover is applied mid-pour: correct techniques to prevent mottling
If rain begins during a pour, apply covers immediately to protect exposed areas from direct contact with rain. Inspect edges and corners for any gaps or improper securing of covers to ensure water cannot seep in.
Verify that the cover material is suitable for the job and follow manufacturer’s guidelines for proper placement and securing. Place covers carefully without dragging, as this can create marks on the concrete surface.
Avoid ponding or sealing in water by allowing for drainage where possible. Remove covers promptly once rain stops to prevent moisture entrapment, which can lead to mottling or other visible defects on the concrete surface.
Proper Curing and Covering After Rain Exposure
Identify surface issues such as streaks or still-wet patches to determine if re-smoothing or re-curing is needed. Do not rush sealing if the surface hasn’t stabilized; plan the next steps based on a visual check and moisture condition. Decide whether re-smoothing or re-curing is appropriate given the current surface state.
Choose the curing approach that aligns with product guidance and the surface condition. Wet curing may be suitable early in curing if moisture can be maintained without wash-off; curing compounds are an alternative when the surface is dusty or stiffened.
Plastic Sheeting (Visqueen) — Benefits, Pitfalls, and Best Practice
Proper use of plastic sheeting can prevent moisture loss from concrete during curing. However, improper installation can lead to issues like water trapping or surface blemishes.
- Avoid Trapping Water: Ensure the slab has gained initial set before applying. Do not cover a wet surface as it may trap free moisture and cause sweating under the plastic.
- Prevent Condensation: Use breathable, permeable covers or vented plastic to allow excess moisture to escape. Avoid using non-porous materials that can cause condensation buildup.
- Weight Edges Properly: Secure the edges of the plastic with weights or tape to prevent wind from lifting it and causing imprinting on the surface.
- Avoid Surface Blemishes: Do not allow the plastic to touch the concrete surface directly. Use spacers or a second layer of plastic to avoid transferring imprints onto the curing slab.
By following these best practices, you can effectively use plastic sheeting as part of your concrete curing process without causing damage to the surface.
Alternative Curing Options and When to Use Them
In addition to traditional wet curing, several alternative methods can be employed to protect concrete during the curing process. The choice depends on various factors such as finish sensitivity, temperature, and available labor.
Burlap-and-Water: This method involves wrapping the slab in burlap soaked in water. It is effective for protecting against rapid moisture loss but requires regular re-wetting. Use it when a rough texture is desired or where labor is readily available to maintain consistent moisture.
Curing Blankets: These are insulated covers that retain heat and moisture. They are ideal for cold weather curing, as they help maintain a consistent temperature. Use them when protecting against freezing temperatures and where insulation is necessary.
Curing Compounds: Applied as a liquid or spray, these compounds form a protective membrane over the concrete surface. They are useful when a smooth finish is desired or in areas with high wind or traffic. Follow product guidelines for application and removal to ensure optimal results.
Identifying and Assessing Damage — Visual Checkpoints
Differentiate temporary curing blemishes from deeper issues that may require repair. Use criteria such as the depth of scaling, texture irregularities, or signs of moisture intrusion to decide on action. Document findings to support any follow-up work.
Develop a visual checklist describing mottling, discoloration, and texture consistency, plus edge integrity and depth cues. Include tactile tests like light tapping to detect hollow sounds or softness that signals subsurface concerns.
Quick on-site severity grading
Use this checklist immediately after assessing damage to categorize it as cosmetic, moderate, or severe. This helps guide your next steps and communicate with clients effectively.
- Estimate affected area: Quickly gauge the percentage of the surface that’s affected. If less than 10%, proceed to the next step.
- Check scaling depth: Gently scrape or tap the surface to confirm if scaling is shallow. If so, continue with the following steps.
- Inspect entire surface: Systematically examine the whole area to ensure no other issues are present. Skipping this step might lead to overlooking additional damage.
- Document findings: Take high-resolution photos with a scale, noting location, exposure duration, and curing method at the time of finish.
- Plan repairs: Create a quick repair plan with prioritized steps based on your findings.
- Re-evaluate grading: If new information arises during repair planning, re-evaluate the damage category to ensure accurate next steps.
Quick rule: If less than 10% of the surface is affected with shallow scaling, categorize it as cosmetic. Clean and continue curing. If 10-50% is affected with moderate scaling, categorize it as moderate. Document, clean, and plan repairs.
When to bring in testing or specialist inspection
Use this checklist to identify when core testing, pull tests, or consultant assessment is needed. These steps help ensure the structural integrity of your concrete.
- Check for widespread damage: Examine the entire surface and edges for signs of extensive or deep-seated problems. If found, consider further investigation.
- Inspect for exposed aggregate: Look for areas where aggregate is exposed due to delamination or other issues. This may indicate a need for specialist assessment.
- Evaluate delamination: Check for widespread delamination, which could suggest underlying structural problems that require professional evaluation.
- Consult a specialist: If you find exposed aggregate or widespread delamination, consult a specialist for an assessment and potential pull tests to confirm the extent of damage.
- Consider additional testing: If initial tests are inconclusive, consider using additional testing methods or deeper consultation to ensure accurate diagnosis and repair planning.
Quick rule: If you find deep scaling across large areas, consider core testing to assess internal damage. If exposed aggregate or widespread delamination is present, consult a specialist for assessment and potential pull tests.
Repair and Remediation Options After Finishing Damage
A rapid visual audit plus simple moisture checks, porosity tests, and a pro check help decide remediation vs. replacement. For minor damage with a sound substrate, light surface treatments may be suitable; moderate damage may require patching or grinding, and severe cases may need overlays or professional repair.
Protect surrounding areas, manage dust and curing conditions, and test options on a small area first. Stake: skipping surface assessment may lead to inappropriate remediation and wasted effort. Quick check/cue: a simple visual audit can identify the type and extent of rain-caused damage on finished concrete.
Cosmetic Fixes vs. Structural Repairs
When rain damage occurs on finished concrete, the first step is to determine the severity of the damage. This will help you decide whether minor cosmetic fixes or more invasive structural repairs are necessary.
Minor damage, such as light staining or small chips, can often be addressed with cosmetic fixes. These include cleaning, color blending, or applying sealers to restore the surface’s appearance. However, these methods do not address underlying issues and may not be suitable for more significant damage.
Significant damage, like deep cracks, texture loss, or extensive scaling, requires structural repairs. This could involve grinding, reprofiling, or applying overlays to restore the concrete’s integrity. These methods are more invasive but can address both surface and underlying issues.
It is crucial to verify the finish type and condition before proceeding with any repair method. Incorrectly applying minor fixes to major damage can lead to premature failure and costly rework.
Cost and Schedule Implications of Common Remedies
The severity of the rain damage will significantly impact the cost and time required for repairs. It is essential to communicate these likely impacts upfront with clients to manage expectations.
For minor damage, expect lower costs and shorter downtime. Quick fixes like cleaning or applying sealers can usually be completed within a day or two at a relatively low cost.
However, for moderate to severe damage, anticipate higher costs and longer downtime. Repairs such as grinding, patching, or applying overlays require more labor, materials, and time. These repairs can take several days to complete and may involve additional costs for equipment rental or specialized labor.
Before planning remedies, it is crucial to estimate the damage severity and extent. Also, review remedy options, labor requirements, and equipment needs with contractors or manufacturers to get accurate cost and time estimates. Underestimating these can lead to budget overruns and project delays.
Planning, Risk Reduction, and Safety Protocols to Avoid Rain Damage
Build in scheduling buffers and go/no-go criteria to delay or reschedule pours when rain risk is present. Establish a clear process for weather-related decisions and documentation. Include contingency options in the plan.
Implement site-wide monitoring and a documented decision log, with roles assigned for weather checks and rapid response. Include worker safety measures for handling wet or damaged concrete, and provide guidance for PPE and safe work practices around moisture and slip hazards.
Site planning and scheduling practices
Effective site planning and scheduling are crucial for minimizing rain exposure risks. Start by creating a detailed weather management plan that includes:
Bad-weather plans: Define clear procedures for postponing or protecting concrete pours when rain is forecast.
Flexible resources: Order materials and equipment with lead times that allow for rescheduling without compromising quality. Consider having backup resources available.
Additionally, set client expectations early on about the possibility of weather-related delays and the need to postpone or implement rain protection measures immediately if rain is forecast during critical concrete operations.
Safety and cleanup procedures for wet/damaged pours
Ensuring worker safety and environmental responsibility are paramount when dealing with wet or damaged concrete pours. Follow these guidelines:
Personal Protective Equipment (PPE): Ensure all workers have access to appropriate PPE, including hard hats, safety glasses, gloves, and steel-toed boots.
Slip/fall prevention: Implement measures such as installing temporary walkways or using non-slip materials to prevent slips and falls on wet surfaces.
When removing soaked covers or handling damaged concrete:
Safe removal/handling: Use appropriate tools, such as shovels or forklifts, and follow safe lifting techniques to avoid injuries. Ensure that the area is stable before entering.
Environmentally responsible cleanup: Collect and dispose of runoff or wash water responsibly, following local regulations. Consider using absorbents or containment systems to minimize environmental impact.
Conclusion
Protecting safety and preserving concrete durability after rain is the bottom line: quick, calm action now prevents scaling, streaks, and costly rework later. Stay steady, follow the plan, and verify each step before proceeding.
Proceed with a simple, practical check as you finish: confirm weather conditions and the likelihood of more rain, inspect the surface for visible moisture or sheen, ensure protection is in place and secured, and test a small area if you’re unsure how the surface will respond. If anything seems uncertain, delay nonessential finishing steps and reassess after a brief, controlled test, keeping the work area safe and dry.
Common mistakes to avoid are rushing the decision, skipping a small-area test, and ignoring visible signs of moisture or surface texture changes. Do not push ahead with finished work when rain is imminent or ongoing; always prioritize safety, recheck protective measures, and follow manufacturer or local guidance for curing and covering. Use the rule of thumb: if you doubt the surface response, pause and protect, then test before continuing.
When in doubt, call a professional if moisture exposure led to ambiguous results, significant surface alteration, or if you’re unsure of curing or remediation steps. A cautious step now can save time and money later. Stay methodical, protect the surface, and keep the project moving toward a durable, clean finish.
FAQ
How does rain affect concrete curing and what should I look for during the curing period?
Rain can disrupt the curing process by washing away cement paste and altering surface moisture. Look for signs such as surface dusting, color variation, or a chalky feel that indicates improper curing. Check manufacturer guidelines and local recommendations for curing practices after exposure.
What are effective ways to protect concrete from precipitation during and after a pour?
Use waterproof covers, curing blankets, or temporary shelters to shield the surface. Secure the covers to prevent flapping and ensure there is ventilation beneath where needed. Remove standing water promptly and re-cover as necessary to maintain the intended curing environment.
Why is timing important when pouring in unfavorable weather, and what should be checked beforehand?
Pouring in rain or imminent rain can compromise finish quality and early curing. Check the weather forecast, ground and base conditions, and any cooling or wind factors that could affect evaporation and strength development. If conditions are not suitable, consider delaying until a stable window is available.
What visual defects indicate rain exposure during finishing, and what rescue steps can you take after exposure?
Defects may include surface staining, white efflorescence, scaling, or laitance and weak patches. Rescue steps include protecting the surface from further rain, removing standing water, re-wetting or re-dosing as appropriate per instructions, and applying a protective covering to allow proper curing. If damage is extensive, consult the manufacturer instructions or a professional for guidance on remediation options.