
Introduction
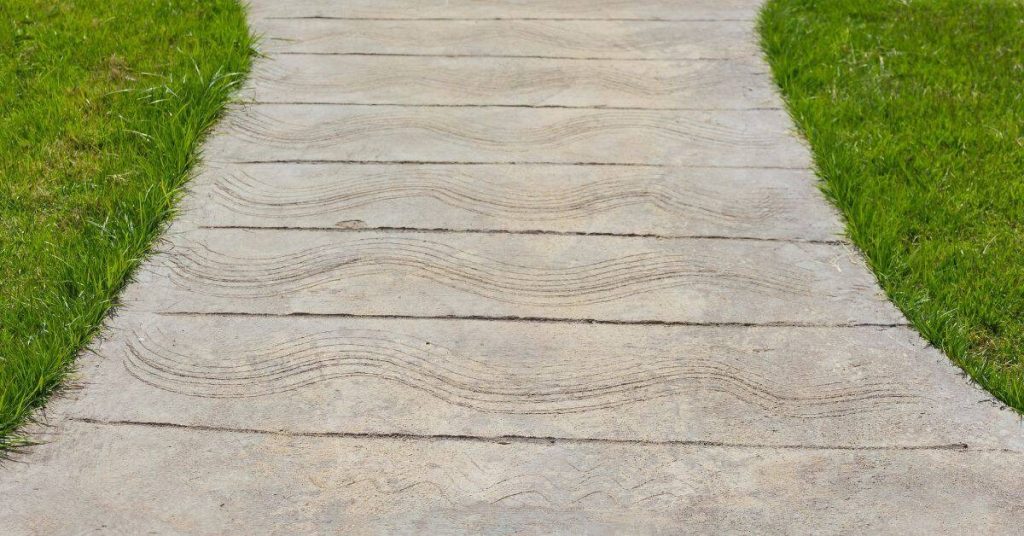
Proper slope on exterior concrete slabs is the intentional downward pitch away from structures to shed water. In practice, set the grade so water flows away from foundations and walkways stay dry. Use simple layout methods to keep the slope consistent during pouring and finishing.
To calculate and achieve the slope, reference the site and any framing constraints, then plan a uniform pitch that suits the area. Mark the correct pitch during layout with basic tools and check against the surface during finishing. Be mindful of drainage issues near foundations and consult product labels, manufacturer instructions, or local rules for requirements and acceptable methods.
Key takeaways
- Verify exterior slab slope targets with local code guidance and manufacturer instructions.
- Mark pitch during layout using a stable string line and level checks.
- Use a straightedge and screed guides to maintain gradual drainage slope.
- Apply forms and pour in stages to prevent misalignment and water pooling.
- Inspect for puddle-prone areas and correct division lines before finishing coat.
- Schedule tests for drainage after cure and guard safety during form removal.
Table of Contents
- Introduction
- Key takeaways
- Why Slab Slope Matters for Drainage and Durability
- Tools and Materials Checklist for Layout and Grading
- Easy Layout Methods for Marking Slab Slope (Step-by-Step)
- Forming, Pouring, and Finishing Practices to Maintain Slope
- Preventing Puddles and Protecting the Foundation
- Long-Term Maintenance and Tests to Ensure Consistent Drainage
- Planning, Costs, and Safety Considerations Before You Pour
- Conclusion
- FAQ
Why Slab Slope Matters for Drainage and Durability
Slab slope directs surface water away from finished areas and structural edges, reducing the risk of puddles that can harm coatings and finishes. A proper grade also protects foundations by guiding water away from walls and joints. In freeze-thaw climates, slope helps minimize repeated wetting and potential cracking, and it lowers slip hazards on walking surfaces.
For complex sites, involve a designer or engineer to confirm slope strategy and drainage intent. Check local guidelines and project notes to confirm the appropriate approach for porches, patios, and pedestrian paths. Use practical verification methods during the pour to confirm that the slope drains toward the intended point and avoids low spots that hold water over time.
How standing water damages slabs and nearby structures
Standing water on exterior concrete slabs can accelerate deterioration, leading to dusting, cracking, and increased permeability. Prolonged exposure can cause water intrusion at foundations, resulting in structural damage, mold growth, and reduced indoor air quality.
During construction, perform a simple test pour to observe water flow. If water collects in specific areas, adjust the slab’s slope accordingly.
Regular inspections are crucial to identify signs of ponding or pooling on slabs, especially near thresholds and low-lying areas. If water pools or stands for extended periods, re-evaluate and adjust the slab design and/or drainage system promptly.
Performance Goals: Drainage, Accessibility, Code Compliance
Adequate slope ensures reliable runoff, protecting the slab and surrounding structures from water damage. Design should consider accessibility standards, such as those outlined by the Americans with Disabilities Act (ADA), and comply with local drainage and building codes.
Ensure your slab design meets minimum slope requirements for typical exterior slabs, generally 1/8 inch per foot or ~1 cm per meter. Consider specific needs for porches, patios, and pedestrian pathways.
Review local codes. Consult relevant authorities during planning to ensure compliance. If your site has complex grading, hillside location, or structural concerns, consult a licensed designer/engineer.
Tools and Materials Checklist for Layout and Grading
Gather essential layout tools that control grade, level, and alignment, including devices for establishing reference elevations and continuous slope. Include marking tools, strings or chalk lines, and a straightedge for quick checks along the slab edge. Have protective equipment and measurement markers ready for accurate setup.
Before purchasing or renting, verify slab thickness, base conditions, and any site constraints that affect drainage. Review local code requirements and consult manufacturer guidance for any specific material interactions. List base materials, form materials, and release agents that influence the final slope and finish, and plan for the quantities needed.
Measuring and layout tools
Accurate measurement and layout are crucial for achieving the desired slope on your exterior concrete slab. Here are essential tools to ensure precision:
- Tape Measure: For accurate length measurements; verify calibration before use.
- Spirit Level: To establish horizontal and vertical lines; check bubble accuracy.
- Line Level or Laser Level: For setting reference lines; ensure batteries are fresh for laser levels.
- String Line: Creates continuous slope guides; tension the line properly for accurate layout.
- Grade Stakes: Mark target grades along the slab’s length; use durable stakes to prevent bending or breaking.
- Slope Blocks: Quickly set and check desired slope; ensure blocks are clean and undamaged for accurate readings.
- Straightedge: Align formwork and check levelness; use a straight, rigid edge for best results.
- Optional: Total Station or Robotic Total Station: For precise layout over long distances; rent or borrow if needed, ensure proper calibration.
Forming and finishing materials
Choosing the right materials ensures proper slab formation, drainage, and durability. Consider these factors when selecting forming and finishing materials:
- Form Boards: Support concrete during setting; use appropriate thickness for desired slab depth.
- Stakes: Secure form boards in place; ensure sufficient length to penetrate subgrade securely.
- Screed Rails: Level and finish the concrete surface; adjust height to match desired slab thickness.
- Concrete Mix: Choose a mix with suitable slump for easy placement and finishing; consider air entrainment for durability.
- Form Release Agent: Prevents concrete from bonding to forms; ensure compatibility with desired finish.
- Surface Finish: Affects runoff and aesthetics; choose a finish that complements your design goals.
- Gravel/Aggregate Cushion (Base Material): Provides a stable, draining subgrade; ensure proper compaction before pouring concrete.
- Metal Edging: Reinforces formwork and provides clean edges; use appropriate thickness for desired slab depth.
Safety and PPE
Proper safety measures protect workers from hazards and ensure a productive work environment. Use this checklist before starting any concrete slab project:
- Hard Hat: Protects against falling objects; ensure proper fit and securement.
- Safety Glasses or Goggles: Shields eyes from debris and chemicals; check for scratches or damage before use.
- Work Gloves: Protect hands from cuts, burns, and other hazards; choose gloves suitable for the task at hand.
- Steel-Toed Boots: Safeguards feet from heavy objects and compression injuries; ensure proper fit and lacing.
- High-Visibility Vest or Clothing: Increases worker visibility, especially in low-light conditions; check for reflective material intactness.
- Ear Protection: Reduces noise exposure from power tools and equipment; use appropriate type (earplugs or earmuffs) based on noise levels.
- Respirator: Protects against dust, fumes, and other airborne hazards; ensure proper fit and filter selection.
- Safety Harness: Provides fall protection when working at heights; inspect harness for damage or wear before use.
- Secure Work Area: Remove tripping hazards, secure loose materials, and provide safe access to the work area.
- Emergency Plan: Establish procedures for responding to accidents, injuries, or other emergencies; communicate plan to all workers.
Quick rule: Always prioritize safety over speed. Address any safety concerns promptly and provide additional training if necessary.
Easy Layout Methods for Marking Slab Slope (Step-by-Step)
The goal is to establish a reliable exterior slab slope away from foundations while minimizing puddles. Typical targets guide drainage direction and edge conditions, with success measured by clean lines of the marking and consistent edge elevations. Use on-site checks to confirm the slope throughout the pour area before concrete begins.
Method one uses a string line with graduated marks to set reference points, method two uses a calibrated laser setup, and method three relies on screed-rail profiling. For each method, follow prep steps, place reference elevations, and mark the surface with durable lines. Verify benchmark elevations, consistency along the edge, and perform a quick water test to confirm drainage orientation.
Step-by-Step Layout Process
The following steps outline a practical sequence for marking exterior concrete slab slope using easy layout methods. This process ensures accurate, repeatable results and helps prevent puddles.
- Preparation: Ensure the substrate is stable and account for any existing footing or drip edge. Gather tools including a level, measuring tape, string line, slope blocks (or a level and tape), and a laser level (optional).
- Safety Checks: Verify that all tools are in good working order. Protect fresh markings from weather.
- Establish Benchmarks: Mark benchmark elevations at each end of the slab and at intermediate points, using a level or laser level for accuracy.
- Mark Slope Intervals: Using slope blocks (or a level and tape), mark drop per interval along the string line. Ensure consistency by double-checking measurements and elevations at each step.
- Transfer Elevations to Forms: With the string taut and level, transfer the marked elevations to the forms using a measuring tape or laser level. Account for any thickness variation in the slab.
- Check Consistency: Verify that markings are consistent along the entire slab edge. Perform a quick water test or feel of the surface to confirm drainage direction.
- Final Checks: Recheck benchmark elevations, tool calibration, and string tension before pouring. Document any deviations for adjustments.
String-line and Slope-block Method (Low-Cost)
This method uses a taut string and slope blocks to establish elevation references and mark the desired slab slope. It’s an affordable way to achieve accurate results.
Steps:
1. Stretch a string line between benchmark elevations, ensuring it’s level and taut.
2. Place slope blocks (or use a level and measuring tape) at the desired drop per interval along the string.
3. Transfer these elevations to the forms using a measuring tape or laser level, accounting for any thickness variation in the slab.
Quick Check: Confirm that the drop per interval is consistent along the string and that markings are accurate at each elevation transfer point.
Pro Tip: If slope blocks are not available, use a level and measuring tape to mark elevations manually. Ensure the string is taut and level at each reference point for accurate measurements.
Laser Level Method (Fast and Accurate)
The laser level method provides fast, precise measurements for marking exterior concrete slab slope. It’s ideal for large slabs or when speed is a priority.
Steps:
1. Set up the laser level according to manufacturer instructions, ensuring it’s level and accurate.
2. Use a laser receiver or measuring rod to take offsets from the laser beam at benchmark elevations and along the slab edge.
3. Stamp layout points on the forms based on these measurements, accounting for any thickness variation in the slab.
Quick Check: Ensure that the laser beam is visible and consistent at each measurement point to maintain accuracy.
Pro Tip: If using a rotating laser, ensure the receiver is properly aligned with the laser beam for precise measurements. Regularly calibrate the laser according to its instructions to maintain accuracy.
Screed Rails and Slope Templates (For Consistent Finish)
Installing screed rails or slope templates at the correct elevations guides the screeding process, ensuring a uniform slab surface with the desired slope.
- Check Elevations: Ensure that the screed rail or template is set to the correct elevation for the desired slope. Verify this at multiple points along the formwork.
- Secure Rails/Templates: Properly secure screed rails or templates to prevent movement during screeding, which can lead to an inconsistent finish.
- Adjust for Thickness Variation: Account for any variation in slab thickness by adjusting the elevation of the screed rail or template accordingly.
- Check Level: Ensure that the screed rail or template is level to maintain a consistent slope across the entire slab.
Quick Rule: Regularly check elevations and level during and after installation to ensure consistency in the final finish.
Forming, Pouring, and Finishing Practices to Maintain Slope
Proper slope starts with careful formwork and elevation planning. Use batter boards, stakes, and screed guides to set consistent height and alignment, and verify the target drainage direction with simple checks on setup geometry and level references before pouring.
A well-executed pour preserves the slope through controlled placement, live screed passes, and mindful finishing to avoid flattening or creating high and low spots near the forms. This matters for long-term drainage and reduces the need for rework, while a quick on-site check—like squaring form corners—helps catch issues early and prevents unnecessary patching or trip hazards later.
Building and verifying forms
Setting up forms correctly is crucial for achieving the desired slab thickness and slope. Start by establishing reference points using batter boards and stakes.
Check diagonal measurements to ensure square corners and correct form alignment. Use level and plumb bobs to verify that batter boards, stakes, and screed guides are properly aligned before setting forms.
If forms settle during the pour, use jacks or wedges to restore elevation. Patch any resulting low spots to maintain proper drainage and prevent trip hazards.
Screeding and consolidating to the slope
Proper screeding technique helps maintain intended slab thickness and preserves the desired slope. Set screed rails at the correct height for your desired slab thickness, ensuring they are level and aligned with forms.
Before pouring concrete, check slope using string lines or laser levels along screed rails to ensure accuracy. During consolidation, use a bullfloat to restore any lost slope and avoid overworking the surface.
If screed rails are not level or aligned, adjust and recheck before proceeding with the pour. This will help maintain consistent slab thickness and preserve the intended drainage path.
Final float and edge finishing considerations
Proper final floating helps preserve slab surface quality and maintains clear drainage paths. Verify that broom finish or texture is consistent across the entire slab to prevent low spots or cross-drains.
Check for low spots or high spots near formwork edges during final floating. Address any issues with additional floating, patching, or re-screeding as needed to maintain proper drainage and surface quality.
Be cautious when adding water near edges during finishing to prevent creating low spots. If excessive water is added, address the issue with additional floating to restore proper drainage.

Preventing Puddles and Protecting the Foundation
The core goal is to direct surface water away from the foundation to prevent dampness and erosion near slab edges. Real-world trouble spots include door thresholds and crawlspace penetrations, where small grading tweaks yield large drainage improvements. Establish a consistent plan for perimeter water management and edge protection.
Clarify grading specifics and checks, and outline how to verify existing grades with simple tools and field tests. Include transitions between the slab and soil or landscape, and ensure that water is directed away from doors and vents. Align gutter and downspout placement with a clear drainage path for the slab.
Slab-to-Foundation Transition Details
The transition from your exterior concrete slab to the foundation is critical for directing water away from your home. Ensure a proper slope at this point to prevent water pooling near walls, which can compromise foundation integrity.
Start by visually inspecting the slab edges and wall interfaces after rain or performing a light spray test. Look for any signs of ponding or erosion. Ideally, the slab should have a positive grade away from the structure, typically around 1/4 inch per foot.
Pro Tip: Verify that there are no negative slopes toward the house and ensure clearance to cladding for proper drainage. If existing transitions show signs of ponding or erosion, re-evaluate and adjust the slope as needed.
Integrating Surface Drains and Downspout Routing
Effective drainage is crucial to prevent localized ponding, which can lead to dampness and erosion. Assess your site conditions to determine if additional drainage measures are necessary.
Inspect downspout discharge points after rain or simulate water flow with a hose to check patterns. If significant runoff or low-lying areas exist, consider installing trench, channel drains, or buried pipes as needed. Ensure proper connection to the main drainage system.
Pro Tip: Re-route downspouts away from doors and vents, and add splash blocks or pads if necessary to control water flow. This will help maintain a dry, well-draining area around your foundation.
Landscaping and Soil Considerations Near the Slab
Proper landscaping and soil management are essential for maintaining long-term drainage performance. Inspect planting beds and soil conditions after rain or during seasonal changes to ensure they do not negatively impact your slab’s drainage.
Check for any signs of settling or compaction in adjacent soil, which can affect the slab’s performance over time. If issues arise, re-evaluate and address them by regrading, adding topsoil, or installing perimeter drainage systems as needed.
Pro Tip: Ensure proper topsoil placement for plantings to maintain a healthy landscape while preserving your slab’s drainage capabilities.
Long-Term Maintenance and Tests to Ensure Consistent Drainage
Schedule routine visual checks across seasons to spot new cracks, scaling, or signs of pooling near edges. Note movement or settlement that might alter slope and require attention. Use simple tests to locate low spots and map drainage visually for future repairs.
Document drainage performance and maintain a basic record of slope measurements. Plan maintenance actions such as sealing, patching, or regrading to prevent recurring puddling. Consider safety and timing for larger repairs and know when to involve a professional for substantial drainage changes.
Simple Water Test and Visual Checkpoints
Inspect your exterior concrete slab seasonally or after major weather events to ensure proper drainage. This guide helps identify potential issues early.
- New or widening cracks: Inspect for fresh or expanding cracks, which may indicate settlement or movement affecting the slope.
- Scaling: Check for flaking or peeling of the concrete surface, as this can compromise water shedding and signal underlying issues.
- Efflorescence: Look for a white, powdery deposit on the slab’s surface. Persistent efflorescence might suggest lingering water.
- Pooling patterns near edges or against structures: Inspect areas adjacent to buildings, walls, or other structures where water may collect and cause damage over time.
- Signs of movement or settlement: Check for uneven surfaces, diagonal cracks, or other indications that the slab has shifted, which could affect drainage.
- Ponding test after rainfall or watering: Perform a simple ponding test by applying water to the surface and observing how quickly it drains. Mark areas where water remains after 24 hours for targeted repairs.
- Using a straightedge/level or string line: Map high and low areas on the slab’s surface to understand its slope and identify any depressions causing ponding.
Key point: Regular visual inspections and simple water tests help detect drainage issues early, preventing costly repairs.
Repair Options for Existing Slabs with Ponding
If you’ve identified low spots on your exterior concrete slab that cause water to pool, address these issues promptly to prevent further damage and maintain the slab’s integrity. Consider the following repair options based on the extent of the problem:
Localized shallow depression: Grind or fill low spots using an appropriate concrete patching material. Ensure proper surface preparation, priming, and re-sealing after repairs to preserve performance and prevent recurrence.
Widespread or deep depressions: Consider partial removal and reprofiling of the affected area, or applying a self-leveling overlay resurfacer with integrated drainage. Always follow manufacturer’s instructions for best results.
Integrated surface drains or downspout routing: If necessary, install surface drains or reroute downspouts to direct water away from low spots and prevent future ponding.
Preventive Maintenance Schedule
Maintain your exterior concrete slab’s longevity and minimize drainage problems with a regular upkeep plan. Perform these tasks at specified intervals to keep your slab in optimal condition:
- Sealant reapplication (every 2-5 years): Reapply sealant according to manufacturer’s instructions when it shows signs of wear or delamination. This helps protect the slab from water intrusion and extends its lifespan.
- Clearing drains (quarterly or after major rains): Inspect and clear any clogged or damaged drains to maintain proper water flow and prevent standing water on the surface.
- Checking downspout discharge (seasonally): Ensure that downspouts are directing water away from the slab, preventing it from pooling near structures. Adjust as needed to maintain adequate drainage.
Planning, Costs, and Safety Considerations Before You Pour
Evaluate the broader cost implications of proper slope, including long-term reduce and repair savings. Weigh these against the potential costs of pooling, erosion, or inspection failures from inadequate drainage. Use this perspective to guide the scope of work and material choices.
Identify decision points for professional help, safety requirements, and permit considerations before starting. Check site setbacks, frost protection needs, and any required safety plans for excavation and edge protection. Prepare a pre-pour checklist that includes soil stability, subgrade prep, and alignment with landscape drainage plans.
Cost and rework implications of poor slope
Improperly sloped concrete slabs can lead to costly repairs and remediation down the line. Standing water after rain or pooling near foundations are telltale signs of an incorrect slope.
Repair complexity: Incorrect slopes may cause cracking, delamination, or even structural failure, requiring extensive rework. Drainage installations: To fix improper slope, you might need to install surface drains, French drains, or adjust downspout routing, adding extra costs.
Potential structural remediation: In severe cases, the slab may need to be removed and repoured entirely. This can significantly increase costs and cause delays in your project timeline. To avoid these issues, ensure you have accurate slope measurements and verify them before pouring.
When to hire a pro or get an engineered solution
While DIY projects can save money, there are instances when hiring a professional is crucial. Complex grading, proximity to existing structures, heavy vehicle loads, or unclear drainage laws may require expert intervention.
Complex grades: Steep slopes, significant changes in elevation, or intricate patterns may necessitate a civil engineer’s expertise. Proximity to structures: Slabs near foundations, retaining walls, or other structures should be designed by professionals to ensure safety and stability.
Heavy loads: If your slab will bear heavy loads, such as vehicle traffic or machinery, consult a professional to determine the appropriate slope and reinforcement. Unclear codes: When local drainage laws are ambiguous or stringent, consider hiring an engineer to ensure compliance.
Permits, inspections, and onsite safety checklist
Before starting any work, it’s crucial to follow this checklist to ensure your project is safe, legal, and up to code.
- Verify permits: Check with local authorities to determine if you need a permit for your project. Failing to do so may result in fines or forced demolition.
- Coordinate inspections: If required by local codes, schedule inspections with the appropriate agency before pouring.
- Excavation safety: Ensure that any excavation is properly shored and protected from collapse. Utilities: Contact your local utility companies to mark underground lines before digging.
- Edge protection: Protect slab edges during forming, pouring, and finishing to prevent injuries or damage.
- Frost protection: Ensure that your slab is protected from freezing temperatures if required by local codes. Slope minimums/maximums: Verify that your planned slope falls within the acceptable range for your area.
- Setback rules: Check local setback requirements to ensure your slab is properly positioned relative to property lines and other structures.
- Site-specific safety plan: Develop a plan tailored to your site’s unique hazards, such as steep slopes or nearby traffic.
Quick rule: Always prioritize safety during layout, forming, pouring, and finishing. Following these steps helps prevent accidents and ensures a successful project.
Conclusion
Maintaining the right slope on exterior slabs protects the foundation, reduces maintenance, and keeps water away from living spaces. Focus on safe procedures, careful layout, and proper curing to achieve lasting results.
Check your plan in a simple, logical sequence: confirm the slope marks are visible on the forms, verify the forms and edges are level and aligned to the planned drainage path, review the pour sequence and reinforcement or control joints, test the surface by observing how water flows after a small test application, and protect the slab during finishing and curing so the slope stays intact. If any step seems unclear, recheck the manufacturer instructions, local rules, or consult the product label before proceeding.
Common mistakes to avoid include underestimating the needed slope, overcorrecting with an excessive incline, and neglecting edge drainage or transitions at doorways. Do not rush the pour or skip curing steps, and never work on fresh concrete in adverse weather. Work calmly, wear appropriate safety gear, and keep the work area clean to prevent trips or damage to forms and edges.
If the project involves complex site constraints, irregular ground, or uncertain drainage paths, consider bringing in a professional before pouring. When you proceed, stay focused on the core goals: accurate layout, proper form setup, controlled pouring, careful finishing, and thorough testing. With careful planning and disciplined execution, you can achieve a durable, puddle-free slab that protects the foundation and looks right for years to come.
FAQ
How do I calculate and achieve proper slope for exterior concrete slabs?
Start with the direction away from the building and establish a reference line. Translate the slope using a string line or a laser level to guide the pour and finishing work. Always check manufacturer instructions or local guidelines for specific slope recommendations and apply those to your layout.
How should I mark the correct pitch during construction layout?
Set a high point along the structure and mark the direction of drainage with a reference line. Use a chalk line or laser level to lay out the slope, and place stakes or markers to define the low edge. Verify the line with a straightedge as you proceed with marking and grading.
What common drainage issues near foundations should I watch for?
Look for areas that hold water after rain or puddle near the foundation. Identify slabs or grading that direct water toward the building and consider adjustments or added drainage to redirect flow away from the foundation. If in doubt, compare with guidance from the product label, manufacturer instructions, or local rules.
What tools work best for laying out slopes and how can I test an existing slab’s slope?
Use a chalk line, straightedge, and a laser level or transit for accurate layout. For testing an existing slab, run a straightedge across the surface and observe water drainage or measure directional flow to confirm it sheds water away from the building. If measurements or results are unclear, consult manufacturer instructions or local guidelines for acceptable slope ranges.