
Introduction
Acrylic and epoxy primers are two common options for preparing concrete overlays, each with distinct behavior and work styles. Acrylic primer typically dries faster and tolerates some movement, while epoxy primer tends to offer greater adhesion and chemical resistance. Look at the label for cure times, substrate compatibility, and any recommendations for overlays to be sure you pick the right system.
Durability differences come down to traffic, moisture, and the concrete itself, so compare your needs rather than price alone. Acrylic tends to be cheaper upfront and easier to apply in steady conditions, while epoxy may require more preparation and specialized mixing—check local rules and product instructions. We’ll Match You with An Approved Installer. Choose a Service, Then Message us or Call us.
Key takeaways
- Acrylic primers offer faster dry times but lower chemical resistance than epoxy.
- Param 5500 epoxy primers offer superior adhesion and durability on challenging substrates.
- Durability differences affect maintenance cost; epoxy often lasts longer in high-traffic areas.
- We’ll Match You with An Approved Installer and coordinate service, then quotes.
- Review Samples & Quotes; Choose a Service, Then Message us or Call us.
- Safety: follow ventilation, PPE, and product label directions during priming.
Table of Contents
- Introduction
- Key takeaways
- Overview: What a Primer Does for Overlay Systems
- Acrylic Primers — Properties, Benefits, and Typical Applications
- Epoxy Primers — Properties, Benefits, and Typical Applications
- Surface Preparation Before Priming
- Durability, Adhesion, and Long-Term Cost Comparison
- Decision Guide, DIY Planning, and Common Mistakes to Avoid
- Tools, Materials, Specs, and Product Spotlight (Including Param 5500)
- From Quote to Completion: Ordering, Approved Installers, Samples, and Aftercare
- Conclusion
- FAQ
Overview: What a Primer Does for Overlay Systems
A primer serves as the first bond between concrete and the overlay you plan to apply, shaping how the entire system performs. It helps the topcoat grip by creating a stable, uniform surface and by moderating moisture movement through the substrate. The choice of primer influences appearance, durability, and how quickly you can move through the project with minimal downtimes.
Compare acrylic and epoxy primers by looking at moisture tolerance, cure behavior, and compatibility with your intended topcoat. Consider how the primer will interact with the concrete’s porosity, whether you’re using a self-leveling compound, a decorative overlay, or an epoxy layer beneath the finish. Surface prep requirements—testing moisture, removing contaminants, and assessing porosity—play a pivotal role, because poor prep undermines adhesion regardless of the primer’s quality. The right primer aligns with your goals for look, performance, and schedule, so plan for appearance uniformity, shear strength under traffic, and an achievable recoat window.
Primer functions (seal, bond, and equalize)
A primer’s job is to prep the concrete for overlays. It does this in three ways:
Sealing pores: Concrete’s porous nature can suck up moisture from the overlay, weakening it. Primer seals these pores, preventing that.
Improving bond: Primers create a better grip for the overlay, enhancing adhesion.
Evening out suction: Without a primer, some areas may absorb more overlay material than others, leading to an uneven surface. Primer evens this out.
How acrylic and epoxy primers differ at a glance
Acrylic and epoxy primers have different chemistries, affecting their performance:
Acrylic Primers: Water-based, low VOCs, fast drying, but less resistant to chemicals and abrasion. Great for decorative overlays and quick turnaround projects.
Epoxy Primers: Solvent-based, higher VOCs, slower curing, but excellent chemical resistance and durability. Ideal for heavy-duty applications like garages or industrial floors.
Both can be used with common overlay materials, but epoxy’s superior durability makes it a better choice for high-traffic areas.
Acrylic Primers — Properties, Benefits, and Typical Applications
Acrylic primer chemistry centers on resin solids in water-based or solvent-based forms, with pigments and additives that influence adhesion, cure speed, and surface tension. The balance of these components determines how well the primer bonds to concrete and how it responds to subsequent coatings. Understanding the chemistry helps you predict performance in real-world conditions.
Prep steps should target clean surfaces and moisture checks, and you’ll want to match the acrylic primer to compatible overlays such as cementitious toppings or microtessellated systems. Benefits to highlight include fast drying and good UV stability, which helps prevent yellowing and speeds up recoat timing. Note limits: heavy chemical exposure or high-alkali substrates may require compatibilizers or alternative primers for reliable bonding. Practical use cases include interior slabs, garages, and decorative overlays where rapid turnaround or UV resistance matters, with clear signs when epoxy primers are a better fit due to substrate conditions. Follow up with coverage guidance, temperature and humidity ranges, and adhesion testing to confirm long-term bond before proceeding.
Performance characteristics and limits
Acrylic primers are known for their balance of performance traits. Here’s what you need to know:
Pot Life: Acrylics have a decent pot life, giving you time to work with the material before it starts to cure.
Film Flexibility: They form flexible films that can accommodate minor substrate movements without cracking. This makes them great for overlays on concrete slabs subject to some movement.
Water Permeability & Temperature Sensitivity: Acrylics are not as water-resistant or temperature-stable as epoxies. They may underperform in high-moisture, extreme-temperature environments.
Best-use scenarios (decorative overlays, mild environments)
Acrylic primers shine in these applications:
Decorative Topping Systems: Acrylics are ideal for decorative concrete overlays. They promote strong adhesion to cementitious toppings and micro-tessellated systems.
Quick Turnaround Projects: Due to their fast drying times, acrylics are perfect when you need to get the job done quickly. This makes them great for interior slabs, garage floors, or apartment renovations where time is of the essence.
Mild Environments: Acrylic primers work best in environments with normal temperature and humidity ranges, and minimal chemical exposure.
Safety and environmental considerations for acrylics
Here’s what you need to know about acrylic primer safety and environmental impact:
VOC Profiles: Acrylic primers have varying volatile organic compound (VOC) profiles. Some are low-VOC, making them suitable for green building projects or indoor use where air quality is a concern.
Safe Handling: Always follow manufacturer guidelines for safe handling and storage. Wear appropriate PPE, including gloves, safety glasses, and respiratory protection if needed.
Water-based Acrylics: For low-VOC needs, consider water-based acrylics. They’re typically easier to clean up with just soap and water, reducing chemical waste.
Epoxy Primers — Properties, Benefits, and Typical Applications
Epoxy primers rely on a two-component system (resin and hardener) that forms a tougher, more chemically resistant film than many acrylics, with solvents or waterborne formats that influence film formation and moisture handling. This chemistry yields superior adhesion to dense or challenging concrete and provides a robust foundation for high-performance topcoats. The resin system and cure behavior dictate how the primer behaves under traffic, spills, and ambient conditions.
Surface prep and substrate compatibility are key: verify porosity, perform moisture tests, and ensure proper cleaning and profiling to support strong intercoat adhesion. Typical applications span indoor and outdoor settings such as garages, basements, industrial floors, and overlays that require chemical resistance or enhanced wear life. Consider matching epoxy primers with compatible topcoats like epoxies, polyurethanes, or cementitious toppings, guided by data sheets and installer experience. Always review mixing ratios, pot life, cure times, and environmental controls to avoid issues like over-priming or moisture entrapment.
Performance characteristics and limits
Epoxy primers are known for their robust performance, but they have specific handling requirements. They’re sensitive to moisture and temperature during application and curing.
Curing: Epoxies cure by a chemical reaction between the resin and hardener. This process can take longer than acrylics, especially in cooler temperatures or high humidity.
Moisture sensitivity: While epoxies can tolerate some moisture, excess water can cause blisters or delamination. Always perform a moisture test (ASTM D4263) before application.
UV sensitivity: Epoxy primers are not UV-stable. They’re best suited for indoor or covered outdoor applications to prevent yellowing and degradation from sunlight exposure.
Best-use scenarios (industrial, heavy traffic, high-adhesion needs)
Epoxy primers shine in demanding environments where superior adhesion and chemical resistance are crucial.
Industrial floors: In warehouses, factories, or other industrial settings, epoxy primers provide excellent adhesion to dense concrete and resist harsh chemicals, heavy equipment traffic, and frequent cleaning.
Garages and basements: For homeowners needing a durable, long-lasting primer for garage or basement floors subject to vehicle traffic, chemical spills, or high humidity, epoxy is an ideal choice.
Overlay systems: When applying decorative or protective overlay systems, using an epoxy primer ensures strong adhesion and helps prevent delamination under heavy wear or exposure to chemicals.
Safety and environmental considerations for epoxies
Working with epoxy primers requires proper safety precautions. Always follow the manufacturer’s guidelines for handling, storage, and disposal.
PPE: Wear appropriate personal protective equipment (PPE), including gloves, eye protection, and a respirator if needed. Epoxies can cause skin irritation and allergic reactions.
Ventilation: Ensure adequate ventilation during application to prevent the accumulation of harmful vapors. In poorly ventilated areas, use a respirator with a particulate filter.
Lower-VOC options: For eco-conscious homeowners or projects with strict VOC regulations, consider using low- or zero-VOC epoxy formulations. These are available but may have slightly reduced performance compared to standard epoxies.
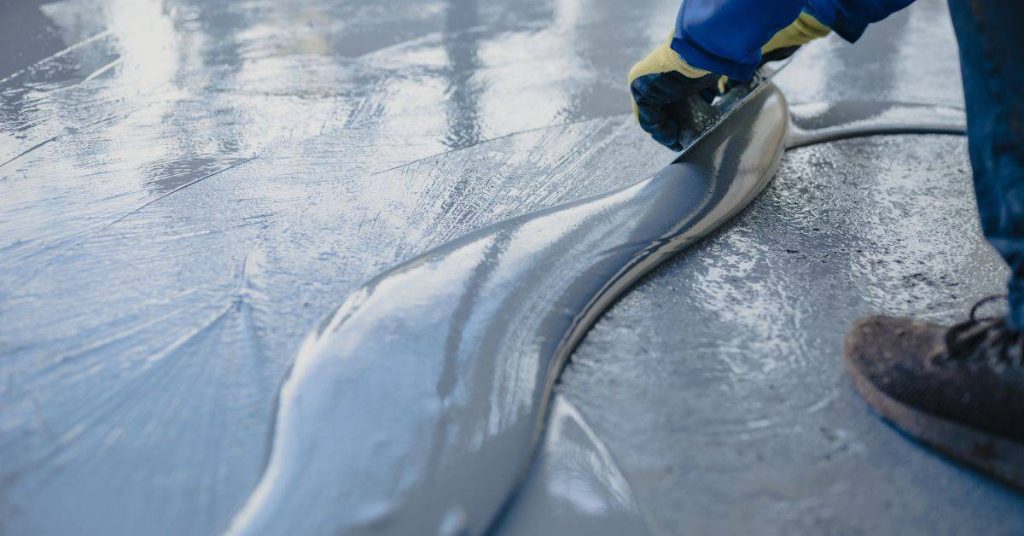
Surface Preparation Before Priming
Profiling sets the stage for reliable adhesion, so determine when to roughen surfaces, remove laitance, and achieve a uniform profile that matches your primer system. The goal is to create a mechanical key without creating excessive dust or damage that could compromise the overlay. Follow the profiling plan with a consistent test area to verify the surface will accept the chosen primer.
Cleaning and decontamination are non-negotiable: remove oils, grease, and loose dust that can hinder bonding, and recheck for residual films that could compromise adhesion. Moisture testing and outgassing checks help you avoid blistering, delamination, or trapped moisture under the coating. Repair steps for cracks and joints should be performed with compatible materials and proper surface profiling to ensure the primer can seal and bond across troubled areas. Finally, assess porosity and energy: etching or mechanical abrasion may be needed to optimize primer adhesion and film uniformity for self-leveling overlays. Plan the workflow with safety gear, ventilation, and documentation of test results for QA and future maintenance.
Profiling, cleaning, and moisture testing
The first step in surface preparation is profiling. This means roughening the surface to create a uniform profile that’s compatible with your chosen primer system.
Shot blasting or diamond grinding are common methods for this. Aim for a Concrete Surface Profile (CSP) of 2-3, which is moderately rough but still suitable for primers.
Next, clean the surface thoroughly to remove any contaminants that could hinder adhesion. Degrease with an appropriate cleaner and ensure all dust is removed. Use a moisture meter to check for in-slab moisture, aiming for less than 4% by weight. Also, perform a calcium chloride test to measure relative humidity at the surface, targeting below 75%.
Repair, crack/joint treatment, and acceptance criteria
Before priming, repair any cracks or joint issues. For cracks, clean them out, fill with an appropriate filler, and let it cure before profiling to a uniform surface.
For joints, saw-cut new ones if necessary, then fill and seal using a suitable compound. Ensure all repairs are sound and compatible with your chosen primer type (acrylic or epoxy).
Acceptance criteria for a ‘ready-to-prime’ surface include: no visible cracks or loose material; clean, dry, and free of contaminants; and a uniform profile that’s consistent with the primer system.
Visual checkpoints and documentation
Before applying any primer, use this checklist to ensure your surface is ready. This helps prevent rework and maintains project acceptance.
- Surface cleanliness: No visible dirt, grease, or contaminants.
- Moisture content: In-slab moisture below 4% by weight and relative humidity at the surface below 75%.
- Cracks and joints: All repaired, filled, and sealed with no visible defects.
- Profile: Uniform CSP of 2-3, compatible with chosen primer system.
- Etching/abrading: If required, surface has been etched or mechanically abraded to enhance porosity.
- PPE and ventilation: Appropriate personal protective equipment (PPE) used during prep work; adequate ventilation provided.
- Test results documented: Records of moisture tests, CSP measurements, etc., are kept for quality assurance (QA).
- Prime-ready photos: Before priming, take photos to document the surface’s condition and serve as a reference for future maintenance.
Quick rule: If any item on this checklist fails, address it immediately before proceeding with priming to avoid coating failures down the line.

Durability, Adhesion, and Long-Term Cost Comparison
Durability for overlays is tied to how well the primer resists movement, wear, and environmental exposure over time. Acrylic primers can offer adequate wear resistance in light-to-moderate traffic scenarios, while epoxy primers often deliver tougher intercoat adhesion and greater film integrity under punishment. Evaluate how these factors translate into real-world performance for your space and usage expectations. The goal is to anticipate how the system will behave as it ages under routine traffic and cleaning regimens.
Adhesion failure modes such as peeling or micro-cracking frequently trace back to improper prep or incompatibilities, so consider how each primer type handles porosity, moisture, and substrate chemistry. Compare prep requirements and moisture considerations to understand long-term performance differences. When projecting life-cycle costs, include initial material and application costs, maintenance windows, and potential re-coating timelines driven by primer choice. Use pull-off tests, moisture meters, and surface profilometry as practical benchmarks to plan preventive maintenance and budgeting decisions.
Durability and typical failure modes
Durability for overlays means how well they hold up over time. Acrylic primers are good for light-duty, decorative jobs. They’re flexible but wear out faster under heavy traffic or harsh conditions.
Epoxy primers excel in durability. They’re tough, resistant to chemicals and abrasion. But they can crack if not installed right or if the substrate moves.
Delamination, peeling off, is common with poor primer choice or inadequate surface prep. Acrylics are more prone due to their flexibility. Epoxies can delaminate if the substrate isn’t compatible (like concrete with high pH).
Blistering and wear are other failure modes. Acrylic overlays can blister under heat or moisture. Epoxy overlays wear out slower but can still chip if not maintained.
Adhesion mechanisms and testing (pull-off, tape tests)
Primer’s job is to bond the overlay to the substrate. Pull-off tests check this adhesion strength. A dollop of strong adhesive is stuck on the overlay, then pulled off with a machine.
Tape tests are simpler. Apply and remove tape from the surface. If it pulls off bits of overlay, adhesion isn’t good enough.
Acrylic primers bond well to clean, dry surfaces. But they can fail if moisture gets in during application or if the substrate is too smooth.
Epoxy primers create strong chemical bonds. They need a rough surface and no contaminants. Moisture can ruin their adhesion too.
Cost comparison and life-cycle savings
Acrylic primers are cheaper upfront, around $0.50 per square foot. Epoxies cost more, about $1-$2 per square foot.
But epoxy’s durability can save money over time. They last longer, reducing re-coating frequency and downtime for repairs. A high-traffic area might need acrylic overlays redone every 3-5 years, while epoxy could last 7-10 years.
Maintenance intervals are also affected by primer choice. Acrylic overlays may need more frequent cleaning and touch-ups. Epoxy overlays can handle heavier duty cleaning and require less maintenance.
So, while epoxy primers cost more upfront, they might be the cheaper option in the long run for high-traffic or harsh environments.
Decision Guide, DIY Planning, and Common Mistakes to Avoid
A practical decision flow helps you choose acrylic or epoxy primers based on moisture, temperature, traffic, and appearance goals, while keeping the plan achievable for a DIY project. Start with environment constraints and load expectations, then weigh the availability of tools, time, and patience for tougher prep. The flow should help you decide when to DIY and when to bring in a pro based on your skill and the project demands.
Ask yourself quick questions about the space: is moisture a major concern, what is the expected traffic, and how tight is your schedule? Map the concrete condition, moisture risk, and existing coatings to identify the required surface prep for each system. Establish a realistic schedule that accounts for ambient temps and recoat windows, and list the tools and PPE you’ll need. A planning checklist can guide assessment, product selection, quantity estimates, and test priming, with explicit notes on common mistakes to avoid and practical troubleshooting tips. Tie your plan to the next steps of samples, quotes, or installer recommendations as needed.
Quick decision matrix (environment, traffic, schedule)
When choosing between acrylic and epoxy primers, consider these quick rules:
Fast-turnaround/decorative projects: Acrylic is your best bet. It’s faster to apply and dries quicker.
Heavy foot traffic/chemical exposure areas: Epoxy is the way to go. It’s more durable and resistant to chemicals.
Regardless of choice, always check moisture levels and substrate condition before proceeding.
Common installer and DIY mistakes
Even with the right primer, mistakes can happen. Here are some to avoid:
- Poor profiling: Inadequate surface preparation leads to poor adhesion.
- Wrong primer thickness: Too thin – weak bond; too thick – slow drying, bubbles.
- Ignoring moisture: High moisture can ruin your overlay. Test before priming.
- Insufficient mixing: Incomplete mixing leads to inconsistent results.
Regularly inspect your work and don’t hesitate to call a pro if you’re unsure.
Planning guide for DIY projects
DIY overlays need careful planning. Here’s what to expect:
Task durations: Allow 2-4 days for prep, 1 day for priming, and 1-7 days for curing (depending on overlay type).
PPE: Wear gloves, safety glasses, and a respirator when mixing and applying primers.
When to call a pro: If you’re unsure about surface prep, moisture levels, or need specialized equipment. Always better safe than sorry.
Tools, Materials, Specs, and Product Spotlight (Including Param 5500)
Before you buy, assemble a complete tools and materials list, including hand tools, mixing gear, safety equipment, and consumables. A well-stocked kit helps you stay on schedule and reduces trips to the supply store. Keep a running tally on site to avoid missing a critical item mid-project.
Understanding key specification terms helps you compare products confidently: pot life, tack-free time, cure time, yield, adhesion strength, and thickness tolerance. Use these definitions to interpret datasheets and match them to your project needs. When choosing materials, compare acrylic vs epoxy overlays and compatible toppings, while noting texture, exposure, and cure schedule. For Param 5500, review the application notes, cure behavior, and compatibility with your system, then verify on the official data sheet: coverage, temperature range, substrate prep, SDS, and warranty particulars. Learn to read product sheets and verify installer references so you select a dependable combination for your space.
Tools and materials checklist
Before you start, ensure you have all the necessary tools and materials for a successful concrete overlay project.
- Grinder/Shot Blaster: To remove old coatings and profile the surface. Skip this and you’ll struggle with adhesion.
- Moisture Meter: Essential to test substrate moisture levels before application. Ignore this and you risk delamination.
- Roller/Spray Equipment: For applying primers, overlays, and sealants. Don’t forget these or you’ll be stuck with a half-done job.
- PPE (Personal Protective Equipment): Safety glasses, gloves, respirator, and protective clothing. Skip this at your own risk.
- Tape Measure: To ensure accurate material coverage calculations.
- Level/Straight Edge: For checking substrate levelness and overlay thickness.
- Plastic Sheeting/Drop Cloths: To protect surrounding areas from overspray or drips.
- Cleaning Supplies (Degreaser, Scrub Brush): To ensure a clean surface for better adhesion. Neglect this and you’ll have weak bond strength.
- Mixing Equipment (Drill with Paddle, 5-Gallon Bucket): For mixing primers, overlays, and patch materials. Don’t mix by hand; it’s a recipe for air bubbles and inconsistent results.
Quick rule: Always double-check your list before starting to avoid mid-project trips to the store.
Material specs and standards explained
Understanding material specifications helps ensure you choose the right products for your project.
- 100% Solids: Indicates no volatile organic compounds (VOCs) are released during curing. Look for 95% or higher to minimize VOC emissions.
- VOC Limits: Check local regulations and choose products that comply. Ignore this and you may face penalties or health hazards.
- Flash-Off Times: Time between application and when the surface is tack-free. Too short, and you’ll have issues with subsequent layers; too long, and you’ll waste time waiting.
- Recommended CSP (Concrete Surface Profile): Check if your substrate meets the recommended profile for optimal adhesion. Wrong CSP can lead to delamination.
- Pot Life: Time a material remains usable after mixing. Too short, and you’ll waste product; too long, and it may cure before application.
- Tack-Free Time: When the surface is no longer sticky to touch. Wait too little, and you’ll contaminate subsequent layers; wait too long, and you’ll delay project progress.
- Cure Time: How long until the material reaches full cure strength. Don’t rush this process or you risk weak spots.
- Yield/Coverage: Amount of coverage per gallon/liter. Underestimate and you’ll run out mid-project; overestimate and you’ll waste materials.
Product spotlight — Param 5500 and comparable options
Param 5500 is a popular choice for concrete overlays, known for its high solids content and excellent adhesion. It’s often used as a base coat under other overlay systems.
Before selecting, check the technical data sheet (TDS) for substrate limits. Param 5500 typically requires a minimum CSP of 2-3, so ensure your surface meets this before application.
Also, note the cure time. Param 5500 usually cures in 16-24 hours at 77°F (25°C), but this can vary with temperature and humidity. Plan your project schedule accordingly to avoid rushing the curing process.
Comparable options: Other high-solids, fast-curing primers like Sika’s Primer G or MAPEI’s Mapelastic Aquadefense can also be considered. Always check TDS for specific project needs and local availability.
From Quote to Completion: Ordering, Approved Installers, Samples, and Aftercare
Walking the journey from inquiry to finished floor helps you align expectations with reality. Consider how your primer choice affects timelines, preparatory work, and the final look, and plan accordingly to keep downtime manageable. Having a clear plan reduces surprises as the project progresses from ordering through installation.
When selecting installers, look for approved operators with visible warranties and regional availability, and request references or samples to gauge work quality. For samples and quotes, specify color or finish tests, and ask for breakdowns of scope, materials, prep, and contingencies. Ensure substrate conditions, moisture testing, and surface profiling are addressed before overlay application, and discuss post-install care, cure times, and ventilation needs. Aftercare should cover cleaning routines, maintenance intervals, and how upkeep influences longevity and appearance, with a clear next step to initiate quotes or contact installers and gather necessary information.
How to choose a service, request samples & quotes, and contact
When choosing a service for your overlay project, be clear about what you need. Ask for:
- Surface prep scope: What’s included (grinding, shot blasting, etc.)?
- Primer type: Acrylic or epoxy? Both have their pros and cons.
- Warranties: What does the warranty cover and for how long?
Request material samples to see the finish in your space. For quotes, expect:
- Scope of work
- Material costs
- Preparation details
- Contingencies (if any)
When contacting suppliers or contractors, provide project info like:
- Square footage
- Substrate type
- Traffic level
- Desired finish
We’ll match you with an approved installer — what to expect
When matched with installers, look for these vetting criteria:
- Licenses: Are they licensed to perform the work?
- References: Can they provide satisfied customer references?
- Insurance: Do they carry liability and worker’s comp insurance?
- Adhesion testing: Have they passed adhesion tests for both acrylic and epoxy systems?
- Warranties: What warranties do they offer on their work?
The platform will pair you with pros based on these criteria. Expect:
- Regional availability
- Competitive pricing
- Expertise in both acrylic and epoxy overlays
Enjoy your new floor — maintenance, warranties, and troubleshooting
Aftercare is crucial for longevity. Expect:
- Cure times: Allow time for the overlay to fully cure before heavy use.
- Ventilation needs: Ensure proper ventilation during curing.
- Cleaning routines: Regular cleaning keeps your floor looking its best.
Confirm typical warranty terms:
- Coverage (materials, labor)
- Duration
- Exclusions (e.g., normal wear and tear)
For common post-install issues:
- Cracking: Check for substrate movement or inadequate prep.
- Peeling: Inspect for moisture intrusion or insufficient adhesion.
- Discoloration: Review cleaning routines and product compatibility.
Conclusion
Choosing the right primer system matters for safety, long-term durability, and a clean look. If you pick acrylic for ease and quick return to service, or epoxy for maximum adhesion and hardness, you’ll save time and avoid costly rework down the line.
To move forward, decide based on your surface and plan: assess the substrate and any coatings, verify the chosen primer matches the overlay and environment, read the product specs, set up proper ventilation and protection, do a small test patch, mix and apply per the manufacturer’s directions, control temperature and humidity, allow adequate cure time, and finish with a careful inspection before handling. Ensure tools and materials align with the plan and keep notes on order and timing, including any Param 5500 guidance or similar product spot checks.
Two common mistakes to avoid are skipping surface preparation and applying too thick or too thin a coat, plus rushing cure times or mismatching primer to substrate. Always ventilate the area, wear eye and skin protection, and test a small area first to catch issues before a full pull. Don’t improvise chemistry or timing; when in doubt, slow down and verify specs, and never work beyond the primer’s recommended temperature range.
If you’re near a decision point for professional help—like uncertain substrate conditions, large areas, or recurrent coating failures—calling in an approved installer is smart. When you finish, you’ll have a durable, good-looking overlay that stands up to use and time. Stay practical, follow the plan, and you’ll finish confident and ready for the next project.
FAQ
What are the key properties of acrylic primers for overlays?
Acrylic primers dry quickly and are generally easy to apply over concrete. They tend to be more forgiving on slightly rough or dusty surfaces. For best results, check the label for surface compatibility and cure times.
They often offer good moisture resistance and help with minor surface defects. If you’re unsure about your surface, compare the manufacturer’s guidance to ensure it suits concrete overlays and your climate.
What are the key properties of epoxy primers for overlays?
Epoxy primers form a tougher bond and can fill small gaps better than acrylics. They resist wear and chemicals better, which helps long-term durability. Always verify cure times and mixing instructions on the product datasheet before use.
Epoxy primers can be more sensitive to surface moisture and improper mixing. If you’re unsure about your prep, consult the manufacturer’s instructions or local guidance for suitability on concrete and metal surfaces.
How do durability and cost compare between acrylic and epoxy primers?
Acrylic primers usually cost less upfront and are quicker to apply, which can save time on a DIY job. They may require more frequent reapplication or top coatings to match epoxy longevity in tough environments.
Epoxy primers tend to last longer and defend better against wear, but the material and process can be pricier and slower. For a long-lasting overlay in harsh conditions, epoxy might be worth the extra cost, depending on your surface and use case.
What is the general application process for acrylic vs epoxy primers?
Prep the surface clean and dry, then apply the primer per label directions. Acrylic primers usually go down in lighter coats and cure quickly, allowing the next layer sooner.
Epoxy primers require careful mixing and a longer tack-free time before top coating. Follow the label for mixing ratios, pot life, and environmental limits to avoid a soft or uneven finish.