
Introduction
Reinforcement for plaster returns at deep windows means adding solid edge support so the plaster won’t bulge. In practice you build up a stable, tight edge before the final coat. This keeps the plaster flush and reduces cracking.
Use appropriate edging, furring, or metal lath as directed on the product label and by the manufacturer. Follow local building rules and read instructions for mixes, cure times, and application steps. If in doubt, check the packaging and ask for guidance at the hardware store to choose safe options.
Key takeaways
- Inspect window reveal geometry and substrate to plan non-bulging plaster returns.
- Use continuous reinforcement behind returns per design to avoid edge bulging.
- Align lath or mesh with window edges, not crossing into reveals.
- Apply mortar skim with proper cure to reduce crack and bulge risk.
- Safety: wear eye and respirator protection; use dust control during sanding.
- Verify acceptance criteria at each stage with visual and tactile checks.
Table of Contents
- Introduction
- Key takeaways
- Why Deep Window Returns Bulge: Causes and Mechanics
- Design Principles for Non-Bulging Plaster Returns
- Reinforcement Options That Don’t Bulge the Edge
- Material Specs and Standards Explained
- Step-by-Step Installation for Deep Window Returns
- Tools and Materials Checklist
- Visual Checkpoints, Acceptance Criteria, and Common Defects
- Maintenance, Troubleshooting and Retrofit Repairs
- Conclusion
- FAQ
Why Deep Window Returns Bulge: Causes and Mechanics
Deep window returns can fail when edge support isn’t working as intended. Movement from framing shifts and substrate movement stress the plaster as it cures. The result is a visible bulge where the edge lacks solid restraint.
Keep in mind how successive coats add weight and pull on the edge during drying. Mismatches between base materials and finishes create incompatibilities that show up as edge distortion. Understanding these mechanics helps you target the failure mode.
Substrate movement and thermal/moisture effects
The substrate behind your plaster return can move. This happens due to temperature changes or moisture content fluctuations.
When the substrate expands or contracts, it puts stress on the return. If there’s no allowance for this movement, the return bulges.
Check for movement allowances before you start work. Look for expansion joints in the substrate and ensure your return is at least 1/4″ away from them.
Edge geometry and unsupported plaster mass
Deep or steep reveals concentrate forces at the edge of your return. This is because the weight of the plaster is pulling down, but there’s no support at the edge.
A sharp, unsupported junction can’t handle this force. It’s like trying to hold a heavy bag with just your fingertips – it’ll slip and bulge.
To avoid this, use a more gradual reveal or provide mechanical support at the edge. This could be a metal angle or a timber batten.
Material incompatibilities and application errors
The materials you use and how you apply them can make or break your return. The wrong choices accelerate bulging.
- Incompatible base coats: Different plaster types need compatible base coats. Using the wrong one weakens the bond, leading to cracking and bulging.
- Excessive wetting: Too much water in your mix makes it heavy and sloppy. It can’t hold its shape and will sag over time.
- Missing mechanical support: Not using lathes or other supports means the plaster has nothing to grip onto. It’ll bulge when stressed.
- Thick coats: Applying too much plaster at once is like trying to build a sandcastle with a shovel – it’s unstable and will collapse under its own weight.
- Poor troweling: Not smoothing out your plaster properly leaves air pockets. These expand when heated, pushing the return outwards.
Design Principles for Non-Bulging Plaster Returns
Spread the load to prevent a single point of edge overload. Use strategies that allow controlled movement without letting the edge float. Plan for a discrete, reinforced edge that stays crisp over time.
Limit plaster thickness near the edge to reduce leverage. Incorporate a detailing approach that guides the plaster away from a stiff edge. Favor compatibility between substrates and finishes to minimize incompatibilities.
Transitioning plaster thickness and feathering techniques
The key to a non-bulging return is avoiding abrupt thickness changes. Abrupt changes stress the edge, leading to cracks or bulges over time.
Plan your return with a gradual increase in thickness from the wall to the window frame. This helps distribute the load evenly and reduces stress on the edge.
Use feathering techniques to create smooth transitions between different plaster thicknesses. Start with a thin layer, gradually building up to the desired thickness at the edge.
Remember: Patience is key here. Take your time to ensure a smooth, even transition.
Allowing for movement without a visible gap
Substrate movement is inevitable due to temperature changes and moisture. To prevent this from creating gaps in your return, consider flexible joins.
Flexible joins allow the plaster to move with the substrate without breaking or cracking. They can be created using flexible joint compounds or tape.
Another approach is to use slip layers – a thin layer of flexible material applied between the plaster and the substrate. This allows for slight movement without affecting the return’s appearance.
Tip: Always test your chosen method on a small, hidden area first to ensure it works as expected.
Integrating thermal and moisture management
Thermal and moisture changes can cause the substrate to expand and contract, putting stress on the return. To mitigate this, consider vapour control measures.
Vapour barriers prevent moisture from entering the wall cavity, reducing the risk of swelling or shrinkage. They should be installed on the warm side of the insulation.
Proper drainage is also crucial. Ensure water can’t get trapped behind the return by providing a clear path for it to escape.
Note: Always consult with a professional if you’re unsure about any aspect of thermal or moisture management.
Reinforcement Options That Don’t Bulge the Edge
Evaluate flexible mesh and its behavior at deep reveals, focusing on edge stability. Consider plaster beads or folded profiles that create a defined, rigid edge support. Explore non-metallic trims that stay dimensionally stable and resist edge collapse.
Compare how each option handles movement and edge rigidity without creating bulges. Think about how the reinforcement sits within the plaster system and how it interfaces with the edge detail. Look for guidance on installation in the product instructions.
Flexible mesh and fabric reinforcement
Use flexible mesh when you need to control cracks. It distributes stress evenly across the plaster, preventing bulging at deep reveals.
Mesh works best over large areas. For edge support, it needs complementary backing. Use it with other reinforcements or proper substrate preparation.
Tip: Stagger mesh layers for added strength and better crack control.
Folded or slotted beads and edge profiles
Low-profile folded beads and slotted profiles provide support without creating a visible bulge. They’re ideal for deep reveals.
These work best when mechanically anchored to the substrate. Use screws or nails, ensuring they’re hidden from view.
Note: Beads and profiles won’t prevent movement. Combine them with other reinforcements for best results.
Hybrid systems and adhesive-reinforced tapes
Combine mesh with beads or tape for added strength. This hybrid approach reinforces the plaster return, preventing bulging.
Adhesive-backed reinforcements limit mass at the corner. They’re great for areas with high movement potential.
Tip: Use adhesive tapes as a base layer before applying mesh or beads for extra adhesion and support.
Material Specs and Standards Explained
Learn how to read basecoat and finishing plaster data sheets and what the numbers mean for performance. Check reinforcement material labels for flexibility, bond strength, and compatibility with substrates. Look up edge bead specifications to ensure proper fit at deep reveals.
Verify what standards or tests apply to the plaster system and reinforcement. Use manufacturer instructions and local rules as your reference. If in doubt, confirm with the supplier or code authority before proceeding.
What to Read on a Product Data Sheet
When you’re picking up materials for your plaster returns, don’t just grab the first thing off the shelf. Check the product data sheets first. Here’s what you should be looking at:
Compatibility with substrate. Make sure it plays nice with your wall material – brick, concrete, or whatever you’ve got.
Recommended application thickness. Too thin and it won’t cover properly; too thick and it’ll crack. Follow the manufacturer’s advice.
Drying/cure guidance. Some plasters need time to dry before they can be finished. Don’t rush this stage or you’ll end up with a poor finish.
Durability and Corrosion Considerations
Plaster returns need to last, so durability is key. Here’s what to consider:
Material choice. Go for corrosion-resistant metals in your reinforcement if you’re working near the coast or in a humid area. Alkali-resistant mesh is also a good idea in some situations.
Check with manufacturers about their products’ resistance to these issues. They should provide guidance on their data sheets.
Long-term performance. You want your plaster returns to look good for years, not months. Durable materials will help ensure that happens.
When to Consult Standards or a Structural Engineer
While this guide covers a lot of ground, there are times when you need professional input:
Large reveals. If your windows have deep returns, it might be wise to consult local building codes or a structural engineer. They can advise on reinforcement needs and ensure compliance with standards.
Structural movement. If your walls move – due to settling, temperature changes, or other reasons – you’ll need expert advice on how to accommodate that movement in your plaster returns.
Unusual substrates. If you’re working with a material that’s not standard – like metal or glass – it’s a good idea to consult local codes and possibly a structural engineer. They can help ensure your returns are up to snuff.

Step-by-Step Installation for Deep Window Returns
Start with thorough substrate prep and dry-fit the profiles before setting any reinforcement. Place the edge detail so it remains discrete and true. Apply reinforcement carefully to avoid creating additional build-up at the edge.
Proceed with the skim coat in a controlled fashion and finish evenly. Allow for appropriate curing behavior and avoid rapid drying conditions that could cause movement. Follow a logical sequence from setup to final finish.
Step-by-Step Installation Process
Follow these practical steps to install deep window returns, ensuring a smooth process from start to finish.
- Preparation and safety checks: Clear the area, ensure all materials are on hand, and wear appropriate PPE. Safety first!
- Measure and mark: Accurately measure and mark out where your returns will go. Double-check measurements to avoid mistakes.
- Main work: Follow the steps below for substrate preparation, reinforcement fixing, basecoat application, and finishing.
- Cleanup: Once finished, clean up the area, dispose of waste responsibly, and store leftover materials properly.
- Final checks: Inspect your work, ensure everything is level and smooth. If any issues arise, don’t hesitate to call a pro for advice.
Substrate and opening preparation
Prepare your substrate and window openings for reinforcement installation. A clean, level surface ensures proper adhesion and a smooth finish.
Start by cleaning the area thoroughly to remove any dust, debris, or old material. Use a suitable cleaner and allow it to dry completely.
Next, level the substrate using a leveling compound if necessary. Ensure it’s smooth and free of imperfections that could show through your finish.
Finally, install any required backers or support bearings. Make sure they’re secure and level, allowing your reinforcement to sit flush without creating a ledge.
Fixing reinforcement and profiles without edge build-up
Install mesh or beads so they’re recessed or flush, avoiding added thickness at the corner that could cause bulging during curing.
Start by dry fitting your profiles to ensure a perfect fit. Make any necessary adjustments before fixing them in place.
When fixing reinforcement, use appropriate fasteners and ensure they’re driven flush with the surface. This prevents them from interfering with your finish or causing bulges.
For mesh reinforcement, consider using a folded or slotted bead to create a recess for the mesh, keeping it flush with the edge and preventing bulging.
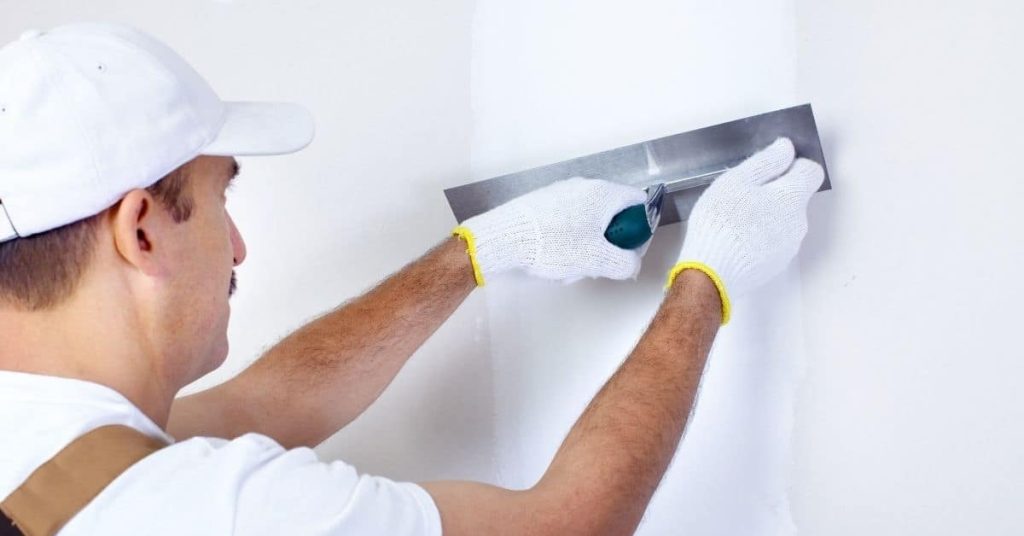
Applying basecoat, feathering and finishing
Apply your basecoat over reinforcement, ensuring a smooth, uniform finish that feathers into the reveal.
Start by mixing your basecoat according to manufacturer instructions. Ensure it’s well mixed and free of lumps or air bubbles.
Using a suitable trowel, apply the basecoat over your reinforcement, working from one side to the other in smooth, even strokes. Feather the edges into the reveal, ensuring a seamless transition between return and wall.
Allow the basecoat to cure according to manufacturer instructions before applying any final coats or finishes. Regularly check for any signs of bulging or movement during this time.
Tools and Materials Checklist
Assemble the essential tools you’ll actually use on site and check condition before starting. Confirm that compatibility exists between substrate, plaster, and reinforcement. Prioritize practical, proven items over brand guarantees.
Keep a clear list of consumables like mesh, beads, and trims, and verify their suitability for deep reveals. Have options ready in case the edge needs a different detailing approach. Refer to labels and technical sheets if you’re unsure about a product’s use.
Hand and power tools
Before you start, check off this list to ensure you have the right tools for clean, efficient work.
- Tape measure: Accurate measurement prevents crooked returns. Check calibration with a known length.
- Pencil and marker: Marking out ensures precise cutting. Use different colors to avoid confusion.
- Straight edge: A long, level straight edge helps guide cuts. Ensure it’s not warped or damaged.
- Utility knife: Sharp blade for scoring and cutting mesh. Replace blades regularly to maintain clean cuts.
- Jigsaw: For cutting profiles and beads. Use a fine-tooth blade for smooth edges.
- Hammer: For tapping in profiles and fixing reinforcement. Check weight and balance for comfortable use.
- Trowel set (3-4 sizes): For applying basecoat, adhesive, and finish plaster. Ensure trowels are not chipped or bent.
- Scraper: For removing excess material and smoothing edges. Check blade for sharpness and flexibility.
- Spirit level: Essential for ensuring returns are plumb and level. Check accuracy with a known level surface.
Quick rule: Always check tools before starting to avoid delays and rework.
Reinforcement and profile selection
Choose the right reinforcement and profiles for your job. This checklist helps you prepare.
- Flexible mesh: For deep returns, choose a flexible mesh that can follow curves without kinking. Check flexibility by bending it gently.
- Fabric reinforcement: For extra strength in high-traffic areas. Check for even weave and no loose threads.
- Folded or slotted beads: For creating a clean edge. Check for consistent size and shape.
- Edge profiles: For finishing the return’s edge. Carry alternatives for different wall types.
- Adhesive-reinforced tapes: For fixing reinforcement to the substrate. Check adhesion strength by peeling a corner.
- Anchors (if needed): For securing profiles in poor substrates. Check compatibility with your profile type.
- Alternative sizes/flexibilities: Carry spares for unexpected changes or mistakes. Check they’re the correct size before starting.
Quick rule: Always check reinforcement and profiles on-site to ensure they match the job’s requirements.
Consumables, adhesives and patching materials
Stock up on these essentials before starting your deep window return project.
- Adhesive: For fixing reinforcement. Check pot life and cure time to plan your work.
- Basecoat plaster: For creating a smooth, even surface. Check for consistent texture and no lumps.
- Finish plaster: For the final layer. Choose a suitable finish (smooth, textured) and check it’s compatible with your basecoat.
- Sealant: For filling gaps and preventing moisture ingress. Check for flexibility and adhesion properties.
- Patching material: For filling holes or cracks. Check it matches the substrate in texture and color.
- Primer (if needed): For improving adhesion on difficult surfaces. Check compatibility with your chosen materials.
Quick rule: Always check consumables’ pot life, cure time, and compatibility before starting to avoid wastage and poor results.
Visual Checkpoints, Acceptance Criteria, and Common Defects
Establish early visual and tactile checks to catch bulging before finishing. Look for edge crispness, levelness, and uniform texture across the returns. Inspect for any signs of cracking or edge separation during and after installation.
Define plain-language tolerances based on the project and local expectations. If anything looks off, reassess edge rigidity, reinforcement placement, and material compatibility. Use the checks as a living guide during work.
Mid-install inspection points
Use this checklist at key stages during installation to ensure your deep window returns are on track.
- Check alignment: Ensure the return is straight and level. Use a spirit level to confirm.
- Verify support contact: Make sure the return is firmly attached to the substrate. Tap it gently; it should sound solid, not hollow.
- Mesh embedding: Confirm that the reinforcement mesh is fully embedded in the basecoat. No wires should be visible or feel loose.
- Edge flatness: Ensure the edge of the return is smooth and flat. Run your hand along it to feel for any irregularities.
- Check for voids: Tap the return; if it sounds hollow, there may be voids behind it. Fill them with patching material immediately.
- Inspect corners: Corners are high-stress areas. Ensure they’re reinforced properly and show no signs of cracking.
- Check for bulging: Gently press the return; it should feel firm, not spongy or bulge out.
- Inspect for cracks: Look for any hairline cracks. Seal them immediately to prevent growth.
Quick rule: If anything feels or looks off, address it right away. Small issues can become big problems later on.
Final inspection checklist
Use this list to ensure your deep window returns are up to par before signing off on the job.
- Uniform finish: Check for a smooth, even surface. No lumps or dips allowed.
- No edge lift: Ensure the return’s edges are firmly attached and show no signs of lifting.
- No visible stress lines: Look for any cracks or lines indicating stress. If present, they need to be addressed.
- Check for delamination: Gently tap the return; it should sound solid, not hollow or echoing.
- Inspect corners: Corners are still high-stress areas. Ensure they’re in good condition.
- Document findings: Take notes and photos of any issues for handover to the next trades or homeowner.
Quick rule: If you find any issues, address them before moving on. A small problem now is better than a big one later.
Photographic examples of common defects and remedies
Take photos of any issues you find during installation or inspection. This helps diagnose problems and track progress.
- Bulging: Cause: Insufficient reinforcement or poor substrate preparation. Remedy: Reinforce with additional mesh, ensure proper substrate prep.
- Cracking: Cause: Stress from movement or insufficient curing time. Remedy: Address the cause, seal cracks immediately.
- Delamination: Cause: Poor adhesion due to contaminants or moisture. Remedy: Remove affected area, clean substrate, reapply with proper preparation.
- Edge lift: Cause: Insufficient adhesive or movement during curing. Remedy: Reattach using fresh adhesive, support edges during curing.
Quick rule: Photos are worth a thousand words. They help track progress and diagnose issues quickly.
Maintenance, Troubleshooting and Retrofit Repairs
Set a plan to monitor returns over time and note any late movement or bulge development. When diagnosing, consider changes in moisture, temperature, or substrate movement as possible causes. Address issues with targeted repairs rather than repeating the same failure path.
Repair options include patching the affected area and reinforcing with a refreshed edge detail. Partial removal and replacement of reinforcement may be necessary to restore edge stability. Use restoration methods that avoid reintroducing the same edge problem.
Quick fixes vs permanent repairs
When your plaster return starts to bulge, it’s tempting to reach for a quick fix. But remember, a quick fix is just that – quick. It might not solve the root problem.
Cosmetic fixes, like applying more adhesive or using fillers, can hide the issue temporarily. But they don’t address the underlying cause and won’t last.
Permanent repairs, on the other hand, tackle the root cause. They involve removing the bulging plaster, reinforcing the substrate, and reapplying new plaster. It’s more work, but it’s the only way to ensure your return stays in place long-term.
If the bulge is large or causing structural issues, don’t try to fix it yourself. Call a professional before it gets worse.
Retrofitting reinforcement into existing returns
If your return is bulging but still intact, you might be able to reinforce it without tearing everything out. This is called retrofitting.
First, drill small holes along the return’s edge. Be careful not to go all the way through. Then, insert reinforcement pins or screws into these holes. This adds extra support without disturbing the surrounding plaster.
If stress relief is needed, you can score the plaster with a utility knife at regular intervals along the return’s edge. This reduces the risk of large cracks forming later.
Remember, retrofitting isn’t always possible or effective. If the bulge is severe, it might be better to remove and replace the entire return.
When to call a specialist
DIY is great, but there are times when you need professional help. Here are some scenarios where you should call a specialist:
– If the bulge is large and causing structural damage. This could indicate a serious problem with your walls or foundations.
– If access to the return requires scaffolding. Safety is paramount, and professionals have the right equipment and training.
– If you’re unsure about what’s causing the bulge. A specialist can diagnose the problem accurately and recommend the best course of action.
Before any intervention, document the conditions. Take photos, measure the bulge, and note any other relevant details. This will help the specialist understand the issue and provide an accurate quote.
Conclusion
Protecting the edge and keeping the plaster returns true under load isn’t optional. That means safety, durability, and a clean appearance come from disciplined decisions and careful execution, not last-minute fixes.
Run the practical checklist in sequence: confirm the existing returns sit true and square, choose a reinforcement option that won’t bulge the edge, verify material specs meet the project needs, follow the step-by-step installation steps, and finish with a visual check and acceptance test before the plaster cures. Keep the process steady, test in a small area first, and respect cure times to avoid costly mistakes.
Common mistakes to avoid are skimping on edge support, using the wrong reinforcement or fasteners, and rushing the installation. Always prioritize safety: wear eye protection, dust control, and follow manufacturer guidelines for materials and loads. If the edge shows any persistent movement, or you’re unsure about the load path, call a professional rather than force a repair. With careful checks and the right reinforcement, you’ll restore strength and keep the look clean and solid. Stay deliberate, stay safe, and you’ll get lasting results.
FAQ
What signs indicate a plaster return is likely to bulge at the edge after installation?
Look for noticeable bowing or gap openings along the edge where the return meets the window. If the plaster looks pushed outward or the edge isn’t flush with surrounding surfaces, it’s a red flag. Confirm with a straight edge or level against the edge to verify.
Can I reinforce a deep window return without increasing edge bulge?
Yes, by using reinforcement that is anchored away from the edge and by shaping the plaster to reduce load transfer at the corner. Follow manufacturer instructions for any stabilizing mesh or embedded bars, and keep any stiffeners low-profile to avoid pushing the edge outward.
What should I check on product labels or instructions before adding reinforcement?
Read the label for compatibility with plaster and substrate, curing times, and recommended installation methods. If unsure, compare with the manufacturer’s data sheet and local guidance, and follow those exact steps to avoid edge distortion.
What are safe steps if the edge already shows bulging during final cure?
Stop and reassess before full cure. Remove or back out any work that’s creating extra edge stress, then reapply with a gentler, properly supported reinforcement plan. If needed, consult the product instructions or local rules for acceptable corrective methods.