
Introduction
Feathering plaster on curved walls means blending the edge of new plaster into the surrounding surface so you don’t see a hard line. Work in small passes and ease the edge as you go, rather than piling on thick and stopping. Check the existing plaster and patch material to choose the right mix and follow any local rules or manufacturer instructions for safe handling.
Identify where the curve changes most and work across that area with light, continuous passes. Keep your trowel at a shallow angle and smooth ridges as you progress, watching for any flat spots. If you see a flat area, add a thin, feathered coat and blend again until it reads smooth to the eye.
Key takeaways
- Start by assessing curve type and flag potential bulges before repair.
- Use flexible feathering with curved trowel to avoid flat spots.
- Prepare curved walls with gentle, progressive feathering in thin coats.
- Create templates or guides to trace correct curvature before repair.
- Mask surrounding surfaces and wear eye protection and a dust mask.
- Finish and sand in stages, checking curve integrity as you go.
Table of Contents
- Introduction
- Key takeaways
- Understanding Curved Plaster Surfaces
- Tools and Materials Checklist
- Preparing Curved Walls for Repair
- Feathering Techniques Specific to Curved Walls
- Creating and Using Templates and Guides
- Finishing and Sanding Without Flattening the Curve
- Troubleshooting Common Problems
- Advanced Tips and When to Call a Pro
- Conclusion
- FAQ
Understanding Curved Plaster Surfaces
Curved walls behave differently from flat surfaces when plaster is applied. The curve alters thickness and how it dries, which can reveal irregularities if you follow flat-wall methods. Look for how the material lays against the contour rather than just filling the area.
Knowing the geometry helps you choose methods that minimize visible transitions. Consider how the curve affects feathered edges and edge continuity as you work. Verify that your approach matches the wall’s curvature before you start coating.
How Curvature Affects Repair
Curved surfaces present unique challenges when it comes to plaster repairs. The key difference lies in the profile change.
Convex surfaces, like domes or arches, require thicker material at the crown, tapering towards the edges. This is opposite to flat walls where we typically apply more material at the edges and less in the middle.
Concave surfaces, such as barrel vaults or curved walls with recesses, need less material at the deepest point, building up towards the edges. The curvature also affects feathering – you’ll need to blend the repair into the existing surface more gradually on curves than on flat walls.
Common Causes of Damage on Curved Walls
Curved walls can suffer from similar damages as flat ones, but the curvature can exacerbate or present these issues uniquely.
Impact damage, like a stray football or a falling ladder, can crack the plaster and cause it to chip off. On curves, this might create visible lines or expose underlying structure.
Structural movement, whether from settling foundations or earthquakes, can stress the plaster, leading to cracks that follow the curve’s profile. Moisture issues, like leaks or high humidity, can cause plaster to blister and peel, again often following the curve.
Poor original finish is another common culprit. If the initial application was too thick, didn’t cure properly, or wasn’t sanded smooth, it may crack over time, especially at the edges where curvature changes the stress points.
Tools and Materials Checklist
Gather hand tools that let you reach gentle radii and maintain control along the curve. Include a flexible trowel, a long blade for feathering, and a mixing paddle that won’t chatter on irregular surfaces. Have a level or straightedge handy for quick checks along the curve.
Choose material forms that stay workable on curves, and note any recommended working time or cure guidance from the label. If you’re unsure, check the manufacturer data sheet or local code guidance for curved installations.
Essential tools for feathering without flat spots
Before you start working on your concrete surface, make sure you have all the necessary tools to achieve a smooth, curved finish. Use this checklist to ensure you’re well-equipped.
- Flexible Knife (12-16 inches): Check blade flexibility by bending it gently. It should spring back into shape without creasing.
- Small Trowel (4-6 inches): Confirm trowel size is suitable for your project’s scale and curvature.
- Sanding Pad (180-220 grit): Ensure the pad is in good condition with no missing or loose abrasives. Check by running your fingers over it.
- Shaping Battens: Verify they’re straight and long enough to span the widest part of your curve. If not, you’ll struggle to maintain a consistent radius.
- Concrete Edger (optional): Check if it’s suitable for your edge profile. Skipping this might lead to rough edges that require additional work.
- Measuring Tape: Ensure it’s long enough and in good working order. A faulty tape can result in inaccurate measurements and uneven curves.
- Level: Confirm it’s accurate by checking against a known straight edge. An inaccurate level can cause flat spots or inconsistent curvature.
- Protractor (optional): If you’re working with specific angles, check if your protractor is calibrated correctly to avoid measurement errors.
Quick rule: Always inspect your tools before starting work. Dull or damaged tools can cause flat spots and require rework, costing you time and money.
Best plasters and compounds for curves
Use this checklist when preparing to apply plaster or compound on curved surfaces. It helps ensure a smooth, durable finish with minimal rework.
- Check flexibility: Squeeze a small amount of the product between your fingers. It should feel soft and flexible. What goes wrong if you skip this: A rigid compound can crack or pull away from curves, leading to costly repairs.
- Inspect for shrinkage: Look for any signs of shrinking or cracking on the product label or manufacturer’s website. Check reviews as well. What goes wrong if you skip this: High shrinkage can cause cracks and gaps, ruining your finish.
- Verify adhesion: Test a small amount on a similar surface to ensure it sticks well. Let it dry, then try to peel or scrape it off. It should stay put. What goes wrong if you skip this: Poor adhesion can cause the compound to fall off, wasting time and materials.
- Check water content: Ensure the product has a suitable water content for your climate and application. Too much or too little can affect curing and performance.
- Read manufacturer’s instructions: Follow guidelines on mixing, application, and curing. Different products have unique requirements.
- Inspect packaging: Check for any signs of damage or tampering before use. Opened bags should be properly sealed to maintain freshness.
- Check compatibility: If using multiple compounds, ensure they’re compatible and can be layered without causing issues. Contact the manufacturer if unsure.
- Consider working time: Check how long the product remains workable after mixing. This affects your application speed and technique.
Quick rule: Always test a small amount of any new compound on your specific surface before starting the job. This helps avoid costly mistakes and ensures you’re using the right product for your needs.
Preparing Curved Walls for Repair
Start with a clean surface and inspect for loose substrate or divots that could distort the curve. Remove dust, oils, and peeling coatings so the new plaster bonds well. Protect adjacent areas from over-spray with tape or shields.
Scrape or abrade any glossy patches and roughen slick edges to improve adhesion. If you see cracks or delamination, note them and plan repairs that respect the original curvature. Always verify cleaning and prep instructions from product labels or manufacturer guidelines.
Surface cleaning and inspection
The first step before any repair is to clean the surface. This ensures new plaster bonds well and follows the original curve.
- Remove loose material: Use a scraper or wire brush to remove any loose plaster, dirt, or debris. Skipping this can lead to poor adhesion and crumbling.
- Check for hidden damage: Tap the wall with a screwdriver handle to listen for hollow spots. This helps find any hidden damage that needs repair.
- Map out the curve: Use a flexible ruler or string line to trace the true profile of the curve onto the wall. This ensures your repairs follow the original shape.
- Inspect for cracks: Look for hairline cracks that may need filling before plastering.
- Check moisture levels: Use a moisture meter to ensure the substrate is dry. Wet surfaces can cause new plaster to fail.
- Remove any old paint or wallpaper: These can prevent new plaster from bonding properly.
- Check for rusted nails or screws: Remove and replace with new ones if found. Rust can stain new plaster.
- Ensure the surface is dry: Use a damp cloth to wipe the wall, then let it dry completely before starting repairs.
Quick rule: Always clean and inspect the entire area, not just the damaged parts. This ensures a consistent finish.
Edge and substrate preparation
Preparing the edges and substrate is crucial for a strong bond with new plaster.
Remove failed edges: Use a utility knife or chisel to cut away any crumbling or damaged edges. This ensures new plaster has something solid to grip onto.
Key the substrate: If the surface is smooth, use a wire brush or sandpaper to ‘key’ it. This creates microscopic pits that help new plaster bond better.
Apply appropriate primers or bonding agents: Use a primer or bonding agent designed for curved surfaces. These help new plaster adhere and prevent cracking. Always follow the manufacturer’s instructions for application and drying times.
Feathering Techniques Specific to Curved Walls
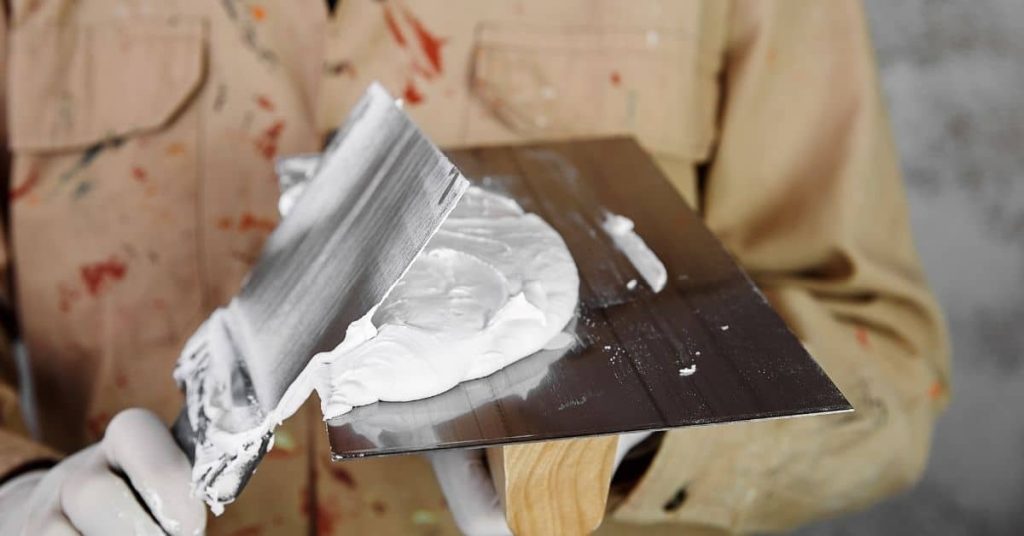
Apply plaster in thin, consistent coats that follow the curve rather than dragging flat patches across. Use short, steady strokes and rotate your wrist to keep edges seamless along the radius. Work with the curve, not against it, to avoid flat spots.
Build the transition gradually, checking for uniform thickness along the contour. Keep the tool at a slight angle to maintain a curved feather line and avoid creating visible flats. If a technique isn’t delivering the curve, pause and review product instructions for curved surfaces.
Applying thin coats without creating flat planes
When working with curved walls, it’s crucial to maintain the wall’s natural curvature in each coat. Applying thick, flat coats can ruin the curve and make your wall look flawed.
Start by checking your base coat compaction. Ensure it’s well-compacted to avoid any lumps or flat spots that could affect your final finish. Use a straight edge to feel for any inconsistencies.
Now, mix your concrete for the next thin coat. Aim for a semi-dry consistency, not too wet and not too dry. This will help you maintain control over the material as you apply it.
Use a curved trowel or a straight one with some flexibility to apply your concrete. Work in small sections, following the curve of the wall. Apply pressure evenly to avoid creating flat spots. Keep checking your work with a straight edge to ensure you’re maintaining the curvature.
Trowel and knife handling for continuous curves
When working with curved walls, your trowel and knife are your best friends. Here’s how to handle them right:
First off, grip your tools like you would a pencil. This gives you the most control and sensitivity. For curves, keep your wrist loose but firm.
Now, stroke along the curve, following its direction. Start at the top and work your way down. Pressure’s key here – light touch for curves. You don’t want to flatten it out or create lines.
Building up compound to match profile
When you’re dealing with deep losses on curved walls, you can’t just slap on a thin coat and call it a day. You need to build up your compound in layers to restore the original contour without creating flat planes.
Start by checking your base compaction. If it’s not solid, fix it before you start. You don’t want your hard work crumbling away later.
Now, mix up a batch of compound following the manufacturer’s instructions. Remember, you’re going for depth here, not thin coats. So, make it thick enough to fill those gaps without sagging.
Using a trowel or knife, apply the compound in small sections at a time. Work from the top down, feathering out the edges to match the existing profile. Don’t try to do too much at once; you’ll lose control of your curves.
Creating and Using Templates and Guides
Templates and flexible battens can help you reproduce the curve consistently. Position guides along the surface and use them to control feather boundaries as you work. Clamp or tape guides where they won’t crush the underlying curve.
Cauls and lightweight forms can support thin coats while they cure. Check that guides stay aligned with the original profile during each pass. When in doubt, consult manufacturer recommendations for use on curved profiles.
How to make curve templates
Create reusable templates to trace and maintain the original curve during repairs.
- Gather materials: Cardboard, scissors, tape, pencil, existing curve’s edge.
- Trace the curve: Place cardboard along the wall’s edge, trace the curve with a pencil. Cut out the traced shape.
- Check accuracy: Tape the template to the wall, ensure it matches the original curve. Adjust if needed.
- Make multiple templates: Create several copies for reference and progress checks.
- Avoid mistakes: Skipping this step may result in inconsistent curves and visible repair lines.
Quick rule: Make templates before starting repairs to maintain the wall’s original curve.
Using flexible battens and cauls
Employ lightweight, flexible guides during application and drying for consistent feathering.
- Gather materials: Flexible battens (thin wood or plastic strips), caul (flexible, thin material like roofing felt).
- Apply battens: Attach battens along the wall’s curve using nails or adhesive. Ensure they follow the curve exactly.
- Check alignment: Use templates to ensure battens match the original curve.
- Apply caul: Place caul over battens, securing it with tape or nails. This helps maintain a smooth profile.
- Maintain flexibility: Ensure battens and caul remain flexible; replace if they become rigid during drying.
Quick rule: Use flexible guides to prevent flat spots and keep a continuous profile during repairs and drying.
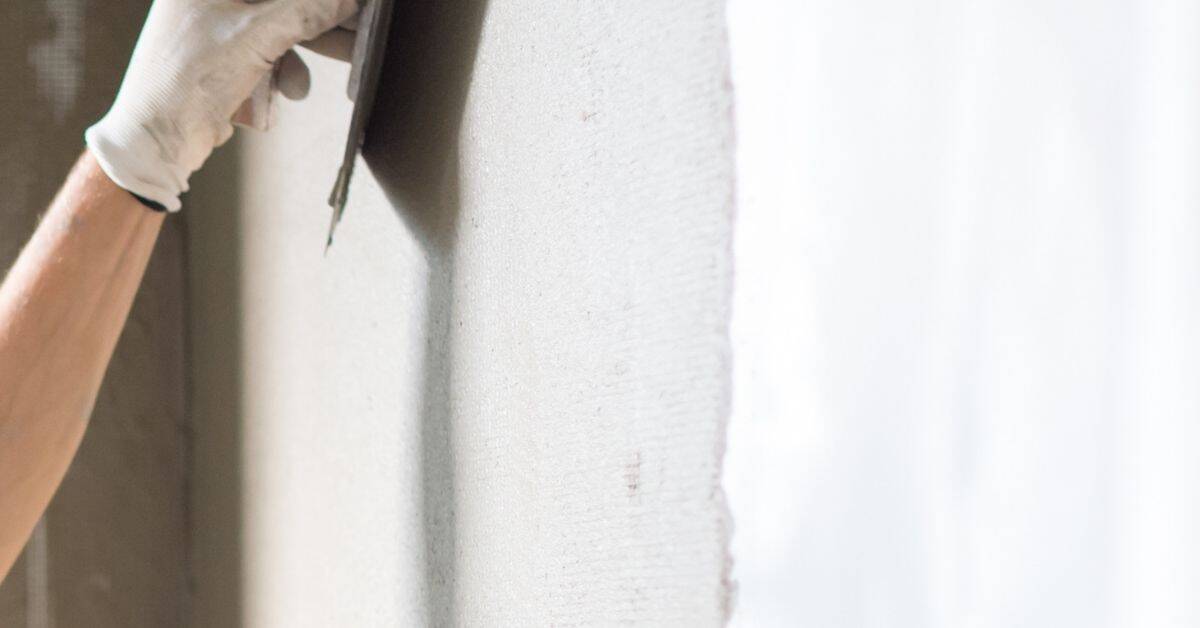
Finishing and Sanding Without Flattening the Curve
Sand with light, overlapping motions and minimal pressure to avoid shaving off the curve. Use fine-grit screens and frequent tests against a straight edge to detect flat spots. Keep the surface moving to maintain a smooth contour.
Wipe away dust as you go and re-check the curve after each pass. If you see flattening, adjust sanding pressure and consider re-coating small areas following the original curvature. Always verify finishing guidelines from product labels or manufacturer instructions.
Sanding alternatives and gentle abrasives
Over-sanding can flatten your curve. So, let’s keep it gentle.
Use sanding sponges for their flexibility. They mold to the wall, giving you control over pressure.
Flexible abrasive sheets work well too. They’re great for getting into those tight spots without losing shape.
Scumbling is another trick. It’s like a light sanding with a damp sponge. It blends edges and knocks down high points without flattening the curve.
Visual checkpoints to verify curvature
Before you start sanding, make sure your curve is still right. Here’s a quick checklist.
- Check light angles: Shine a light at different angles. If the curve looks consistent, you’re good.
- Trace the profile: Run your finger along the wall. Feel for any flat spots or inconsistencies.
- Inspect edges: Check where new plaster meets old. Make sure it’s smooth and follows the curve.
- Check for shadows: Look for any sudden changes in light and dark. They might indicate a flat spot.
- Feel for high points: Run your hand over the wall. High points will feel rougher than low points.
- Inspect templates: If you used templates, make sure they still fit snugly against the wall.
- Check for dust: A little dust can hide imperfections. Wipe off excess with a damp cloth.
- Step back and look: From a distance, your eyes can pick up on any inconsistencies.
Quick rule: If something doesn’t feel or look right, trust your instincts. Check it again before you sand.
Troubleshooting Common Problems
Identify issues like edge dings, hollow spots, or sheen variations early. Pinpoint whether they come from prep, mixing, or application along the curve. Plan targeted corrections that restore the continuous profile.
For recurring flat spots, reassess feather direction, coat thickness, and tool technique. Avoid overworking the same area, which can create new flats. When uncertain, check troubleshooting sections in product data sheets or guidance from pro forums and local rules.
Fixing flat spots after curing
After your plaster has cured, you might find small flat areas where the curve wasn’t maintained. Here’s how to fix them:
Selective build-up: Apply a thin layer of joint compound only on these flat spots using a flexible trowel or knife. This helps maintain the curve while building up the area.
Re-feathering: Once the compound has set, use your trowel or knife to re-create the original curve by feathering out the edges of the repaired area. Work in small sections to keep the curve consistent.
Repairing cracks and delamination on curves
Cracks and delamination on curved walls can be tricky. Here’s how to tackle them:
Treat underlying causes: Before making repairs, identify what caused the damage – it could be moisture, settling, or poor initial workmanship. Address these issues first to prevent recurrence.
For delamination: Use a flexible trowel or knife to apply joint compound directly onto the delaminated area. Press firmly and feather out the edges to re-bond it with the surrounding plaster. Apply pressure using a caul or batten to help maintain the curve while the compound sets.
Reinforce repairs: Once the initial repair has set, apply a flexible reinforcing mesh or tape over the area. This helps distribute stress and prevents future cracking. Then, build up the compound in thin layers, following your curve template, to match the original profile.
Advanced Tips and When to Call a Pro
Challenging curves may require more complex templates or specialty compounds designed for curved work. Consider layering strategies that respect the profile while building strength. Document your process so you can adjust next time.
Know when to bring in a pro for structural concerns or decorative profiles beyond your experience. Refer to the project’s requirements and local guidelines to determine if expert help is warranted. Always verify scope and recommendations from professional instructions or local code authorities.
Reinforcement, moldings, and specialty materials
The right materials can make all the difference when repairing plaster on curved walls. They can help prevent cracking, staining, and weak bonds.
- Flexible Reinforcement Mesh: Use for added strength in areas prone to cracking. Look for high-quality galvanized steel mesh with small openings (1/4″ or 6mm). Avoid cheap, large-mesh options that can rust and cause more damage.
- Fiberglass Reinforcement: Specify chopped strand fiberglass for added flexibility and strength. It’s resistant to corrosion and won’t rust like steel. Mix it into your plaster compound before application.
- Preformed Mouldings: Use for decorative restorations or where damage is extensive. Choose moldings made from the same material as your existing plaster (gypsum, lime, etc.) to ensure a good bond and similar appearance.
- Flexible Cauls: Use these flexible battens to create curves when applying new plaster. They help maintain the curve’s shape while the plaster dries. Look for cauls made from materials like wood or plastic that won’t warp or sag.
- Specialty Plaster Compounds: For complex repairs, consider using specialty plasters designed for specific applications. For example, use a lightweight spackling compound for small repairs to minimize weight and prevent cracking.
Assessing scope and hiring a plaster specialist
Knowing when to call in a professional can save you time, money, and headaches. Here’s how to assess the scope of your repair and find a qualified contractor.
First, inspect the damage thoroughly. Look for signs of structural issues, extensive damage, or complex decorative profiles that may be beyond your DIY skills. If you’re unsure, it’s better to err on the side of caution and consult a professional.
When hiring a plaster specialist, look for someone with experience and credentials. Ask for references, check their licenses and insurance, and ensure they have a proven track record working with your type of plaster (gypsum, lime, etc.).
Get multiple quotes from different contractors. This helps you compare prices and services. Be wary of anyone offering significantly lower prices than others – it could indicate subpar materials or workmanship.
Conclusion
Feathering a patch on curved walls is as much about planning and restraint as it is about technique. Keep the curve true, test each step in a small area, and you’ll get a durable repair that blends with the surface.
Start by checking the wall, cleaning the area, and setting up your templates or guides. Mix the repair compound to the consistency you need, apply in thin, controlled passes, and use steady, feathered strokes to follow the curve. Let each coat skim and dry before adding more, then sand lightly and recheck the curve. Finish with a final seal or finish coat that matches the surrounding texture, and clean up thoroughly so you don’t trap dust in joints.
Common mistakes to avoid are flattening the curve with over-sanding or thick patches, skipping the small-area test, and not allowing proper drying times between coats. Safety matters too: wear a dust mask, use eye protection, keep your work area well ventilated, and don’t work above your comfort level with ladders or scaffolding. If you see signs of structural movement, severe cracking, or dents that won’t hold a feather, pause and re-evaluate before proceeding.
When to call a pro is clear: if the curve is severely damaged, if you’re unsure about the wall’s backing, or if repeated repairs fail to hold. In those cases, professional help saves you time and money and protects the underlying structure. Stay steady, follow the steps, and you’ll keep the curve strong and the finish clean.
FAQ
How do I avoid creating flat spots when feathering on a curved wall?
Work with the curve, not against it. Build thin layers and feather the edge along the curve so the transition follows the contour.
What tools or settings help keep a smooth, curved finish?
Use a curved or flexible trowel that matches the wall’s profile. Apply light pressure and keep the blade almost flat to blend the edge with the existing plaster.
How can I test whether the repair will hold its shape after drying?
Let the mud set according to the product instructions, then check for uniform curvature. If edges pull away or pinhole, rework the feather and re-smooth before it cures.
What are common signs of failure on curved repairs and how should I respond?
Visible flat spots, cracking along the edge, or edges that don’t blend. If you see these, rework the feather from the center out and recheck the curve with a straightedge or template.