
Introduction
Stress-relief cuts and reinforcement help fix plaster cracks above doorways by reducing tension and adding support. I’ll show you how to identify the crack pattern and decide if you need cuts, mesh, or patching compound. This is a hands-on job you can do with common tools, but check your plaster type and any local requirements before you start.
There are a few practical approaches to stress-relief cuts and reinforcement you can choose from. Typical options include shallow relief cuts, fiberglass or metal mesh, and patching compound, with care taken to match the wall feel. Always verify product labels and instructions, and follow local rules for crack repair and plaster work.
Key takeaways
- Identify cracks above doorways early to plan proper stress relief and reinforcement.
- Choose appropriate stress relief cuts (V, keyhole, or saw-cut) depending on crack.
- Reinforce with fiberglass mesh and multi-layer joint compound for durability and bonding, and anchored edge nails for secure bonding.
- Use sharp utility knife to clean edges and establish clean cut lines.
- Match finish plaster and paint after curing following manufacturer guidelines.
- Safety: wear eye protection, mask dust, and turn off power when cutting.
Table of Contents
- Introduction
- Key takeaways
- Why Plaster Cracks Form Above Doorways
- Assessing the Crack and Deciding Repair Scope
- Types of Stress Relief Cuts and How They Work
- Tools and Materials Checklist
- Step-by-Step: Making Stress Relief Cuts and Reinforcing the Area
- Finishing to Match Existing Plaster and Paint
- Cost, Time Estimates, and DIY Vs Professional Choices
- Safety, Prevention, and Long-Term Maintenance
- Conclusion
- FAQ
Why Plaster Cracks Form Above Doorways
Cracks above openings are a telltale sign of movement and finish failure, not just a surface issue. You’ll see patterns that help pinpoint what moved and when. Common shapes include vertical, diagonal, rabbit-shaped, or widening at corners, each signaling something about load paths and settlement.
Structural factors like header performance, lintel adequacy, and door sag influence how loads transfer through studs and framing. This concentrates stress just above the opening and can crack plaster or drywall finishes. Distinguish movement-related cracks from finish or adhesive failures caused by moisture, temperature cycling, or plaster compatibility with the substrate.
Structural movement and settlement
The cracks you see above doorways often start with the building itself. Framing shifts, joist deflection, and settlement can all concentrate stress at those door headers.
When a house settles, it’s not always evenly. Some parts might sink more than others. This uneven movement puts extra pressure on the headers above doors and windows. That’s why you often see cracks there first.
Deflection happens when joists sag under load. If they’re not properly supported, they can bend, pushing up on the header and causing it to crack. The same goes for framing members that shift or move out of plumb.
Look for cracks that run vertically or diagonally above doorways. These usually signal movement-related issues.
Thermal, moisture, and humidity effects
Temperature changes and moisture can also cause cracks in your plaster. Here’s how:
Plaster expands when it gets warm and contracts when it cools. The same goes for the framing members behind it. If they don’t expand and contract at the same rate, you get stress and cracking.
Moisture can make things worse. It causes both materials to swell, putting even more pressure on the plaster. And if that moisture freezes, well, that’s a whole other problem.
Check for cracks that run horizontally or follow the perimeter of the doorway. These often indicate thermal or moisture-related issues.
Plastering and construction defects
Sometimes, the problem isn’t with the building itself but how it was finished. Poor plastering can lead to cracking.
If the plaster didn’t key properly into the lath or substrate, it can’t stick when stress is applied. Inadequate bonding between coats of plaster can also cause problems. And missing control joints mean there’s no place for the plaster to expand and contract naturally.
Look out for cracks that are ‘rabbit’ or ‘e’-shaped, or widen at corners. These often indicate a problem with the plastering itself.
Assessing the Crack and Deciding Repair Scope
Documenting crack width, length, and pattern helps you decide between a simple patch or a bigger fix. Note doorway location and any surrounding damage such as stains or bulging. Look for signs that point to structural movement or just a finish issue.
Check for indicators like sticking doors, floor or ceiling gaps, or sagging arches, plus any moisture or efflorescence behind the plaster. Set up a simple documentation routine with photos, measurements, and a basic map of the crack area. Use that to determine if reinforcement is enough or if a professional assessment is needed.
How to inspect and document damage
First, grab a ruler, caliper, camera, and paper for sketching. You’ll need these to measure, photograph, and note the cracks.
Measure crack width at its widest point. Length is crucial too – mark it with a pencil or tape. Use a caliper for precise measurements.
Take scale photographs. Place a ruler or measuring tape next to the crack. This gives context and helps track changes over time.
Sketch a simple map of your home, marking doorways and cracks. Note any surrounding damage like water stains, bulging plaster, or nail pops.
Cosmetic vs structural indicators
Hairline cracks are usually cosmetic. They’re thin, often due to minor settling or plastering defects. If they’re not widening, you might just need a simple patch.
Widened cracks, especially those that follow vertical or horizontal lines, could be structural. These may indicate movement in the framing or foundation.
Stair-step patterns suggest stress from door lintels or studs. Check for any signs of moisture, like water stains or salt efflorescence. This can cause cracks to widen over time.
If you see bulging plaster, loose chunks, or cracks that seem to be getting worse, these are red flags for structural issues. Don’t ignore them – they might need professional attention.
When to call a professional
If cracks are progressively widening, it’s time to call in the pros. This could indicate ongoing movement or structural issues that need addressing.
Misaligned doors or windows, sagging arches, or floors that feel spongy underfoot – these all suggest framing movement. Don’t try to fix these yourself; get a professional opinion first.
Any visible damage to the lintel above your doorway, or signs of trouble with roof beams or joists, should also raise alarm bells. These are serious structural issues that need immediate attention from a pro.
Remember, it’s always better to err on the side of caution. If you’re unsure about any cracks or damage, don’t hesitate to call in an expert for advice and assessment.
Types of Stress Relief Cuts and How They Work
Shrinkage joints, control joints, and micro-cuts each interrupt stress paths to slow or stop crack propagation. They are chosen based on door width, plaster thickness, and the substrate you’re on. Placement should match known movement patterns while preserving lath, hardware, and wiring.
Tools and materials include appropriate saws or grinders, edge templates, patch or plaster, and reinforcement options. Understand safety requirements and whether cuts should be pre-cut or made after the plaster has cured, depending on the situation.
Shrinkage joints and purpose
Shrinkage joints are deliberate separations made in the plaster to accommodate surface movement. They’re typically placed above doorways, where cracks often form due to structural movement and settlement.
Why they work: By interrupting stress paths, shrinkage joints allow the plaster to move independently, preventing cracks from propagating further.
Their placement is crucial. For standard doors (32″-36″ wide), a single joint above the doorway, about 1/4″ deep and running parallel to the door frame, usually suffices.
Control cuts and expansion joints
Control cuts are targeted grooves made in the plaster to control where cracks occur. They’re narrower than shrinkage joints, typically around 1/8″ wide.
Why they work: By creating a weak point, control cuts encourage cracks to form there instead of randomly across the surface.
Expansion joints differ by allowing movement between two surfaces. They’re wider than control cuts and filled with a flexible material like backer rod or foam.
Choosing cut patterns and placement
Placement of relief cuts should relate to door geometry, framing, and crack history. For instance, if cracks are forming above the header, a shrinkage joint there might help.
Consider door width/height, plaster thickness, and substrate (lath, drywall, concrete). Deeper cuts may be needed for thicker plasters or wider doors.
Spacing should follow material thickness and manufacturer guidance. For standard plasters, cuts every 6-8 feet along the length of the wall are common.
Tools and Materials Checklist
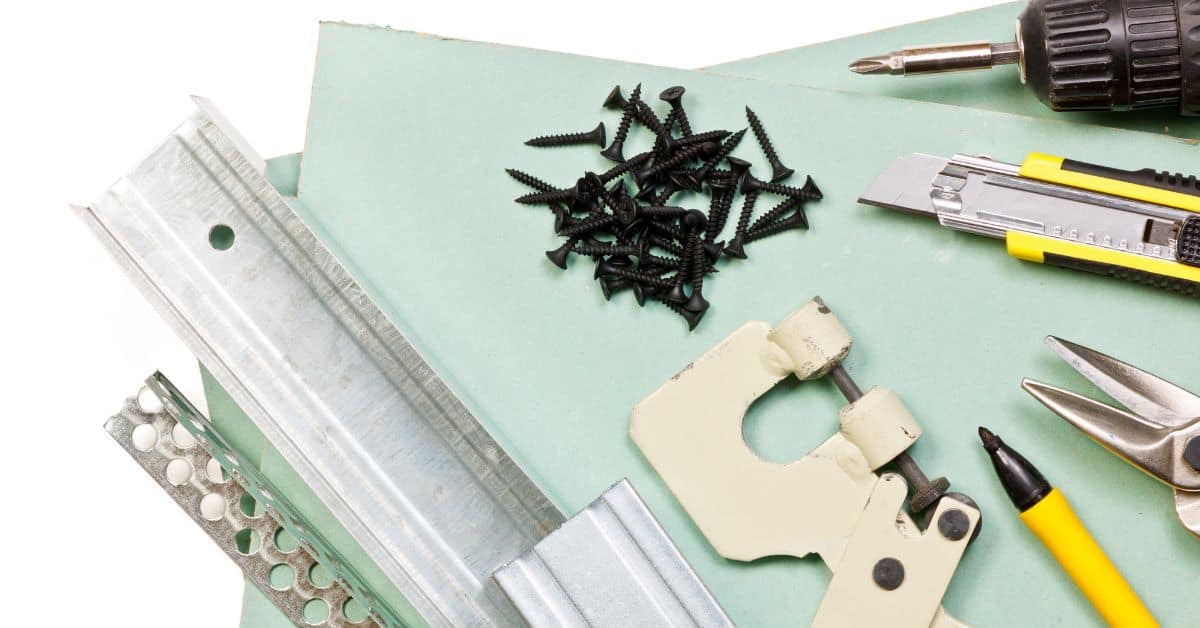
Identify the crack location and determine if a stress-relief cut is needed, then select cutting tools such as a utility knife or angle grinder with a guard. Always include safety gear in your plan. Keep the work area contained and clean while you work.
Reinforcement choices range from metal lath to fiberglass mesh or polymer grids, with bonding agents to improve adhesion. For patches, have plaster patch mixes or lime-putty ready, plus the correct thickness guidance and finishing materials to match the surface.
Cutting tools and PPE
Before you start trimming or cutting, gear up and gather the right tools.
- Dust mask: Protect your lungs from plaster dust. Use a respirator for deeper cuts.
- Eye protection: Safety glasses or goggles keep dust out of your eyes.
- Hearing protection: An angle grinder can be loud; protect your ears.
- Utility knife: For scoring and shallow cuts on the plaster surface.
- Angle grinder with diamond blade: For deeper cuts, like stress-relief cuts or removing damaged plaster.
- Hand saw or keyhole saw: For small channels or precise cuts.
- Oscillating multi-tool: Useful for intricate cuts and shaping.
- Gloves: Protect your hands from cuts and dust.
- Angle grinder guard: Essential safety when using an angle grinder.
Quick rule: Never skip PPE. Safety first, always.
Reinforcement options (mesh, tape, metal)
Choose the right reinforcement for a strong repair.
- Metal lath: Best for wide cracks and structural repairs. Use with a bonding agent for better adhesion.
- Fiberglass mesh tape: Suitable for narrow cracks. Apply with a primer or bonding agent.
- Polymer grid: Flexible, good for curved surfaces. Use with a compatible patching compound.
- Metal expansion strips: Ideal for control cuts and expansion joints. Install before plastering.
Quick rule: Match reinforcement to crack width and plaster type for best results.
Patching compounds and finishing materials
Use compatible materials for a durable, long-lasting repair.
- Plaster patch mix: Ideal for small cracks. Match the existing plaster type if possible.
- Lime-putty or gypsum-based patch: For larger repairs. Choose based on your wall’s construction.
- Bonding agent or primer: Improves adhesion of patch to existing plaster. Use before applying the patch.
- Setting-type plaster compound: For deep cuts or voids. Apply in thin layers, allowing each to set before adding more.
- Acrylic paint or primer: For final finish. Choose a color and type that matches your existing wall.
Quick rule: Always test patching compounds on a small area first to ensure compatibility with your existing plaster.
Step-by-Step: Making Stress Relief Cuts and Reinforcing the Area
Start with a clear prep by assessing patterns above the doorway, clearing the area, and protecting floors. Verify no live utilities and consult a professional if cracks are unusually wide. Gather PPE and the necessary tools before you begin.
<