
Introduction
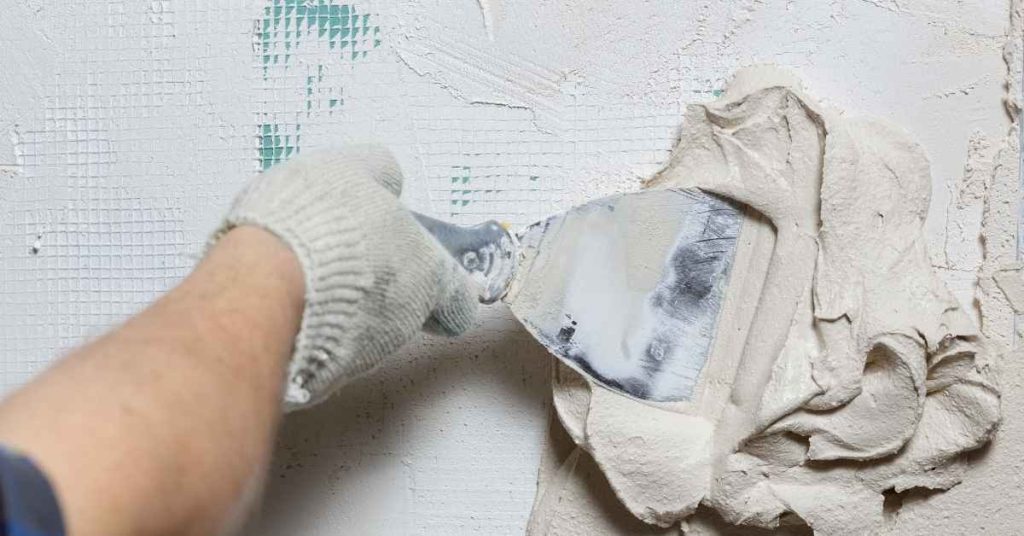
Plaster over radiant heat walls is coating heated walls with plaster after adding mesh and a small isolation layer. It relies on a reinforced base and a separating layer to handle heat and movement. In practice, expect this to be a hands-on job that needs careful prep and patience.
The work breaks down into prep, install mesh and isolation, then plaster, all while watching heat cycles. Always check product labels and manufacturer instructions for heat compatibility and curing guidance, and follow local rules. If in doubt, test a small area and be prepared for touch-ups as materials move with temperature.
Key takeaways
- Align plaster on radiant walls requires proper insulation and substrate prep.
- Verify system shutdown and surface temperature limits before plastering.
- Use compatible primers and plaster mixes; consult manufacturer guidelines.
- Install mesh or lath with proper spacing and bond to key substrate.
- Include movement isolation joints at transitions to prevent cracks.
- Plan visual checks, moisture tests, and thermal cycling expectations during cure.
Table of Contents
- Introduction
- Key takeaways
- Why Plaster over Radiant Heat Walls?
- Understanding Radiant Wall Heating Systems
- Material Compatibility: Plasters, Primers, and Admixtures
- Mesh, Lath, and Reinforcement Strategies
- Isolation, Movement Joints, and Detailing
- Installation Workflow and Best Practices
- Visual Checkpoints, Testing, and Inspections
- Long-Term Performance, Maintenance, and Troubleshooting
- Conclusion
- FAQ
Why Plaster over Radiant Heat Walls?
Covering radiant heat walls with plaster can improve aesthetics, fire resistance, and surface durability. It also creates a seamless finish that’s easier to clean and maintain over time. The trade-offs include chances of affecting thermal transfer paths and potential cracking if movement isn’t managed.
When planning, focus on maintaining good thermal transfer while protecting long-term finish integrity. Check how your plaster system will interact with active heating elements and verify guidelines from the material or system manufacturer. Consult local rules or your label for any required clearances or performance specifications.
Performance expectations and thermal comfort
Plastering over radiant heat walls can enhance your home’s thermal comfort. Here’s what to expect:
Heat perception: Plaster provides a stable, even surface for heat distribution. You’ll feel consistent warmth rather than hot spots.
Heat-up and cool-down times: Plaster has some mass, so it may slightly slow down the initial heat-up process but will also help maintain temperature during cool-down periods, providing more consistent heating.
Realistic thermal performance: Expect a 1-2°F difference in temperature compared to bare radiant walls. This is due to plaster’s slight insulating properties and mass. However, it won’t significantly impact overall efficiency or comfort.
Situations to avoid plastering over radiant walls
While plaster can enhance your radiant heat system, there are situations where it’s best avoided. Here are some mistakes to steer clear of:
- Improperly installed heating: If the radiant heating elements aren’t properly embedded in the concrete or gypsum board, plastering over them won’t fix installation issues.
- Frequent temperature shocks: Sudden and extreme temperature changes can cause stress on both the plaster and the underlying heating system. Avoid frequent on/off cycling or wide temperature swings.
- Incompatible substrates: Plaster isn’t suitable for all surfaces. If your radiant heat walls are made of materials that don’t bond well with plaster, like certain types of foam board, consider alternative finishes.
- Moisture issues: Radiant heat systems can introduce moisture into the wall assembly. If there’s a risk of excess moisture or condensation, avoid plastering until these issues are resolved.
- Fire safety concerns: While plaster provides some fire resistance, it shouldn’t be used as a sole means of meeting fire codes. Always check local regulations and consult with professionals if you’re unsure.
In summary, avoid plastering over radiant heat walls when there are installation issues, temperature extremes, incompatible substrates, moisture problems, or fire safety concerns.
Understanding Radiant Wall Heating Systems
Radiant wall systems use embedded or mounted elements to deliver heat through the wall mass. Construction details and operating temperatures influence plaster choices and detailing, including substrate preparation and attachment methods. Different substrates demand specific bonding or reinforcement to hold up under cycling heat and humidity.
Before plastering, review the system’s data or installation guide and confirm compatible finishes. Verify with the data sheet, installation manual, or manufacturer instructions. When in doubt, consult local codes or the system supplier for limits on surface treatments and maximum exposure conditions.
Types of systems: hydronic vs electric vs panel systems
Radiant wall heating systems come in three main types. Each has its own way of distributing heat, affecting how plaster performs.
Hydronic Systems: These use hot water running through pipes embedded in the walls. They provide even, comfortable heat with surface temps around 75-85°F (24-29°C). Plaster choice isn’t critical here; standard gypsum plasters work well.
Electric Systems: These have electric heating elements installed in the walls. They can reach higher surface temps, up to 100°F (38°C), and heat distribution may not be as even. Use plasters rated for higher temperatures and consider mesh reinforcement to handle any uneven expansion.
Panel Systems: These use thin, large panels with embedded heating elements. They’re easy to install but can have hot spots if not properly designed. Choose plasters that can handle localized heat and consider using isolation membranes to even out heat distribution.
Typical surface temperatures, heat cycles, and their effect on materials
How your radiant wall system heats up and cools down affects how well plaster holds up. Here’s what to consider:
- Steady Heat: Systems with steady heat cycles cause minimal stress on plasters. Standard gypsum plasters are fine here.
- Rapid Cycling: Quick heating and cooling can cause cracking. Use plasters rated for thermal cycling, like those with fiber reinforcement or lightweight aggregates.
- High Peak Temperatures: Systems that reach high surface temps need plasters rated for those temps. Look for plasters with ‘high temp’ in their name or specs.
- Uneven Heat Distribution: Hot spots can cause staining and weak bonds. Use isolation membranes to even out heat, and consider mesh reinforcement to handle any uneven expansion.
- Moisture Sensitivity: Some plasters are sensitive to moisture from rapid cycling or high temps. Avoid these in radiant wall applications.
Material Compatibility: Plasters, Primers, and Admixtures
Plaster bases vary from cementitious mixes to gypsum and lime, each with its own moisture and alkalinity behavior. Primer or bonding agents help the plaster grab onto heated substrates without lifting or delaminating. Be mindful of how admixtures interact with heat cycles and substrate chemistry.
Check compatibility limits and guidance on moisture and alkalinity from the product label or manufacturer instructions. If you’re unsure, verify with the supplier or local building requirements before proceeding with a specific combination.
Cement, Gypsum, and Lime Plaster Pros/Cons
Each plaster type has its own strengths and weaknesses. Let’s break them down for radiant-heated walls.
Cement Plasters: Flexible, strong bond, but less vapor permeable. Good for heated walls as they don’t crack easily from heat cycles.
Gypsum Plasters: Soft, easy to apply, good for fine finishes. Not suitable for heated walls due to high shrinkage and cracking risk under thermal cycling.
Lime Plasters: High vapor permeability, flexible, but weak bond strength. Can be used over radiant heat with proper isolation, but may require more coats and maintenance.
Primers, Bonding Agents, and Admixtures for Better Adhesion
Using the right primer or additive can enhance your plaster’s bond strength and crack resistance.
When to use: Always use a primer or bonding agent when applying plaster over heated walls. Some plasters may require specific admixtures for optimal performance.
Verify with manufacturers: Always check the manufacturer’s guidelines for compatible primers, additives, and application methods. Some plasters may react negatively with certain products.
Example: For cement plasters, use a primer that promotes adhesion and reduces suction. For lime plasters, consider using an alkali-resistant primer to prevent delamination.
Mesh, Lath, and Reinforcement Strategies
Reinforcement options include metal lath, alkali-resistant fiberglass mesh, and embedded scrim, each serving different crack-control needs during thermal cycling. The placement and embedment depth influence crack resistance and long-term stability. Choose a system that matches substrate and expected movement.
Follow embedment practices recommended by the manufacturer and verify that the reinforcement is compatible with heated surfaces. Check product instructions or data sheets for any minimum coverage or sealant requirements at joints and terminations.
Mesh and Scrim Selection and Placement
The mesh you choose affects your plaster’s strength and thermal performance. Here’s what to consider:
Weight: Heavier meshes (24-28 gauge) provide more strength but can restrict heat transfer. Lighter ones (20-22 gauge) are better for radiant heat.
Aperture: Wider mesh openings (1/2″ to 3/4″) allow better heat flow, while smaller openings (1/8″ to 1/4″) provide more strength. Choose based on your plaster’s thickness and required strength.
Placement matters too. For full embedment, place the mesh entirely within the plaster layer. Spot-fastening is quicker but offers less support.
Traditional and Modern Lath Attachment Methods
Lath attachment affects heat transfer and stress points in your plaster. Here’s how to fasten it right:
Mechanical Fastening Patterns: Use staggered patterns for even support. Avoid straight lines that can create cold/stress points.
Substrate Fastening Spacing: Space fasteners 6″-12″ apart, depending on your lath’s width and the plaster’s thickness. Closer spacing provides more support but restricts heat flow.
Avoid heat-conducting fasteners like metal screws. Use non-conductive alternatives to prevent cold/stress points that can cause cracks.

Isolation, Movement Joints, and Detailing
Isolation strategies decouple plaster from substrate movement using expansion joints, soft joints, and perimeter gaps. Proper detailing helps prevent crack propagation over thermal cycling. Specify where joints are needed and how materials transition to other finishes.
Document recommended joint widths and locations according to the system or plaster manufacturer, then confirm with project drawings or local guidance. If unsure, reference product instructions or code requirements for movement compatibility.
Designing thermal expansion and control joints
Thermal movement in radiant walls can cause cracking if not properly accounted for. Here’s how to design effective expansion and control joints:
First, space joints every 6-8 feet, both horizontally and vertically. This allows the wall to expand and contract freely without stressing the plaster.
The joint width should be around –3/16″ to –1/4″ wide, depending on the expected thermal movement. Use a joint filler or backer material that can accommodate this movement without cracking.
For best results, use a flexible joint compound specifically designed for radiant heat applications. Apply it with a joint trowel, ensuring it’s well-bedded into the joint.
Sealing penetrations and transitions (windows, outlets, corners)
Penetrations like windows, outlets, and corners need special attention to maintain airtightness and accommodate differential movement:
Use flexible transition strips at the intersection of walls and ceilings. These allow for movement without cracking the plaster.
For windows and outlets, use a backer rod and caulk system. First, insert a backer rod into the gap to provide a base for the caulk. Then, apply a bead of paintable, flexible caulk over it.
Corners are high-stress areas. Reinforce them with a corner guard or metal angle before applying plaster. This helps prevent cracking due to movement.