

Introduction
Plastering over calcimine paint is applying plaster directly to a painted lime-based coating to build a new surface.
This job is hands-on, and you’ll need to test the wall, clean it, and pick a plaster that fits the job.
To test bond, scratch a small area, look for peeling, and check with a damp sponge to see if the surface grips.
Prep means cleaning, removing loose material, and roughening the surface so the plaster can grab. Always check product labels and local rules for prep and curing, and follow manufacturer instructions if you use additives or bonding agents.
Key takeaways
- Identify calcimine presence and bond issues before plastering to avoid failure.
- Use labeled primers designed for lime plaster and calcimine surfaces.
- Stabilize loose plaster and chemically treat weak areas to improve bonding.
- Protect adjacent finishes and wear eye, mask, and breathable clothing during work.
- Apply plaster in thin, even coats and monitor drying for cracks.
- Document repairs and monitor over time; call a pro for persistent failures.
Table of Contents
- Introduction
- Key takeaways
- What Calcimine Paint Is and Why It Affects Plaster Adhesion
- How to Test and Confirm Calcimine on Walls
- Tools and Materials Checklist for Prepping and Plastering
- Surface Preparation: Cleaning, Stabilizing, and Repairs
- Choosing and Applying Primers and Bonding Agents
- Plastering Techniques to Maximize Long-Term Bond
- Troubleshooting Common Failures and Repair Strategies
- Long-Term Monitoring, Maintenance, and When to Call a Pro
- Conclusion
- FAQ
What Calcimine Paint Is and Why It Affects Plaster Adhesion
Calcimine paint is a traditional decorative coating that sits on the wall surface. It often contains chalky fillers and water-soluble binders. This combination makes it prone to chalking, softening, and poor cohesion over time.
Understanding calcimine helps you choose the right prep and bonding approach. When you identify it early, you adjust steps and select products that are compatible with a chalky, moisture-prone substrate. This awareness prevents wasted work and costly failures later on.
Physical signs and common locations of calcimine
Calcimine has a distinctive look. It’s usually a dull, matte finish that doesn’t shine like modern paints. You might see it in older homes, often on walls or ceilings.
Here’s what to look for:
- Powdering: Gently touch the surface. If it feels powdery and leaves a mark on your finger, that’s calcimine.
- Dull finish: Unlike latex or oil paints, calcimine doesn’t reflect light. It looks flat and lifeless.
- Older homes: Calcimine was commonly used before 1950. If your home is older, there’s a good chance you’ve got calcimine under that old paint.
How calcimine differs from latex, oil, and other coatings
Calcimine is a unique beast. It’s made of lime putty mixed with pigments. That’s different from latex or oil paints, which are water- or oil-based.
Why does this matter?
Latex and oil paints have good cohesion and adhesion. They stick well to surfaces and don’t easily flake off. Calcimine, on the other hand, is water-soluble and has poor cohesion. It can powder and flake if not treated right.
Here’s how it compares:
- Latex: Sticks well, resists moisture. Can be painted over with care.
- Oil: Also sticks well, but can yellow or darken over time. Can usually be painted over.
- Other coatings: Some may stick, some may not. Always test first.
How to Test and Confirm Calcimine on Walls
Start with a simple tape test to check adhesion. Apply and remove a small piece of tape after pressing firmly. A clean pull without debris on the tape indicates good substrate adhesion for now.
Next, perform a water rub on a hidden area to see if the surface dissolves or powders away. A solvent spot test can reveal soluble layers; use only in well ventilated areas and follow solvent safety guidelines. Interpret results by noting where the surface remains stable versus where it softens or loses particles.
Step-by-step at-home tests (tape, damp cloth, solvent)
The following quick and easy tests help you confirm if your walls have calcimine paint. They’re safe for DIY homeowners to perform.
- Tape test: Apply painter’s tape to the wall, press firmly, then pull off quickly. If calcimine comes off with it, you’ve got calcimine.
- Damp cloth test: Rub a damp cloth on the wall. If color transfers, it’s likely calcimine. Be sure to check in an inconspicuous area first.
- Solvent spot test: Apply a small amount of denatured alcohol or lacquer thinner to a cotton swab and gently rub the wall. If the paint softens or dissolves, it’s calcimine. Safety first: Ensure proper ventilation when using solvents.
- False positives: Be aware that these tests might not work on walls with multiple layers of paint or if your calcimine is in poor condition.
- When to call a pro: If you’re unsure about the results, or if there’s any sign of lead or asbestos, consult a professional.
When to escalate to lab tests or professional inspection
Use this checklist when DIY tests aren’t conclusive, or when you suspect hazardous materials or structural issues.
- Inconclusive results: If your at-home tests don’t give clear answers, consider lab testing.
- Suspected lead/asbestos: If your home was built before 1978, assume the presence of lead. Asbestos may be present in older homes too. Skip this at your peril: Disturbing these materials can release harmful particles.
- Moisture issues: If walls feel damp or show signs of mold, consider a professional moisture inspection.
- Older homes: If your home is over 50 years old, it’s wise to assume calcimine and proceed with caution.
- Extensive areas: For large areas, lab testing can provide peace of mind before starting work.
Quick rule: When in doubt, err on the side of safety. Consult a professional if you’re unsure about any aspect of your walls’ condition.
Tools and Materials Checklist for Prepping and Plastering
Assemble a basic set of PPE, cleaning tools, and a few key primers or bonding agents. Include a trowel, hawk, float, and mixing container. Have a level, brush, and clean rags ready for surface prep.
Verify each product for compatibility with chalky or unstable surfaces by checking the product data sheet or manufacturer instructions. Also confirm any VOC or safety information before use in the project area. Keep a simple, homeowner friendly stock of reinforcement materials and plaster supplies on hand.
Essential Personal Protective Equipment and Safety Items
Safety comes first. Use this checklist before you start testing, cleaning, or plastering.
- Gloves: Protect your hands from solvents and plasters. Latex or nitrile gloves are good choices.
- Safety glasses: Shield your eyes from dust and debris during sanding and cleaning.
- Dust mask: Prevent inhaling harmful particles while sanding or working with dry plasters.
- Long sleeves and long pants: Protect your skin from solvents, plasters, and dust.
- Work boots: Provide traction and protect your feet from falling objects.
- Apron or coveralls: Keep your clothes clean and protected from plasters and solvents.
- Respirator (optional): For heavy-duty sanding or working with toxic materials, use a respirator to protect your lungs.
- Solvent-resistant gloves: For handling solvents, use thicker, solvent-resistant gloves to prevent skin irritation.
Quick rule: Always check and follow safety guidelines on product labels.
Recommended Prep Consumables and Plastering Products
Having the right products ensures a smooth prep process and reliable bond with your plaster. Check this list before you start.
- Degreaser: Clean walls thoroughly to remove grease, dirt, and grime. Test on a small area first.
- TSP (trisodium phosphate): A strong cleaner that removes dirt, grease, and loose paint. Dilute according to instructions.
- Solvents (mineral spirits or denatured alcohol): For spot cleaning and removing tough stains. Always test on a small area first.
- Consolidant: Strengthens weak or crumbling surfaces. Apply with a brush, following manufacturer’s instructions.
- Primer (PVA or acrylic): Seals the surface and improves plaster adhesion. Choose one compatible with your plaster type.
- Bonding slurry: A mixture of plaster and water, applied to improve adhesion. Make sure it’s compatible with your plaster type.
- Basecoat plaster: The first layer of plaster that goes onto the wall. Choose one suitable for your surface and desired finish.
- Finish plaster (skim coat): The final, smooth layer that gives your wall its finished look. Ensure it’s compatible with your basecoat.
- Reinforcement mesh: For areas prone to cracking or where extra strength is needed. Choose one suitable for your plaster type and application method.
Quick rule: Always check product compatibility and follow manufacturer’s instructions for the best results.
Surface Preparation: Cleaning, Stabilizing, and Repairs
Begin by removing loose material and loose paint flakes from the wall. Clean the surface to remove dust, grease, or efflorescence that could interfere with bonding. Stabilize any chalky areas so they do not powder under plaster.
Address substrate defects and moisture or mold sources before priming or plastering. Treat leaks or high humidity issues, then plan repairs so the substrate is solid and dry for the next steps. This order helps prevent future bond failures.
Safe removal and stabilization methods for chalky paint
The first step is to remove any loose calcimine. Be gentle, we don’t want to create more dust or damage the surface.
Use a soft-bristle brush or dry cloth to gently remove flaking material. For stubborn areas, try dry brushing – use a stiff-bristle brush with no water to agitate and lift off chalky paint.
For more adherent calcimine, low-pressure wet cleaning can help. Use a sponge or soft cloth dampened with clean water. Work in small sections, rinse frequently, and avoid over-wetting the substrate.
If removal is impractical, use consolidants or isolation coatings to stabilize chalky areas before plastering. These products penetrate and bind loose paint, preventing it from mixing with your new plaster. Always follow manufacturer’s instructions for best results.
Repairing substrate damage, salts, and stains
Before you start plastering, fix any cracks or holes in the surface. Use a suitable filler for the substrate – joint compound for drywall, spackling paste for wood, etc.
If you see efflorescence (white salt deposits) or stains, treat these issues first. Efflorescence indicates moisture intrusion; address the source to prevent recurring problems. Use a wire brush to remove efflorescence, then clean the area with a damp cloth.
For stains, identify their cause – mold, water damage, etc. If it’s ongoing water intrusion, fix that first. Then, use a suitable stain-blocking primer before proceeding with plaster work. For mold, treat with a mold-killing solution, let dry, then prime.
Choosing and Applying Primers and Bonding Agents
Select primers and adhesion promoters that are designed for chalky or unstable surfaces. Consider isolating primers or two component systems if the surface is very soft or peeling. Follow the manufacturer guidance for coverage and curing.
Always check the product data sheet for specific limits and compatibility with plaster types. Apply according to instructions and ensure proper ventilation and drying conditions. Use only as directed to avoid trapping moisture under the plaster.
How to select a primer or adhesion promoter
Choosing the right primer or bonding agent is crucial for a reliable plaster bond. Here’s what you need to consider:
Surface stability and porosity: If your surface is stable but porous, an acrylic bonding primer should do the trick. They’re easy to apply and suitable for most interior surfaces.
Expected moisture exposure: For areas with high humidity or moisture, opt for an epoxy or silicate system. These provide better resistance against water damage. However, they require proper ventilation during application and may need professional help.
Special cases: If you’re dealing with severe chalking or unstable surfaces, consider using a specialty stabilizer first, before applying the primer. Always follow manufacturer guidelines for compatibility.
Proper primer application and inspection before plastering
Before you start plastering, ensure your primer is applied correctly and has cured properly. Here’s a checklist to follow:
- Wet the surface evenly: Apply the primer in even strokes, ensuring full coverage.
- Thin only if allowed: Some primers can be thinned for better penetration. Follow manufacturer instructions.
- Adequate coverage: Aim for at least two coats, allowing proper drying time between each.
- Inspect for uniform curing: Check for any uncured spots or inconsistencies.
- Check for dust or debris: Ensure the surface is clean and free of contaminants that could hinder adhesion.
- Feel the surface: It should be dry to touch. If it’s still tacky, wait longer before plastering.
- Look for signs of delamination: Any peeling or flaking indicates poor application or incompatible surfaces.
- Test adhesion: Stick a piece of tape on the surface and pull it off. If primer comes off with it, wait longer before plastering.
Quick rule: Always follow manufacturer instructions for specific limits and drying times to ensure optimal performance.
Plastering Techniques to Maximize Long-Term Bond
Use proven application techniques such as applying a bonding slurry or key coat before the main plaster layer. Build up with a scratch coat and allow it to set before applying the finish coat. Follow the recommended thickness and joint patterns from the product guidelines.
Reinforce marginal substrates with appropriate lath or mesh as needed. Adhere to product mixing and wet film guidelines to avoid drying issues and cracking. Work steadily and maintain consistent moisture during application.
Using bonding slurries, key-coats, and scratch coats
Each preparatory plaster layer serves a specific purpose. They help create a strong bond between the calcimine surface and your new plaster.
Bonding Slurry: This is a thin, diluted mixture of plaster applied first. It penetrates into the calcimine, creating tiny mechanical bonds. Apply it evenly with a trowel or brush, let it set for 15-30 minutes, then lightly scratch it to improve adhesion.
Key-Coat: A slightly thicker layer than the slurry, the key-coat fills minor surface imperfections. Apply it after the slurry has cured but before it’s completely dry. Let it cure for at least 24 hours before applying the next coat.
Scratch Coat: This is the final preparatory layer. It’s thick enough to fill any remaining imperfections and provide a solid base for your finish plaster. Apply it evenly, let it set until it’s leather-hard (can be scratched with a nail), then lightly scratch it to improve adhesion.
Mechanical reinforcement options: lath, mesh, and fastenings
When your calcimine surface is weak or damaged, mechanical reinforcements can save the day. They provide extra grip for your plaster and help prevent cracks.
Metal Lath: This is a sheet of metal with holes punched in it. Apply it over your key-coat using fastenings like staples or nails. It provides excellent grip but can be heavy, so use it sparingly on fragile substrates.
Fiberglass Mesh: Lighter and more flexible than lath, mesh is great for curves and hard-to-reach places. Apply it over your key-coat using a mesh-specific adhesive or thinset mortar. Let it set before applying the scratch coat.
Fastenings: Use appropriate fastenings to secure your reinforcement to the substrate. For lath, use staples or nails. For mesh, use an adhesive or thinset mortar. Always ensure they’re securely fastened for maximum bond strength.
Troubleshooting Common Failures and Repair Strategies
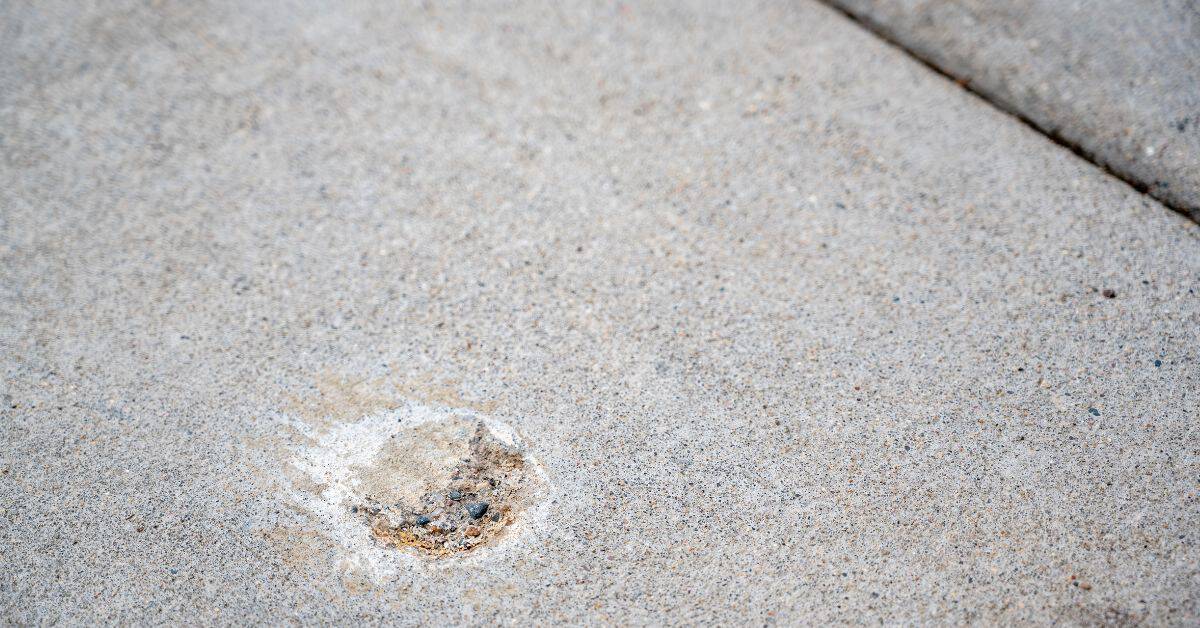
Look for blistering, cracking, or partial delamination as signs of bond failure. Start diagnosis with a visual inspection and gentle surface testing. Note where failures originate and how extensive they are.
Decide between spot repairs and full removal based on damage extent. If repairs are needed, follow the same prep and bonding sequence as the original work. Use photos and notes to document issues for future reference.
Diagnosing adhesion problems and root causes
First, inspect the failed areas closely. Look for blisters, cracks, or delamination.
Test for remaining chalk: Use a putty knife to scrape the surface gently. If it comes off easily, you’ve got chalky paint left.
Check for contamination: Wipe with a damp cloth. If it’s still slippery or discolored, clean and let dry before proceeding.
Moisture or movement could be the root cause. Check for water damage, leaks, or structural issues.
Repair workflows: patch, re-prime, or full strip
For small failed areas, patch repair might suffice. Remove the loose plaster, clean, and apply a bonding agent.
If more than 10% of the surface is affected, consider re-priming and re-plastering: Strip off the failed plaster, clean, prime, and replaster.
But if you find widespread issues like severe delamination, moisture intrusion, or structural movement, it’s time for a full strip and rebuild: Remove all old plaster, repair substrate, stabilize, and start fresh.
Long-Term Monitoring, Maintenance, and When to Call a Pro
Set up a practical inspection routine that includes moisture checks and visual notes on surface conditions. Look for new signs of moisture, efflorescence, or loss of bond after weather events or changes in use. Keep an eye on plaster joints and corners for movement.
Document any concerns with photos and written observations to share with a plasterer or building professional. If issues persist or moisture is suspected, consider scheduling a professional assessment to prevent bigger problems.
Visual checkpoints and simple maintenance tasks
Regularly inspect your plasterwork to catch any issues early. Here’s a quick checklist.
- Check for chalking: Gently rub the surface with a damp cloth. If it leaves marks, re-prime and touch up.
- Inspect cracks: Hairline cracks are normal, but wider ones need attention. Fill and re-prime if necessary.
- Feel for soft spots: Gently press the surface. Softness indicates moisture or damage beneath.
- Monitor corners: Check where walls meet ceilings or other walls. Cracking here is a red flag.
- Keep it clean: Dust and dirt can weaken adhesion over time. Regularly wipe down surfaces.
- Maintain humidity: Keep indoor humidity between 30-50%. Too much or too little causes problems.
- Control temperature: Avoid extreme temperatures, especially near heat sources like fireplaces or radiators.
- Address water damage: Fix any leaks promptly to prevent moisture buildup behind the plaster.
Quick rule: Inspect your plasterwork every 6 months. Catching issues early prevents costly repairs.
When to hire a professional and how to prepare for an estimate
Knowing when to call in the pros saves you time, money, and stress. Here are some red flags:
Widespread delamination: If large areas are peeling or falling off, it’s beyond DIY repair.
Structural movement: Cracks along walls or ceilings could indicate structural issues that need professional assessment.
Recurring moisture: Persistent dampness behind the plaster may require a pro to diagnose and fix the root cause.
Before contacting a contractor, gather as much information as you can:
Take photos of the affected areas from different angles. Include close-ups of any cracks or damage.
Make notes about when the problems started, what triggered them (if known), and any previous repairs attempted.
If you’ve had moisture issues, perform a moisture test using a hygrometer. Keep records of all readings.
Conclusion
The core idea is simple: you want a solid, durable bond between plaster and the wall that lasts. Start right, test and prep carefully, and you cut the chance of cracks, peels, and rework down the line.
Run this as a practical check: confirm calcimine presence with a simple test, clean and stabilize the surface, repair cracks, apply a compatible primer or bonding agent, and then plaster in proper coats. Do the work in small sections, keep humidity and dust down, ventilate well, and always monitor as you go to catch trouble early.
Avoid these common traps: skipping the test and assuming all walls are the same, using the wrong primer or bonding agent, and rushing the plaster while the surface is still dirty or damp. Never ignore safety—wear a dust mask, eye protection, and good ventilation; work in a dry, well-lit area; and clean up spills before they set. If you can’t achieve a solid bond after the first coat, don’t force it. Reassess the surface, recheck the product compatibility, and adjust prep or support before proceeding.
If the wall shows persistent moisture, significant damage, or you’re unsure about the calcimine layer or substrate, call a pro. When you do push ahead, you’ll be confident you’ve got a lasting, trouble-free finish that resists failure and costly repairs. Stay steady, follow the steps, and you’ll get it done right.
FAQ
Do I really need to remove calcimine or can I just seal it?
You should verify if the calcimine is flaking or powdery. If it’s loose, remove it to avoid trapping dust under your finish. If it’s stable, you may still need a bonding primer—check the product instructions for guidance.
What should I look for on primer or bonding agent labels?
Read the label for adhesion on non-porous surfaces and for compatibility with plaster. Look for surface preparation notes, cure times, and any required conditioners or primers before plaster.
How should I test for stable adhesion before plastering?
Spot-test a small area with the primer or bonding agent and wait as directed by the manufacturer. If the coating shows good adhesion and no peeling, you can proceed. If it peels, you need more prep or a different product.
What mistakes commonly cause plaster to fail over calcimine?
Skipping cleaning, using the wrong bonding agent, or not following cure times can cause bond failures. Always clean, seal or prime as directed, and respect any waiting periods stated by the product label.