
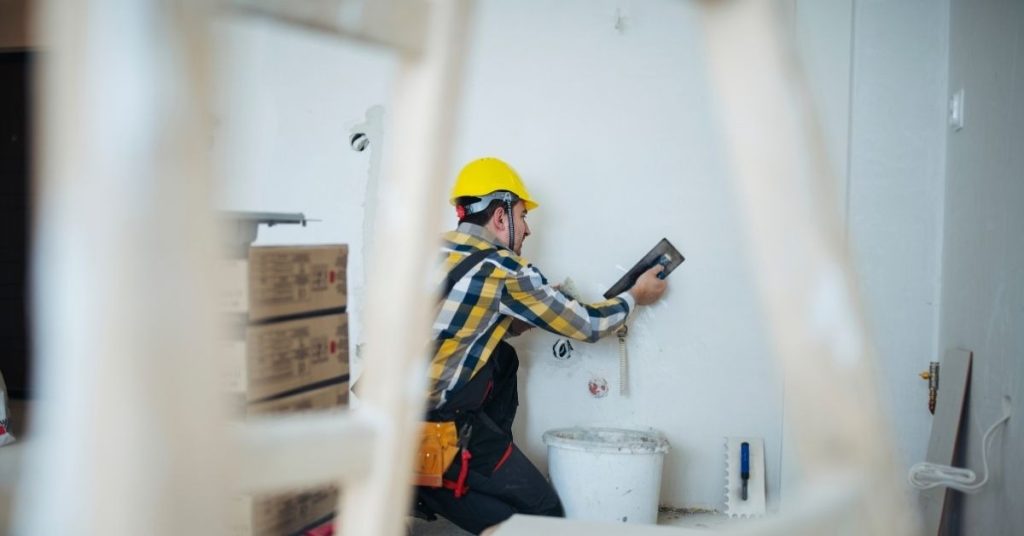
Introduction
Plaster after flooring changes is about finishing edges where the wall meets the new floor to keep things smooth and crack-free.
This topic covers baseboard edges, gaps, and how plaster behaves around different floor heights.
Stay practical and honest about what you can patch and what might need more follow-up.
Start by inspecting the baseboard area for gaps or uneven transitions and plan your patching approach.
Check the product label and manufacturer instructions for suitable plaster or patching material and bonding methods.
If you’re unsure about numbers, materials, or local guidance, verify with the label or local rules before you mix and apply.
Key takeaways
- Assess plaster finish and baseboard clearance before removing flooring or trim.
- Protect existing plaster edges with painter’s tape and soft protection during work.
- Plan crack isolation joints and movement gaps to prevent future cracking.
- Check flooring thickness and plaster edge alignment to minimize gaps.
- Use appropriate plaster skim coat technique; feather edges toward baseboard.
- Safety: disconnect power, wear eye protection, and manage dust control.
Table of Contents
- Introduction
- Key takeaways
- Why Plaster Work Matters After Flooring Changes
- Pre-Work Assessment and Measurement
- Tools and Materials Checklist
- Removing or Protecting Baseboards and Trim
- Techniques for Finishing Plaster at Baseboard Edges
- Managing Gaps Between Flooring and Plaster/Baseboard
- Crack Isolation and Movement Joints
- Repair, Skim, and Finishing Workflow After Flooring Changes
- Conclusion
- FAQ
Why Plaster Work Matters After Flooring Changes
When you change flooring, the plaster and baseboard interfaces can shift and show seams you didn’t have before. Addressing these areas now helps prevent visible gaps and misaligned edges. It also supports long-term durability by reducing movement stress at the wall finish.
Beyond aesthetics, proper detailing protects against moisture intrusion and helps the room look finished. Check that the plaster surface is clean, dry, and ready for any edge work, and verify local guidance on baseboard transitions with the manufacturer instructions if needed.
How flooring changes affect plaster, trim, and joints
When you change your flooring, especially from one type to another with different heights or expansion rates, it can put stress on the adjacent surfaces. Plaster, baseboards, and joint compounds are particularly vulnerable.
The main issues you’ll face are:
Gaps: New flooring might be thinner or thicker than the old one. This can cause gaps between the floor and the baseboard, letting in drafts and looking unsightly.
Lifting: If the new floor isn’t level, it can put pressure on the baseboards, causing them to lift away from the wall or even crack the plaster behind them.
Cracks: Movement in the new flooring can transfer through the baseboards and into the plaster, leading to cracks. This is especially true if your home has settled over time.
Timing: repair now or wait
So, should you fix these issues right away or wait? It depends on a few factors:
Type of flooring: Some floors, like hardwood or laminate, can shrink and expand with changes in humidity. If you’ve installed one of these, it’s best to wait a few months to see if any movement settles down.
Severity of issues: If there are large gaps or cracks, it might be worth fixing them now to prevent further damage or pests from getting in.
Budget and time: If you’re planning other renovations soon, you might want to wait until then to tackle these repairs. But if your budget allows, it’s usually best to fix issues as they arise to maintain the value of your home.
Pre-Work Assessment and Measurement
Start with a thorough walkthrough to document baseboard condition and wall flatness. Note any bowing, cracking, or loose trim that could affect the plaster edge. Record existing gaps at the interface and how the new flooring height may change movement paths.
Use your measurements to map out where adjustments will be needed and what tools or materials will be required. If you’re unsure about movement vectors, consult product data sheets or manufacturer instructions for guidance.
Inspecting baseboards, plaster substrate, and fastenings
Start by examining the condition of your baseboards. Look for any signs of rot, warping, or poor adhesion to the wall.
Check nail/screw fastenings. Ensure they’re secure and not pulling out from the substrate. Tighten if necessary.
Inspect the plaster substrate itself. Check for cracks, holes, or other damage that could compromise its integrity.
Use a flat edge tool like a straightedge to check wall flatness. If it wobbles, you might have issues to address before proceeding.
Measuring gaps and expected movement
Begin by measuring the width of any gaps between baseboards, walls, and flooring. Note these measurements for future reference.
Check for vertical offsets or misalignments between baseboards and walls. These could indicate settling or other issues that need addressing.
Consult manufacturer recommendations. Check the allowances for movement in your flooring and building materials to ensure your expectations match reality.
Consider seasonal expansion/contraction of materials when planning your repairs. This can help prevent future issues.
Tools and Materials Checklist
Gather basic hand tools for trimming, patching, and finish work, plus protective gear for safety. Include items for plaster repair and gap filling that suit your project scale. Have a plan for clean-up and dust control as you work.
Verify that you’re using materials compatible with plaster and the flooring you installed. Always check product labels, data sheets, and local rules to confirm suitability and any application limits before you begin.
Recommended repair materials (plaster, tapes, sealants)
Use this checklist before starting any repair work to ensure you have the right materials for your job. This will help prevent costly mistakes and rework.
- Plaster Mix: Check product label for compatibility with your substrate (e.g., concrete, brick, or existing plaster). Ensure it matches the type of plaster already in use to maintain consistency.
- Reinforcing Mesh/Tape: Choose a mesh or tape that’s suitable for your repair size and wall type. For larger repairs, consider using both mesh and tape for added strength.
- Flexible Sealant: Select a sealant that’s compatible with your substrate and flooring. Check product label for suitability (e.g., silicone for tiles, acrylic for wooden surfaces).
- Plaster Sand: Ensure sand is clean, dry, and free from impurities. Check the sand-to-plaster ratio on the product label to mix correctly.
- Plaster Additives: Consider using additives (e.g., accelerators, retarders) if recommended for your specific job. Always follow manufacturer instructions.
- Primer/Backing Coat: Check if a primer or backing coat is required before applying the final plaster layer. This helps improve adhesion and prevent cracking.
- Scrim Tape: For larger repairs, use scrim tape to reinforce joints and prevent cracking. Ensure it’s compatible with your chosen plaster mix.
- Protective Clothing/Gear: While not a material, ensure you have the right gear (e.g., gloves, goggles) to protect yourself during repairs.
Quick rule: Always follow manufacturer instructions and check local building codes to ensure your chosen materials comply with regulations.
Tools, consumables, and protective supplies
Before you start any plaster edge work, make sure you have all the necessary tools and materials. Use this checklist to ensure you’re well-prepared and safe on site.
- Tape measure: Check it’s in good working condition with no damaged tape or broken spring.
- Level: Ensure it’s accurate by checking against a known straight edge. A common mistake is using an inaccurate level, leading to crooked lines.
- Straight edge (T-square): Confirm it’s straight and true. A warped or bent edge can cause uneven plaster edges.
- Utility knife: Check the blade is sharp and secure in the handle. Dull blades or loose handles can cause accidents or poor cuts.
- Plaster Hawk (mixing pan): Ensure it’s clean, undamaged, and large enough for your mixing needs.
- Plastering trowel: Check the trowel is the right size for your job. Too small can cause fatigue, too large can lead to waste or poor results.
- Plaster hawk (mixing tool): Ensure it’s clean and undamaged. A damaged hawk can cause lumps in your plaster mix.
- Safety glasses: Check they fit well and provide adequate protection. Debris in the eyes is a common injury on site.
- Dust mask: Ensure it fits properly and provides adequate protection against plaster dust. A poor-fitting mask can lead to inhalation of harmful particles.
- Work gloves: Check they provide good grip and protect your hands from cuts or abrasions. Poor gloves can cause accidents or discomfort.
Quick rule: Always check your tools before starting work to avoid costly mistakes and ensure a safe working environment.
Removing or Protecting Baseboards and Trim
Decide if removing trim cleanly will give you better access to the plaster edge. For a clean removal, use proper tools and take care to avoid damaging the wall and molding. Label or photograph pieces to facilitate reinstallation.
If you protect the trim in place, plan for masking and careful edge work to minimize overrun. Look for manufacturer guidance on removal methods and any warranty implications for the trim or wall finish.
How to remove trim without damaging plaster
Start by scoring the paint at the top and bottom of the baseboard with a utility knife. This helps prevent cracking when prying.
Use a flat pry bar, not a crowbar. Place it between the wall and the trim, then gently tap it to create space. Work your way down the length of the board.
Once loose, use a utility knife to cut through any remaining adhesive or caulk. Lift the trim off carefully. Label each piece with a number or letter as you remove it for easy reinstallation later.
Protecting and masking trim when leaving it in place
If you decide to leave the trim on, protect it with painter’s tape and a drop cloth. Tape along the top edge of the baseboard, then fold the drop cloth over it.
For service reveals, use a utility knife to score the paint at the bottom of the baseboard where you want your reveal. Then, use a pry bar to gently create space between the wall and trim. This allows access for flooring or plaster work without removing the trim.
Be careful not to damage the trim or the wall while creating your service reveals. Work slowly and carefully.
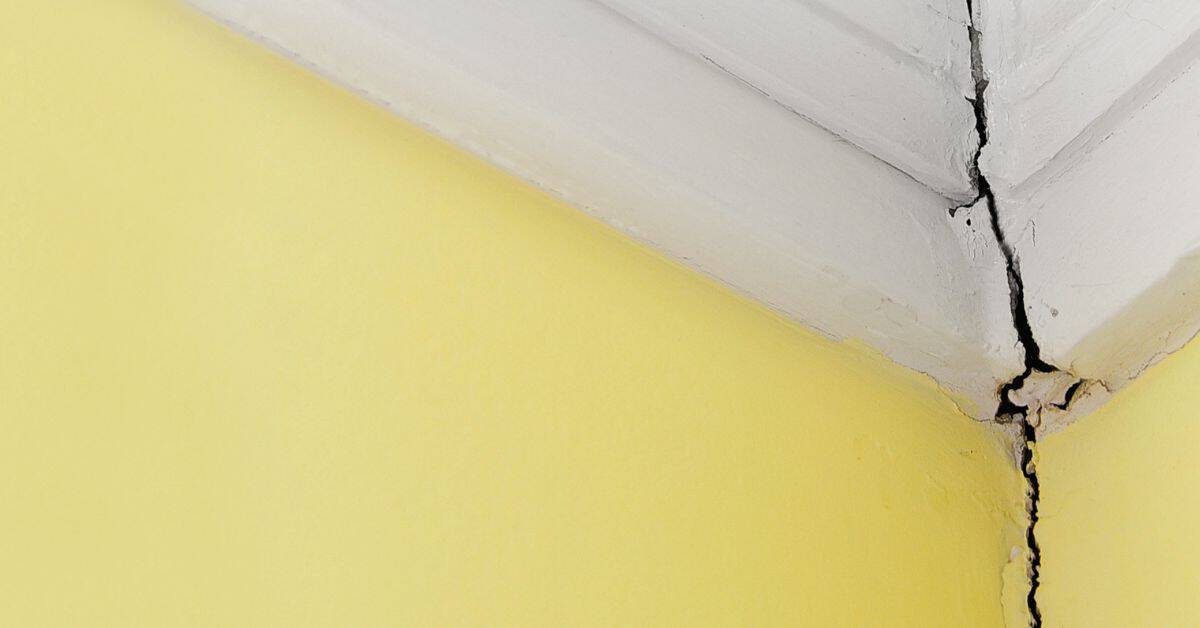
Techniques for Finishing Plaster at Baseboard Edges
Focus on creating a clean junction with reliable edge control, using appropriate scribing and reveals. Plan for consistent plaster thickness and a stable edge line where baseboard will sit. Ensure the surface is primed and ready for a final finish coat.
Align your technique with the flooring height and baseboard profile, and verify that any edge treatments won’t compromise movement tolerance. When unsure, refer to product instructions and local building codes for guidance on edges and reveals.
Scribe, reveal, and shadow-gap methods
When dealing with uneven trim or baseboards, scribing the plaster is key. This involves shaping the plaster to follow the contour of the trim.
To accommodate movement and hide variation, create a consistent reveal. This is a small gap between the plaster and trim, usually 1/8″ to 3/16″.
A shadow-gap is similar but wider, typically 1/4″ or more. It’s useful when there’s significant variation in the trim.
Feathering, rounding, and chamfering edges for paintable transitions
For a smooth paint job, feather the plaster edge. This means tapering it to a thin point so there’s no abrupt change in thickness.
Rounding or chamfering the edge can also help. This creates a curved or beveled surface that’s easier to paint and less prone to stress lines.
Use a sharp trowel or rasp tool to create these profiles. Be careful not to over-sand, as this can weaken the plaster.