
Introduction
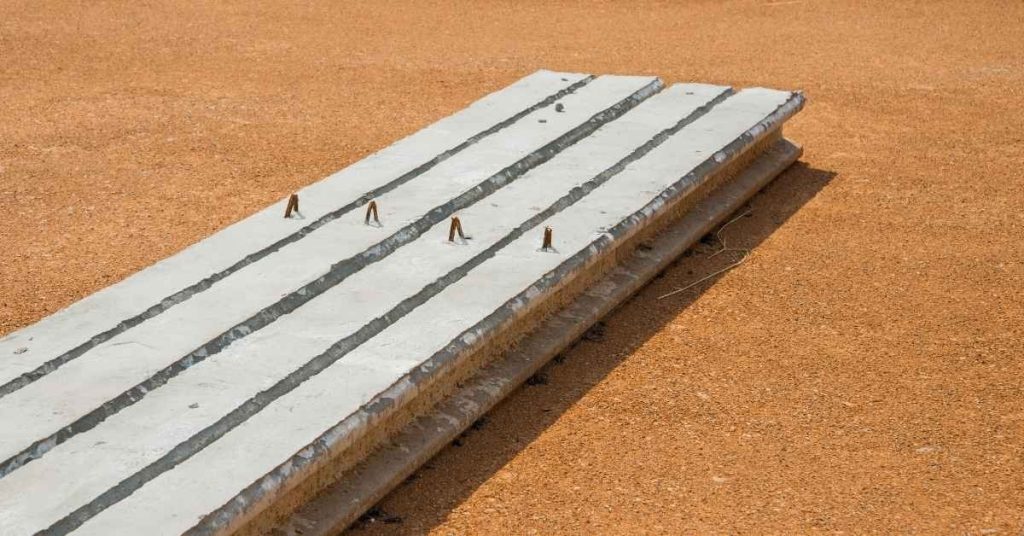
Penetrating sealers soak into the concrete and block moisture from within. Film sealers stay on the surface and create a protective film. Both aim to slow water and stain absorption, but they behave differently outdoors.
Choose penetrating sealers for natural look and breathability on outdoor slabs. Film sealers can enhance color and provide a weather resistant surface, but may peel if the film is damaged. Check product labels for outdoor suitability, recoat times, and maintenance needs.
Key Takeaways
- Penetrating sealers penetrate the substrate and cure without forming surface film, remaining invisible.
- Film-forming sealers form a protective surface film that can peel with moisture, possibly altering color.
- Choose based on porosity, exposure, traffic, and maintenance expectations for outdoor concrete.
- Penetrants reduce slip risk and maintain texture; films strengthen surface yet risk peeling.
- Follow manufacturer instructions; never apply in rain or frozen conditions.
- Reapplication intervals depend on use, but anticipate resealing before wear.
Table of Contents
- Introduction
- Key Takeaways
- How Penetrating Sealers Work
- How Film-Forming Sealers Work
- Choosing the Right Sealer for Specific Outdoor Uses
- Application Best Practices to Prevent Peeling
- Maintenance, Lifespan, and Cost-Effectiveness
- Safety, Environmental, and Regulatory Considerations
- Tools, Materials, and Planning Checklist for a Successful Resealing Project
- Conclusion
- FAQ
How Penetrating Sealers Work
Penetrating sealers interact with concrete by responding with minerals in the substrate or by occupying tiny pores while leaving the surface breathable. Some sealers rely on a chemical reaction that forms new compounds within the capillary network. Others mainly fill micro-pores without creating a continuous film on the surface.
Breathability and vapor permeability are central advantages, helping to reduce moisture buildup that can lead to peeling in outdoor cycles of rain and sun. Consider how a breathable barrier affects long-term durability, freeze–thaw resilience, and maintenance needs when choosing this type of sealer for exterior concrete.
Common Chemistries and How They Act
Penetrating sealers for concrete typically fall into two categories: silane-based and siloxane-based.
Silane sealers react chemically with the minerals in concrete, forming a stable bond that repels water. They are often used on dense surfaces like driveways or interior floors.
Siloxane sealers also react with concrete but create a more flexible barrier. They are ideal for outdoor applications and surfaces subject to freeze-thaw cycles.
Outdoor Performance Strengths
Penetrating sealers excel in outdoor environments due to their breathability and resistance to weathering.
Breathability allows moisture vapor to escape, preventing buildup that could lead to peeling or cracking. This is particularly important outdoors where concrete is exposed to rain and sun cycles.
Freeze-thaw resistance makes these sealers suitable for regions with harsh winters. They can withstand multiple freeze-thaw cycles without losing their effectiveness.
UV stability ensures that the sealer does not degrade under prolonged exposure to sunlight, maintaining its protective properties over time and minimizing maintenance intervals.
How Film-Forming Sealers Work
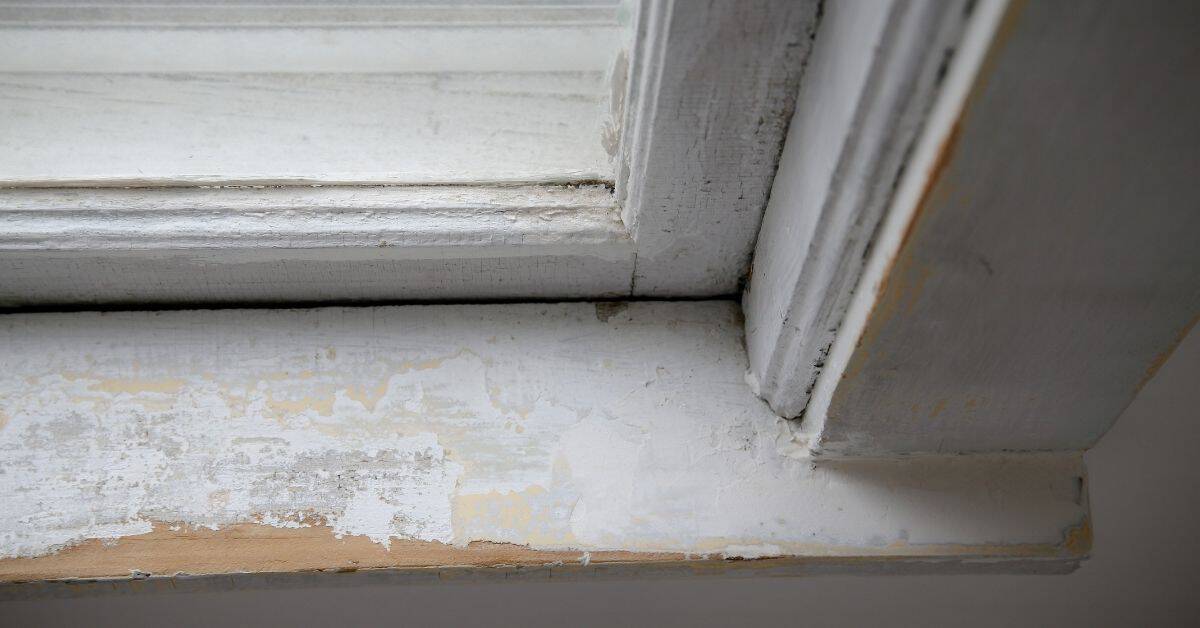
Film-forming sealers rely on adhesion of a continuous surface film to the concrete, with flexibility to accommodate substrate movement. Key performance drivers include the film’s ability to resist cracking, wear, UV exposure, and moisture intrusion. Proper adhesion to the substrate is essential for durability outdoors.
Practical limits exist: peeling or delamination can occur if surface prep is insufficient, if the coating is incompatible with the substrate, or if environmental conditions are not suitable. Be mindful of how temperature and humidity, maintenance cycles, and reapplication plans influence overall performance when planning a project with film formers.
Film Types and Finish Options
Selecting the right film type and finish ensures optimal performance and aesthetic appeal. Review the label or datasheet for available film types and finishes to ensure compatibility with your substrate and project needs.
Film types include solvent-based, water-based, and hybrid sealers. Each has its own application method, drying time, and environmental impact. Choose the one that best suits your project requirements.
Finish options typically range from gloss to matte or textured. Consider the desired look of your finished surface when making your selection. If a specific aesthetic finish is required, ensure the chosen sealer can provide it.
If peeling, delamination, or poor adhesion occurs, re-evaluate your surface preparation, substrate compatibility, and film selection. Reapply with the correct product and proper preparation to achieve optimal results.
Typical Outdoor Failure Modes for Films
Identifying potential failure modes helps prevent premature sealer degradation and maintains long-term performance. Inspect your site for existing issues or conditions that may cause film sealers to fail, such as excessive heat, humidity, or heavy foot traffic.
Common failure modes include peeling, cracking, UV degradation, moisture damage, and wear. Assess the risks specific to your project and select a sealer with enhanced resistance to these potential issues.
If your project faces high risk of UV exposure or moisture intrusion, choose a sealer with enhanced UV and moisture resistance. If your substrate experiences significant movement or stress, select a flexible film sealer to minimize cracking.
Should failure modes occur, address the root cause (e.g., insufficient surface prep, incompatible substrate, or inadequate sealer selection). Reapply with the correct product and proper preparation to resolve the issue.
Choosing the Right Sealer for Specific Outdoor Uses
Start by assessing the substrate finish and condition, including porosity, repairs, and any existing coatings. Determine whether a pre-seal treatment or thorough cleaning is required before applying a sealant. This helps ensure the chosen system will bond and perform as intended outdoors.
Match the sealer to traffic level and exposure, such as high-traffic or chemical contact versus low-traffic or shaded areas. Consider exterior elements like freeze–thaw cycles and salt exposure when making a decision, and use a brief workflow or decision aid to guide selection.
High-Traffic and Industrial Exterior Surfaces
Abrasive resistance and low maintenance are crucial for heavy use areas. Verify sealer’s abrasion resistance claims on the label or datasheet before application.
Assess your substrate for any repairs, coatings, or pre-seal treatments needed before sealing. If heavy wheel loads and frequent cleaning cycles are expected, consider densifying or penetrating sealers to avoid decorative films that may peel under these conditions.
If your surface shows signs of wear or damage, consider reapplying a suitable sealer or repairing the substrate before resealing.
Residential Patios, Driveways, and Decorative Concrete
Aesthetics and easy maintenance are key for residential outdoor surfaces. Ensure the sealer’s finish options align with your desired aesthetic, such as gloss, satin, or matte.
Evaluate your existing surface texture, porosity, and any coatings or repairs before sealing. If you have decorative concrete with intricate patterns or colors, opt for film-forming sealers to protect and enhance surface details.
If the sealant appears dull or discolored, consider cleaning and reapplying a suitable sealer.
Extreme Climates (UV, Freeze-Thaw, Salt)
The sealer must withstand harsh environmental conditions to prevent premature failure. Verify the sealer’s resistance to UV degradation, freeze-thaw cycles, and de-icing salts on the label or datasheet.
Inspect your substrate for any damage or weaknesses before sealing in extreme conditions. If severe UV exposure is expected, choose a sealer with high UV resistance. If frequent freeze-thaw cycles or salt exposure are expected, select a sealer designed for extreme cold and de-icing salts.
If the sealant shows signs of cracking, peeling, or discoloration due to environmental factors, consider reapplying a suitable sealer or addressing substrate issues before resealing.
Application Best Practices to Prevent Peeling
Control environmental and substrate conditions before sealing, including suitable temperature and moisture ranges and noting any outdoor exposure risks. Plan for wind and ambient conditions that could affect curing and adhesion. Document the concrete age and curing status as part of the readiness check.
Follow a clear technique playbook for surface conditioning, mixing, and application. Use proper tools and methods, and observe recommended recoat or cure times between coats. Provide a simple prep and moisture log and a type-specific checklist for quick on-site reference.
Surface Preparation and Moisture Management
Proper surface preparation and moisture control are crucial for sealer bonding and longevity. Begin by using a moisture meter to confirm slab moisture levels are within acceptable ranges, as specified on the product label or datasheet.
Verify that the concrete is clean, dry, and free of contaminants. Inspect for and address any efflorescence or delamination. If the concrete shows signs of active moisture issues or is too wet, identify and resolve the source of moisture, then allow the concrete to dry completely before proceeding.
Improper surface preparation or moisture management can lead to sealer peeling. If this occurs, strip the sealer and reapply after correcting the underlying issues.
Apply Sealers Under Optimal Conditions
Ensure proper curing and adhesion by applying sealers when ambient conditions are suitable. Monitor wind speed to avoid application issues. Follow product instructions for ideal temperature (typically 50-90°F/10-32°C) and relative humidity (40-70%) ranges.
If environmental conditions fall outside the recommended ranges, delay application until suitable conditions are met. Incorrect application or cure management may lead to sealer failure. If this occurs, strip the sealer and reapply under the correct conditions.
Compatibility Checks and Test Patches
Before applying the sealer to your entire surface, perform small-area adhesion and aesthetic tests on the actual substrate and existing coatings. This helps prevent costly mistakes. Use the intended sealer product for these tests, observing for signs of delamination, discoloration, or other adverse reactions within 24-72 hours.
If a test patch indicates incompatibility or an unwanted appearance, consider using an alternative sealer product or consult with the manufacturer. If full application results in similar issues, strip the sealer and reapply a compatible one after addressing any underlying problems.
Maintenance, Lifespan, and Cost-Effectiveness
Penetrating and film sealers differ in outdoor performance over time, including UV exposure, wear, and how often you should recoat. Understanding maintenance steps and indicators helps avoid premature failures.
A simple on-site check is to confirm the concrete is dry, clean, and free of debris before any coating. If a film sealer is present, remove it first to prevent peeling, and monitor for chalking, color fade, or peel risk as part of a maintenance workflow. For exterior slabs exposed to de-icing salts or harsh cleaners, choose a sealer with suitable chemical resistance, and use surface prep and timing cues to manage recoat frequency and overall cost.
Concrete Sealer Maintenance Schedule
Maintaining your concrete sealer ensures optimal performance. Follow this checklist for regular upkeep.
- Visual Inspection: Examine surfaces for signs of peeling, cracking, or discoloration every 6 months.
- High-Traffic Zones: Inspect frequently used areas quarterly. Reapply sealer if the surface appears dull or shows wear.
- Vehicle Traffic Surfaces: Examine driveways and parking lots annually, focusing on tire marks and oil stains.
- Cleanliness: Remove dirt, debris, and stains promptly to prevent buildup. Use a mild detergent and soft-bristle brush.
- Moisture Content: Ensure surfaces are dry before applying sealer. Check for efflorescence (white powder) indicating excess moisture.
- UV Exposure: Inspect areas with direct sunlight exposure twice a year, as UV rays can degrade sealers over time.
- Freeze-Thaw Cycles: In cold climates, inspect surfaces annually for signs of frost damage or delamination.
- De-icing Salt Damage: Check for salt residue and its impact on the sealer’s integrity once a year, especially in winter.
Maintenance Tip: Regularly inspect your concrete to catch issues early and extend the lifespan of the sealer.
Upfront Cost Versus Lifecycle Cost Considerations
When evaluating concrete sealer options, consider both initial price and long-term ownership costs.
Initial Cost: Film-forming sealers often have a lower upfront cost due to their quicker application process.
Labor and Downtime: Penetrating sealers may require more labor for surface preparation and longer cure times, increasing initial costs but potentially reducing long-term maintenance needs. Always check manufacturer guidelines for specific product requirements.
Reapplication Intervals: Film-forming sealers typically need to be reapplied every 1-3 years, while penetrating sealers can last up to 5 years or longer. Consider the frequency of reapplication and associated labor and material costs over time when comparing options. Always consult product labels for specific reapplication intervals.
Safety, Environmental, and Regulatory Considerations
PPE, ventilation, and safe handling are essential when applying outdoor sealers, with clear steps for gloves, goggles, respirators where applicable, and training sign-offs. Expect VOC considerations and air-quality advisories, and plan for outdoor ventilation and window or shade opportunities that suit the product’s limits. Prepare for runoff control, spill containment, and proper disposal of waste materials to protect soil and waterways.
Understanding regulatory, permitting, and site assessment needs helps avoid delays and hazards, including stormwater rules and labeling requirements. Check product labels and datasheets for temperature, humidity, and substrate compatibility to choose penetrating vs film sealers appropriately. Skipping safety protocols could lead to worker injury or environmental damage, and if VOC limits are not verified, do not proceed with application.
Worker Protection and Application Safety
Protecting workers during sealer application is crucial. Always review the product’s Safety Data Sheet (SDS) to understand specific personal protective equipment (PPE) requirements.
Common PPE includes: gloves, goggles, and respirators for solvent-based products. Ensure adequate ventilation when using these products.
If workers experience symptoms during application, stop work immediately, provide first aid as needed, and follow the SDS emergency procedures.
Environmental Impact and Runoff Management
Minimizing environmental impact is essential. Contain wash water and runoff using barriers, filters, or other approved methods to prevent contamination of soil and waterways.
Follow local guidelines: for disposal or recycling of used materials, VOC limits, and stormwater discharge requirements. Check product labels or datasheets for VOC content.
If runoff occurs, contain and manage it immediately to prevent off-site impacts. Follow local guidelines for reporting spills or releases.
Tools, Materials, and Planning Checklist for a Successful Resealing Project
Resealing Checklist: Tools, Materials, Site Assessment & Plan
This guide provides a practical checklist for a successful reseal project. It covers essential tools, materials, site assessment, and a clear preparation and application plan. You’ll learn about crucial surface-preparation gear, applicators, safety equipment, and simple criteria to choose among sealers and cleaners.
By following these steps, you can prevent sealant failure and costly rework. Before choosing products and scheduling work, check the surface condition, porosity, contamination, and moisture levels. Proper preparation improves adhesion. Ensure the surface is dry and free of tackiness, and address issues like efflorescence or peeling before proceeding.
Tools and Materials Checklist
The following tools and materials are essential for a successful resealing project. They will help you prepare the surface, apply the sealant, and ensure longevity.
- Scraper or chisel: Used to remove old sealant and any loose material. A sharp edge is crucial to prevent damage to the substrate.
- Safety glasses: Essential for protecting your eyes from debris and chemical exposure during surface preparation and sealant application.
- Gloves: Protect your hands from chemicals, heat, and sharp edges. Choose gloves that fit well to maintain dexterity.
- Masking tape: Helps create clean lines and prevents sealant from bonding where it’s not wanted. Use a high-quality tape for better adhesion and easier removal.
- Caulk gun: Essential for applying sealant. Choose a caulk gun with an adjustable squeeze trigger for better control over the sealant flow.
- Sealant (silicon, polyurethane, etc.): Select a sealant suitable for your surface and application. Check the label for compatibility, cure time, and expected lifespan.
- Putty knife or caulk smoother: Used to smooth out the applied sealant, remove excess material, and create a professional finish. A flexible blade is ideal for following contours.
- Hair dryer (optional): Can be used to accelerate the curing process in cold or humid conditions. Ensure it’s set to low heat to prevent damaging the sealant.
Pro tip: When using a hair dryer, keep it moving to avoid overheating any one spot and potentially warping the surface.
Visual Inspection Checklist
Before starting your resealing project, follow this checklist to ensure a successful outcome. It helps verify the surface’s readiness for sealing and identifies common issues that may cause rework.
- Surface Cleanliness: Inspect the surface for dirt, grease, or other contaminants. Wipe with a damp cloth to confirm it’s clean.
- Dry Surface: Check for signs of moisture. Perform a simple water test: apply a few drops; if they bead up and don’t absorb, the surface is likely dry enough.
- Surface Profile: Ensure the surface has a suitable profile (not too smooth or too rough) to promote good adhesion. You should be able to feel slight texture with your fingertips.
- No Active Paint or Coating: Make sure any previous paint or coating is fully cured and not tacky to the touch.
- Temperature Check: Ensure the surface temperature is within the recommended range for your chosen sealant (usually 50-90°F/10-32°C).
- Sealant Condition: Inspect your sealant cartridge or tube for any signs of damage. Squeeze a small amount onto a piece of cardboard to check its consistency.
- Sealant Compatibility: Ensure the chosen sealant is compatible with the surface material (e.g., silicone for porous surfaces, polyurethane for non-porous).
- Application Temperature: Check that the temperature is within the application range specified by the manufacturer.
Key Point: Always perform a visual and tactile inspection of the surface before applying any sealer. This helps ensure good adhesion and prevents costly rework.
Preparation Steps for Sealant Application
Before starting your resealing project, review the following steps to ensure a successful outcome. These points should be considered after completing visual checks and acceptance criteria from previous sections.
- Evaluate Surface Condition: Inspect the surface for damage, contamination, or porosity. A simple water drop test can help: if the water bead disappears quickly, the surface may still require cleaning or sealing.
- Verify Local Regulations: Ensure your project adheres to local building codes and regulations regarding sealants and their application.
- Select Suitable Sealant: Choose a sealant appropriate for your substrate (e.g., concrete, wood, metal) and expected weather conditions. Always consult the manufacturer’s recommendations.
- Gather Necessary Tools and Materials: Refer to earlier sections’ checklists to ensure you have all required tools and materials for the job.
- Determine Application Method: Decide whether you’ll apply the sealant using a brush, roller, or spray. Consider using masking tape to protect adjacent areas.
- Estimate Sealant Quantity: Calculate how much sealant you’ll need based on surface area and manufacturer’s coverage rates. It’s advisable to have a slight excess rather than insufficient quantity.
- Plan Application Timing: Schedule your application for a dry, calm day with temperatures within the recommended range (typically 50-90°F or 10-32°C).
- Consider Primer Use: If the surface is contaminated or porous, consider using a primer to enhance adhesion. Always follow manufacturer’s instructions for application.
- Plan Cleanup and Disposal: Have suitable cleaning materials ready (e.g., solvents, rags) and know how to dispose of sealant remnants responsibly.
Key Point: Always prioritize surface preparation. Neglecting this step can result in sealant failure and costly rework.
Conclusion
Choosing a sealer strategy that fits outdoor concrete hinges on safety, durability, and appearance. Penetrating sealers tend to preserve the natural look and resist peeling when properly applied, while film-forming sealers can offer stronger surface protection in high-wear areas. Regardless of choice, plan a careful test, follow product instructions, and schedule work for favorable weather to avoid trapping moisture or creating uneven patches.
To move from plan to action, confirm the area to reseal, run a small test patch, read the sealer label for surface prep and cure times, check the forecast, and gather the right tools and PPE. Prepare the surface, clean and dry it, apply the chosen sealer in thin, even coats, and avoid puddling. Maintain a clear work area, keep pets and kids away, and document the process so you can repeat successful steps in other sections of the surface.
Avoid common mistakes by not skipping surface prep, not exceeding recommended application thickness, and not sealing in unsuitable temperatures or humidity. Always wear eye protection and gloves, ventilate as required, and respect local rules on outdoor coatings and runoff. If the project involves complex substrates, questionable existing coatings, or uncertain weather windows, consider a professional assessment to prevent costly mistakes and irreversible damage, then proceed with confidence and a plan you can follow step by step.
FAQ
What Are the Key Properties of Penetrating Sealers That Affect Outdoor Performance?
Penetrating sealers soak into the concrete to reduce porosity and limit moisture movement. They preserve the natural look and remain breathable, which helps prevent peeling caused by trapped moisture. Performance depends on the product’s chemistry and the concrete’s condition when applied.
What Properties Define Film-Forming Sealers and How Do They Behave Outdoors?
Film-forming sealers create a surface layer that can raise the appearance and provide a barrier against stains. They can enhance water resistance but may trap moisture if the surface is not properly prepared or if the substrate is damp. Peeling is more likely when the substrate expands or contracts beyond the film’s flexibility.
In Which Outdoor Scenarios Would You Choose Penetrating Sealers Versus Film-Forming Sealers?
Choose penetrating sealers for high-porosity concrete, rough textures, or when breathability and a natural look are priorities. Film-forming sealers are often used on smooth, prepared surfaces where you want a uniform film, gloss, or easier cleaning. Always follow the manufacturer’s guidance for recommended use cases.
How Should Environment and Maintenance Influence Sealing Outcomes and Upkeep?
Temperature, humidity, sun exposure, and moisture contact can affect how well a sealer cures and how long it lasts. Regular inspection and cleaning help detect early signs of wear or peeling. Check product labels for reapplication intervals and environmental limitations specific to the product.