
Introduction
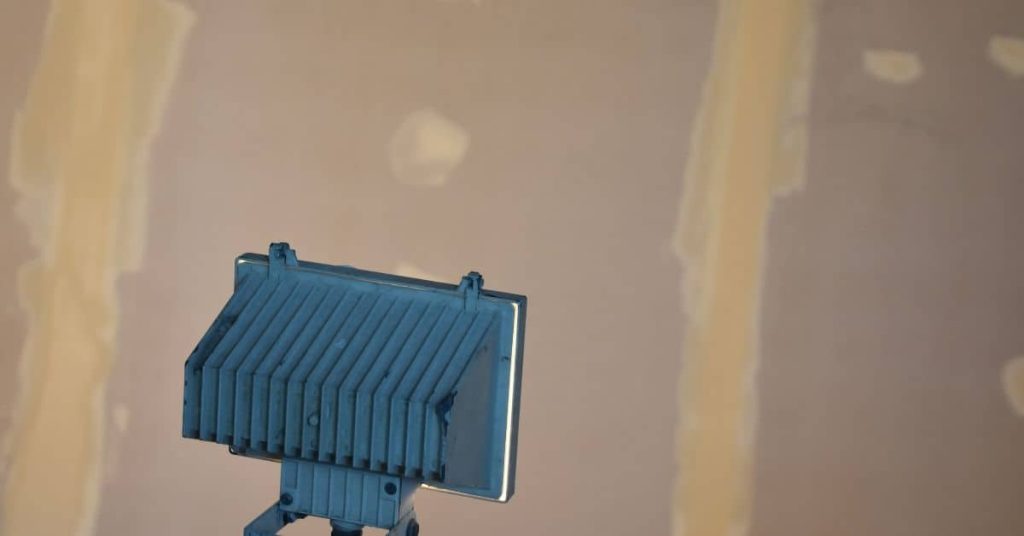
Patching drywall is the process of repairing holes or damaged areas in wallboard with a patch, joint compound, and tape to restore a smooth surface.
Start by evaluating the size of the damage and gathering the basic supplies you’ll need before you mix anything. Keep in mind that for bigger damage you may need different techniques and possibly approval from local rules or a pro.
Then follow a simple, hands-on sequence: apply a patch or backing, cover with joint compound, let it set, and sand smooth. Gather supplies like a patch or backing, joint compound, putty knife, sanding block, and a scrap of drywall, and always check product instructions and local guidelines for sizes and curing times. For larger holes, expect a more involved repair and consider the recommended method you find on the patching product label or by talking to a pro.
Key takeaways
- Assess damage first; choose repair path using Quick Decision Guide and stop rules.
- Gather supplies by repair type: patch, compound, tape, mesh, knife, scraper, sandpaper.
- Safety: wear eye protection and dust mask; cover working area to protect belongings.
- For tiny holes, apply patch or spackle skim, feather edges flush with wall.
- Patch larger holes using mesh or butterfly method per instructions; check local codes and label.
- Visual checkpoints and troubleshooting: sanding dust, cracking, paint match; reapply as needed.
- Budget and time notes: DIY vs professional help depend on damage scope.
Table of Contents
- Introduction
- Key takeaways
- Quick Decision Guide — Choose the Right Repair and Stop Rules
- Tools and Materials Checklist (by Repair Type)
- Safety and Prep Before You Start
- Step-by-Step: Fixing Nail Holes and Very Small Holes (<1/2 Inch)
- Step-by-Step: Small to Medium Holes (1/2–3 Inches) Using Mesh Patch
- Step-by-Step: California (Butterfly) Patch for Larger Holes (3 Inches and Up)
- Common Mistakes, Troubleshooting, and Visual Checkpoints
- Cost and Time Estimates — DIY Vs. Professional Help
- Conclusion
- FAQ
Quick Decision Guide — Choose the Right Repair and Stop Rules
Start with a quick diagnostic map that matches what you see to a simple repair. Begin with the smallest fix and move up only if the first method won’t hold. Keep the flow practical and avoid overhauling the wall when a minor patch will do.
Know the stop rules that signal you should reassess or call a pro. Active water intrusion, mold, sagging drywall, large cracks near corners, or signs of structural movement mean you should pause DIY work. Before you cut, power down near outlets, dry the area, and plan your patch size so you don’t overcut or underpatch.
Hole-size chart and repair thresholds
Size matters when it comes to drywall repairs. Here’s a quick guide:
Pinholes/nails: These are the easiest. Use spackle or lightweight joint compound.
Small holes (1/4–1/2 inch): Self-adhesive mesh patches or small drywall patches work best here.
Medium holes (1/2–3 inches): You’ll need drywall backing and joint compound for these. Cut a piece of drywall to fit, secure it with screws, then apply joint compound.
Large holes (>3 inches): If the hole is structurally compromised, you might need to replace the damaged sheetrock.
Stop rules — when to pause the job
Some signs mean it’s time to stop and reassess. Here are the red flags:
Water stains or active water intrusion: This could indicate a hidden leak that needs professional attention.
Mold, exposed wiring/plumbing, crumbling drywall: These are safety hazards. Stop work immediately and call a pro.
Large cracks near corners or structural movement: These could be signs of bigger issues like foundation problems. Don’t DIY this; get it checked out.
Inability to identify the underlying issue: If you can’t figure out what caused the damage, it’s best to stop and consult a professional.
Tools and Materials Checklist (by Repair Type)
Separate lists by repair type: nail holes, mesh-patch repairs, and California patches, with a short intro about what each repair typically needs. For each type, keep a compact essentials list plus practical upgrades that improve results. This helps you shop quickly and stay organized on the job.
Compare material options across budgets without guessing specs. Include basics like spackle, lightweight joint compound, mesh or paper patches, tape, primer, and compatible paint. Add safety notes on PPE, surface prep, dust control, and drying guidance to keep the work clean and safe.
Basic kit for nail holes and very small repairs
Use this checklist when you’re dealing with minor drywall damage like nail holes or small cracks. It’ll help you fix these issues quickly and efficiently.
- Spackle or lightweight joint compound: Check the label to ensure it’s suitable for your repair type. Use a small amount, as too much can crack when drying.
- Putty knife or applicator (1″ – 2″): A small putty knife is ideal for nail holes. Ensure it’s clean and in good condition to avoid damaging the surrounding area.
- Sandpaper (150-220 grit) or sanding sponge: Check the grit size to ensure it’s fine enough for smooth finishing. A sanding sponge can help reach awkward angles.
- Paper towels: Essential for cleaning up excess spackle and checking your work.
- Drywall primer (optional): While not always necessary, it helps seal the repair and provides a better surface for painting. Check if it’s compatible with your paint type.
- Tape measure: Measure the hole or crack to ensure you’re using the right tool size. Skipping this can lead to applying too much or too little material, causing rework.
- Light source (optional): A flashlight or bright light can help you spot any missed spots or imperfections in your repair.
- Patience: Drywall repairs take time to dry and sand. Rushing this process can cause cracks or a poor finish.
Quick rule: Always test your materials on a small, hidden area first. This ensures compatibility and helps you practice your technique before tackling the main repair.
Supplies for mesh-patch (small–medium) repairs
Use this checklist when you’re repairing small to medium-sized holes or cracks in your drywall. It’ll help you get the job done right, first time.
- Mesh Patch: Check product label for size and type. For small-medium repairs, use a mesh patch that’s at least 2″ larger than the hole on all sides.
- Joint Compound (Mud): Choose a setting-type compound for most repairs. Check local rules if you’re unsure about specific brands or types.
- All-Purpose Joint Tape: Ensure it’s wide enough to cover the mesh patch and extend at least 2″ onto the surrounding drywall.
- Putty Knife (6″): A standard, flexible knife for applying mud. Check its condition; replace if bent or damaged.
- Putty Knife (10″ or 12″): Larger knife for spreading and feathering the final coat. Ensure it’s in good condition.
- Sanding Tool: A sanding block or pole sander with 120-grit sandpaper. Check paper condition; replace if worn or clogged.
- Primer (PVA): Choose a PVA primer to seal the patch and prepare it for paint. Check manufacturer’s instructions for application methods.
- Paint: Match your existing wall color as closely as possible. Check paint can label for type; use latex for most interior jobs.
Quick rule: Always prime the repaired area before painting to ensure even coverage and prevent tannins from bleeding through.
Supplies for California (large) patch repairs
Use this checklist when you’re repairing large holes or cracks in your drywall, typically 6″ to 24″. It’s crucial to have the right supplies to ensure a strong and lasting repair.
- Drywall Scraps: Ensure they match the existing wall texture and thickness. Check by holding them against the damaged area.
- Jab/Utility Knife: A sharp one is essential for cutting drywall scraps to size. Test it on a scrap before starting.
- Screws or Adhesive: For attaching the patch, use drywall screws (1-1/4″ to 2″) or construction adhesive. Check product labels for suitable uses.
- Joint Compound: Get a setting-type compound for large repairs. Check local rules if you’re unsure about specific brands.
- Corner/Feathering Knives: You’ll need both to shape the compound and create smooth edges. Ensure they’re clean and in good condition.
- Primer & Paint Supplies: Get a primer suitable for drywall and your chosen paint color. Check if you have enough brushes, rollers, and trays.
- Mesh Drywall Tape: For added strength, use mesh tape instead of paper tape. Ensure it’s the right size (6″ or 12″) for your repair.
- Sandpaper/Sponge: Medium-grit sandpaper (80-120) and a damp sponge are needed to smooth and clean up the repaired area. Check you have both before starting.
Quick rule: Always test your tools, materials, and techniques on scrap pieces before starting the actual repair. This helps avoid costly mistakes.
Safety and Prep Before You Start
Outline PPE and site safety to protect yourself and others. Wear gloves, eye protection, a good mask, and sturdy footwear, and keep the area well ventilated with dust control in mind. A clean, dry site helps prevent hidden issues from sneaking in later.
Check utilities and moisture before you touch the drywall. Verify circuits nearby are off if wiring is involved and look behind for plumbing, insulation, or hidden damage. If you find leaks or mold, address them first and reassess before patching.
Personal protective equipment and work setup
Safety first. Here’s what you need to protect yourself and keep your workspace clean.
- Gloves: Protect hands from sharp edges and patching compounds. Choose durable, comfortable ones around $5-$10 a pair.
- Safety glasses: Shield eyes from debris. Consider impact-rated ones for added protection, about $10-$20.
- Dust mask or respirator: Essential for sanding to avoid inhaling drywall dust. A basic mask is around $5, while a half-face respirator costs $20-$40.
- Footwear: Wear sturdy shoes with good grip to prevent slips and falls. Safety toes are optional but recommended, around $30-$60.
- Drop cloths and plastic sheeting: Cover floors and nearby walls to protect them from patching compounds and dust. A 9x12ft canvas drop cloth is about $5, while a roll of plastic sheeting costs $10-$20.
- Ventilation: If possible, work in an area with open windows or use a portable fan to keep the air moving. For larger jobs, consider renting a HEPA vacuum for around $50-$80 per day.
Assessing underlying damage — water, mold, electrical, plumbing
Before you start patching, check for hidden issues that could cause bigger problems down the road.
Water damage and mold: Inspect around the hole for stains, warping, or mildew. If found, trace back to the source (leaky pipe, roof, etc.) and fix it before patching. Water-damaged drywall may need to be replaced.
Electrical issues: Turn off power at the circuit breaker before working near wiring or outlets. Use a non-contact voltage tester ($10-$20) to ensure power is off. Locate and mark any hidden electrical boxes behind the drywall.
Plumbing concerns: Check for water supply lines, drain pipes, or vents behind the damaged area. If present, make sure they’re intact and won’t be compromised by your repair. If in doubt, consult a professional plumber.
Step-by-Step: Fixing Nail Holes and Very Small Holes (<1/2 Inch)
Begin with prep and assessment: identify the size, clean the surface, and protect surrounding drywall. Remove loose material so the patch will bond well. Keep the area ready for a smooth finish.
Choose a patch method suitable for tiny holes and recessed spots. Use spackle or a premium joint compound with a narrow knife, dab if needed, and feather the edges. Let each layer dry before moving to the next and finish with light sanding.
Step-by-Step Repair Process
The following steps guide you through fixing nail holes and very small drywall holes (less than 1/2 inch) from start to finish, ensuring a professional-looking result.
- Inspect the hole. If it’s larger or has underlying damage, consult our Stop Rules before proceeding.
- Protect surrounding drywall with painter’s tape and drop cloths.
- Remove any loose material around the hole using a utility knife or your fingers.
- Apply spackle or joint compound using a narrow putty knife, building up thin layers to fill the hole. Allow each layer to dry according to the manufacturer’s instructions before applying the next one.
- Lightly sand the patched area once fully dried. Wipe off dust and prime the area before painting.
- Paint the patched area using thin, blended strokes, matching the surrounding wall color as closely as possible.
- Inspect your work under different lighting conditions to ensure a seamless finish.
Prep, Apply Spackle, and Feather Edges
Before applying spackle, remove any loose debris around the hole using a utility knife or your fingers.
Apply spackle to the hole using either your finger or a narrow putty knife. For tiny nail holes, use just a small amount of spackle.
To feather edges, spread the spackle thinly beyond the hole’s perimeter, blending it into the surrounding wall. This helps create an invisible repair.
Drying, Sanding, and Paint Touch-up Tips
Allow the spackle to dry according to the manufacturer’s instructions. Typically, this takes around 24 hours for a thin layer.
Sand the patched area lightly using fine-grit sandpaper (120 or 220 grit) once it’s completely dried. Wipe off any dust with a damp cloth.
To touch up paint, use a small artist’s brush or a touch-up marker to apply thin, blended strokes around the patched area. This helps avoid repainting the entire wall. Test your paint match under various lighting conditions before applying it to ensure a seamless finish.
Step-by-Step: Small to Medium Holes (1/2–3 Inches) Using Mesh Patch
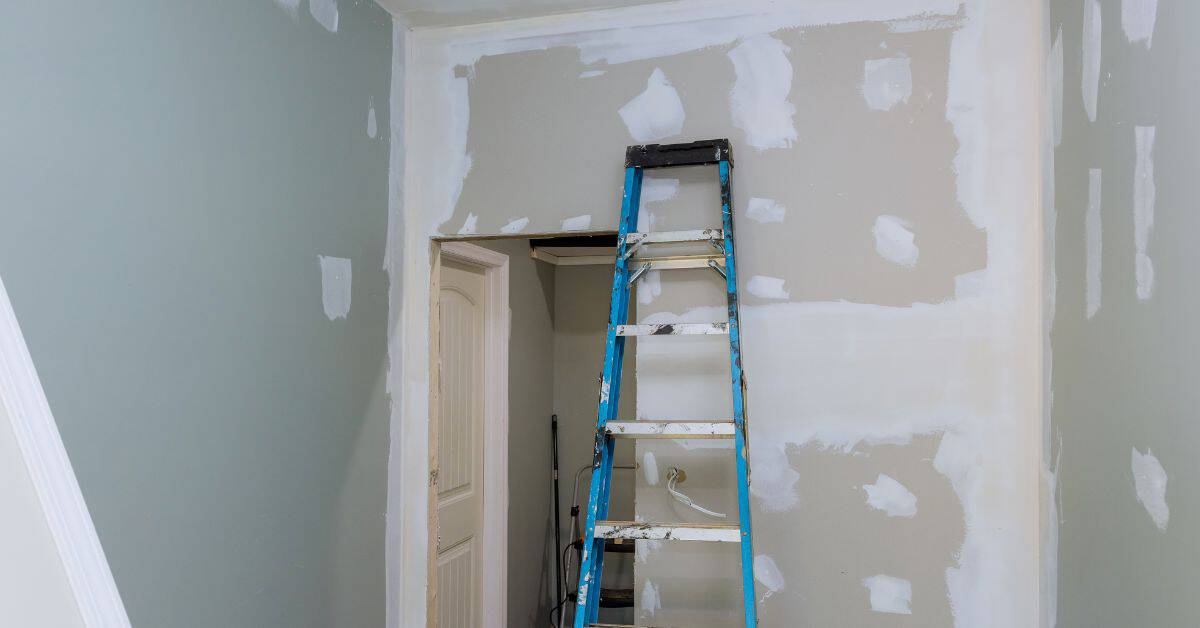
Define the scope as holes you can cover with self-adhesive mesh and a couple coats of mud. If edges are irregular, consider a backing or fibrous patch for a solid hold. Ensure the wall is dry and sound before applying patch material.
Apply the patch carefully: cut to fit with generous overlap, center it, and press to remove bubbles. Embed the mesh edge neatly and build thin coats of joint compound, feathering beyond the patch for a flush finish. Sand between coats and prime after the final mud sets.
Step-by-Step Process
The following steps guide you through repairing small to medium holes (1/2″–3″) using self-adhesive mesh patches. This process ensures a durable, flush repair.
- Assess the hole size and shape. If edges are irregular or hole is larger than 3″, consider using a patch with backing or a fibrous patch.
- Clean the area: remove dust and any loose material. Ensure the wall is dry and sound.
- Choose a mesh patch that’s at least 1/4″ larger on all sides than the hole. Cut it to fit, if needed.
- Center the patch over the hole, press firmly to activate the adhesive, and embed the mesh edge into the compound to avoid bubbles.
- Apply a thin first coat of joint compound, feathering beyond the patch edges. Let it dry completely before proceeding.
- Sand lightly to remove any ridges or high spots. Wipe off dust with a damp cloth.
- Apply a second coat of joint compound, smoothing it into the surrounding wall. Let it dry again.
- Lightly sand one last time, wipe off dust, and prime the repaired area.
Cut, apply mesh patch, and embed compound
Start by cutting the self-adhesive mesh patch to fit your hole. Ensure it’s at least 1/4″ larger on all sides for proper adhesion.
Center the patch over the hole and press firmly. This activates the adhesive and secures the patch in place.
Using a trowel, spread joint compound thinly from the center of the patch outwards to the edges. Be careful not to create ridges or apply too much compound at once.
Pro tip: Embed the mesh edge into the compound as you spread it to avoid bubbles and ensure a smooth finish.
Drying schedule, sanding, and priming for paint
The drying time between coats of joint compound depends on temperature and humidity. Aim for at least 24 hours in ideal conditions (70°F/21°C).
Sand lightly between each coat to remove any ridges or imperfections. Wipe off dust with a damp cloth before applying the next coat.
After the final coat dries, lightly sand one last time and wipe off dust. Apply a primer designed for drywall repairs to seal the patch and prevent “telegraphing” – where the repaired area shows through the paint.
Note: If you’re using an oil-based primer or paint, ensure proper ventilation and follow safety guidelines for working with volatile organic compounds (VOCs).
Step-by-Step: California (Butterfly) Patch for Larger Holes (3 Inches and Up)
Use the California patch when holes are larger and you want a seamless blend with the surrounding drywall. The goal is a sturdy mount and a surface that sands and paints evenly. Prepare by squaring and sizing the patch to fit the opening.
Follow the workflow: back-cut or score the patch for clean edges, set with mud and tape, and work through multiple thin coats to feather the edges. Between coats, sand lightly and prime before final paint to achieve a smooth result.
Step-by-Step Process
This step-by-step guide walks you through the California (Butterfly) patch process for larger holes, ensuring a seamless result.
- Prep and safety checks: Put on your PPE, lay down drop cloths, and turn off power to nearby outlets. Inspect the hole for any underlying damage.
- Square the hole: Use a drywall rasp or utility knife to square the edges of the hole. This ensures a clean fit for your patch.
- Measure and cut the patch: Transfer the squared dimensions to a new piece of drywall, adding 1-2 inches extra on each side. Cut it out using a drywall saw or utility knife.
- Back-cut or score: On the backside of the patch, make shallow cuts or scores around the edges. This releases the mounting edge and helps create a strong bond with the joint compound.
- Set the patch: Apply joint compound to the back of the patch and press it firmly into place. Use mesh tape or paper tape along the edges for added strength.
- Apply mud and feather edges: Spread a thin layer of joint compound over the patch, filling any gaps. Let it dry, then apply multiple thin coats, feathering the edges to blend with the surrounding wall. Sand between coats.
- Prime and paint: Once the final coat is dry, lightly sand the surface and wipe off dust. Apply primer, let it dry, then paint to match the surrounding area.
- Final checks: Inspect your work for any high or low spots. If needed, apply more joint compound, let it dry, and sand again before painting.
Cut square opening and size/fit patch
Creating a clean, square opening ensures your patch fits snugly. Here’s how to do it:
First, use a drywall rasp or utility knife to carefully square the edges of the hole. This tool helps create straight lines that will match the shape of your new patch.
Next, measure the squared dimensions of the hole. Add 1-2 inches extra on each side to account for the patch’s size and any slight imperfections in squaring the hole.
Transfer these measurements to a new piece of drywall. Use a T-square or straight edge to draw a square line along the measurement marks. Cut out the patch using a drywall saw or utility knife, following your lines carefully.
Set patch, apply mud, and feather edges
Securing the patch and applying joint compound correctly is key to a seamless finish. Here’s how:
Apply a thin layer of joint compound to the back of the patch. This helps create a strong bond with the surrounding drywall. Press the patch firmly into place, using mesh tape or paper tape along the edges for added strength.
Spread a thin layer of joint compound over the patch, filling any gaps between the patch and the surrounding wall. Let it dry completely. Once dry, apply multiple thin coats of joint compound, feathering the edges to blend with the surrounding wall. Feathering involves tapering the thickness of the compound, making it thinner as you approach the edge.
Let each coat dry according to the manufacturer’s instructions before sanding lightly with fine-grit sandpaper. This helps remove any excess compound and creates a smooth surface for painting. If needed, apply more joint compound, let it dry, and sand again before painting.
Common Mistakes, Troubleshooting, and Visual Checkpoints
Watch for common mistakes like overfilling, skipping feathering, or using the wrong mud consistency. Fixable gaps and rework are far easier when you catch them early. Take note of surface cleanliness and drying times to avoid texture issues.
Use a quick diagnostic routine to spot problems: check for hairline cracks, dust, or moisture; test patch adhesion with gentle pressure; and identify edge erosion or shrinkage. Visual checks before painting should confirm a flush, smooth finish with matched texture and a clean, dry surface.
Fixing overfill, under-sand, and bulging patches
Use this checklist when you notice high spots, ridges, or visible mesh after patching.
- Check for high spots: Run your hand across the patch. If it feels raised, sand lightly with fine-grit sandpaper.
- Inspect feathered edges: Look for any ridges left from not feathering properly. Sand gently to remove.
- Check mesh visibility: For medium-large holes patched with mesh, ensure it’s not visible. Apply more compound if needed.
- Skim coat for leveling: If sanding doesn’t fix it, apply a thin skim coat of joint compound to level the patch.
- Check for bulging: Press gently around the edges. If it feels soft or gives way, it’s under-sanded. Sand more.
- Reapply compound if needed: For severe cases, remove the old patch, reapply compound, and follow the initial drying/sanding process.
- Avoid over-sanding: Be careful not to sand too much, which can create a depression or weaken the patch.
- Test with light: Hold a flashlight at an angle. If you see shadows, more work is needed.
Quick rule: Always check your work under different lighting conditions to catch any missed spots.
Priming and paint-matching tips for invisible finishes
Use this checklist before painting to ensure a seamless, color-matched finish.
- Check patch dryness: Ensure the patch is completely dry. Touch lightly; if it feels cold or tacky, wait longer.
- Inspect for dust: Wipe with a damp cloth. If it leaves residue, clean again.
- Use primer: Apply a coat of primer to seal the patch and help paint adhere evenly.
- Match sheen: Ensure your paint matches the surrounding wall’s sheen (gloss, semi-gloss, etc.).
- Check color match: Paint a small test area on the patch. Let it dry, then compare to the existing wall.
- Avoid high-contrast paints: If your paint is much lighter or darker than the surrounding wall, use a glaze or stain blocker first.
- Use primer-enhanced paint: For one-coat coverage, consider using a paint with built-in primer.
- Test in different lighting: Check your test patch under various lights to ensure color match.
Quick rule: Always test paints on the actual wall before committing to a whole room.
Cost and Time Estimates — DIY Vs. Professional Help
Frame your decision around the repair type and location. High-traffic or moisture-prone areas may need extra prep or a pro’s touch. Consider the scope and your deadline when weighing DIY versus hiring help.
Outline practical stop conditions: moisture or structural concerns, or multiple patches in a single area. If the job feels beyond your comfort zone, plan to consult a pro and verify any local rules or permits before proceeding.
Typical cost and time ranges (safe estimates)
Here’s what you can expect in terms of costs and time for different drywall repairs.
Small holes (1/2–3 inches): $5–$15, 45–90 minutes total. Materials: spackle, mesh patch, joint compound, tape. Tools: putty knife, sandpaper.
Medium holes (3–6 inches): $10–$30, 1–2 hours total. Materials: joint compound, tape, mesh or fiberglass patch. Tools: putty knife, sandpaper, utility knife.
Large patches (6+ inches): $20–$60, 2–4 hours total. Materials: joint compound, drywall patch kit, tape. Tools: utility knife, trowel, sandpaper.
When to hire a professional and what to expect
While DIY is great for small repairs, there are times when it’s best to call in the pros.
Water/mold damage: Pros have specialized equipment to detect moisture and prevent mold growth. They’ll also ensure structural integrity isn’t compromised.
Large or repeated repairs: If you’ve got multiple holes, large gaps, or extensive damage, it’s often faster and cheaper to hire a pro. They can handle the job in one visit.
Textured finish matching: Pros have experience working with various textures and can match existing finishes better than most DIYers. Expect them to include prep, repair, sanding, priming, and painting in their estimate.
Conclusion
Safety first and durability go hand in hand here. When you patch drywall, you protect your walls, your home, and your time by sticking to the proven stop rules and choosing the right repair method for the hole you’re filling.
Check in this order: confirm the hole size and type, pick the repair method that fits, gather the exact tools and materials, test any patch on a scrap area if possible, mask and protect surrounding surfaces, apply the compound with proper taping or patch, let it dry, sand smooth, then prime and paint to blend. Do the work in a well-ventilated area, wear eye protection, and unplug nearby outlets if you’ll be working near them.
Common mistakes to avoid are skipping prep or tape, applying too much mud at once, not letting patches dry before sanding, and over-sanding edges. Keep patches dry, clean, and even, and always test a small area first to confirm adhesion and finish before proceeding. If you see large damage, cracks into studs, or signs of structural movement, don’t push on — step back and call a professional.
If the opening is clearly oversized, or the wall shows water damage or structural clues, seek help rather than forcing a patch. With careful steps and patience, you can finish a solid, seamless repair and feel confident about the result.
FAQ
What supplies do I need for patching drywall holes of various sizes?
Have a basic kit: joint compound, a wide putty knife, sandpaper or a sanding block, a drywall patch or mesh, and a backing support for larger holes. Add drywall tape for small seams and a utility knife, plus a damp cloth to clean dust. Check the product labels for cure times and recommended patch sizes.
What are the step-by-step steps for patching a small hole (about 1/4 to 1/2 inch)?
Clean the area, apply a thin coat of joint compound with a small knife, and embed a tiny sheet of tape if needed. Let it dry, then apply a second, slightly wider coat and sand smooth. Finish with a light top coat and a final sand before painting.
How do I patch a medium-sized hole (roughly 1/2 inch to 3 inches) using a patch or mesh patch?
Cut a patch to cover the hole with 1/4 inch overlap on all sides. Attach the patch with joint compound or self-adhesive mesh, then cover with a coat of compound. Build up with additional coats, letting each dry, then sand smooth before painting.
What about larger holes and the California (butterfly) patch method? When should I use it?
For large holes that expose studs, use a backing piece and a butterfly patch or full-surface patch, following the manufacturer’s instructions. Secure the patch, cover with joint compound in multiple coats, and sand to a flush finish. If in doubt, check the patch kit instructions and local guidance for installation steps.