

Introduction
Patch “Picture Framing” on painted stucco means touching up small areas so the patch blends with the surrounding paint while keeping the texture. This guide introduces how to spot the framing, choose basic tools, and apply a feathered coat with primer over patches. Keep it practical and straightforward, like a real hands-on repair.
Before you patch, prep the area by cleaning and roughening the edges so the new material sticks. Choose a patch material and primer that match the surface, and check the product label or manufacturer instructions for how to use them. When you apply, feather the edges into the surrounding paint to minimize a ridge and achieve a smooth transition.
Key takeaways
- Identify picture framing by narrow, uniform edges around patches on painted stucco.
- Use flexible patch compound and mesh or paper tape for cracks.
- Prep surface with PPE, cleaning, degreasing, and loose paint removal.
- Prime zones before patching to seal porous stucco edges and patches.
- Feathered coating techniques create a seamless blend with surrounding finish.
Table of Contents
- Introduction
- Key takeaways
- Understanding Picture Framing on Painted Stucco
- Tools and Materials Checklist
- Surface Preparation and Safety Precautions
- Prime Zones: Where and How to Apply Primer Before Patching
- Feathered Coating Repair Technique: Step-by-Step
- Finishing Steps, Painting, and Touch-Ups
- Preventive Measures and Long-Term Planning
- Common Mistakes, Troubleshooting, and When to Hire a Pro
- Conclusion
- FAQ
Understanding Picture Framing on Painted Stucco
Picture framing on painted stucco refers to narrow bands that appear darker or with a different texture along edges or around architectural features. This pattern is not the same as generic peeling or uniform wear across the surface. Accurate identification upfront guides how you approach primer, feathering, and whether the issue relates to paint on paint, surface texture, or the substrate itself.
Common causes include prior patches or skim coats, feathered edge paints, moisture-related texture changes, efflorescence, and movement around openings or decorative details. You’ll often see framing near windows, doors, hatbands, eaves, or where patches were previously applied. A concise diagnostic plan helps you map out prime zones and feathering needs before patching begins.
What is picture framing and how it forms
Picture framing on painted stucco refers to narrow, darker or differently textured bands that form at edges or hatbands. It’s caused by edge shedding – where the paint dries faster at the edges, pulling away from the surface – and differential absorption, where the substrate absorbs more moisture in certain areas.
These factors lead to a buildup of coating in these zones, creating a distinct band that stands out from the rest of the surface. Understanding this mechanism helps us address the issue effectively.
Common causes and typical locations (hatbands, trim, corners)
Picture framing often starts at edges – around windows, doors, hatbands, eaves – or where repairs were made. Flashing that’s improperly installed or damaged can cause moisture to accumulate, leading to framing.
Movement joints and uneven coating application are other common culprits. Check these areas for signs of framing: hatbands – the horizontal bands around windows; trim – where walls meet the ceiling or floor; corners – especially exterior ones.
Visual checkpoints for diagnosis
Before you start repairs, use this checklist to confirm picture framing and understand its cause. Inspect under raking light to highlight texture transitions.
- Texture changes: Look for areas where the stucco’s texture differs from the surrounding surface.
- Paint layer difference: Check if the paint layer seems thicker or darker in certain zones.
- Adhesion test: Gently scrape or use a fingernail to check if the paint adheres well. If it flakes off easily, you’ve found framing.
- Moisture indicators: Look for efflorescence (white, powdery deposits) or signs of water damage around framing areas.
Quick rule: If in doubt, document findings with photos. They’ll guide your feathering and prime-zone planning later on.
Tools and Materials Checklist
List the core tools you will rely on, including trowels, a hawk, a margin trowel, a mixing paddle, a drill with mixing bits, measuring cups, and basic safety gear. Have budget-friendly substitutes in mind if you need to save, and consider what to rent versus buy for a small job. Keep the setup simple to move between patches efficiently.
Catalog the patching materials and coatings you’ll need, like stucco patch, bonding agents, elastomeric additives, patch tape or mesh, primers, matching exterior paint, and a compatible topcoat. Prioritize higher quality options where texture and bonding matter most. Plan for different budgets by listing essentials, upgrades for frequent use, and rental options for one-off projects.
Essential tools for feathered patches
Use this checklist before you start patching to ensure a smooth, durable finish.
- Trowels (5in, 10in, and margin trowel): For applying and spreading compound. Skip at your peril – uneven application leads to cracking.
- Hawk: Holds compound while you’re working. No hawk means no free hand for feathering.
- Mixing paddle and drill/bit: For mixing compound. Without this, you’ll end up with lumps that ruin your patch.
- Measuring cups: Ensures consistent mix ratios. Inconsistency causes weak patches.
- Sanding pads (120-grit): For smoothing and preparing surface. Skipping this leaves a rough, poor-adhesion surface.
- Goggles: Protects eyes from debris. Safety first – don’t skip.
- Dust mask: Shields from harmful particles. Essential for your health.
- Gloves: Keeps hands clean and protected. No gloves, no grip, no control over trowel.
- Stucco patch compound: Choose one designed for painted surfaces. Incompatibility causes peeling.
- Bonding agent: Ensures adhesion to painted substrate. Skip this, risk delamination.
- Acrylic elastomeric additive: Adds flexibility and durability. Without it, patch cracks under stress.
- Stucco mesh or patch tape: Reinforces the patch. No reinforcement means weak patch.
- Primer/sealer: Prepares surface for paint. Skip this, expect poor paint adhesion.
- Matching exterior paint: Color-match to avoid obvious patches. Incompatible colors stand out.
- Compatible topcoat: Finish should match existing texture. Mismatch looks unprofessional.
- Stucco patch compound: Expect $20-$40 per 5-gallon bucket. Larger quantities, lower price per gallon.
- Bonding agent: Around $10-$20 per quart. Buy only what you need to avoid waste.
- Acrylic elastomeric additive: About $30-$50 per quart. A little goes a long way, so buy small.
- Stucco mesh or patch tape: Around $10-$20 per roll. Buy enough for your repair plus 10% extra.
- Primer/sealer: Expect $15-$30 per quart. Again, buy only what you need.
- Exterior paint: Around $20-$40 per gallon. Buy enough for your repair and touch-ups.
- Rentals (trowels, hawk, drill): Daily rates vary by location ($10-$30). Check local rental stores for prices.
Quick rule: Don’t skimp on tools. Cheap tools lead to poor results.
Materials and compatible products
Choose the right materials for a strong, lasting patch that matches your existing finish.
Quick rule: Compatibility is key. Wrong materials cause patch failure.
Cost considerations and approximate breakdown
Understand pricing factors to plan your budget effectively.
Quick rule: Shop around. Prices vary by store and location. Always compare quotes.
Surface Preparation and Safety Precautions
Begin with a thorough surface assessment to identify delaminated areas, cracks, efflorescence, and any signs of water intrusion. Note the health of the substrate and plan patching zones to guide primer and coating choices. Documenting findings with notes helps when you select materials and techniques.
Cleaning should remove dirt and loose material without forcing moisture behind the finish. Avoid aggressive high pressure methods that can damage the substrate. Delaminated coating must be removed to a sound substrate, using scrapers and brushes and then vacuuming the dust.
Personal protective equipment and safe practices
Safety comes first when working with stucco. Here’s what you need to protect yourself and your workspace.
- Respirator: Protects from dust and fumes. Use a P100 rating for best results. Around $25-$40.
- Eye protection: Safety glasses or goggles shield your eyes from debris. Expect to pay around $10-$20.
- Gloves: Protect hands from chemicals and sharp edges. Disposable gloves are cheap, around $5 per pack.
- Long sleeves: Shield skin from sun exposure and accidental contact with chemicals. A long-sleeved shirt costs around $10-$20.
- Ladder safety: Secure ladders to prevent falls. Inspect before use, ensure proper footing, and don’t overreach.
Cleaning, removal, and substrate inspection
Before you start patching, follow this checklist to ensure a sound surface.
- Inspect delaminated areas: Identify loose paint or stucco. Remove with a scraper or wire brush.
- Check for efflorescence: White powdery deposits indicate moisture. Address the source before proceeding.
- Look for cracks: Inspect for hairline or larger cracks. Repair as needed.
- Evaluate joints: Ensure recessed joints are intact and not cracked. Repoint if necessary.
- Check flashing/weep drainage: Verify proper water drainage to prevent moisture buildup.
- Test for moisture content: Use a moisture meter to ensure the substrate is dry (ideally below 15%).
- Inspect previous repairs: Evaluate existing patches. Remove and redo if necessary.
- Check substrate rigidity: Gently push on the surface. Soft spots indicate potential issues.
Quick rule: If in doubt, consult a professional before proceeding to avoid costly mistakes.
Masking and protecting adjacent surfaces
Protect windows, trim, and landscaping from overspray and accidental damage with these simple steps.
Use painter’s tape to mask off areas you don’t want to be affected. Press down firmly to create a good seal.
For windows, lay plastic drop cloths over them, securing with tape if needed. Ensure the plastic is taut to prevent paint from getting underneath.
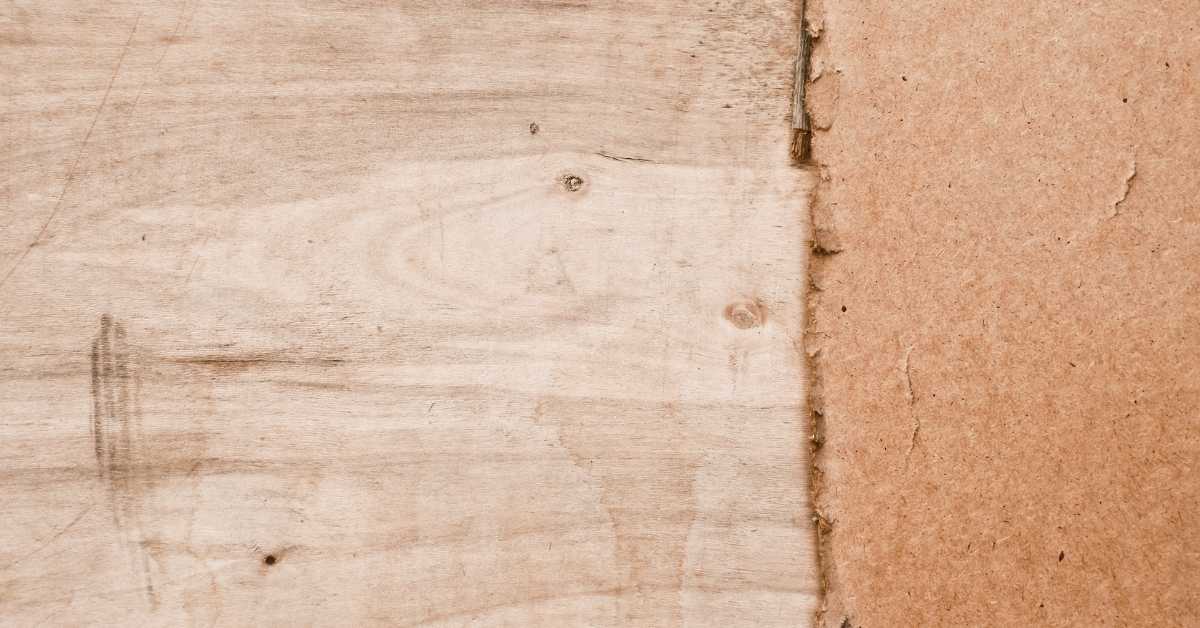
For trim and landscaping, use drop cloths or cardboard to protect these areas. Secure with tape or weights as necessary.
Prime Zones: Where and How to Apply Primer Before Patching
Prime zones are the perimeter around framed edges and feathered transitions where patching will occur. These zones help reduce bleed-through and improve adhesion. Defining them clearly prevents over-priming and missed areas.
Prepare the surface with cleaning and light sanding, ensuring the area is dry before applying primer. Choose primers compatible with painted stucco and patch materials, and consider a tinted primer if color bleed is a concern. Follow the product label for any timing and environmental conditions that affect performance.
Identifying exact areas to prime (hatbands and feather edges)
To prevent re-creating framing lines, mark and limit your primer application to transition zones only. Here’s how:
Hatbands: Apply primer along the perimeter of the framed area, about 2-4 inches wide. This helps seal the edges and prevents paint bleed-through.
Feather edges: Prime the feathered transitions where patching will occur. Use a brush or roller to apply primer in a tapering pattern, starting thick at the edge of the framed area and thinning out as you reach the unpainted stucco. This helps blend the patched area seamlessly into the existing surface.
Primer selection and material specs explained
Choosing the right primer is crucial for adhesion, stain-blocking, and overall patch success. Consider these factors:
- Bonding Primers: Use for better adhesion to painted surfaces. They’re ideal for sealing edges and preventing bleed-through.
- Stain-Blocking Primers: Apply where color bleed is a concern, like around trim or corners. They seal the surface and prevent stains from showing through.
- Tinted Primers: Use to match your existing paint color, helping hide any remaining imperfections after patching.
- Compatibility: Ensure your primer is compatible with both your painted stucco and chosen patch compound. Incompatibility can lead to cracking, staining, or weak bonds.
- Coverage: Check the coverage rating on the primer label. A higher coverage means you’ll use less product to achieve the desired results.
Drying, cure, and recoat considerations
Proper drying conditions are vital for primer performance. Here’s how to ensure your primer is ready for patching:
Temperature and Humidity: Primers typically perform best in temperatures between 50-90°F (10-32°C) with relative humidity below 85%. Avoid applying primer in extreme heat, cold, or high humidity.
Drying Time: Follow the manufacturer’s recommendations for drying time. This is usually around 1-4 hours, depending on the product and environmental conditions. To confirm, gently touch the primed surface with a clean, dry cloth. If no paint transfers, it’s ready for patching.
Cure Time: Some primers require a specific cure time before applying subsequent coats or patch compounds. Always follow the manufacturer’s guidelines to ensure optimal performance and adhesion.
Feathered Coating Repair Technique: Step-by-Step
Define prep zones on painted stucco by marking where prime will occur and where feather edges will blend. Establish a target feather width to minimize framing lines and make the repair less noticeable. Gather materials and mix the patch to the consistency recommended by the manufacturer.
Apply in small batches with a edge-led trowel technique, pressing to remove air voids and creating a smooth initial layer. Feather the edges by gradually tapering the thickness and maintaining a consistent motion to avoid sharp transitions. Allow a brief set and perform light passes to refine texture before the patch cures.
Step-by-Step Repair Process
Follow this clear, numbered sequence to achieve a seamless feathered coating repair on your painted stucco.
- Preparation: Inspect the area, gather materials, and put on PPE. Safety first!
- Mask off adjacent surfaces using painter’s tape and paper or plastic sheets.
- Main Work: Prime hatbands and feather edges as previously instructed. Let it dry according to manufacturer’s guidelines.
- Mix patch compound in small batches, ensuring correct consistency for feathering.
- Apply the patch: Use a trowel to apply the compound, compressing it onto the surface to avoid air voids. Make an initial smooth pass before feathering.
- Feather the edges: Work in small areas, using light passes and tool angles to taper the patch into the existing texture.
- Check your work: Inspect for any missed spots or visible lines. Make additional light passes if needed.
- Clean-up: Remove masking materials, clean tools, and dispose of waste properly.
- Final Checks: Allow the patch to cure according to manufacturer’s guidelines before applying a final texture match check.
Mixing consistency and preparing patch material
Achieving the right slump or consistency for feathering is crucial. Here’s how to get it right:
- Stucco Patch Compound: Look for a product compatible with your existing stucco. Read labels carefully.
- Water: Use just enough water to achieve a ‘mayonnaise-like’ consistency. Too much water weakens the bond and causes cracking.
- Mixing Time: Mix only what you can use within 30 minutes. Over-mixing or adding excess water ruins the batch.
- Color Matching: If needed, tint your patch compound to match your existing stucco. Follow manufacturer’s guidelines for accurate color matching.
- Avoiding Common Mistakes: Don’t add too much water or over-mix. Both lead to weak patches and visible lines.
Applying base patch and feathering outward
Start by applying the patch compound with a trowel or float, using even pressure. Work in small sections to avoid overworking the material.
Once you’ve applied the base patch, it’s time to feather the edges. Use a flexible trowel or float, and work from the center of the patch outward towards the existing stucco.
Apply light pressure as you move outwards, reducing the thickness of the compound until it blends seamlessly with the original surface. Remember, less is more when feathering. Too much compound creates visible lines.
Texture matching and blending tips
Replicating your stucco’s texture pattern is key to a seamless repair. Here are some tips:
Stippling: Use a stiff-bristled brush or a texturing comb to create small indents in the wet patch compound, mimicking the existing texture.
Tool Angles: Hold your trowel or float at different angles as you feather outwards. This helps to blend the patch into the existing stucco and hides transition lines.
Avoid Over-Smoothing: Be careful not to over-smooth the patch compound, especially when blending into the original surface. Too much smoothing can create visible lines or a shiny spot.
Finishing Steps, Painting, and Touch-Ups
After patching, sand lightly to create a uniform sheen and feather edges into the surrounding surface. Inspect for pinholes, ridges, or unpainted spots that could reveal the repair. Address any surface imperfections before final painting.
Choose exterior acrylic or elastomeric paint that matches color and sheen, and apply a compatible primer if needed. Use thin, even coats and appropriate rollers or brushes to blend edges. Test color in multiple lights and document color codes for future touch-ups.
Sanding, Inspection, and Visual Checkpoints
Before you pick up your paintbrush, follow this checklist to ensure a smooth, blended repair.
- Check for ridges: Run your hand over the patch. Feel for any raised edges or bumps that could telegraph through the paint.
- Inspect pinholes: Look closely at the patched area. Fill any tiny holes with spackling compound before painting.
- Verify feathering: Check where the patch meets the existing stucco. Make sure it’s well-blended and not too thick or thin.
- Check for unpainted spots: Ensure there are no missed areas that could show through the paint.
- Smoothness check: Lightly sand any rough patches with fine-grit sandpaper. Wipe off dust and recheck.
- Moisture test: Dab a small area with a damp cloth. If it darkens, you’ve got moisture to address before painting.
- Efflorescence check: Look for white, powdery deposits. If present, clean and treat the area before painting.
- Dry time check: Ensure the patch is fully dry (at least 24 hours) before painting to avoid moisture trapping.
Quick rule: A thorough inspection now saves touch-ups later.
Paint Selection and Application Strategies
Choosing the right paint and applying it correctly is key to a seamless repair.
Match sheen: Use an exterior acrylic or elastomeric paint that matches your existing stucco’s sheen. This ensures a uniform finish.
Use a compatible primer to ensure adhesion and uniform drying. Apply it only where you’ve patched, not the entire wall.
Apply thin coats: Use a micro-roller or brush for better control. Apply multiple thin coats (3-4) instead of one thick one to avoid drips and sags. Let each coat dry according to manufacturer’s instructions before applying the next.
Sealants, Protective Topcoats, and Final Inspection
After painting, follow this checklist to ensure durability and longevity.
- Check for missed spots: Inspect the entire repaired area. Touch up any missed or poorly covered areas.
- Inspect edges: Ensure the paint is well-blended into the surrounding stucco, with no hard lines.
- Dry time check: Allow the final coat to dry completely (at least 24 hours) before applying a sealant or topcoat.
- Apply breathable sealer/topcoat: Use a breathable sealant or topcoat to protect the paint and allow moisture evaporation. Apply it only where you’ve patched, not the entire wall.
- Moisture test: Dab a small area with a damp cloth after sealing. If it darkens, you’ve got a problem that needs addressing.
- Efflorescence check: Look for white, powdery deposits after sealing. If present, clean and treat the area before repainting.
Quick rule: A thorough final inspection ensures your repair lasts.
Preventive Measures and Long-Term Planning
Identify persistent moisture drivers such as drainage conditions, flashing, and stucco cracks, and consider how they contribute to framing over time. Understanding these factors helps you plan preventative work beyond the patch itself. A proactive approach sets the stage for lasting repairs.
Think about drainage improvements and movement accommodation, including joints and sealants, to reduce edge activity. When choosing coatings, consider long-term performance, breathability, and compatibility with primers and patches. Establish a simple maintenance routine to catch issues early.
Fixing underlying causes (flashings, joints, substrate)
Before you start patching, fix the root causes of picture framing. Here’s what to tackle:
Flashings: Check and repair any damaged or missing flashings around windows, doors, and roof edges. These keep water out and prevent moisture buildup.
Weep holes: Ensure stucco has proper weep holes at the bottom to allow trapped moisture to escape. If clogged, clean them out.
Control joints: Install expansion joints every 8-10 feet horizontally and vertically to accommodate stucco’s natural movement and prevent cracks from propagating.
Coating system choices for longevity
Select a durable coating system to minimize future picture framing. Here are key features to consider:
Low or zero-VOC: Choose paints with low or no volatile organic compounds for better indoor air quality and reduced environmental impact.
Elastomeric vs. breathable coatings: Elastomeric coatings stretch and move with the substrate, while breathable coatings allow moisture to escape. Both have their uses; choose based on your specific needs.
Compatible primers/top coats: Use a primer that bonds well with both the existing stucco and your chosen top coat. This ensures long-term adhesion and resistance to picture framing.
Maintenance and monitoring plan
Regular maintenance keeps picture framing at bay. Here’s a simple inspection checklist:
Seasonal checks: Inspect your stucco annually, especially after harsh winters or rainy seasons. Look for any new cracks, lifting, or staining.
Moisture meters: Use a moisture meter to check for hidden moisture buildup behind the stucco. If readings are consistently high in certain areas, investigate further.
Touch-up vs recoat: For minor issues like small cracks or edge lifting, touch up with paint and sealant. Recoat the entire area if you notice widespread problems or extensive damage.
Common Mistakes, Troubleshooting, and When to Hire a Pro
Be aware of frequent DIY missteps such as overly aggressive sanding, skipping moisture tests, using incompatible patch materials, neglecting edge feathering, and skipping primer. These choices often lead to rework or failed repairs. Quick checks help you spot potential problems early.
Develop a short troubleshooting plan for issues like finish sheen mismatch, texture differences, or new cracks. Include safety reminders and environmental considerations, plus a contractor interview checklist to compare bids, materials, warranties, and timelines when a pro is warranted.
Top DIY Pitfalls to Avoid
Here are some common mistakes homeowners make when patching painted stucco that can derail your repair.
- Overly aggressive sanding: Be gentle. Too much sanding removes too much material, weakening the surface.
- Skipping moisture tests: Moisture causes peeling and cracking. Always test before patching.
- Using non-breathable or incompatible materials: Stucco needs to breathe. Use compatible, breathable materials only.
- Neglecting edge feathering: Abrupt edges show up under paint. Feather out for a smooth blend.
- Skipping primer: Primer seals and promotes adhesion. Don’t skip this crucial step.
Remember, patience and careful preparation are key to a successful patch job.
Troubleshooting Reappearance or Staining
If your repair starts showing signs of trouble, act fast. Here’s how to diagnose and address the issue.
Reopening cracks: Check for underlying moisture or substrate issues. If found, address these first before repatching.
Staining or discoloration: This could be due to incompatible materials or improper sealing. Reprime and repatch if necessary.
Regular inspections can help catch any reappearance early, making touch-ups easier.
DIY vs Professional: Decision Factors and Contractor Questions
Know when to DIY and when to hire a pro. Here are some factors to consider.
Scope of work: Simple patches can be DIY, but larger repairs or complex issues may need a pro.
Materials and tools: If you don’t have the right materials or tools, it might be cheaper and safer to hire a pro.
When hiring, ask these questions:
– What’s included in the bid?
– Can I see references and past work?
– Will you test for moisture and address underlying issues?
– What kind of warranty do you offer?
Conclusion
Finish that patch with solid priming and a feathered coating, and you’ll get durability and a clean look that lasts. Focus on safe work habits and small, controlled steps so you don’t dent the stucco or waste time repainting later.
First, inspect the patch area, protect nearby surfaces, and gather the right tools and safety gear. Test primer in a hidden spot, apply primer only to the prepared zones, apply the feathered coat in thin, even layers, and let each coat cure before moving on. Check color and texture in good light, then finish with paint, touch-ups, and a careful cleanup before the job is done.
Common mistakes slow you down: skipping surface prep, skipping the proper primer zones, or laying thick coats that dry unevenly. Safety first means wearing eye and respiratory protection, securing ladders or scaffolds, and avoiding work in rain or extreme heat. Test in a hidden spot to confirm adhesion and color, and ensure you maintain feathered edges so the repair blends naturally.
If the patch requires large damage, unusual textures, or you’re unsure about primer zones, it makes sense to call a pro rather than push on blind. When in doubt, plan for a professional assessment and keep the project safe and controlled. Stay decisive, follow the steps, and you’ll protect the surface and achieve a durable, neat result.
FAQ
1. How can I tell if I’m dealing with picture framing on painted stucco and how do I identify it?
Picture framing shows as a boxed or framed look around a patch. Look for a slightly raised edge and a patch with a different texture or sheen. Check the area under the patch: edges often run in a straight line like a frame.
2. What basic tools do I need for patching painted stucco and creating a feathered edge?
Have a hawk or mud pan, trowels, a rubbing brick or sponge, and a brush for feathering. Use a patching base compound compatible with painted surfaces. Always follow product labels for mixing and clean-up.
3. What prep steps should I do before patching painted stucco?
Clean the area with a mild cleaner and let it dry. Remove loose paint and loose stucco from the patch zone. Duzz or scuff the edges slightly to help the patch grab and feather properly.
4. How do I apply primer over patches and feather the coating to blend with the surrounding paint?
Prime the patch and a small surrounding band to seal the repair. Apply the patching layer, then feather the edges by smoothing outward in thin passes. Let the primer and patch dry per the product instructions before painting.
5. How should I choose the right paint color and finish after patching?
Match the existing stucco color and finish as closely as you can. If color is off, test a small area first and blend with a slightly lighter or darker shade as needed. Use a finish that matches the current surface (flat, eggshell, satin) and follow the label for top coat recommendations.