
Introduction
Painting stucco after patch repairs means applying a fresh coat once patched areas have fully cured to protect and blend with the rest of the wall.
Treat the patched spots as part of the surface and plan for color uniformity across the whole wall. Avoid rushing the cure; follow product labels and local rules for drying times, and use clean, compatible materials.
Timing the paint after patch work hinges on surface dryness and cure, so check the patch and room conditions before painting. Choose a primer compatible with stucco and the chosen topcoat, and plan for feathered edges to minimize halos. Practice touch-up techniques on a small area first and prepare surrounding surfaces to keep lines clean; if in doubt, verify with manufacturer instructions or local guidelines.
Key takeaways
- Wait until patched stucco is dry to the touch before painting.
- Use a breathable elastomeric primer on stucco to seal repairs.
- Apply primer evenly to avoid halo rings around patched areas.
- Identify and prep touch-up zones with clean edges and feathered transitions.
- Wear eye protection and gloves; ensure ventilation and weather considerations.
Table of Contents
- Introduction
- Key takeaways
- When to Paint After Stucco Patching (Timing)
- Step-by-Step Patch Repair Checklist
- Primers for Stucco: What to Use and Why
- Painting Techniques to Avoid Halo Rings
- Tools and Materials Checklist
- Paint Choices and Eco-Friendly Options
- Safety, Budgeting, and Project Planning
- Aftercare, Maintenance, and Common Mistakes to Avoid
- Conclusion
- FAQ
When to Paint After Stucco Patching (Timing)
Look for visual and tactile cure indicators on the patch, not a clock. Check color fade, hardness to touch, and surface feel by gentle pressure or a fingernail scratch.
Always consult the patch product and primer or paint instructions for any minimum wait time, and compare those with the current weather conditions. Review looming rain risk, humidity, and temperature range, plus whether the area has shade or sun exposure to gauge moisture evaporation and finish adhesion.
Recognizing cure and dryness
Check your patched stucco for visual signs of cure. The patch should blend in with the surrounding surface, no longer looking fresh or wet.
The color should have faded to match the existing stucco. If it’s still vibrant, it’s not ready.
Test with a gentle touch. The patch should feel hard and dry, like the rest of your stucco. Press lightly; if it feels soft or gives way, it needs more time.
Try a fingernail scratch test. If you can’t leave a mark, it’s ready for primer. If your nail sinks in, wait longer.
How weather and season affect timing
Temperature and humidity impact drying time. In hot, dry conditions, patches cure faster. In cold or humid weather, they take longer.
Avoid painting in extreme temperatures. It’s best to paint when the temperature is between 50-90°F (10-32°C).
Check the rain forecast. Paint shouldn’t get wet for at least 24 hours after application. So, avoid painting before a rainstorm.
Shade can also affect drying time. Patches in direct sunlight cure faster than those in the shade. Adjust your timing accordingly.
Fast-setting vs cement-based patches
Fast-setting patches can be ready for primer in as little as 30 minutes, but they often require special primers to prevent halo rings.
Cement-based patches take longer to cure – usually a few days. But they’re more forgiving and don’t typically need special primers.
Vinyl patches are different. They don’t harden like cement-based ones, so check the manufacturer’s instructions for specific timing and primer needs.
Always follow the manufacturer’s guidelines for your specific patch type to ensure proper cure before priming and painting.
Step-by-Step Patch Repair Checklist
Start with a quick damage assessment and moisture check to ensure the patch will cure properly. Identify whether expansion cracks, water intrusion, or underlying substrate issues need repair first.
Gather materials and protect surrounding surfaces: patch mix or pre-mixed patch, bonding agent, trowels, hawk, texturing tools, painter’s tape, drop cloths, and appropriate PPE. Prepare the surface by removing loose material, cleaning debris, and lightly dampening the area to improve patch adhesion without soaking.
Step-by-Step Repair Process
Follow this checklist to ensure a smooth and effective patch repair on your stucco surface.
- Inspect damage: Check for expansion cracks, water intrusion, or substrate issues before patching.
- Gather materials: Have stucco patch mix, bonding agent, trowels, hawk, texturing tools, tape, drop cloths, and PPE ready.
- Protect surroundings: Tape off areas and lay down drop cloths to prevent paint or patch from getting on unwanted surfaces.
- Remove loose material: Scrape off any damaged stucco using a trowel or putty knife. Skipping this can lead to an uneven surface.
- Clean the area: Remove dust and debris with a damp cloth. A clean surface ensures better adhesion.
- Lightly dampen: Moisten the area slightly to improve patch adhesion, but avoid soaking it as this can cause curing issues.
- Prime edges: Apply a thin layer of primer on bare edges to help with feathering and prevent future seams from showing.
- Apply bonding agent: If required by your patch product, apply a bonding agent for better adhesion and strength.
- Lay base coat: Apply a thin layer of patch or underlayment to level the area and build up to the surrounding plane. This step is crucial for a smooth finish.
- Patch and feather: Apply patch material in thin layers, feathering edges outward to blend with existing stucco. Skipping this can result in visible seams.
- Texture the patch: Use your chosen technique (trowel, brush, or spray) to mimic surrounding texture for a seamless look.
- Let it cure: Allow the patch to cure according to product instructions. Rushing this step can lead to weak patches that crumble or crack over time.
- Inspect for uniformity: Check for any color variance, uneven texture, or visible seams before priming and painting.
Quick rule: Always follow the manufacturer’s instructions for specific products to ensure optimal results.
Surface preparation and cleaning
Before applying any patch material, prepare your stucco surface with these steps for better adhesion and a smooth finish.
- Remove loose material: Use a trowel or putty knife to scrape off any damaged or crumbling stucco. This ensures a stable base for your patch.
- Clean dust and debris: Remove all dirt, mildew, and other contaminants using a damp cloth or brush. A clean surface promotes better adhesion of the patch material.
- Lightly dampen the area: Moisten the repair area slightly to improve patch adhesion without soaking it, which can hinder curing.
- Check for moisture: Ensure the underlying substrate is dry before patching. Moisture can cause patches to fail and lead to further damage.
Quick rule: Never apply patch material on a dirty, damp, or structurally unsound surface.
Proper mixing and applying patch materials
Mixing and applying your stucco patch correctly is crucial for a durable, long-lasting repair.
- Mix consistently: Follow the manufacturer’s instructions to mix your patch material thoroughly. Inconsistent mixing can lead to weak patches that crumble or crack over time.
- Apply bonding agent (if needed): If required by your patch product, apply a thin layer of bonding agent on the repair area for better adhesion and strength.
- Lay base coat: Apply a thin layer of patch or underlayment to level the area and build up to the surrounding plane. This step helps create a smooth, seamless finish.
- Feather edges: Apply patch material in thin layers, feathering edges outward to blend with existing stucco. Overbuilding the patch can result in visible seams and a rough texture.
- Avoid overbuilding: Be mindful of how much patch material you’re applying at once. Too much can cause the patch to sag or crack as it cures.
Quick rule: Always follow the manufacturer’s mixing and application guidelines for optimal results.
Matching texture and letting patches cure
After applying your patch material, follow these steps to ensure a seamless blend with the surrounding stucco and allow proper curing.
- Match existing texture: Use your chosen technique (trowel, brush, or spray) to mimic the surrounding stucco’s texture. This helps create an invisible repair.
- Let it cure partially before texturing: Allow the patch to cure slightly before texturing to prevent damaging the fresh material and ensure a consistent finish.
- Texture the patch: Use your chosen technique (trowel, brush, or spray) to mimic surrounding texture for a seamless look. Skipping this step can result in visible patches.
- Allow full curing time: Let the patch cure according to product instructions before priming and painting. Rushing this step can lead to weak patches that crumble or crack over time.
- Inspect for uniformity: Check for any color variance, uneven texture, or visible seams before priming and painting. This ensures a consistent finish across the entire surface.
Quick rule: Always follow the manufacturer’s curing instructions to ensure optimal results and prevent damage to your patch repair.
Primers for Stucco: What to Use and Why
Identify primer categories suitable for stucco and patched areas, such as acrylic latex primers, bonding primers, masonry primers, and alkyd-based primers. Explain where each excels or falls short based on adhesion and surface prep needs.
Discuss permeability and breathability, emphasizing vapor-permeable primers to prevent moisture entrapment. Note any exceptions where a moisture barrier might be required and where guidance from product labels or manufacturer instructions should be followed.
Primer types explained (acrylic, bonding, elastomeric, masonry)
When it comes to primers for stucco, you’ve got a few options. Each has its own strengths and best use cases.
Acrylic Primers: These are your all-around workhorses. They’re cheap, easy to apply, and suitable for most substrates like plywood, OSB, or even concrete. They seal the surface, prevent moisture from getting in, and help your stucco stick better.
Bonding Primers: These are like superglue for your stucco. They’re great when you’ve got a tricky substrate that needs extra help to bond with – think metal lath or foam insulation boards. But be careful, they can be too aggressive and cause problems if not used right.
Elastomeric Primers: These are like a flexible sealant in a can. They’re perfect for areas that see a lot of movement – think expansion joints or where your stucco meets other materials. They’ll stretch and flex with the surface, keeping cracks at bay.
Masonry Primers: These are designed to work best on masonry surfaces like brick or block. They penetrate deep into the pores, creating a strong bond for your stucco. But they can be too thick and cause problems if used on wrong substrates.
How to apply primer for best results
Applying primer right is key to a solid stucco finish. Here’s how:
Check your primer type. Acrylic goes on thin, bonding needs good coverage, elastomeric and masonry can be thicker.
Use a good quality brush or roller for even application. Don’t skimp here, it’s worth the extra few bucks.
Shoot for these film builds: acrylic at 3-5 mils, bonding at 4-6 mils, elastomeric/masonry at 8-12 mils. Check product labels for specifics.
For feathered edges, use a dry brush or roller to lightly blend the primer into the adjacent surface. This hides transitions and reduces cracking.
Coverage, adhesion tests, and recoat guidance
Before you start, check your primer’s label for coverage rates. It’ll tell you how much area one gallon covers. Don’t guess; it’s your guide.
Now, do a small adhesion test. Apply primer to a hidden spot on your stucco. Let it dry as per the label. Then, try to scratch or peel it off. If it sticks like glue, you’re good to go. If not, recheck your surface prep.
When recoating, follow the label’s instructions. Don’t just wait a day or two and slap on another coat. Some primers need up to 30 days between coats. Patience pays off here; rushing leads to poor adhesion and wasted effort.
Painting Techniques to Avoid Halo Rings
Outline proper sequencing: when to apply patch description versus after-patch primer and paint, and how long to wait between steps to minimize edge penetration and texture changes. Avoid sharp boundary lines by planning the order of operations around the patched area.
Cover feathering and blending techniques, wet-edge management, and texture matching. Include practical brush or roller motions, pressure control, and testing on inconspicuous spots to verify uniformity before full coverage.
Blending and feathering techniques
Alright, listen up. You’ve patched that crack or hole, now let’s make it disappear.
First off, you gotta feather out your paint from the repair. That means start painting from the edge of your patch and work your way out. Don’t just slap a coat on and call it a day.
Now, here’s where most folks mess up. They let their paint dry too fast. You wanna keep those edges wet, so they blend together nice and smooth. Check your paint label for drying times, but aim to work in sections small enough that you can keep everything wet.
And remember, no heavy coats. That’s just asking for trouble. Keep it light and even. You can always come back for another coat if you need to.
Roller, brush, and spray strategies
Alright, let’s talk tools. You’ve got your roller, your brush, and maybe even a paint sprayer. Each has its place, but they all need some know-how to avoid those nasty halo rings.
Rollers: Use a nap that matches your surface. Short nap for smooth walls, longer for textured ones. Overlap each stroke by about half the roller width. Don’t press too hard, let the paint do the work.
Brushes: For trim and edges, use an angled brush. Work in small sections, blending into the wall with a ‘W’ or ‘M’ pattern to avoid lap marks. Keep your brush wet but not dripping.
Sprayers: Set your sprayer to medium fan width and flow rate. Overlap each pass by about half the spray width. Keep it moving, don’t linger on one spot. And for Pete’s sake, wear a mask and goggles!
Color, Sheen, and Wet-Edge Management
Halos happen when your new paint doesn’t blend with the old. It’s all about managing color contrast and drying times.
Sheen matters: High-gloss paints dry slower than flat or eggshell. Mixing sheens can cause halos. Stick to one sheen for a smooth finish.
Check your paint labels, they’ll tell you the drying time. Match drying times when blending new and old paint. If you’re unsure, test on a scrap piece first.
Wet-edge management: Keep a ‘wet edge’ while painting to blend colors. Don’t let your roller or brush dry out between strokes. Work in small sections at a time.

Tools and Materials Checklist
Core patching and surface-prep tools include putty knives, hawk and trowel, sanding blocks, stiff brush, bucket, scotch-brite, chimney brush for gaps, a pole sander, masking tape, drop cloths, and plastic sheeting. Protect surroundings as you work.
Primers and paints should be stucco-friendly, with attention to bonding or etching primers if the area is porous or newly patched, and exterior-grade products. Review film-thickness, coverage per coat, recoat windows, and cure times on product labels.
Essential tools for patching and painting
Before you start, make sure you have all the right tools to get the job done efficiently. Here’s a checklist of essentials.
- Trowels & Hawks: For applying and spreading patch compounds. Skip this, struggle with application.
- Rollers & Brushes: For painting. Different sizes for different tasks. Miss this, uneven coverage.
- Sprayer (optional): For even texture and paint application. Don’t use, risk halo rings.
- Sanding Blocks/Pole Sander: To smooth patches before painting. Skip, rough surfaces remain.
- Stiff Brush & Chimney Brush: For cleaning gaps and crevices. Miss this, dirt affects adhesion.
- Masking Tape & Drop Cloths: Protect surroundings from paint. Don’t use, risk damage to nearby surfaces.
- Plastic Sheeting: Cover large areas for protection. Skip, overspray causes mess.
- Moisture Meter & Flashlight/Raking Light: Check moisture levels and inspect for halo rings. Miss this, paint peels or halos appear.
Quick rule: Gather all tools before starting to avoid mid-job trips to the store.
Materials and accessory supplies
Having the right materials on hand ensures a smooth patching and painting process. Here’s what you need:
- Patch Compounds: Choose stucco-specific compounds for best results. Skip, patches may not last.
- Primers: Bonding/etching primers for porous or patched surfaces. Miss this, paint peels.
- Paints: Low-VOC, elastomeric or acrylic, exterior-grade paints. Don’t use interior paints, they won’t last outdoors.
- Tapes & Masks: For protecting edges and breathing safety. Skip, risk paint bleeding or health issues.
- Fasteners (if needed): For securing loose stucco. Don’t use, loose pieces fall off.
- Texture Additives & Tools (optional): To match existing texture. Miss this, new patches stand out.
- Adhesion/Test Panels: Check paint adhesion before full application. Skip, find out too late that paint doesn’t stick.
- Sample Patches: Verify color match before painting entire area. Don’t use, risk painting wrong color.
Quick rule: Buy a bit extra of everything in case you need to touch up or redo any areas.
Material specs and safety data notes
Before using, review technical data sheets (TDS) and safety data sheets (SDS) for each product to ensure safe application. Here’s what to check:
- VOC Content: Check low-VOC paints to minimize environmental impact. Don’t use high VOC, risk health issues.
- Temperature & Humidity Ranges: Ensure products can be used in your current weather conditions. Use outside these ranges, application may fail.
- Compatibility: Check if primers and paints are compatible with your stucco surface. Don’t use incompatible materials, risk peeling or discoloration.
- Cure/Rewet Times: Follow these to avoid damaging patches or paint. Ignore, risk ruining work.
- Ventilation & PPE Requirements: Follow safety guidelines for each product. Don’t use without proper ventilation/PPE, risk health issues.
Quick rule: Always read and follow the manufacturer’s instructions to ensure safe and effective application.
Paint Choices and Eco-Friendly Options
Cover core exterior stucco paint formulations and how each handles patched areas and hairline cracks. Compare acrylic, elastomeric, and breathable options without assuming a single best choice.
Explain trade-offs among durability, elasticity, and vapor permeability, with guidance on matching patch-repair textures and porosity. Include reminders to consult product data sheets for compatibility with primers and coatings, and consider low-VOC options where appropriate.
Best paint types for exterior stucco
When choosing a paint for your exterior stucco, look for flexibility and UV resistance. These properties will help your paint stand up to the elements and maintain its appearance over time.
Acrylic paints are a popular choice due to their durability, elasticity, and breathability. They can handle patch repairs and hairline cracks well. However, they may not provide the best hide for larger patches or repairs.
Elastomeric paints offer excellent flexibility and can bridge minor cracks. They’re great for areas with frequent temperature swings but may not be as breathable as acrylic paints.
Breathable-block paints allow moisture to escape, preventing trapped water from causing damage. They’re ideal for humid climates but might require more coats to achieve full coverage.
Low-VOC and eco alternatives
When going green, look for paints with low or zero VOCs (volatile organic compounds) and low odor. These products are better for the environment and your health.
Water-based paints are typically low in VOCs but may not have the same durability as oil-based paints. Silicone-based paints offer good performance and low VOCs, while mineral paints provide eco-friendly options with excellent breathability.
When choosing greener options, verify their performance aspects such as durability, elasticity, and color longevity to ensure they meet your needs.
Consider using a primer designed for low-VOC paints to improve adhesion and coverage. Always follow the manufacturer’s guidelines for application and safety.
Finish and sheen recommendations
Choosing the right finish and sheen is crucial for balancing hide, washability, and halo visibility. For exterior stucco, a satin or semi-gloss sheen is usually best.
Satin finishes provide good hide, are easy to clean, and have low reflectivity, reducing the appearance of halo rings. They’re suitable for most climates but may not be the best choice in areas with heavy pollution due to their lower washability.
Semi-gloss sheens offer excellent durability, washability, and hide. They’re a good choice for areas prone to dirt or mildew but can reflect more light, potentially increasing halo visibility.
When matching the existing surface, consider using a paint with similar sheen and texture. This will help ensure a consistent appearance across your patched repairs and the original surface.
Safety, Budgeting, and Project Planning
Outline ladder use, PPE, and safe handling of tools and cleaners for stucco work. Emphasize fall protection basics and proper setup to minimize risk on exterior surfaces.
Identify overhead hazards, weather constraints, and surface conditions that affect cure times. Provide budgeting pointers, a patch-to-paint timeline, and guidance on deciding when to hire a pro if the patch is complex or texture matching is critical.
Ladder, scaffold, and PPE precautions
Working at height requires careful planning. Always set up your ladder on a stable surface, with the base one foot away from the wall for every four feet of ladder height. Follow local codes and regulations.
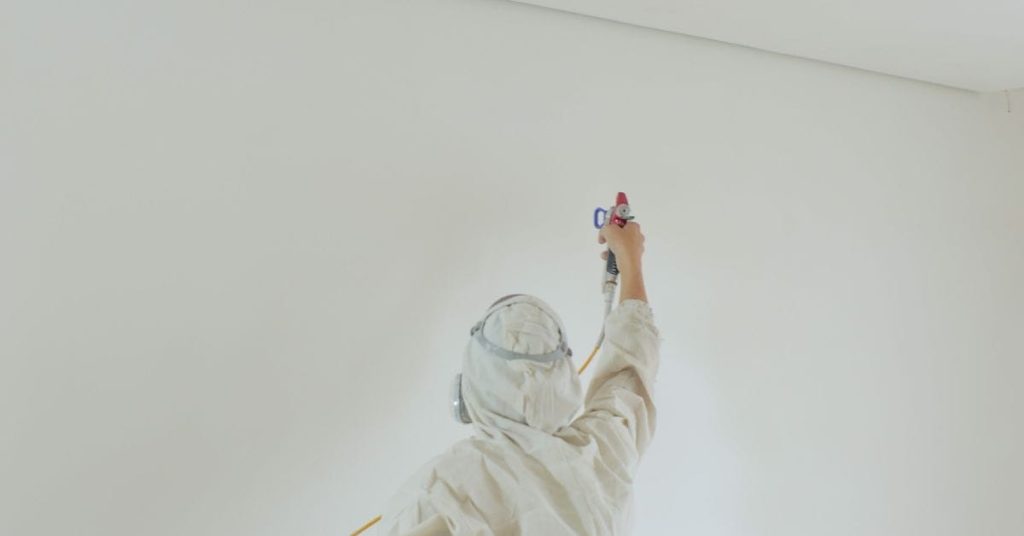
Wear appropriate safety gear: non-slip shoes, gloves, eye protection, and a harness if you’re more than 6 feet off the ground. If sanding or spraying materials, use a respirator to protect against dust and fumes.
Inspect your ladder before each use. Ensure all rungs are secure, and there are no cracks or damage. Keep three points of contact at all times – two hands and one foot, or two feet and one hand.
Estimating costs and time for the project
First, calculate your surface area. A rough estimate is square footage times 10 for a single-story home. Add 20% for waste and overage.
Material costs: Paint, primers, patch materials, caulk, and tools rental will be your main expenses. Allocate 10-20% as a contingency for hidden repairs or prep work.
Time planning is crucial. Allow at least two weeks for the project, including drying/curing windows between steps. Plan for multiple coats of paint, and schedule weather windows to avoid delays due to rain or high heat.
When to call a professional
DIY is great, but know your limits. If you find extensive stucco damage, structural concerns, or difficult access areas, it’s time to hire a pro.
Complex patch repairs require specialized knowledge and tools. A contractor can ensure the repair blends seamlessly with the existing texture and finish.
If you’re unsure about matching the original color or texture, consult a professional. They have access to specialized products and techniques that may be beyond a DIYer’s reach.
Aftercare, Maintenance, and Common Mistakes to Avoid
Define a practical maintenance schedule with initial checks and seasonal considerations after painting. Note how weather events can impact stucco and adherence over time.
List common mistakes and fixes, such as cleaning or prepping incorrectly, painting too soon, or using incompatible primers. Include remediation steps and a simple documentation method to track future maintenance and color matches.
Maintenance checklist and inspection tips
Use this checklist regularly to keep your stucco looking great and prevent future repairs.
- Every 4-6 weeks: Check for cracks, blisters, or peeling paint. Catching these early prevents bigger issues.
- Quarterly: Inspect for moisture staining or efflorescence. These can indicate water intrusion.
- After heavy rain: Look for new cracks or soft spots. Heavy rain can exacerbate existing damage.
- Before winter: Ensure there are no loose or peeling areas that could worsen with freeze-thaw cycles.
- After painting: Document the date, observed conditions, and any touch-ups needed in a maintenance log.
- Seasonally: Check for halo rings around patch edges. These can indicate adhesion issues.
- Annually: Re-evaluate your paint color match and update notes as needed.
Quick rule: Inspect regularly to catch failing areas early and prolong results.
Common mistakes and how to fix them
Here are some common DIY errors and how to avoid or fix them.
- Applying paint too soon: Wait at least 28 days after patching before painting. This gives the patch time to cure properly.
- Using wrong primer: Ensure your primer is compatible with both your stucco and topcoat. Incompatible primers can cause adhesion issues.
- Poor texture match: Use a paint with similar sheen and texture to the surrounding area to avoid a mismatched look.
- Painting in extreme temperatures or humidity: Paint when temperatures are between 50-90°F (10-32°C) and humidity is below 80% for best results.
Addressing these issues promptly will help maintain your stucco’s appearance and longevity.
Troubleshooting halo rings and touch-up strategy
Halo rings can appear around patch edges due to poor adhesion. Here’s how to fix them:
Mild cases: Lightly sand the area, re-prime with a bonding primer, and repaint, feathering the edges to blend with the surrounding paint.
Severe cases: If halo rings are large or widespread, it may be best to repaint the entire affected area for a consistent look. Always test your touch-up in an inconspicuous spot first to ensure color match.
Preventing future halo rings: Ensure proper surface preparation and priming before painting, and allow adequate cure time for patches.
Conclusion
The key to a durable, clean finish is painting after patch work only when the surface is truly ready. Take your time with the cure, prep, and primer, or you’ll waste money and lose appearance fast.
Check the weather window and surface condition, confirm the patch has fully cured, clean and dry the area, apply the recommended primer for stucco, let the primer dry completely, choose the right paint and eco-friendly option, apply in thin, even coats, and inspect for any halo signs before the final cure. Do all of this in that practical sequence and you’ll avoid missteps and costly rework.
Common mistakes to avoid are rushing the timing, skipping or undersizing primer, and using the wrong brush or roller technique that creates uneven coverage or halo rings. Safety rules are simple: wear PPE, cover nearby surfaces, test a small area first, mix paint and primer as directed, work in good light and ventilation, and don’t overwork the surface. If you hit stubborn cracks, suspect structural issues, or the patch area is large, don’t push past practical limits—call a pro and get a solid plan before you proceed.
If you know when to call in help, you’ll stay safe and finish strong. When in doubt about large repairs, complex substrates, or persistent defects, bring in a professional, then carry on with the rest of the plan. Stay steady, follow the steps, and you’ll end with a finish that lasts and looks right.
FAQ
When is it safe to start painting after patching stucco?
Wait for the patched area to dry and cure per the patch product’s instructions, then test for color and adhesion on a small area. If the patch still feels soft or tacky, hold off until it air dries completely. Check the manufacturer label for any guidance on recoat times or surface preparation.
How do I choose the right primer for stucco patches?
Use a primer specified for exterior stucco or masonry surfaces and for use with the topcoat you plan to apply. Look for compatibility with both the patch material and the finish paint, and follow the label’s instructions for surface prep. When in doubt, ask the paint store or check the product datasheet.
What techniques help prevent halo rings around patched areas?
Feather the edges of the patch and blend with a primer before topcoat to reduce contrast. Apply paint in thin, even coats and match sheen and color to the surrounding surface. If halos persist, check that the patch, primer, and paint are compatible and that the patch is fully dry before refinishing.
How should I identify touch-up areas and clean them up safely?
Inspect for edges that stand out, then mark and prep only patches that are dry and properly bonded. Clean nearby surfaces with a gentle method and mask off areas you don’t want painted. Wear basic safety gear and follow product labels for room ventilation and cleanup rules.