
Introduction
The timeline for painting pressure-treated lumber is crucial to ensure a durable, long-lasting finish. Rushing the process can lead to peeling, warping, or mildew growth.
Understanding the drying time and when to test your lumber is key. Here’s a step-by-step timeline to guide you through the process.
For the full guide, see Painting Pressure-Treated Lumber: Moisture Tests and When It’s Actually Ready.
The Step-by-Step Timeline for Painting Pressure-Treated Lumber
Follow this timeline to ensure your pressure-treated lumber is ready for painting:
- Day 1-3: Unpack and Acclimate – Allow the lumber to sit in a dry, shaded area to begin acclimating to its new environment.
- Day 4-7: Initial Moisture Test – Use a moisture meter or simple tests like the cup test to check if the wood’s moisture content is within the paint manufacturer’s recommended range. If not, continue to the next step.
- Day 8 and Beyond: Drying Period – If the initial test shows high moisture content, allow the lumber to dry further under cover in a dry, shaded area. Retest every few days until it reaches the desired moisture level.
- Day X (when ready): Surface Preparation – Once the lumber is dry enough, prepare the surface by roughening and removing dust for better primer adhesion and paint finish.
- Day X+1: Priming – Apply a compatible, stain-blocking primer formulated for treated wood. Follow the manufacturer’s instructions for drying time.
- Day X+2: Painting – Paint the lumber using your chosen exterior-grade paint. Again, follow the manufacturer’s instructions for drying and recoating times.
By following this timeline, you’ll ensure that your pressure-treated lumber is ready for painting, resulting in a durable, long-lasting finish.
Key takeaways
The preparation time before painting directly affects the overall project schedule. Plan accordingly to ensure you have enough time for each step in the timeline.
- You can paint pressure-treated lumber once moisture is sufficiently tested and dry.
- Plan for thorough moisture testing before paint, using reliable methods and interpreting results carefully.
- Waiting time depends on wood condition and environment; check manufacturer instructions.
- Moisture tests guide dryness; painting too soon risks peeling and poor adhesion.
- Choose exterior-grade primer and paint compatible with treated wood; follow label.
- Safety: wear protective gear, ensure ventilation, and dispose of waste per local rules.
Table of Contents
- Introduction
- Key takeaways
- Can You Paint Pressure-Treated Lumber?
- How Long Should You Wait Before Painting?
- Moisture Testing Methods and How to Interpret Results
- Preparing Pressure-Treated Lumber for Paint
- Primer and Paint Selection for Pressure-Treated Wood
- Best Application Techniques and Environmental Conditions
- Risks, Common Mistakes, and How to Fix Failures
- Safety, Handling, and Environmental Considerations
- Conclusion
- FAQ
Can You Paint Pressure-Treated Lumber?
Yes — painting pressure-treated lumber is a valid finish option, but only after the wood has dried to an appropriate moisture level; painting while the lumber is still wet commonly leads to adhesion failure. Finishing with paint or a compatible sealer helps reduce moisture cycling at the surface, limits surface checks, and improves color longevity when coatings are chosen to match the exposure and substrate.
To verify readiness use a moisture meter (pin or pinless) and sample several boards and board ends rather than relying on appearance alone; check the paint or primer label or product data sheet for the manufacturer’s acceptable substrate moisture guidance. Take your time: drying after installation depends on weather and wood type, re-check after rain or seasonal swings, and follow proper surface prep—clean, bright, and dry—before priming and topcoating to avoid trapping moisture under the film.
Why waiting matters
Pressure-treated lumber retains moisture and treatment chemicals that can interfere with paint adhesion and finish longevity.
When you rush to paint, these trapped substances can cause your coating to peel or crack over time. It’s like trying to glue wet wood – it just won’t stick right.
Patience is key. Let the lumber dry out naturally before applying any finish. This way, you’ll get a better bond and longer-lasting results.
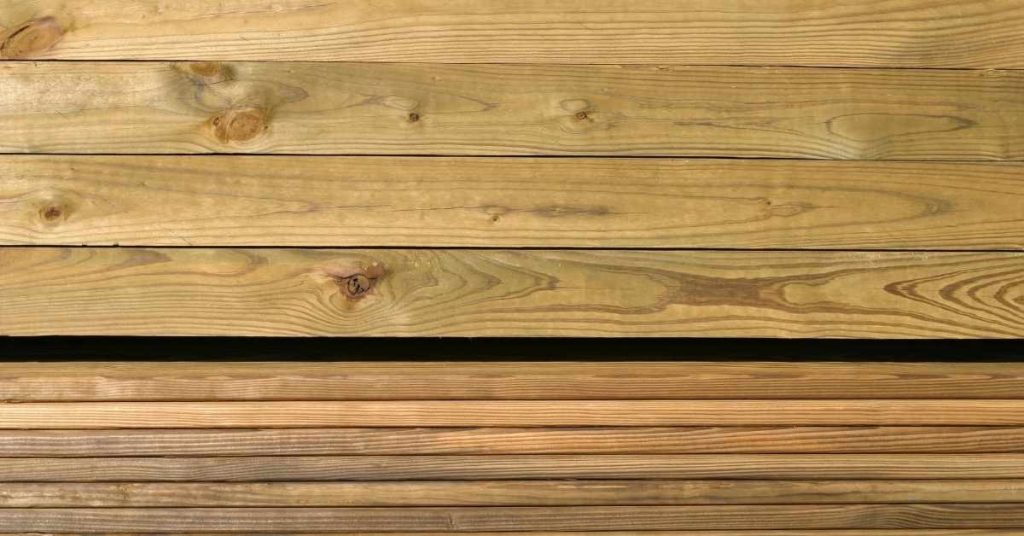
Types of pressure-treated lumber to know (KDAT, green, ACQ, CA)
Understanding the type of treatment your lumber has undergone can help you determine how long it needs to dry and what kind of finish works best.
KDAT (kiln-dried after treatment) dries quickly and is ready for painting soon after installation. Green lumber, on the other hand, takes longer to dry due to its high moisture content.
ACQ (alkaline copper quaternary) and CA (chromated arsenate) treated woods have different drying times and may require special handling or primers. Always check your lumber’s specific treatment type before painting.
How Long Should You Wait Before Painting?
There is no single universal wait time because drying depends on multiple variables: initial moisture content, wood species and thickness, whether it was kiln-dried or still green, and local climate and airflow. Each factor can speed up or slow down drying, so expect a range of possible timelines and plan to verify readiness rather than rely on a fixed interval.
Use a moisture meter to confirm the lumber is within the acceptable moisture range listed on the coating’s technical data sheet, and perform tests at multiple locations including cut ends and near fasteners. If readings are borderline, delay and re-test, or improve drying conditions; perform light sanding or wipe-clean steps before priming, and always follow manufacturer instructions for acceptable substrate conditions.
Factors that change drying time
The time it takes for pressure-treated lumber to dry depends on several factors. Here’s what you need to know:
Climate: Warmer, drier climates speed up the process. In humid regions, expect longer wait times.
Board thickness: Thicker boards take longer to dry than thinner ones. A 2×4 will dry faster than a 6×6.
End-grain exposure: Boards with exposed ends (like those used for joists) dry slower as end grains absorb and release moisture quickly.
Practical timeline guidance and what to check
Before you start painting, use this checklist to ensure your pressure-treated lumber is ready. Start checking after at least two weeks, but remember, it could take up to a few months depending on the factors we discussed earlier.
- Supplier tags: Check if they mention drying times or special handling instructions.
- Product instructions: Follow manufacturer guidelines for painting and sealing.
- Moisture content: Use a moisture meter (pin-type or pinless) to test for 15-19% moisture content, ideal for most paints and primers.
- Surface dryness: Touch the wood. If it feels cool or damp, it’s not ready.
- End grains: Check these carefully as they can retain moisture longer.
- Sealer recommendations: Follow your paint manufacturer’s sealer suggestions to improve adhesion.
- Cleanliness: Ensure surfaces are clean and free of dirt, debris, or mill glaze (a waxy residue).
- Sanding: Lightly sand rough spots with fine-grit sandpaper for better paint adhesion.
Quick rule: If your readings are borderline (18-20%), recheck, lightly resand, or wait a bit longer before painting to avoid issues.
Moisture Testing Methods and How to Interpret Results
Compare tests before you rely on one: pin-type meters read electrical resistance through the wood and are good for surface-to-interior checks, while pinless meters scan a shallow area without penetration; the water droplet test and visual checks are quick indicators but less precise. Each method has trade-offs—pin meters are more precise at specific depths, pinless meters are faster for broad checks, and the water test reveals surface repellency rather than internal moisture.
When testing, sample multiple boards, ends, and newly cut areas and log the readings to spot trends; interpret results against the moisture limits specified on the paint/primer data sheet rather than a universal number. If readings approach the manufacturer’s upper limit, continue drying and re-test; if surface readings are low but cores remain wet, delay coating and consider additional conditioning or ventilation before priming.
Moisture meters — pin vs. pinless and how to use them
Both pin-type and pinless moisture meters measure wood’s moisture content (MC), but they work differently.
Pin-type: Drives pins into the wood, measuring resistance between them. Pros: Cheap, easy to use. Cons: Less accurate, destructive.
Pinless: Sends electrical signals through the wood without penetrating it. Pros: More accurate, non-destructive. Cons: Pricier.
Before using, check your paint/primer or lumber-supplier’s target MC. Take multiple readings across boards, near ends, and in newly cut areas. Re-check after a few days to ensure stability.
Water droplet (bead) test and visual checkpoints
Use this quick test when you’re unsure about wood’s readiness. It’s especially useful for pressure-treated lumber.
- Darkening: Wood absorbs water, turning darker. If it stays dark, it’s still wet.
- Mildew: Wet wood can grow mildew. See spots? Wait longer.
- Sap: Fresh sap indicates green wood. Let it dry more.
- Bead test: Place a few drops of water on the surface. If they soak in quickly, wait. If they bead up and stay, you’re good to go.
Quick rule: If water beads up but there are other signs of moisture, re-check later.
When to use advanced or repeated monitoring
For high-value projects, consider more advanced methods. Weigh samples before and after drying for precise MC readings.
Lab testing: For critical projects, send samples to a lab for accurate, detailed reports.
Log readings over time to track progress. Re-test every few days until results stabilize. Why? Some woods dry slowly or unpredictably. Better safe than sorry.
Preparing Pressure-Treated Lumber for Paint
First confirm moisture readiness with a meter and feel checks; only proceed when readings meet the coating manufacturer’s requirements and the surface is free of blanching or surface dampness. Address any repairs—replace or tighten loose boards, fill cracks where appropriate, and sand raised grain or rough spots that will prevent a uniformly bonded coating.
Clean thoroughly to remove dirt, tannin stains, and biological growth with appropriate cleaners or a diluted detergent, rinse well, and treat mildew or algae with a labeled cleaner and rinsing protocol. After the wood is dry, perform light sanding to create a keyed surface, remove dust, then prime with a product recommended for treated lumber or follow label instructions for sealing and topcoat compatibility.
Cleaning and mildew/algae removal
Pressure-treated lumber can pick up dirt, dust, algae, and oils during storage or handling. These contaminants must be removed before painting to ensure good adhesion.
Use a suitable cleaner like TSP (trisodium phosphate) or a bleach solution with water for mildew/algae removal. Apply the cleaner, let it sit for 10-15 minutes, then scrub and rinse thoroughly. Allow the lumber to dry completely before priming.
Note: Never mix bleach with ammonia-based cleaners as toxic fumes can be produced.
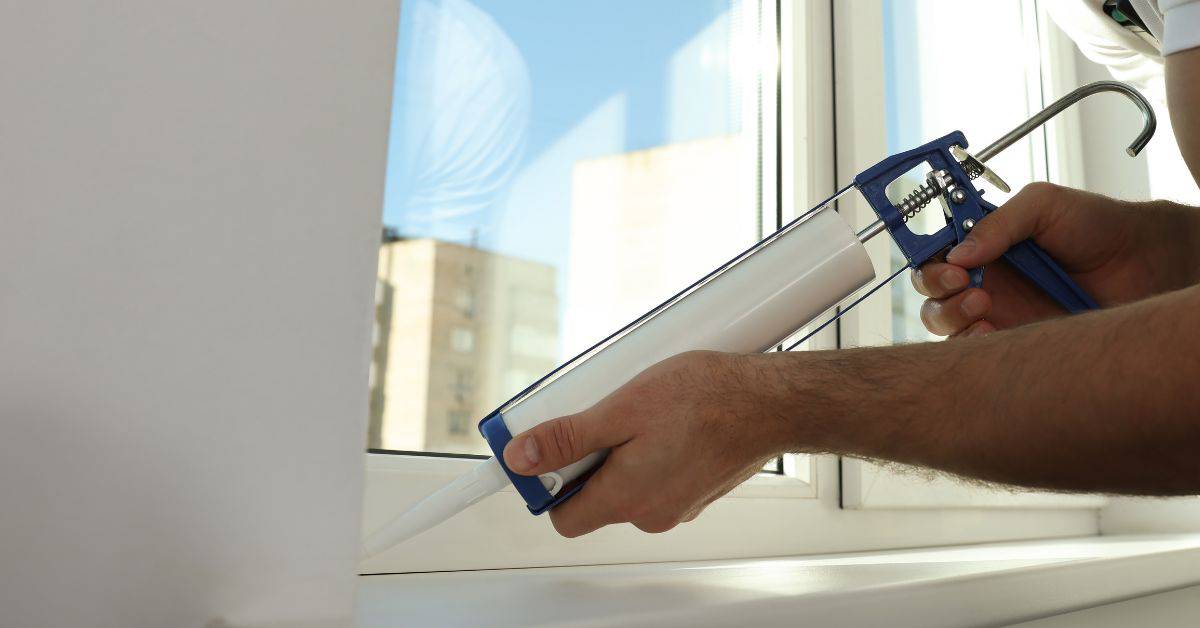
Sanding, caulking, and addressing surface defects
Light sanding helps create a solid substrate for paint adhesion. Use medium-grit sandpaper (120-150 grit) to lightly sand the surface, following the grain of the wood.
Pay special attention to end grains. Seal them with a suitable primer or sealer to prevent moisture wicking and subsequent paint failure.
Caulk gaps and cracks using a paintable acrylic-latex caulk. Apply it smoothly and evenly, then wipe off excess with a damp cloth. Allow the caulk to dry according to manufacturer’s instructions before priming.
Primer and Paint Selection for Pressure-Treated Wood
Choose primers and topcoats that balance adhesion, water resistance, and vapor permeability appropriate for the preservative and moisture condition of the wood; check product labels and technical data sheets for treated-wood compatibility. Primer choice—water-based or oil-based, stain-blocking or bonding—should be made after confirming the lumber’s preservative type and current moisture condition against the manufacturer’s guidance.
Decide between paint and stain based on desired appearance and substrate condition: solid-color finishes give film protection while penetrating stains allow more vapor movement. Verify compatibility by reading product labels and performing a small adhesion test patch if in doubt; if moisture is marginal, select a moisture-tolerant primer per the product data sheet and plan for appropriate recoat intervals and maintenance inspections.
Types of Primers and Their Purpose
A primer’s job is to prepare the wood surface for paint, improving adhesion and hiding. For pressure-treated lumber, bonding or stain-blocking primers are often recommended.
Bonding primers create a better bond between the wood and topcoat, helping prevent peeling. They’re usually oil-based and should be used on treated woods with low moisture content.
Stain-blocking primers seal in tannins that can bleed through paint, causing discoloration. They’re often water-based but may require a sealer coat before painting to prevent tannin bleed.
Paint Types and Sheen Recommendations
For exterior use, consider oil-based paints. They’re durable, offer good adhesion, and can be used on treated woods. However, they have strong fumes and slow drying times.
Alternatively, acrylic (latex) paints are water-based, low-odor, and fast-drying. They perform well on exterior surfaces but may not adhere as well to treated wood if the moisture content is high.
For sheen, opt for semi-gloss or gloss. These offer better durability and easier cleaning than flat or satin finishes. However, they may show imperfections more.
Best Application Techniques and Environmental Conditions
Select the application method that suits the project: brushing for control on end grain and tight joints, rolling for flat boards, and spraying for speed on large areas—each method has different thinning and overlap techniques to avoid runs and lap marks. Confirm the lumber meets the moisture-content target and surface condition called for by the coating manufacturer using a meter and quick tactile checks before you start.
Work only in suitable conditions—follow the coating’s temperature, humidity, and dew-point guidance, avoid direct sun or wind that causes flash drying, and keep an eye on the weather forecast for rain within the manufacturer’s required window. Prep with cleaning, light sanding, and masking, back-prime end grain where recommended, and follow the manufacturer’s recoat and cure recommendations to prevent common moisture-related defects like blistering and peeling.
Tools and coverage techniques
First off, you’ll need a few tools to get the job done right. Grab yourself a concrete trowel – I prefer a 12″ for most jobs, but check your label if you’re unsure. You’ll also need a straight edge or screed for leveling and a bull float for smoothing.
Now, let’s talk coverage. The key here is evenness. You don’t want no thin spots or air pockets. Here’s how to do it:
- Check base compaction. Make sure your base is solid before you pour. We don’t want no settling later on.
- Start by spreading the concrete with your trowel, working from the outside in. Remember to pay special attention to end grains and joints. These are where most problems start.
- Use your straight edge or screed to level it out. Go slow and steady here. You want a smooth, even surface.
- Once it’s starting to set, bring in the bull float. This is when you really smooth things out. Again, focus on those end grains and joints. They should be as smooth as the rest of your pour.
Weather, Temperature, and Humidity Considerations
Listen up, DIYers. Weather’s a fickle beast, and it can mess with your concrete job real good if you ain’t careful.
High humidity, dew, or rain can slow down the curing process, making your concrete weak as a kitten. Check your product label for specific limits, but generally, keep humidity below 80% and avoid applying in damp conditions.
Temperature’s another biggie. Concrete sets best between 50°F to 90°F. Below 40°F, it might not set at all. Above 100°F, it sets too fast and can crack. So, check the forecast and plan accordingly.
Rapid temperature swings are a no-no too. They cause stress in the concrete, which can lead to cracking. Try to keep temps consistent throughout the setting process.
Risks, Common Mistakes, and How to Fix Failures
Painting too soon risks peeling, blistering, trapped moisture, and accelerated decay if moisture is sealed beneath a film; other frequent errors include skipping proper prep, using incompatible primers, and failing to seal end grain. Diagnose readiness with a moisture meter and test patches to avoid starting before the substrate is suitable.
If failure occurs, follow a step-by-step remediation approach: remove loose coating back to sound wood, allow the lumber to dry fully, treat any biological growth, sand and re-prime with a compatible product, and replace severely rotted boards. Prevent repeat problems by using breathable exterior primers labeled for treated wood, confirming substrate moisture before each coat, and maintaining the finish with periodic inspections.
Recognizing adhesion and finish problems early
Paint peeling, blistering, or cracking on your pressure-treated lumber is a clear sign that something’s gone wrong. But how do you know if it’s due to moisture or improper prep? Here are some visual and tactile clues:
Moisture-related issues often show up as:
- Bubbles or blisters in the paint, like tiny water balloons.
- Peeling paint that comes off in large sheets or curls at the edges.
- A musty smell, indicating trapped moisture and potential mold growth.
Improper prep can lead to:
- Cracking or flaking paint, especially around nails or screws.
- Uneven paint coverage, with some areas looking dull or faded.
- A gritty or rough feel underfoot, indicating that the surface wasn’t properly sanded or cleaned before painting.
Repair and recovery approaches
When you spot adhesion or finish problems early, it’s time to take action. Here’s how to safely remove failed coatings, re-test moisture levels, and re-apply the correct primer and paint:
Removing failed coatings:
- Use a putty knife or scraper to gently lift off peeling paint.
- Sand down any remaining rough edges with fine-grit sandpaper (120-grit).
- Wipe the surface clean with a damp cloth to remove dust and residue.
Re-testing moisture levels:
- Use your moisture meter to check the wood’s moisture content. Aim for 15% or less before painting.
- If it’s still too high, extend the drying window and improve ventilation in the area.
Re-applying primer and paint:
- Once the wood is adequately dry, apply a breathable exterior primer compatible with pressure-treated lumber.
- Let it dry according to the manufacturer’s instructions, then apply your chosen paint using recommended techniques.
Safety, Handling, and Environmental Considerations
Use appropriate PPE when cutting or sanding treated lumber: safety glasses, a rated respirator or dust mask, nitrile gloves, long sleeves, and hearing protection; prefer dust collection or wet cutting to minimize airborne particles. Identify the preservative type on the lumber tag and consult the MSDS or product data sheet for any special handling, ventilation, or first-aid requirements before work begins.
Control dust and debris by containing work areas, using HEPA vacuums, and avoiding indoor sanding without ventilation; never burn treated wood and follow local disposal rules for scrap and sawdust. Store lumber off the ground to reduce leaching and contamination, plan cuts to minimize waste, and confirm disposal and cleanup plans before starting to protect people and the environment.
Personal protective equipment and cutting best practices
Safety is paramount when working with pressure-treated lumber. Here’s what you need to protect yourself and maintain a clean workspace.
- Safety Glasses: Protect your eyes from debris. They should meet ANSI Z87.1 standards, around $5-$10.
- Respirator or Dust Mask: Prevent inhaling dust. A respirator with a P100 filter is recommended, about $20-$30.
- Nitrile Gloves: Protect your hands from splinters and preservative exposure. A box of 100 costs around $5-$8.
- Long Sleeves and Long Pants: Cover exposed skin to minimize contact with treated surfaces.
- Hearing Protection: Use when operating power tools to prevent hearing damage. Disposable earplugs are around $10 for 20 pairs.
- Sharp Blade: A sharp blade reduces tear-out and splintering, making cuts cleaner and safer.
- Dust Collection or Wet-Cutting: Use a vacuum with HEPA filter ($30-$50) or wet-cutting technique to minimize airborne particles. Rentable dust collection systems start at around $25 per day.
Disposal, runoff, and local regulations
Proper disposal of pressure-treated lumber is crucial to protect the environment. Here’s what you need to know.
Never burn treated lumber: It releases harmful chemicals into the air. Fines can reach up to $50,000 per violation.
Check local regulations for disposal: Some areas require treated wood waste to be taken to specific facilities or landfills. Failing to comply may result in fines.
Contain wash/runoff: When cleaning pressure-treated lumber, contain the runoff to prevent it from entering soil or water sources. Use drop cloths and collect any wash water for proper disposal.
Conclusion
Moisture readiness and proper prep are what keep paint from peeling, warping, or fading. When you see the lumber meet the moisture targets and you follow the right primers and paints, you get a durable, good-looking finish that lasts.
Before you call out a final coat, run through this simple check: verify you’re within the target moisture range for your climate, confirm the surface is clean and dry, apply the right primer for pressure-treated wood, choose a paint suited for exterior use, apply with steady, even motions in good light and mild weather, and test a small patch first. If any step flags a fail, stop and reassess rather than rushing a full job.
Common mistakes to avoid are skipping moisture testing, painting damp or dirty boards, using the wrong primer, or ignoring ventilation and weather limits. Always wear proper PPE, keep pets and kids away from the work area, and don’t rush cure times. Protect nearby surfaces and follow the manufacturer’s recoat intervals to prevent adhesion problems.
If you’re unsure about moisture results, or the boards show inconsistent readings, or you’re dealing with an unusually damp site, consider bringing in a pro. When in doubt, don’t push on—fix the moisture issue, prep again, and recode. Stay sharp, finish clean, and you’ll have a result that lasts.
FAQ
Can you paint pressure-treated wood?
Yes. Wait until the wood is dry enough as per the manufacturer’s instructions, then prime and paint with suitable products. Check the label on the wood or the paint—if in doubt, ask the supplier or read the product datasheet.
How long should I wait before painting?
Follow the wood manufacturer’s drying guidance and your chosen paint system. Use a moisture test to confirm dryness and only paint when the wood meets the tested requirements from the product instructions.
What moisture tests should I use and how do I interpret results?
Use a moisture meter or an approved proce-dure from the label. If the reading meets the manufacturer’s target, it’s ready for paint. If you’re unsure, compare against the product instructions or local guidelines.
What is the step-by-step process to paint pressure-treated wood?
Clean and dry the surface, apply a compatible primer, then apply the finish per the product directions. Keep the area well ventilated and follow temperature and humidity guidance from the paint label.