
Introduction
Mounting heavy items on stucco means creating solid backing behind the finish and using spacers to keep the surface intact while fasteners carry the load.
Choose an anchor type appropriate for stucco and plan spacers and backing to avoid crushing the finish. Follow installation steps for the chosen anchor, check for proper spacing and blocking behind the stucco, and test the load; if issues arise, remove and switch methods or seek guidance.
Key takeaways
- Verify structural backing behind stucco before selecting spacers and blocking.
- Choose wall anchors rated for exterior stucco and heavy loads from manufacturers.
- Use appropriate spacers and backing blocks to prevent finish crushing during mounting.
- Follow step-by-step installation for toggles or sleeves, cleaning dust for grip.
- Test load gradually, and inspect for cracks, gaps, or movement after mounting.
- Safe removal: back off fasteners, protect finish, replace with correct anchors if needed.
Table of Contents
- Introduction
- Key takeaways
- How Stucco and EIFS Behave Under Load
- Locating and Confirming Structural Backing Behind Stucco
- Choosing the Right Fastener for Stucco and Underlying Substrate
- Spacers, Pads, and Blocking to Protect the Finish
- Step-by-Step Installation Workflow for Heavy Items
- Safety, Load Assurance, and Testing the Mount
- Troubleshooting Failures and Long-Term Maintenance
- Alternatives and Cost-Effective Options When Direct Mounting Isn’t Viable
- Conclusion
- FAQ
How Stucco and EIFS Behave Under Load
Traditional stucco is a cement plaster over lath that gets its strength from the backing and framing behind it. Thin veneer stucco is much thinner and relies more on the substrate and channeling behind the finish. EIFS adds insulation and a finish coat that is even less structural. The finish layer itself does not carry significant loads, so attachments must transfer to the substrate or to built‑in blocking.
Common failure modes come from not respecting the load path: cracks, delamination, crushing of the finish, or anchor pullout. These issues point back to the condition of the backing and the presence of solid blocking behind the finish. Plan your mounting around solid backing like studs, masonry, or properly installed blocking. Use lag screws or through-bolts into blocking or studs for heavy items, and consider lightweight anchors only if blocking is absent, with caution. Keep in mind that adding exterior blocking or a backer plate can help distribute the load.
Stucco vs EIFS vs thin brick
Traditional stucco, thin veneer, and EIFS (Exterior Insulation and Finish Systems) are different materials with varying construction methods. Understanding these differences is key to determining the best anchoring strategy.
Traditional Stucco: This is a thick layer of cement plaster applied over a lath base. It’s strong but heavy, requiring solid backing like studs or masonry.
Thin Veneer Stucco: Lighter than traditional stucco, it’s applied over a wire lath and reinforced with fiberglass mesh. While it can span minor gaps, it still needs proper backing for heavy loads.
EIFS: This is a lightweight synthetic finish over foam insulation and a base coat. It’s not designed to bear significant loads; attachments must rely on the substrate or blocking behind the finish.
Why the finish can’t carry heavy loads
The outer layer of stucco or EIFS is not designed to bear significant loads. Applying heavy forces directly to this layer can lead to several failure modes.
Delamination occurs when the finish peels away from its backing due to insufficient adhesion or excessive stress. This can cause the finish to fall off in large pieces, leaving your wall exposed and unsightly.
Crushing happens when the finish is compressed beyond its limits, causing it to crack and crumble. This not only looks bad but also compromises the protective function of the finish.
Cracking can occur due to stress concentrations at the point of attachment or from the finish being pulled away from its backing. These cracks can let in water, leading to further damage over time.
When to consult a manufacturer or engineer
While this guide provides general advice, there are times when you should seek professional help before mounting heavy items on stucco or EIFS.
If your attachment exceeds the scope of typical DIY projects, such as installing a heavy sign or satellite dish, consult the manufacturer’s guidelines for their specific product. They can provide recommendations tailored to their system.
In cases where you’re unsure about the structural integrity of your wall or the loads involved, consider hiring a structural engineer. They can assess your situation and provide a safe, reliable solution.
Always remember, it’s better to be safe than sorry. If in doubt, don’t hesitate to seek professional advice.
Locating and Confirming Structural Backing Behind Stucco
The goal is to confirm what sits behind the stucco without damaging the finish, so you can choose safe mounting methods. You’re looking for wood blocking, masonry, metal lath, or hollow spaces behind the surface. Non-destructive checks help you avoid unnecessary repairs.
Use a stud finder with deep or dual-mode, a strong magnet to locate nails or screws, and an inspection camera for small access points. If available, reflective or thermal imaging can help map backing patterns. Map exterior clues like window or door framing and interior clues such as outlet anchors, testing at multiple heights to verify consistency. Document measurements and decide whether to anchor into blocking, masonry, or opt for alternative fastening with safety margins. If backing can’t be confirmed, call a pro before drilling.
Detecting studs, masonry, and cavity spaces
Start by using a high-quality stud finder with deep/dual-mode capability. This tool can detect wood framing, metal lath, or even masonry behind stucco.
For wood studs, you’ll see consistent signals at standard 16″ or 24″ on-center spacing. For metal lath, expect scattered, inconsistent signals. With masonry, the signal will be strong and solid.
Use a magnet to check for nails or screws that might indicate wood framing behind the stucco. If available, use a borescope or inspection camera to visually confirm your findings through small access points.
Test drilling and exploratory openings
Before you start drilling, mark out where you plan to drill. Keep these holes small – around 1/4″ to minimize finish damage.
Use a masonry bit for suspected masonry or metal lath behind the stucco. If you hit wood, switch to a wood bit. Drill slowly and steadily, checking depth regularly.
If you hit something unexpected like a utility line or hollow space, stop immediately. Mark the spot and consider calling a professional.
Once you’ve verified the substrate type and depth, you can use this information to choose appropriate fasteners and mounting methods.
Using building plans and visible clues
If available, consult your home’s construction drawings. These often show stud locations, masonry walls, and other structural elements behind finishes.
Look for exterior clues like windows, doors, and eave lines that might indicate stud or blocking locations. Interior clues can include outlet boxes, switch plates, and fixture anchors.
Check adjacent penetrations too – vents, service entries, or other openings may reveal what’s behind the stucco. If you see a penetration with a metal plate or a vent cover secured with screws, there’s likely solid backing nearby.
Remember, these clues can only guide you. Always confirm your findings with test drilling before mounting heavy items.
Choosing the Right Fastener for Stucco and Underlying Substrate
Under stucco you may encounter wood lath, solid masonry, EIFS, or brick/ concrete backing. Each substrate drives a different fastener approach and set of installation steps. Always cross‑check the product packaging for substrate compatibility before starting.
Compare anchor families by pullout and shear strength, installation steps, and resistance to moisture and outdoor exposure. Link item weight and dynamic loads to the appropriate fastener type, and know when masonry anchors, sleeve anchors, toggle bolts, or specialty resin anchors are preferred. Read the labeling for load ratings, minimum drill sizes, and corrosion resistance. Follow a quick decision flow: determine substrate, determine load, pick an anchor family, verify drill size, and review installation steps on the packaging. Avoid crushing or tunneling through stucco and maintain spacing to prevent cracks. If heavy items require blocking, plan for it.
Anchors for masonry or concrete backing
When you’re mounting heavy items on stucco that’s covering a solid substrate like masonry or concrete, you’ll want to use anchors designed for these hard surfaces. Drywall-style anchors won’t cut it here.
Masonry anchors and sleeve anchors are your best bet. They have high pullout and shear strength, making them ideal for heavy loads. Here’s how to choose:
Masonry Anchors: Use these when you can install them into the masonry itself. They’re great for concrete or brick substrates. Drill a hole slightly smaller than the anchor’s diameter, insert the anchor, and fill with expanding grout.
Sleeve Anchors: These are good when you need to install into existing holes or can’t drill into the substrate directly. They work by expanding inside a sleeve, providing high holding power. Choose one that’s rated for your load and compatible with your substrate.
Anchors for wood or metal studs behind stucco
If you’re lucky enough to have studs behind your stucco, you can use screws, lag bolts, or through-bolts. Here’s when to use each:
Screws and Lag Bolts: Use these when you’re mounting light to medium-weight items. Drive them directly into the stud for a secure hold. Just be sure not to strip the wood.
Through-Bolts with Backing Plates: For heavy items, use through-bolts with backing plates. Drill a hole through the stucco and into the stud. Insert the bolt, then attach the backing plate on the other side for extra support. Tighten the nut to secure.
Remember, even if you’re mounting to studs, it’s still important to spread out your fasteners to avoid stressing the stucco too much.
Anchors and techniques for EIFS or thin veneer
EIFS (Exterior Insulation and Finish Systems) and thin veneers require special consideration. You can’t rely on the lamina alone to support your heavy item.
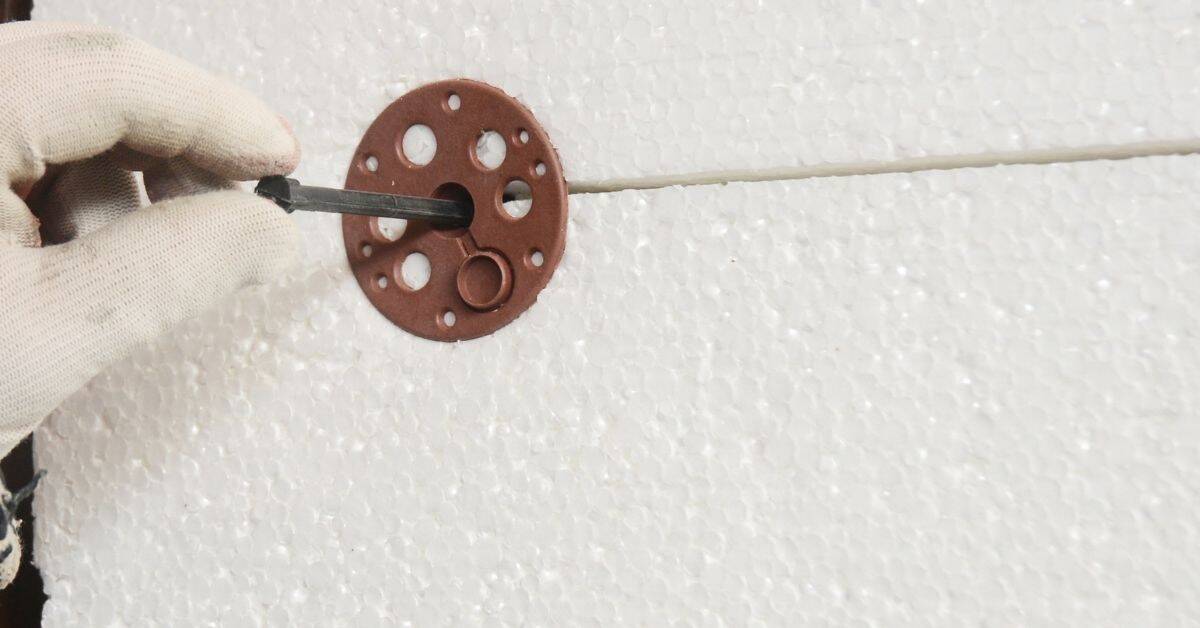
Use specialty anchors designed for these systems, like powder-actuated fasteners or resin anchors. They penetrate through the EIFS or veneer and into the structural backing behind it.
Here’s a quick guide:
EIFS: Use powder-actuated fasteners if you can penetrate to the studs or other structural backing. If not, use resin anchors that expand inside a sleeve for extra holding power.
Thin Veneer: Similar to EIFS, use anchors that penetrate through the veneer and into the substrate behind it. Resin anchors are often a good choice here too.
Spacers, Pads, and Blocking to Protect the Finish
Spacers, pads, and blocking spread load, keep the finish from bearing directly on a point, and create a drainage/thermal movement gap. They help prevent surface crushing and allow for movement without cracking the finish. Choose materials that won’t corrode or seize in outdoor conditions.
Pick spacers and pads made of rubber, neoprene, gaskets, or plastic shims rather than hard metals that could crack stucco. When sizing blocking, align with the load and span, locate solid backing, and position blocking to transfer weight to structural supports while leaving a gap from the finish. Clean the surface, pre-mark spacing, and seal edges to protect against moisture. Ensure the support plane stays continuous and level without pinching the stucco.
Types of spacers and standoffs
Spacers and standoffs are crucial to protect your stucco finish. They distribute weight, prevent point crushing, and maintain a gap for drainage and thermal movement.
Common materials include rubber, neoprene, gaskets, plastic shims. Avoid hard metals that can crack stucco.
Fixed standoffs are preferable when direct contact with the heavy item is needed. They provide consistent spacing and prevent finish damage.
Installing blocking behind stucco
Blocking provides solid backing for heavy items. During new construction, install blocking before applying stucco, securing it to studs or masonry.
For retrofits, use expansion bolts or sleeve anchors to attach blocking to existing structural supports without over-stressing the finish.
Determine load and span first. Locate studs or solid backing using a stud finder or exploratory openings.
Drainage, ventilation, and thermal movement gaps
Leaving a gap between the heavy item and stucco surface is vital. This allows for drainage of water and expansion due to temperature changes.
Without this gap, water can become trapped, leading to long-term finish damage and potential structural issues.
Use spacers and standoffs that maintain a consistent gap. Ensure they’re compatible with your stucco system and won’t corrode or degrade over time.
Step-by-Step Installation Workflow for Heavy Items
Start with a planning sequence: assess the load, choose fasteners, and map mounting locations away from fragile finishes; determine if blocking or interior studs are needed. Confirm wall composition and plan spacer thickness to create a stable gap without crushing the finish.
Select fasteners and spacers suitable for stucco, and consider corrosion resistance for outdoor use. Outline installation steps in order: layout, predrill, install blocking or anchors, insert spacers, mount the item, perform a load test, and seal the perimeter. Finish by protecting the surface during drilling and allowing proper curing time before final load.
Step-by-Step Installation Process
Follow this clear, numbered sequence to safely and efficiently install heavy items on stucco while minimizing finish damage.
- Preparation: Gather tools, materials, and safety gear. Check wall composition and structural support as previously discussed.
- Layout and Marking: Use a level and measuring tape to mark mounting locations away from fragile finishes. Consider the item’s weight distribution.
- Predrilling: Drill pilot holes using a masonry bit for concrete or wood bit for studs, following your layout marks. Be careful not to drill too deep and damage underlying layers.
- Install Blocking or Anchors: If needed, install blocking behind stucco using appropriate fasteners. For anchors, choose the right type based on backing material (refer to earlier sections).
- Insert Spacer/Lot: Place spacers or standoffs into predrilled holes to maintain correct clearance and prevent water intrusion.
- Mount Heavy Item: Align and secure the heavy item using appropriate fasteners. Tighten securely but avoid overtightening, which can crack the stucco.
- Load Test: Gently apply load to ensure the installation is secure. If it wobbles or feels insecure, recheck your work and tighten as needed.
- Seal Perimeter: Apply a suitable sealant around the perimeter of the mounting area to prevent water intrusion.
Tools and materials checklist
Use this checklist before starting any cutting or drilling to ensure you have everything needed for a smooth installation.
- Drill: Cordless drill with appropriate bits (masonry, wood, or metal).
- Bits: Masonry bit for concrete or masonry anchors; wood bit for studs and wooden blocking; metal bit for metal studs.
- Fasteners: Appropriate anchors (concrete/masonry, wood, or metal) based on backing material.
- Spacers/Standoffs: Correct size to maintain finish clearance and prevent water intrusion.
- Sealant: Silicone or other suitable sealant for preventing water intrusion.
- Tape Measure: To accurately mark and measure mounting locations.
- Level: To ensure accurate layout and alignment of heavy item.
- Safety Glasses: To protect eyes from debris during drilling.
- Work Gloves: For handling tools and materials safely.
- Ear Protection: If using a hammer drill or other loud power tools.
Quick rule: Always double-check your layout before drilling to avoid costly mistakes.
Drilling, depth control, and anchored fastening
Proper drilling technique and depth control are crucial for secure anchoring without damaging the finish.
Drilling: Use a slow, steady speed to prevent heat buildup. Apply gentle pressure; let the bit do the work.
Depth Control: Measure and mark your drill bit at the desired depth using painter’s tape or a marker. Stop drilling once you reach this mark to avoid damaging underlying layers.
Anchored Fastening: Ensure the anchor engages fully with the intended backing material (concrete, wood, metal). If using toggle bolts, make sure they’re properly seated and expanded within the wall cavity.
Sealing penetrations and cosmetic repair
Proper sealing prevents water intrusion, while cosmetic repair maintains the stucco’s uniform appearance.
Sealing: Apply a bead of suitable sealant around the perimeter of the mounting area. Use a damp rag to smooth and remove excess sealant, ensuring a neat finish.
Cosmetic Repair: If drilling has caused minor damage to the stucco finish, use a matching stucco patching compound to fill and smooth the area. Allow it to cure according to manufacturer’s instructions, then lightly sand and paint to match the existing finish.
Safety, Load Assurance, and Testing the Mount
Distinguish static weight from dynamic or shock loads, and understand how stucco and backing affect each scenario. Use conservative safety factors and realistic load ratings, accounting for movement and vibration. Calculate total load and buffer as part of your planning.
Verify backing and hardware: confirm stud or blocking presence, choose anchors suitable for stucco, and ensure the mounting surface won’t crush the finish. For testing, pre‑load gradually, observe deflection or cracking, and check for looseness. After installation, perform regular inspections and note warning signs of failure. If issues arise, spacing, backing redesign, or added bracing may be required to prevent failure.
Simple load-checks and safety factors
First, figure out your item’s weight. Then consider dynamic loads – how it’ll move around when used.
Apply a safety factor. For heavy items or critical mounts, use 1.5 to 2 times the calculated load.
For example, if your item weighs 200 lbs and you expect some movement, calculate for 300-400 lbs total load.
When to hire a pro or use engineered fasteners
If your item’s over 500 lbs, consult a pro. They’ll ensure safety and stability.
For public-use installations – like heavy signage or gym equipment – engage an engineer. They can design mounts to handle expected loads and forces.
Unknown backing? Don’t guess. Hire someone who knows how to test and reinforce it properly.
Troubleshooting Failures and Long-Term Maintenance
Common failure modes include pullout, cracking, water intrusion, and finish crushing or delamination. Visual cues guide you toward the likely cause, such as missing anchors, inadequate embedment, or moisture exposure. Use a diagnostic checklist to narrow down root causes.
Verify substrate and backing behind stucco, confirm appropriate fastener types and sizes, and assess overall wall material. For repairs, replace failed anchors, add backing blocking, or use epoxy or mechanical anchors compatible with stucco/EIFS. Patch carefully to preserve the finish and apply protective sealants. Plan for maintenance with regular inspections and documentation to guide future remodels or upgrades.
Repairing pulled anchors and reinforcing attachments
If your anchor has pulled out, don’t panic. First, remove any remaining debris from the hole.
Option 1: Move to new backing. If the original backing is compromised, move your attachment to a new location with solid backing. Drill a new pilot hole and install a larger through-fastener.
Option 2: Add external blocking. For heavy items, consider adding external blocking to distribute the load. This involves attaching a piece of lumber horizontally behind the stucco, then reinstalling your anchor into this blocking.
Preventing and repairing stucco cracking
Cracks in stucco can be unsightly and may indicate structural issues. Here’s how to prevent and repair them.
Prevention: Ensure proper expansion joints are installed during construction to allow for natural movement. Keep the wall surface clean and free of debris that could trap moisture.
Repair: For hairline cracks, use a flexible acrylic caulk designed for stucco. For larger cracks, you may need to cut out damaged areas and replace them with new stucco. Always address the root cause (e.g., settling, moisture) to prevent recurrence.
Routine inspection and re-tightening
When to use this checklist: Inspect your heavy item mounts annually or after severe weather events.
- Check for movement: Gently push and pull on the item. Any excessive movement may indicate a failed anchor.
- Look for moisture stains: Water damage can compromise stucco and anchors. Check around the mount and behind it if possible.
- Inspect nailback: Nailback is when an anchor pulls back through the face of the stucco. If you see this, your anchor needs replacement.
- Tighten hardware: Over time, hardware can loosen. Tighten any loose screws or bolts.
- Check for corrosion: Rust indicates moisture intrusion and may require replacing the affected hardware.
- Inspect sealants: Check that all joints are still sealed to prevent water intrusion.
- Recheck load estimates: If your item has become heavier (e.g., adding plants to a hanging planter), you may need to reinforce the mount.
- Document repairs: Keep notes on any repairs made for future reference.
Quick rule: If in doubt, consult a professional. It’s better to be safe than risk further damage or injury.
Alternatives and Cost-Effective Options When Direct Mounting Isn’t Viable
Direct mounting may not be viable when weight is high, the finish risk is too great, or utilities are hidden behind the wall. Establish clear criteria to choose alternatives that protect the finish.
Explore non‑penetrating or minimal‑impact options like freestanding supports, rail systems, adhesive‑backed mounts, or magnetic mounts, noting their typical load ranges. For retrofit, consider base plates, over‑stud blocking concepts, or decoupling layers to shield the finish. Compare durability, appearance, installation ease, and maintenance needs to pick the best fit. Plan surface prep, weight distribution, and clearance for access, and verify compatibility with stucco or EIFS before committing.
Non-penetrating and minimal-impact mounts
When direct mounting to stucco isn’t feasible, consider these non-penetrating options. They avoid compromising the finish and offer flexibility.
Freestanding frames sit on the ground, supporting heavy items like planters or signs. They’re easy to install but may require more floor space.
Facade rails attach to the wall using adhesive or magnetic strips, providing a surface for mounting. They’re great for lighter loads and can be repositioned if needed.
Clamping systems use pressure to secure items without drilling. They’re versatile but may leave marks on delicate surfaces.
Cost vs long-term safety and aesthetics
Choosing the cheapest option isn’t always best. Consider long-term implications for your stucco finish and safety.
Cheaper options, like adhesive-backed mounts, may seem appealing but can peel off over time, especially in harsh weather conditions. They might also leave residue that’s hard to remove.
More expensive, robust systems like freestanding frames or over-stud blocking offer better durability and safety. They’re designed to withstand weather exposure and heavy loads without compromising the stucco finish.
Investing more upfront can save you from costly repairs down the line. It’s also crucial for ensuring your mount remains safe and secure, protecting both people and property.
Conclusion
Mounting heavy items on stucco without crushing the finish comes down to respect for the backing, careful spacing, and solid testing. Follow the checks and steps now so the hardware stays secure and the surface looks right for years.
Make it actionable: locate and confirm structural backing, verify the substrate and fastener type, install spacers or blocking to keep pressure off the finish, work through a step-by-step workflow, test the load in a controlled way, and plan for inspection and maintenance. Do a dry-fit first, then fasten with the right hardware, and re-test before you load the item fully.
Common mistakes to avoid are over-stressing the stucco, skipping backing checks, and skipping the load test. Never skip PPE or fall into a quick-anchoring habit that ignores the substrate. Keep the finish protected by using spacers, and never overtighten fasteners. These rules protect you, the wall, and the long-term appearance.
If backing is uncertain, or the item is very heavy or irregular, call a professional rather than guess. When in doubt, take smaller steps, test in a safe area, and stay conservative with the load. Stay steady, follow the checks, and you’ll keep the mount solid and the stucco looking sharp.
FAQ
What type of wall anchor is best for heavy items on stucco or masonry surfaces?
For heavy loads, you’re usually looking at anchors rated for masonry or hollow walls. Check the product label or data sheet for load ranges and the substrate it’s designed for. If you’re unsure, ask the manufacturer or read local guidelines before choosing.
How do I install different types of anchors on stucco, plaster, or brick?
Follow the anchor’s instructions step by step: drill the correct size hole, insert the anchor, then drive or tighten the fastener to the recommended depth. Toggle bolts, sleeve anchors, and masonry screws each have their own steps, so don’t mix them up. If instructions aren’t clear, verify with the product documentation or manufacturer support.
What are common problems with wall anchors on stucco and how can I fix them?
Common issues include loose anchors, cracked stucco, or anchors not gripping the substrate. Re-check hole size, ensure the anchor is appropriate for the substrate, and replace any damaged fasteners. If in doubt, test in a small area first and follow manufacturer guidance.
How do I remove wall anchors without ruining the finish?
Back out the fastener fully, then gently pull the anchor free with steady pressure. If the anchor won’t budge, you may need to drill it out or cut it flush and patch the hole. Always patch and finish per the stucco or plaster repair guidelines after removal.
Any quick tips for hanging common items (shelves, brackets, TVs) on different materials?
Use anchors rated for the actual substrate (drywall, plaster, brick, or stucco) and match to the load. Consider using a backing or blocking behind the finish for extra grip. For heavy items, treat mounting as a multi-step system with proper anchors, screws, and surface protection. Always verify load capacity from the product label and stay within safe ranges.