
Introduction
The most durable roofing material is the option that resists weathering and lasts the longest with proper installation and maintenance.
In practice, that means considering how well a roof stands up to wind, hail, temperature changes, and UV exposure. A good choice fits your climate, roof pitch, and maintenance plan. When comparing options, balance durability with installation practicality and how it will perform over time in your area.
When comparing metal and asphalt shingles, note how each handles durability, weight, and wind resistance. Think about upfront costs versus long‑term expenses, and how environmental factors like sun, moisture, and temperature swings influence performance. Always check manufacturer instructions and local building rules to scope what qualifies as the most durable option for your home.
Key takeaways
- Metal roofs offer longevity and low maintenance but require proper flashing and gauges.
- Asphalt shingles install quicker and cheaper upfront, yet lifespan varies with climate.
- Compare total cost: upfront price, maintenance, energy savings, and replacement frequency.
- Test standards guide performance but verify local codes and installer qualifications.
- Environmental factors influence choice: coastal salt, fire zones, shade, and wind.
- Safety: ensure proper fall protection and roof edge access during installation.
Table of Contents
- Introduction
- Key takeaways
- Quick Overview of Durable Roofing Materials
- How to Compare Roofing Materials: Decision Criteria
- Testing Standards and How to Interpret Them
- Metal Roofing Vs. Asphalt Shingles — in-Depth Comparison
- Durable Solutions for Flat and Low-Slope Roofs
- Warranties, Specs, and What to Verify Before Buying
- Cost, Energy Performance, and Environmental Considerations
- Choosing Installers, Dealing with Permits/Hoas, and Safety
- Conclusion
- FAQ
Quick Overview of Durable Roofing Materials
Durable roofing materials fall into a few main families: asphalt shingles, metal, slate or tile, composite, and single-ply membranes. Each has typical longevity and maintenance patterns in residential settings, but performance varies with climate and installation quality. Start by recognizing the general durability expectations for each family and how they fit your roof geometry.
Durability is a three-way mix: inherent material strength, how well it was installed, and site conditions like sun exposure, wind, and moisture. Look for labels that hint at performance, such as wind resistance, impact resistance, fire ratings, and warranties, and learn to read them quickly. Use practical cues about longevity, maintenance needs, and common failure modes to compare options.
Material family highlights
Choosing the right roofing material is crucial for longevity and performance. Each has its strengths and weaknesses.
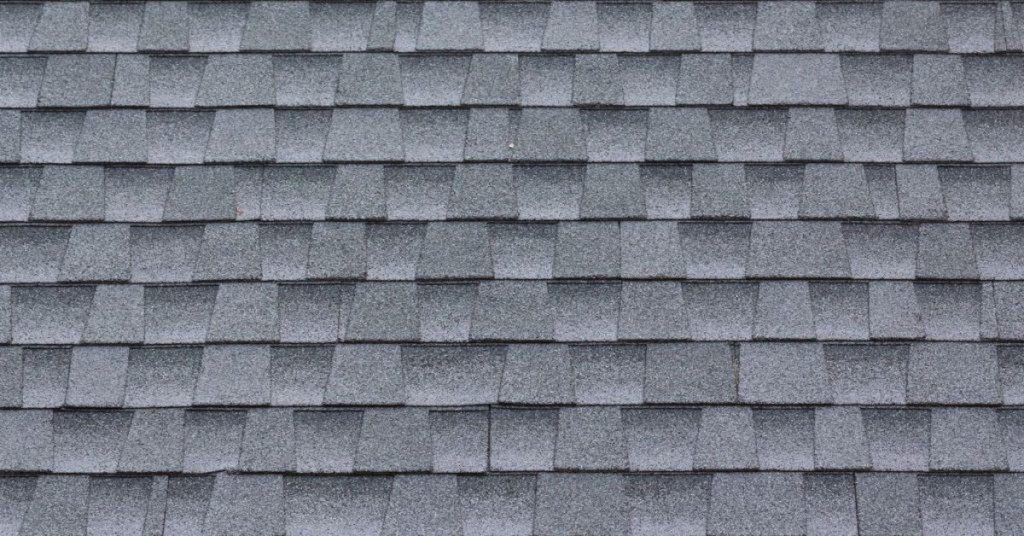
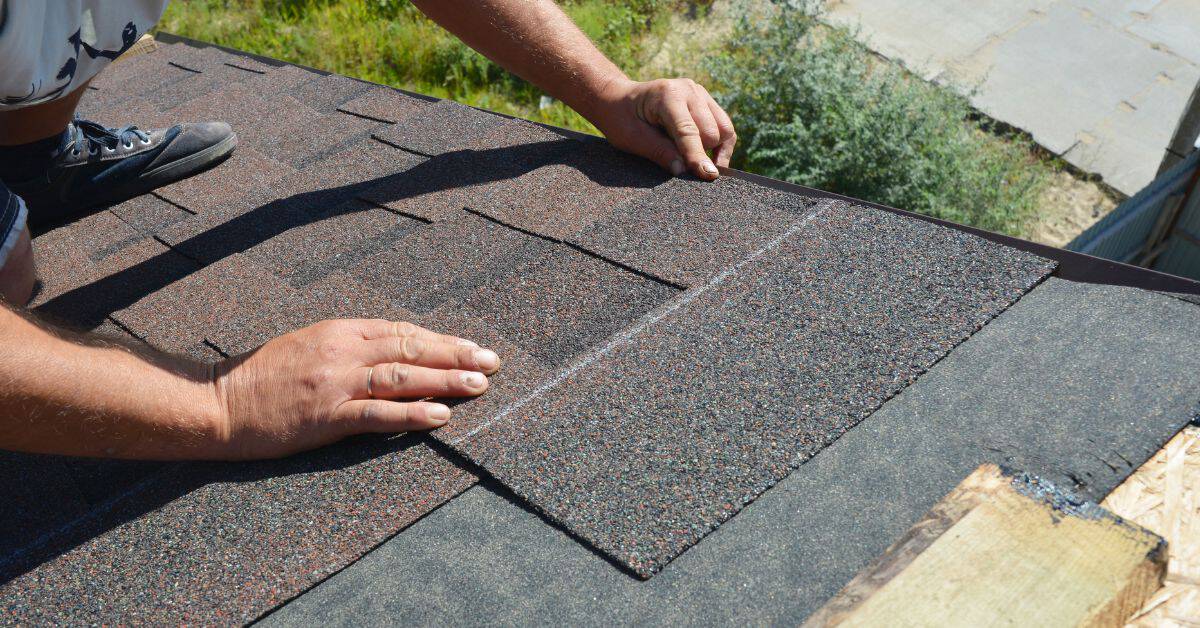
- Asphalt shingles: Inexpensive, easy to install. Look for high-quality fiberglass mats and algae resistance. Avoid low-grade materials that curl or crack quickly.
- Metal (steel, aluminum): Long-lasting, energy-efficient. Check thickness (29-36 gauge) and coating systems. Rust and denting can be issues with thin or poorly coated metal.
- Slate/tile: Natural stone or concrete. Heavy, durable. Expect high initial cost and complex installation. Cracking under impact is possible.
- Composite (plastic): Mimics slate or wood. UV-resistant, algae-proof. Check for Class A fire rating. Fading and cracking can occur with cheap products.
- Single-ply membranes: Lightweight, flexible. Ideal for flat roofs. Look for thick mil thickness (45-90 mil). Punctures are common failure points.
What ‘durable’ means in practice
Durability isn’t just about material strength. It’s how well a roof holds up under real-world conditions.
Wind resistance: Look for wind ratings (e.g., 110 mph). High winds can lift or tear off shingles, dent metal, or crack tiles.
Impact resistance: Hail and debris can damage roofs. Some materials offer impact-resistant options.
UV resistance: Sun exposure breaks down materials over time. Most modern materials have UV protection built-in.
Maintenance: Regular cleaning, inspections, and repairs extend service life. Expect to maintain your roof, regardless of material chosen.
How to Compare Roofing Materials: Decision Criteria
Define core decision criteria upfront: durability metrics, wind uplift, impact resistance, moisture protection, fire rating, and expected warranty terms. Compare these on a like-for-like basis using product literature and third-party verifications. Don’t skip installation compatibility notes that affect performance over time.
Evaluate total cost of ownership by including upfront price, installed cost, maintenance, energy effects, potential rebates, insurance, and resale value over the roof’s life. Also confirm roof weight limits, underlayment needs, ventilation, drainage, and climate-specific loads before choosing a system.
Step-by-Step Process
Follow these practical steps to compare roofing materials based on decision criteria, ensuring a thorough and efficient evaluation.
- Prepare the site: Clear debris, set up safety barriers, and ensure proper lighting for inspection.
- Check existing roof condition: Inspect the current roof’s structure, underlayment, and ventilation. Make notes of any damages or needed repairs.
- Gather material samples: Obtain samples from your shortlisted materials to compare directly on-site.
- Evaluate each material: Follow a consistent checklist (durability, wind uplift, impact resistance, moisture protection, fire rating) and note results for each sample.
- Perform simple tests: Conduct basic field tests like waterproofing or wind load simulations if possible. Document results.
- Review warranties: Compare warranty terms for each material, ensuring they meet your expectations.
- Calculate total cost of ownership: Estimate upfront installation costs, ongoing maintenance, energy efficiency impacts, potential rebates, insurance, and resale value over the roof’s life.
- Assess structural compatibility: Confirm roof weight limits, required underlayment, ventilation needs, drainage, and local snow/wind loads for each material.
- Consider aesthetics and regulations: Check color, texture, architectural compatibility, HOA or local code restrictions, fire zone requirements, and slope suitability for each option.
Performance criteria to prioritize
When comparing roofing materials, prioritize these technical attributes based on your climate and roof design:
Wind Resistance: Essential in areas prone to high winds. Look for materials with proven wind uplift resistance ratings.
Impact Resistance: Important if your area experiences hail or falling debris from storms. Choose materials that can withstand impact without damage.
Fire Rating: Crucial in fire-prone regions. Opt for Class A-rated materials offering the best fire resistance.
Waterproofing: Vital in areas with heavy rainfall or snow melt. Select materials with effective waterproofing and moisture protection properties.
Cost versus lifecycle trade-offs
To assess long-term value, compare upfront cost, expected replacement frequency, and maintenance needs:
Upfront cost is just the beginning. Consider how often you’ll need to replace the roof and its maintenance requirements over time.
High initial cost but low maintenance: Some materials may have a high upfront price but require little ongoing care, making them cost-effective in the long run.
Low initial cost with frequent replacement: Cheaper options might need replacing more often, leading to higher overall costs. Factor this into your decision-making process.
Testing Standards and How to Interpret Them
Common lab tests cover impact resistance, dynamic or impact testing, and uplift or wind-related evaluations. Look for weather-exposure simulations that reflect hail, wind, and moisture conditions. These tests guide how a product will perform under real storms.
Also check major third-party standards and certifications such as ICC-ES, FM Approvals, and UL listings. Verify the certification on product documentation and understand what each guarantee covers before relying on the claim.
Major impact and durability standards explained
The roofing industry uses several lab tests to rate a material’s resistance to impacts, wind, fire, and weather. These tests help you compare products objectively.
Impact Resistance: UL 2218 is the most common test for shingles. It uses steel balls dropped on samples from varying heights to simulate hail or debris impact. Results are Class 1-4, with 4 being most resistant.
Wind Uplift: ASTM D6380 tests a material’s resistance to wind forces. Results are given in pounds per square foot (psf). Higher numbers mean better performance against wind lift-off.
Always look for independent third-party certifications like ICC-ES, FM Approvals, or UL listings. These ensure products meet or exceed specific standards. Don’t rely solely on manufacturer claims.
Why lab tests may not match field performance
Lab tests provide valuable data, but real-world conditions can alter a product’s performance. Here are some factors to consider:
Roof Age: Older roofs may have degraded materials that perform differently than new ones in the lab.
Temperature: Extreme heat or cold can affect how a material responds to impacts or wind forces.
Installation Quality: Poor installation can compromise a product’s performance, even if it passed lab tests.
Roof Slope and Supporting Structure: Steeper slopes and weaker structures may cause a material to perform differently than in controlled lab conditions. Always consider these factors when comparing test results to your specific situation.
Metal Roofing Vs. Asphalt Shingles — in-Depth Comparison
Durability facets include hail impact, wind uplift, fire resistance, and performance through freeze-thaw cycles for both metal and asphalt. Compare how each handles real-world weather over time in your climate. Consider typical failure modes like rust or granule loss when evaluating long-term reliability.
Structural and weight differences matter: metal generally weighs less or more depending on deck design, which affects retrofit plans. Think about installation complexity, typical timelines, and how underlayment or fastening systems influence labor costs and outcomes.
Metal Roofing: Pros, Cons, and Ideal Use Cases
Metal roofs are tough. They can take a beating from hail or wind without showing much damage. Corrosion resistance is another plus. Metal won’t rot like wood or grow mold like asphalt.
But metal’s not perfect. It costs more upfront than other materials. You need skilled installers to get it right, and they’re not cheap either. Also, metal expands and contracts with temperature changes. This thermal movement can cause issues if not accounted for in installation.
Metal is ideal for homes that stay in the family for generations. It lasts long – 40 to 70 years or more. Plus, it’s great at reflecting heat, saving on cooling costs.
Asphalt Shingles: Pros, Cons, and Ideal Use Cases
Asphalt shingles are easy on the wallet. They’re also simple to install, making labor costs lower too. You can find them everywhere, so replacement is never a hassle.
However, asphalt’s not built to last like metal. Many products only last 15 to 30 years. And they’re vulnerable to hail and wind unless you buy impact-rated ones. Asphalt also loses granules over time, staining your roof and gutters.
Asphalt is good for homes where budget or short-term occupancy are concerns. They’re flexible too, so they work well on complex roof designs.
Matching Material to Your Property Lifecycle and Roof Design
Choosing the right roofing material depends on how long you plan to keep your home and its design. Here’s what to consider:
- Long-term stay (20+ years): Consider metal for longevity, energy efficiency, and low maintenance.
- Short-term occupancy: Asphalt might be the way to go for affordability and ease of replacement.
- Complex roof design: Asphalt’s flexibility makes it a good choice for intricate designs. Metal may require additional support due to its weight.
- Structural load limits: Check your home’s framing can handle the weight of your chosen material. Metal is heavier than asphalt.
- Aesthetics and resale value: Consider what looks best with your home’s style and what potential buyers might prefer.
Durable Solutions for Flat and Low-Slope Roofs
For low-slope roofs, define the target assemblies and where each membrane excels or falters. This helps you steer toward a system that matches your durability goals without over- or under-building. Avoid mismatches that compromise performance later on.
Compare main membrane options—EPDM, TPO, PVC, BUR, and SPF—with a focus on long-term wear, UV resistance, puncture resistance, seam integrity, and environmental tolerance. Consider how each choice handles ponding water and edge details in your climate.
Strengths and weaknesses of flat-roof systems
Each flat roof system has its own durability strengths and weaknesses. Let’s dive into the key factors for each.
EPDM/Rubber: Great UV stability, good chemical resistance. Watch for seam failures and punctures.
TPO/PVC: Excellent UV resistance, good puncture resistance. Seam integrity is crucial; watch for seam failures over time.
Built-Up Roofing (BUR): Good durability with multiple layers. Watch for moisture intrusion and surface erosion.
Spray Foam (SPF): Excellent insulation, good adhesion. Watch for nozzle and coating issues, and ensure proper cooling/UV protection.
Maintenance and prevention for flat roofs
Regular maintenance is key to extending your flat roof’s service life. Here are some inspection points and preventive measures:
Inspections: Check for ponding water, damaged seams, and roof penetrations every 6 months.
Preventive Measures: Keep drains clear; repair damaged seams promptly to prevent water intrusion. Address any signs of wind uplift or ozone exposure.
For spray foam roofs, ensure the coating is intact and performing its UV protection role.
Warranties, Specs, and What to Verify Before Buying
Separate warranty types clearly: material vs workmanship, duration, transferability, prorated vs non-prorated coverage, and what events void coverage. Use this as a baseline to compare products across brands. Don’t assume all warranties are the same just because they sound similar.
Key datasheet checks include approved substrates, wind uplift rating, impact resistance or hail performance, fire rating, UV/color stability, and any limits on staining or temperature. Understand installation and maintenance requirements that affect coverage so you don’t lose benefits later.
How to read and compare warranties
Warranties are your safety net. They protect you from costly repairs or replacements. But they’re not all created equal.
Material Warranty: Covers the roofing material itself. It’s usually non-transferable, meaning it stays with the house if you sell.
Workmanship Warranty: Covers installation errors by the contractor. Some are transferable to new owners. Always ask for both warranties and their durations.
Prorated vs Non-Prorated: Prorated coverage decreases over time, while non-prorated stays the same. Check if your warranty is prorated and how it’s calculated.
Material specs and standards to request
Roofing material choices matter. They affect performance, longevity, and aesthetics. Here’s what to look for on datasheets:
- Coating Type: Ask about the coating’s durability, UV resistance, and color stability.
- Substrate Thickness: Thicker substrates last longer but cost more. Find a balance between cost and longevity.
- Fire Class: Ensure it meets local building codes for fire resistance.
- Impact/Wind Test References: Ask for references to independent lab tests proving wind uplift and impact resistance.
- Temperature/Creep Limits: Check if the material can handle your area’s temperature extremes without warping or cracking.
Cost, Energy Performance, and Environmental Considerations
Frame your analysis around lifecycle cost and energy performance, balancing upfront price with long-term savings. A quick comparison should include how reflectivity, insulation compatibility, and climate affect cooling loads. Don’t overlook end-of-life disposal and recycling options.
Examine embodied energy, manufacturing footprint, and recyclability for each material. Factor in VOCs, emissions from maintenance, and any green certifications or incentive programs that can influence the total cost of ownership over time.
Calculating lifecycle and payback considerations
When comparing roofing materials, consider both upfront costs and long-term expenses. Here’s what to include:
Materials: Cost per square foot, including labor for installation.
Maintenance: Regular cleaning, inspections, repairs, and expected replacements over the roof’s lifespan.
Energy Savings: Estimate heating/cooling savings based on reflectivity, insulation compatibility, and local climate. Consult local vendors or online calculators for accurate estimates.
Energy efficiency and sustainability factors
Consider these energy-saving and eco-friendly aspects when choosing a roof:
Reflectivity/Cool Roof Potential: High Solar Reflectance Index (SRI) reduces heat gain, lowering cooling loads. Check product data sheets for SRI ratings.
Insulation Compatibility: Ensure the chosen material works well with your existing insulation to maximize energy efficiency.
Recyclability and End-of-Life Disposal/Reuse: Opt for materials that can be recycled or repurposed at the end of their lifespan, reducing waste. Check manufacturer websites for recycling programs.
Certifications/Labels: Look for green certifications like ENERGY STAR or LEED to ensure your choice meets sustainability standards.
Choosing Installers, Dealing with Permits/Hoas, and Safety
Vet installers on residential experience, licensing, and insurance. Ask for references and review photos, then request a detailed written proposal with scope, materials, timeline, and payment schedule. A thorough check now prevents later headaches.
Plan permits and HOA review upfront: ensure the contractor will pull permits and confirm any color or material restrictions. Weigh DIY vs professional work for risky tasks and demand a site safety plan, proper fall protection, and a clear cleanup procedure before starting.
Vetting contractors and comparing bids
When choosing a contractor, it’s crucial to do your homework. Here are the documents and checks you should request:
Licensing: Ensure they have a valid license for residential concrete work in your area.
Insurance: Ask for proof of liability and workers’ compensation insurance to protect yourself from any damages or injuries that may occur during the project.
Local references: Request at least three local references, preferably for projects similar to yours. Contact them to verify the contractor’s quality of work and professionalism.
Written scope: Insist on a detailed written proposal outlining the project’s scope, materials, timeline, and payment schedule. This helps manage expectations and avoid misunderstandings.
Local rules, permits, and climate-driven choices
Before starting any roofing project, it’s essential to understand the local regulations and how your area’s climate may impact material selection.
Municipal codes: Check with your local building department to identify any permit requirements for structural work or specific roofing materials. Ensure your chosen contractor will pull these permits on your behalf.
HOA guidelines: If you live in a community with an HOA, review the covenants and restrictions regarding roofing materials, color, and work hours to avoid any violations.
Climate risks: Consider your area’s climate when selecting a roofing material. For instance, if you live in an area prone to hail or wildfires, choose a material that can withstand these conditions. Similarly, if you’re in a high-wind zone, opt for materials with superior wind resistance.
Safety, tools, and DIY planning checklist
Before starting any roofing project, use this safety checklist to ensure you’re prepared. This list is most applicable for minor repairs or maintenance tasks.
- Fall protection: Ensure you have proper fall arrest systems in place if working at heights above 6 feet.
- Ladder safety: Use sturdy, well-secured ladders and follow safe climbing practices.
- Weather considerations: Avoid working during severe weather conditions to prevent injuries or damage.
- PPE: Wear appropriate personal protective equipment, including hard hats, safety glasses, and work gloves.
- Tools and materials: Prepare a list of necessary tools and materials before starting any repair work.
- Debris management: Plan for safe disposal or recycling of old materials to prevent injuries or property damage.
- Structural concerns: If your project involves structural changes, consider hiring a licensed professional to ensure safety and code compliance.
- Flashing/roof penetrations: For tasks involving flashing or roof penetrations, consult a professional to avoid water leaks or other issues.
Quick rule: When in doubt about your skills or the project’s complexity, always err on the side of caution and hire a licensed professional.
Conclusion
Choose a durable material with a clear path to installation: verify its performance, ensure proper support for the roof type, and prioritize safety to protect people and the structure’s appearance for years to come.
Run a practical checklist as you move: confirm the material’s tested standards and what they mean for your climate, compare costs and warranties side by side, check installation requirements and the availability of qualified installers, and verify permit and HOA rules before any work starts. Start small by testing in a discreet area, inspect fasteners and underlayment compatibility, and plan a step-by-step schedule that avoids overreaching or rushing the job.
Avoid common mistakes: never skip roof edge or flashing detail work, never ignore weather and temperature limits for materials, and never ignore safety gear or fall protection. Follow simple safety rules like using stable ladders, securing tools, and turning off power where needed. Take the time to double-check flashing, ventilation, and drainage; a small misstep here costs more later than the time you save now.
If the roof is complex, the slopes are unusual, or local codes, permits, or warranties require expert review, call a professional. When in doubt, get a hands-on inspection from a pro before you cut, drill, or seal. With careful planning and conservative steps, you’ll finish strong and avoid costly mistakes—that means a durable roof that looks right and lasts.
FAQ
What are the main pros and cons of metal roofing versus asphalt shingles?
Metal roofs are typically longer lasting and more resistant to wind, hail, and fire. Shingles are cheaper upfront and easier to install for a DIYer, but may need more frequent maintenance and inspections. Check local climate, roof pitch, and manufacturer guidance to weigh durability against cost.
How should I think about lifespan and durability when choosing materials?
Durability depends on material type, installation, and maintenance. Metal often lasts longer than asphalt in harsh weather, but quality matters. Always verify with the manufacturer’s label or datasheet and consider your local exposure and roof slope.
What’s a realistic way to compare initial cost versus long-term expenses?
Estimate upfront material and install costs, then factor in expected replacement or repair cycles and energy savings. Do not rely on vague numbers; use itemized quotes and reference product instructions to project maintenance needs over time.
What installation and maintenance considerations should I plan for?
Follow the material’s installation guidelines and local rules. Maintenance needs vary by material—metal may require inspections for fasteners; shingles may need moss removal and sealant checks. Always check labels or manufacturer instructions to avoid voiding warranties.