
Introduction
Matching old exposed aggregate concrete means repairing and extending the surface so new material blends with the existing exposed aggregate.
This hands-on approach focuses on color, texture, and the way stones recess with the surrounding mix. Take time to assess the current finish and plan how patching or extensions will align with the original surface.
Start by selecting a stone mix that mirrors the size and tone of the visible aggregate and by testing small patches. Use patching methods that respect the surface profile and consider blending stains or pigments to unify tones over time. Always check manufacturer instructions and local rules for any coating or staining steps.
Key Takeaways
- Assess whether repair or replacement preserves character before choosing patching or extension.
- Select stone mix carefully to ensure tonal and texture consistency across patches.
- Test color and finish on a hidden area before full application.
- Follow proper surface prep and bonding steps to maximize patch longevity.
- Document color progress with daylight and artificial lighting to guide blending.
- Prioritize safety: use eye protection, masks, and proper ventilation during work.
Table of Contents
- Introduction
- Key Takeaways
- Why New Patches or Extensions Often Look Different from Old Exposed Aggregate
- Assessing the Site: Repair Vs Replacement and Visual Planning
- Tools and Materials Checklist for Matching Exposed Aggregate
- Surface Preparation and Bonding Methods
- Color-Matching Techniques for Exposed Aggregate
- Patching and Finishing Workflow for Exposed Aggregate (Step-by-Step)
- Aging, Distressing, and Blending Strategies: Natural Vs Accelerated Methods
- Quality Checks, Cost Factors, Safety, and Environmental Considerations
- Conclusion
- FAQ
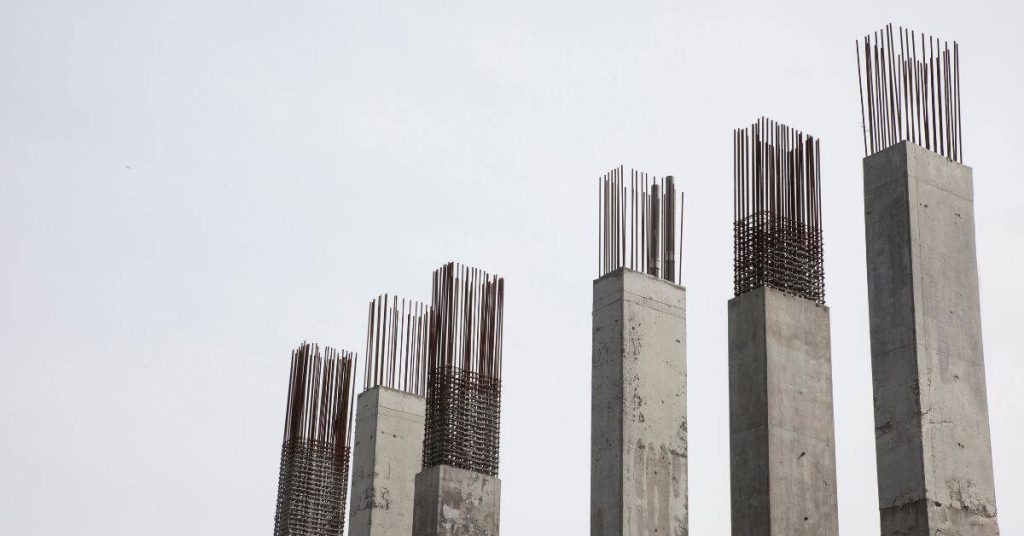
Why New Patches or Extensions Often Look Different from Old Exposed Aggregate
The color and texture of new patches rarely identically match aged exposed aggregate. Variations often come from differences in aggregate and cement color, cementitious content, and the specific finish used on the old surface. Curing, aging, and environmental exposure also push the appearance away from a perfect match.
You can improve blending by feathering edges, using a consistent finish technique, and controlling curing conditions. Consider color-enhancing options such as appropriate release agents, color hardeners, or stains to help integrate patches with the surrounding surface. Set realistic expectations about near-matches versus full replacement or decorative blending and know when professional help may be warranted for a seamless result.
Causes of Color Variation
The primary drivers of color differences between new and old exposed aggregate concrete are:
- Cement type: Different cement types have varying colors. Review labels to ensure consistency.
- Aggregate mineralogy: Aggregates with different minerals reflect light differently, affecting the overall color.
- Water/cement ratio: A higher water content can lead to a lighter concrete color. Check ratios for consistency.
- Curing and efflorescence: Incomplete curing or moisture issues can cause efflorescence (white salt deposits), altering the surface appearance. Inspect for signs of efflorescence and address any moisture sources before patching.
Understanding these factors helps manage expectations for patch or extension appearance. If color mismatch occurs, consider using a color hardener or stain to blend the new and old surfaces.
Aggregate Vs Cement Matrix Influences
The visual outcome of exposed aggregate concrete is determined by:
- Aggregate size, shape, and color: Observe the existing surface to match these properties in your patch or extension.
- Paste color and surface exposure: Compare cement paste colors and how light reflects off both old and new surfaces to gauge similarity.
Balancing aggregate and paste colors ensures a more consistent visual outcome. If significant differences exist, consider using a release agent with color-enhancing properties or resurfacing techniques like micro-tining to better match the old surface’s texture.
Assessing the Site: Repair Vs Replacement and Visual Planning
Start with a structural and movement assessment to distinguish cosmetic issues from structural concerns. Look for cracks, settling, or deflection that might drive a patch or an extension. Identify areas where underlying issues could require full removal for durability.
Check material condition factors such as moisture intrusion, efflorescence, reinforcement corrosion, and deterioration of joints. These conditions influence patch materials, attachment methods, and long-term performance. Plan for seamless transitions by aligning joints, edges, and texture with the existing surface and mapping shade variation to minimize visible seams.
Structural Assessment and Decision Criteria
Inspect your concrete surface for signs of ongoing movement or deep cracking. These could indicate structural issues that may require replacement rather than repair.
Distinguish cosmetic surface issues from structural failures by probing and sounding the concrete. If it sounds hollow or feels spongy, underlying issues might be present.
Check for deep cracks, ongoing movement, heaving, or deflection. Also, look for undermining or signs of structural failure such as bulging or leaning slabs. If the movement rate exceeds acceptable limits (check local building codes), consider full replacement or extension. Similarly, if slab thickness or span length is insufficient for loading, evaluate for removal or extension.
Addressing underlying issues driving patching vs. replacement decisions ensures long-term durability of your concrete surface.
Visual Transition Planning
To minimize visible seams between new and old concrete, carefully plan the alignment of joints, edges, and texture with existing exposed aggregates.
Check shade variation and surface pattern across the existing surface. Map color, texture, and aggregate size variation to identify target areas for sampling. If significant variation is present, implement strategic blending techniques such as using stone mixes or decorative techniques to harmonize with older surfaces.
Proper alignment of new concrete with old ensures a seamless transition between the two surfaces, enhancing the overall aesthetic appeal of your project.
Material Specs and Standards to Confirm
The choice of materials significantly impacts the final result of your patching or extension work. Ensure compatibility with existing concrete by verifying key material properties.
- Cement Type: Verify it meets ASTM C150 standards for consistency in strength and setting time.
- Aggregate Gradation: Check that it adheres to ASTM D6913 standards for proper size distribution, ensuring a strong bond with the cement matrix.
- Admixtures: Ensure they meet relevant standards such as ASTM C494 or C1017 for consistent performance and compatibility with other materials.
- Compatibility: Review product data sheets and supplier specifications to ensure all materials are compatible with the existing surface, preventing issues like cracking or staining.
- Material Testing: If the existing concrete is unknown or non-standard, conduct material testing to match properties accurately.
Tools and Materials Checklist for Matching Exposed Aggregate
Match old exposed aggregate by choosing approved repair mortars, pigments, bonding agents, and sealers that are compatible with the specific surface. Verify exterior labeling and long-term durability, and aim to match aggregate size, color tones, and gloss; conduct swatch trials to refine tint and depth before patching. Keep a close eye on product labels and datasheets, and source products that are labeled for exterior use and compatible with the existing mix to avoid mismatches and early deterioration.
This matters because compatibility guides the patching technique, drying behavior, and final appearance. A deliberate workflow—swatch tests, color and texture checks, and a sealing-test plan—helps ensure a seamless blend and predictable results. Plan for proper tools, safety gear, and weather timing, and maintain good ventilation and dust control during mixing and grinding; document and address any mismatches by reworking with compatible products to preserve the blend over seasons.
Patch Mixes and Aggregate Options
Before you begin patching or extending your exposed aggregate concrete, consult this checklist to ensure a compatible and durable repair.
- Cementitious patch: Suitable for small repairs, verify it’s labeled for exterior use and long-term durability.
- Polymer-modified mortar: Offers better flexibility and adhesion; check compatibility with existing concrete.
- Epoxy options: Ideal for heavy-duty repairs; ensure they’re suitable for exterior use and match the existing concrete’s gloss level.
- Matching aggregate size: Check product labels to ensure aggregates are similar in size to your existing concrete.
- Color tone matching: Use color swatches or small test patches to find a close match; adjust pigments if necessary.
- Gloss level matching: Verify the patch material’s gloss level matches the old surface to avoid visible seams.
- Pre-blended repair kits: Consider using these for large repairs or when structural issues require replacement; ensure they match your existing concrete.
- Verify compatibility: Always perform small test patches on inconspicuous areas to confirm color and texture match before committing to the whole area.
Quick rule: If in doubt, consult a professional or perform extensive testing to avoid costly mistakes.
Bonding Agents, Stains, and Sealers
To enhance the longevity and appearance of your repaired concrete, use this checklist to select appropriate bonding agents, stains, and sealers.
- Bonding adhesives: Choose a compatible bonding agent for improved adhesion; apply before patching.
- Acid stains: Offer natural-looking color variations; test on inconspicuous areas to confirm results.
- Water-based stains: Provide consistent colors with low VOCs; ensure suitable application conditions.
- Integral pigments: Add color directly to the patch mix; verify compatibility and desired shade.
- Tinted sealers: Offer color enhancement and surface protection in one product; test for color match.
- Check labels: Ensure products are labeled for ‘bonding’, ‘staining’, or ‘sealing’ capabilities and suitable application conditions.
- Test products: Always perform small tests on inconspicuous areas to confirm color match and compatibility before applying to the whole area.
- Adjust concentrations: If needed, adjust stain/pigment concentration for a closer color match; reapply bonding agent if adhesion is poor.
Quick rule: Thorough testing and careful application are key to achieving a successful and lasting repair.
Tools and PPE
Protect yourself and work efficiently with the right tools and personal protective equipment (PPE).
- Grinders: With diamond blades, remove old concrete and prepare surfaces; rent or borrow for occasional use.
- Pressure washers: Clean surfaces thoroughly before patching; ensure suitable pressure and nozzle tip.
- Mixers: Ensure even distribution of aggregates and binders in your patch mix; hand-held or drill-mounted options available.
- Trowels, margin tounds, float: Apply and smooth patch mixes; choose sizes appropriate for the repair area.
- Bonding brushes: Apply bonding agents evenly; ensure suitable bristle type and size.
- Release agents: Prevent patch material from sticking to tools; apply sparingly to avoid affecting bond strength.
- Dust mask, eye protection, gloves: Protect against dust, debris, and chemicals; ensure they meet safety standards and fit well.
Quick rule: Inspect tools before use, replace or repair if malfunctioning, and upgrade PPE if it fails to protect.
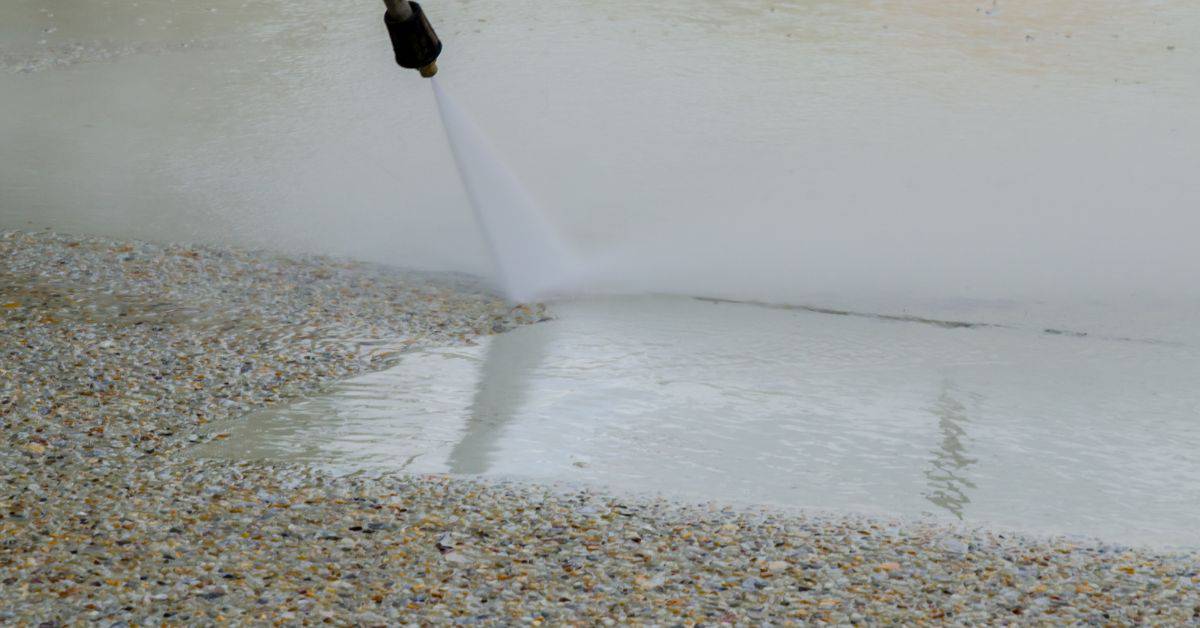
Surface Preparation and Bonding Methods
Begin with a thorough surface appraisal to identify factors that could hinder bonding, such as flaking, dusting, oil, moisture, or residual sealers. Note any contamination that requires special cleaning or profiling before patching.
Choose appropriate cleaning and profiling methods, prioritizing mechanical roughening and targeted chemical cleaners for stubborn contaminants. Decide between mechanical and chemical bonding strategies based on the old texture, porosity, and presence of sealers that may block adhesion.
Cleaning, Decontamination, and Profiling
Begin by thoroughly inspecting the surface for contaminants such as oil/grease, sap, dust, or residual sealers. These can hinder bonding.
Oily or greasy residue should be removed using an appropriate degreaser and mechanical action like wire brushing or light shot blasting. If sap or other organic matter is detected, apply a targeted cleaner, scrub, and rinse thoroughly.
Pressure washing can help remove loose material and dust. Mechanical abrasion methods like scarifying, light shot blasting, or wire brushing are essential for achieving the necessary surface profile for bonding. Re-clean if contaminants remain after initial attempts to ensure optimal bonding strength and appearance.
Mechanical Vs Chemical Bonding
Choose between mechanical keys, dowels, or chemical bonding agents based on the old concrete’s surface characteristics. Evaluate texture and porosity to determine the most effective method for bond strength.
Smooth or sealed surfaces may require chemical bonding agents or light mechanical roughening. For porous, textured surfaces, consider mechanical keys, dowels, or heavy-duty abrasion methods.
If initial attempts result in insufficient bond strength, re-evaluate and adjust your chosen method accordingly to ensure a strong bond between the old and new concrete.
Moisture Control and Pre-Wetting/Scratch Coats
Monitor temperature, humidity, and moisture content of the surface to prevent plastic shrinkage and ensure adequate hydration. In dry or low-humidity conditions, pre-wet the surface or use a scratch coat to retain moisture.
In warm, humid conditions with a damp surface, apply a scratch coat immediately before patching or extending to promote strong bonds and prevent premature drying, cracking, or weakened bonds.
Adjust your strategy as needed based on environmental conditions to ensure the best possible bond between the old and new concrete.
Color-Matching Techniques for Exposed Aggregate
Establish a rigorous testing plan with small test patches on representative concrete. Document mix ratios, application methods, and curing conditions, and compare results with color references to judge hue and saturation. Iterate until the blend reads as cohesive.
Address finishing, maintenance, and risk management by planning sealing windows and sheen levels, considering UV stability and long-term protectant life. Note common mistakes such as over-staining or under-sealing and how to avoid them through controlled steps and evaluation.
Integral Color and Mixing Stone Blends
To match the original concrete’s color, consider adding pigments directly to your mix. Custom-blend aggregates to replicate the original palette.
Inspect trial batches for consistent hue, intensity, and saturation. Verify pigment compatibility with your cement type and aggregate size.
If original aggregate is inconsistent or unavailable, create a custom blend to match the original palette as closely as possible. Adjust pigment dosage and aggregate blend until you achieve a satisfactory match.
Stains, Dye Systems, and Tinted Sealers
Use stains or dyes to add color variation and consistency. Test acid and water-based stains on both paste and aggregate surfaces.
Evaluate multiple tones to replicate the variegation of your original concrete. If needed, use a tinted sealer as the final step to fine-tune your color.
Avoid over-staining by testing and iterating on small areas first. Always follow manufacturer’s guidelines for stain application and drying times.
Overlays and Full-Surface Strategies
When spot-matching is impractical, consider using overlays to create a uniform finish across new and old surfaces. Overlays can be textured or exposed-aggregate.
Test overlay application methods to achieve your desired texture or exposure level. Ensure the overlay material is compatible with your existing concrete.
If spot-matching is not feasible due to extensive repairs or extensions, apply the overlay across new and old surfaces. Follow manufacturer’s recommendations for sealant application to avoid under-sealing.
Patching and Finishing Workflow for Exposed Aggregate (Step-by-Step)
Verify substrate readiness with thorough surface cleaning, moisture checks, and compatibility of any priming or bonding agents. Ensure the old surface will accept a new patch under the chosen system.
Select and embed aggregate that matches size, color, and translucency, then position and compact to blend with the surrounding texture. Plan the sequence for exposure and finishing to achieve a seamless transition after curing.
Step-by-Step Process
The following steps outline a practical workflow for patching and finishing exposed aggregate concrete repairs, ensuring a seamless blend with existing surfaces.
- Prepare the area: Clean the surface, assess moisture levels, and ensure compatibility with existing patches. Apply bonding agents if necessary.
- Select and embed aggregate: Match particle size, color, and translucency. Embed, position, and compact the aggregate to achieve a seamless transition.
- Exposure and finish sequencing: Expose or re-expose aggregate after initial set or curing, using trowels, brushes, or light mechanical scarifiers. Time final texture and exposure depth appropriately.
- Finishing operations: Trowel, burnish, seal, and cure the patch. Test patches first to validate color, texture, and exposure before full-scale work.
- Document and adjust: Record mix ratios, curing conditions, and any color variances. Adjust ongoing work as needed for a cohesive look.
Small Patch Technique
For small exposed-aggregate repairs, follow these steps to achieve a subtle blend with surrounding concrete:
Preparation: Clean and prepare the surface. Select matching aggregate and ensure it’s properly embedded.
Placement and Compaction: Position the aggregate carefully, then compact it gently to avoid displacing stones.
Finishing Operations: Follow exposure and finish sequencing guidelines to achieve a consistent look with surrounding concrete.
Larger Extensions and Tie-in Methods
When extending or tying in exposed aggregate concrete, follow these steps to minimize visible transitions:
Preparation: Ensure substrate readiness, perform bonding checks, and select matching aggregate.
Keying Edges and Match-Milling/Dowels/Joints: Key edges for better adhesion. Use match-milling or dowels/joints to minimize transitions between old and new concrete.
Pouring Sequence and Aggregate Exposure Timing: Pour and expose aggregate at the right time, following exposure and finish sequencing guidelines.
Common Mistakes to Avoid
To ensure a successful repair, be aware of these frequent errors and how to prevent them:
- Poor Surface Preparation: Inadequate cleaning or moisture assessment can lead to adhesion issues. Always prepare the surface properly.
- Mismatched Water Content: Incorrect water content can affect aggregate exposure and final appearance. Maintain consistent water content throughout the repair process.
- Wrong Exposure Timing: Exposing or re-exposing aggregate at the wrong time can lead to inconsistent results. Follow recommended timing guidelines for optimal results.
- Inconsistent Finishing Operations: Inconsistencies in troweling, burnishing, sealing, and curing can result in varied appearances. Maintain consistent finishing operations across all repairs.
Address each mistake promptly to prevent further issues and ensure a successful repair.
Aging, Distressing, and Blending Strategies: Natural Vs Accelerated Methods
Develop a scoring or test plan using sample panels to compare aging effects on both new and existing pours. Test multiple patch blends, sealers, and topcoats to evaluate how they age together. Use objective references to guide decisions on finish and appearance.
Check safety, regulatory, and material compatibility considerations when using cleaners, stains, or sealers. Review compatibility with the existing surface and verify that products are suitable for exterior use and long-term performance. Keep documentation for QA and future repairs.
Artificial Aging and Distress Techniques
To blend new concrete with older surfaces, consider using artificial aging and distressing techniques. These methods mimic the natural weathering process, helping your new work appear more aged.
Surface Treatments: Apply chemical treatments to alter the surface texture and color of new concrete. Always check product labels for safety instructions and compatibility with existing surfaces.
Selective Staining: Use acid stains or other staining methods to create variations in color, simulating long-term exposure to elements.
Mechanical Abrasion: Lightly abrade the surface using tools like wire brushes or sandblasters to mimic erosion and wear. Be cautious not to damage the concrete’s integrity.
Controlled Weathering and Maintenance
Maintaining your new patches consistently with existing concrete helps achieve a uniform appearance. Implement these controlled weathering techniques:
Selective Cleaning: Regularly clean new patches using the same methods applied to the older surfaces. This ensures consistent aging.
Sealer Wear-in: Allow sealers to wear naturally on both old and new surfaces. Reapply sealers as needed, following manufacturer instructions for compatibility with existing surfaces.
Document your maintenance process with before/after photos and notes for future reference.
When Overlays Are Preferable
In some cases, an overlay or full resurfacing may be a more reliable solution than attempting to age or distress new concrete. Consider these scenarios:
Extensive Damage: If the existing surface has extensive damage or is severely worn, an overlay can provide a consistent, uniform appearance.
Color Disparity: When the color difference between old and new concrete is significant, an overlay may be necessary to achieve a seamless look. Use integral colors in your overlay mix for best results.
Time Constraints: If your project has tight deadlines, an overlay can speed up the process compared to aging techniques.
Quality Checks, Cost Factors, Safety, and Environmental Considerations
Quality checks for bond and color match begin with careful surface prep, moisture testing, and porosity assessment, plus small field patches to compare texture and color under natural and artificial light. Document deviations and establish tolerance ranges for blending with aggregates, sealers, or stains.
Practical tests include dye compatibility, abrasion, curing considerations, and controlled patches to judge blend visibility and long-term stability. Re-testing after repairs or extensions may be needed. Compare labor costs, skill level, timeline, and warranty implications to decide DIY versus contractor; gather multiple local quotes and request environmental data from suppliers to inform safety planning and environmental considerations.
Visual Checkpoints and Testing Methods
Before commencing major patching or extension work, confirm adhesion and color match to ensure a successful outcome. Follow this checklist:
- Surface Preparation: Clean and prepare the surface according to manufacturer guidelines to remove any contaminants that could hinder bonding.
- Moisture Testing: Check for excessive moisture using a moisture meter to prevent bond failure. Moisture levels should be below 4% for proper adhesion.
- Porosity Assessment: Evaluate the surface’s porosity to ensure adequate absorption of the patching mortar. A quick water drop test can help determine this.
- Small Field Patches: Apply small test patches (around 1-2 sq ft each) using your chosen mix and application method, allowing them to cure according to manufacturer instructions.
- Color Matching: Compare the color of test patches with the existing surface under both natural and artificial light. Acceptable tolerance ranges vary but aim for a close match within 1-2 shades.
- Texture Matching: Inspect the texture of test patches against the existing surface to ensure they blend seamlessly. Run your fingers over both surfaces to compare.
- Aggregate Exposure: Check if the aggregate exposure in test patches matches the existing surface. This is crucial for maintaining a consistent look.
- Curing Time Checks: Allow test patches to cure as per manufacturer guidelines before proceeding with further checks. Improper curing can lead to weak bonds and color issues.
- Tap/Bond Checks: Gently tap the test patches with a hammer or use a pull-off adhesion tester to ensure strong bonding. Weak or hollow-sounding taps indicate poor adhesion.
Quick Rule: If any test patch fails, troubleshoot issues and re-test before proceeding with full-scale work.
Cost Drivers and Hiring Vs DIY Decision
Minimizing project costs while ensuring quality work involves careful consideration of cost factors and whether to hire a professional or tackle the job yourself.
Obtain multiple local quotes from suppliers for materials and contractors for labor. Compare the scope of work, warranties, material costs, labor rates, site access requirements, complexity, and required skill level. If DIY is feasible with adequate skills and time, proceed with the DIY approach. However, if hiring a professional is more cost-effective or ensures better quality, hire a reputable contractor based on quotes, reviews, and references.
If costs escalate unexpectedly during the project, reassess the project scope, consider alternative materials, or explore other solutions to keep expenses in check.
Safety, Disposal, and Environmental Impact
Ensuring safe work practices and minimizing the environmental footprint of your project involves careful consideration of safety measures, proper disposal methods, and choosing eco-friendly materials.
Wear appropriate personal protective equipment (PPE) during patching and extension work. Control dust to minimize inhalation risks. Properly dispose of waste and wash water according to local regulations. Follow volatile organic compound (VOC) and chemical handling guidelines for stains and sealers, opting for low-VOC products where possible.
Choose eco-friendly materials such as low-VOC sealers and recycled aggregates. Check local codes and permits, and document environmental data from suppliers to ensure you’re making informed decisions. If low-impact products are available, prioritize their use to minimize environmental impact. However, if high-impact materials are necessary, implement additional safety measures and disposal methods to mitigate environmental risks.
Conclusion
Patching and extending exposed aggregate requires careful planning and diligent work to protect safety, durability, and appearance. When the patch or extension is based on solid surface prep, correct bonding, and thoughtful color blending, the result will look and wear like the surrounding area rather than a temporary fix.
A practical checklist to carry through: confirm patching is appropriate versus full replacement, test color in a hidden area before committing, prepare the surface and choose a compatible bonding method, mix and apply in controlled batches, cure and seal according to the material instructions, and perform final visual and surface checks for uniformity and adhesion. This sequence keeps work focused and repeatable, reducing surprises.
Two common mistakes to avoid are skipping proper surface preparation and bonding steps, and attempting to match color or texture without testing first in a discreet spot. Practice patience with curing times, avoid rushing repairs, and always wear appropriate eye, skin, and ventilation safety measures while mixing and curing. Do not ignore local environmental conditions or manufacturer guidelines, and never proceed if you see active cracking or loose patches—these signal professional attention may be needed.
If the project scope exceeds your comfort level or you encounter persistent unevenness, structural concerns, or failing patches, consider a professional assessment before further work. When you proceed, stay methodical and conservative, and keep the goal in sight: a durable, safe, and natural-looking blend that ages gracefully with the rest of the surface.
FAQ
How Can I Match the Color of Old Exposed Aggregate When Patching or Extending?
Compare the color and texture of the existing surface under good lighting. Use pigments or stains labeled for concrete and compatible with exposed aggregate. Always test on a small, inconspicuous area first and follow the manufacturer instructions.
What Patching Techniques Work Best for Exposed Aggregate Concrete?
Use a patching method that preserves the visible aggregate and creates a seamless blend with the surrounding surface. Choose a repair material compatible with the old concrete and apply in thin layers, feathering the edges to minimize a ridge. Verify cure time and surface finish with the product label or manufacturer guidance.
How Do I Select the Right Stone Mix for Consistency with Old Aggregate?
Match the stone size, color, and distribution as closely as possible to the existing mix. If a direct match is not available, consider using a combination of aggregate tones and adjust the binder or finishing technique to blend. Check supplier samples, and follow any guidance from the material manufacturer.
What Are Practical Options for Applying Stains or Pigments on Old and New Surfaces?
Choose stains or pigments that are designed for concrete and compatible with exposed aggregate. Apply as directed on the label, often in multiple light coats for even color. Test in a hidden area first and document the results before wider application.