
Introduction
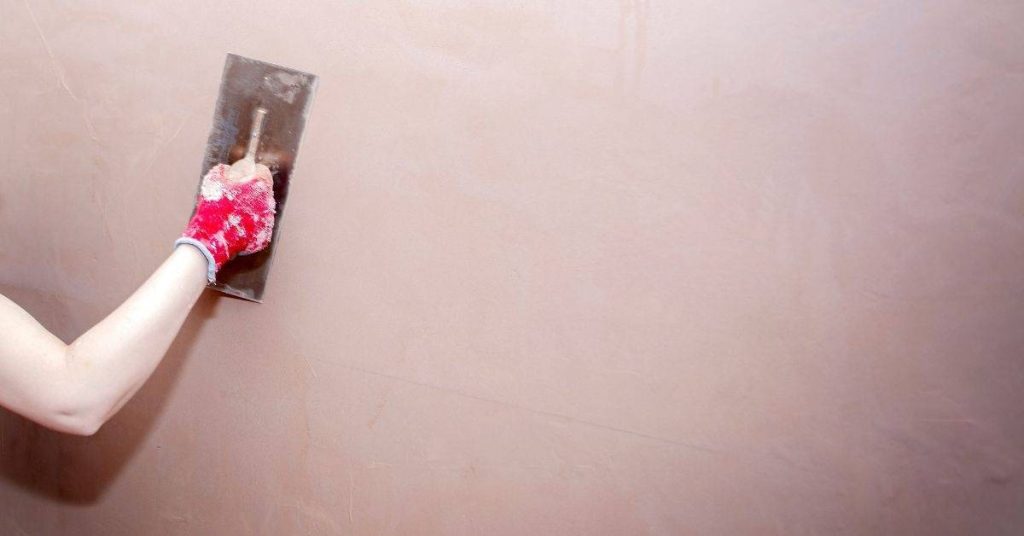
A matching 1920s plaster finish is a subtle, handmade wall surface that uses light trowel marks and a soft, aging sheen. The goal is to recreate the quiet texture and depth of period walls without looking overdone. It involves careful surface work, controlled plaster mixes, and patient application.
Before you start, assess the existing surface and clean it, then plan how you will recreate the base and the marks. Consider the ingredients and preparation: choose a plaster mix that suits your setting, and prepare the surface so it accepts a thin, even layer. As you apply, work in small sections, use a clean trowel to create gentle, deliberate strokes, and aim for a subtle sheen that matches the era; check product labels and manufacturer guidance for compatible finishes.
Key takeaways
- Understand historical plaster finishes and identify subtle trowel textures in samples.
- Prepare surface by cleaning, patching, and priming to minimize suction and contamination.
- Choose lime-based or gypsum-lime mixes matching historic textures and workability.
- Use a controlled trowel technique to recreate soft, evenly defined marks.
- Preserve sheen by gradual layer buildup and compatible sealers or finishes.
- Wear PPE and follow ventilation, fumes, and dust precautions during mixing and sanding.
Table of Contents
- Introduction
- Key takeaways
- Understanding 1920s Plaster Finishes
- Tools and Materials Checklist
- Preparing the Surface
- Mixing Approach and Material Specs Explained
- Application Techniques to Recreate Subtle Trowel Marks
- Achieving the Right Sheen and Finish
- Curing, Drying, and Scheduling Considerations
- Repairing, Matching, and Blending to Existing Plaster
- Conclusion
- FAQ
Understanding 1920s Plaster Finishes
The 1920s interior plasterwork often relied on lath and plaster substrates and lime-based mixes. Construction practices of the time influenced how surfaces held texture and sheen. This section helps you recognize authentic materials and methods that define the period look.
You’ll notice subtle, intentional trowel marks, slight surface irregularities, and a soft, low-luster sheen that differs from later smooth gypsum finishes. The goal is to understand how finish choices relate to performance, moisture handling, and crack resistance. Practical guidance covers sourcing authentic materials, traditional trowel or combing techniques, and appropriate lattice or patching patterns for faithful restoration.
Visual and Tactile Characteristics
To accurately recreate a 1920s plaster finish, begin by examining period examples to understand their unique visual and tactile qualities. Document these features before starting your project.
Brush/Trowel Stroke Patterns: Look for subtle, intentional trowel marks created by traditional troweling or combing methods. These patterns may vary but are often visible upon close inspection.
Sheen and Surface Irregularities: Note the soft, low-luster sheen of early 20th-century plasters. Unlike later gypsum finishes, these surfaces have slight undulations and irregularities that contribute to their distinctive appearance.
Why Materials and Techniques Matter Historically
The choice of materials and application methods significantly influences the final look and performance of your plaster finish. Understanding these differences ensures historical accuracy and longevity.
- Lime Plaster: Traditional lime plasters offer breathability, allowing walls to ‘breathe’ and absorb moisture. They also provide a subtle sheen and slight surface irregularities characteristic of early 20th-century interiors. Avoid: Using modern, fast-setting plasters that lack these qualities.
- Gypsum Plaster: Gypsum plasters set quickly but may lack the breathability and subtle sheen of lime plasters. They are also more prone to cracking over time. Tip: If using gypsum, consider adding hair or fibrous reinforcement for improved strength.
- Modern Portland-based Plasters: These plasters often have a smooth, uniform appearance and lack the breathability of traditional lime plasters. They may also stain more easily due to their lower pH. Avoid: Using these plasters if historical accuracy is paramount.
Tools and Materials Checklist
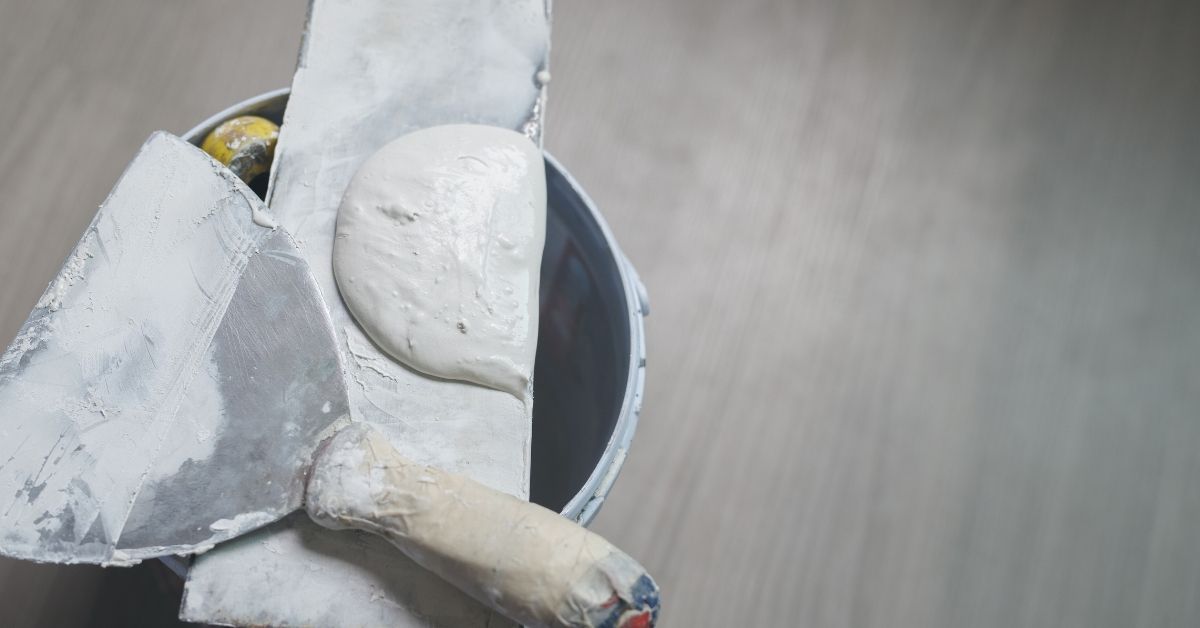
Start with core tools and a reliable mixing setup, including a trowel, darby or steel float, margin trowel, hawk, and a mixing bucket. A small portable mixer can help with consistent batches, and ergonomic grips reduce fatigue. Keep a plain water source and clean rags on hand for clean work.
Choose materials and finishes that suit plaster-like textures, with primers or bonding agents that suit lime or gypsum bases. Consider aggregate options and optional sheen enhancers, plus release agents if you plan to use molds or stencils. Include sponges, light sandpaper, trowel keying tools, and a damp cloth for subtle wipe-downs as part of your kit.
Essential tools for professional results
The right tools ensure consistent trowel marks and sheen in your tiling project. Before you start, briefly inspect each tool to ensure it’s fit for purpose.
- Trowels (various sizes): Essential for applying mortar or adhesive. Different sizes are needed for various tile sizes and patterns. Key spec: Choose trowels with notched edges suitable for your tile size. Tip: Regularly clean and maintain trowel edges to prevent damage.
- Hawk: A flat board used to hold mortar while you’re working. Essential for keeping your workspace organized. Tip: Ensure it’s large enough to accommodate your largest trowel.
- Finishing float: Used after applying the tile to smooth out any excess mortar and ensure a level surface. Essential for achieving a professional finish. Key spec: Choose one with a flat, smooth edge. Tip: Use light, even strokes to avoid damaging tiles.
- Sponge: Optional but recommended for cleaning excess mortar from tile surfaces. Helps maintain a clean workspace and prevents staining. Tip: Use a damp sponge; too much water can cause tiles to lift.
- Burnisher/polisher: Optional, used after grouting to smooth out and polish the surface. Enhances sheen and removes excess grout haze. Key spec: Choose one with a smooth, non-abrasive surface. Tip: Use gentle pressure to avoid damaging tiles.
- Mixing tools: Essential for preparing mortar or adhesive. Can be a simple paddle mixer or a drill attachment. Key spec: Ensure it’s compatible with your mixing container and drill (if applicable). Tip: Always follow manufacturer instructions for mixing ratios and times.
- Sanding tools: Optional, used to lightly sand tiles before grouting to improve adhesion. Essential for achieving a strong bond between tile and grout. Key spec: Choose fine-grit sandpaper (e.g., 120-grit) or a suitable sanding tool. Tip: Be careful not to sand too aggressively; it can damage the tile surface.
Pro tip: When choosing tools, consider both your project’s needs and your budget. Homeowner-grade tools are sufficient for small projects, but professional-grade tools offer durability and consistency for larger jobs. Always ensure all necessary tools are clean, undamaged, and suitable for the task at hand.
Materials and substitution guidance
The right materials ensure your project’s durability and appearance. Here are the key components:
- Lime Putty/Hydraulic Lime: Used for mixing mortar, these binders create strong, breathable joints. Look for pure lime with no added aggregates. Avoid gypsum-based alternatives as they can cause efflorescence and are unsuitable for exterior use.
- Fine Sand: Mixed with lime to make mortar, fine sand improves workability and strength. Check the particle size; medium or coarse sand may lead to weak joints.
- Breathable Sealers/Waxes: Applied after installation, these protect surfaces from water ingress while allowing moisture vapor to escape. Opt for natural waxes or silane/siloxane-based sealers over synthetic products that can trap moisture and cause damage.
- Plaster of Paris (Gypsum): A quick-setting alternative for interior, non-load bearing applications. However, it’s incompatible with lime-based materials, so avoid mixing them. Gypsum also lacks the durability and breathability of lime-based products.
- Bonding Agents/Primers: Used to improve adhesion between new and existing surfaces. If materials don’t bond properly, recheck labels and consider using a bonding agent or primer to prevent delamination.
Pro tip: Always check product labels for compatible materials, mix ratios, and manufacturer instructions. Store lime-based products in sealed containers away from heat sources to maintain their quality.
Preparing the Surface
Start with a clear diagnosis of substrate type and condition, identifying plaster over lath versus cementitious bases and any moisture signals. Look for movement or bulging that could affect adhesion. Address these findings before re-plastering begins.
Assess cleanliness and integrity by checking for chalkiness, efflorescence, mold, oil, or loose patches. Remove barriers to adhesion and stabilize any damaged areas. Plan protective measures and appropriate primers that won’t obscure the subtle trowel marks you aim to reproduce.
Inspecting substrate and identifying lath types
Begin by visually inspecting the surface for any visible signs of lath or substrate type. A rapid scan can help identify wood, metal, or solid masonry.
Wood Lath: Expect movement; use flexible bonding agents and consider pinning loose areas.
Metal Lath: Assume a rigid base; focus on adhesion, not movement; use compatible bonding agents.
Incorrect identification may lead to improper prep methods and adhesion issues. If prep methods fail, re-evaluate substrate type and condition, and adjust accordingly.
Prepping: cleaning, keying, and priming
Thoroughly clean the surface to remove any loose material, dirt, or contaminants. This is crucial for proper adhesion and preventing efflorescence.
Where needed, create a mechanical key using sandpaper or a bonding agent to improve adhesion. Apply a compatible primer following manufacturer’s instructions.
If the substrate is chalky or powdery, remove loose material thoroughly. If efflorescence is present, clean with a suitable solution, rinse, and allow to dry before priming.
Inadequate cleaning and priming can lead to poor adhesion, efflorescence, and compromised finish. If issues arise post-priming, re-clean the surface, address any underlying problems, and re-prime.
Mixing Approach and Material Specs Explained
Identify suitable base plaster options such as lime-based, gypsum-based, or cementitious plasters, and note how their properties influence texture and cure behavior. The emphasis is on matching the historical character rather than chasing fixed ratios. Always follow manufacturer specs for mixing and pot life, and test small batches first.
Practice safe mixing, including PPE, ventilation, and dust control. Understand which additives or modifiers are compatible with different bases and how they may affect workability and drying. Check water consistency, adhesion tests, and environmental conditions that influence early finish quality to plan batching and cleanup steps.
Choosing Lime, Gypsum, or Blended Plasters
Selecting the right base plaster is crucial for achieving an authentic 1920s finish and ensuring substrate compatibility. Here’s a brief comparison of lime-based, gypsum-based, and blended plasters:
Lime-based plasters are historically accurate and offer excellent breathability, making them ideal for replicating vintage finishes. However, they have slower curing times and may not be suitable for all substrates.
Gypsum-based plasters provide faster setting times, making them convenient for modern projects. They also offer good fire resistance but lack the breathability of lime-based plasters.
Blended plasters combine lime and gypsum to balance historic accuracy with quicker curing times. They can be a good compromise, but their performance may vary depending on the blend ratio.
Mixing Best Practices and Test Batches
Proper mixing is essential for consistent finishes and optimal plaster performance. Follow these best practices:
1. Order of mixing: First, add water to the mix, then gradually introduce the dry plaster while mixing continuously.
2. Judging consistency: The ideal consistency should be smooth but not runny or lumpy. It should hold its shape slightly when scooped but spread easily with a trowel.
3. Test batches and sample panels: Always mix small test batches first to ensure the desired consistency, adhesion, and finish. Apply these test batches on sample panels to assess their performance under real-world conditions before committing to full walls.
Application Techniques to Recreate Subtle Trowel Marks
Introduction
Strive for subtle, irregular trowel marks and a low-sheen, variegated surface that mimics the authentic 1920s plaster look. Employ precise hand technique to prevent gouges, emphasize light drag patterns, and choose a trowel with an edge shape that creates gentle texture without sharp ridges. Practice on sample boards until you can consistently reproduce the same marks with smooth motion and balanced surface.
Construct multiple test panels with controlled variables to refine base versus finish coats, drying times, and moisture management. Document results for replication. Regularly check progress by feeling for smooth, even texture and confirming no rough spots. Have a professional assess edge sharpness before proceeding. If the base coat is still tacky, allow it to dry further (5-10 minutes) before applying the finish coat. Use damp-drag on near-dry surfaces to modulate patina and sheen; if marks are uneven, lightly sand and reapply, then blend with a touch of misted water.
One-coat vs Multi-coat Approaches
The number of coats applied significantly impacts the final texture’s authenticity and depth. To recreate subtle trowel marks typical of 1920s plaster, consider the following:
Single Finish Coat: If your desired finish is a single, light texture with minimal depth, apply one finish coat after a base coat. Inspect the surface after each coat for proper adhesion, coverage, and drying time before proceeding.
Scratch and Brown Coats: For authentic 1920s-style deep texture and patina, apply scratch and brown coats before the final finish coat. This process builds depth and helps achieve a more historic look. Again, inspect the surface after each coat for proper application.
Trowel Motion, Pressure, and Timing
Correct technique ensures consistent, subtle tool marks and sheen development. Here’s how to control trowel motion, pressure, and timing:
Light, Subtle Marks: To create light, subtle marks, use a soft touch and gentle, consistent motion with the trowel’s edge. Inspect the trowel edge for cleanliness and sharpness before each pass to ensure even marks.
Sheen Development: To develop sheen, increase pressure slightly and use circular or cross-hatch motions for burnishing. Monitor drying time to prevent flash drying, which can cause uneven sheen development.
Creating Authentic Tool Marks and Texture Control
Accurate replication of historic tool marks enhances the overall aesthetic. Here are practical drills, visual checkpoints, and tolerances for tool marks:
- Trowel Size: Smaller trowels create smaller, closer marks. Larger trowels create larger, more spaced-out marks. Reduce or increase trowel size as needed to achieve the desired mark size and spacing.
- Pressure: Less pressure creates lighter, less visible marks. More pressure creates heavier, more visible marks. Adjust pressure to control mark visibility.
- Stroke Direction: Vary stroke direction (straight, circular, cross-hatch) to create a variegated texture. Inspect the surface regularly during application for consistent marks and texture development.
- Drying Time: Allow each coat to dry according to manufacturer instructions before applying additional coats or using a textured roller. Flash drying can cause inconsistent texture and sheen development.
- Burnishing Tool: For added sheen, use a burnishing tool after the final finish coat. Renting or borrowing this tool is often more cost-effective than purchasing one.
Achieving the Right Sheen and Finish
Define the target look as a soft, low-sheen surface that highlights subtle marks without glare. Explain how finish choices influence historic authenticity and room feel. The aim is a balance between texture clarity and visual softness.
Catalog finishing methods such as buffing versus burnishing and when each is appropriate for plaster stability. Explore breathable coatings and how thin applications affect moisture transfer. Warn against non-breathable coatings and discuss diluted washes or tints to enhance depth while preserving texture.
Buffing, burnishing, and sealing options
To achieve the desired sheen and maintain plaster breathability, consider these buffing, burnishing, and sealing methods:
Mechanical Burnishing: This method uses a mechanical buffer to create a subtle sheen. It’s ideal for those seeking minimal effort with a subtle sheen. Ensure you follow the manufacturer’s instructions for proper application and safety.
Natural or Microcrystalline Waxes: For a natural, low-sheen finish and easy application, opt for natural or microcrystalline waxes. These are typically breathable and provide a soft, matte appearance. Always verify product labels for breathability claims and follow application instructions.
Breathable Sealers: Some sealers maintain plaster breathability while providing protection against moisture and dirt. Common types include acrylic-resin or PVA-based sealers. Check product labels to ensure they are suitable for historic plasters and follow manufacturer guidelines.
Selecting sheen level and testing samples
Before applying your chosen finish across the entire surface, create small sample panels to evaluate different sheen levels under various light conditions and angles.
To ensure consistent results:
- Document the lighting conditions and viewing angles for each sample.
- Allow samples to cure according to the manufacturer’s instructions before evaluating.
- Compare samples at different times of day and from various angles to assess sheen consistency.
For a low-gloss finish: Test samples with lower sheen levels, such as satin or eggshell. If matching an existing sheen, create samples that mimic the reference sheen as closely as possible.
If results vary significantly, re-test under different conditions or adjust sample preparation to ensure accurate representation of your desired finish.
Curing, Drying, and Scheduling Considerations
Explain how ambient temperature, humidity, and airflow influence curing, drying, and the appearance of trowel marks. Provide practical guidance on safe ranges and seasonal considerations without pinning down exact figures. These factors shape the final look and durability.
Offer scheduling tips for a realistic DIY timeline, including milestones, daylight planning, batch management, and contingencies for weather. Emphasize not skipping cure steps to maintain authenticity and performance. Include guidance on protective measures during curing and quick indicators for readiness before subsequent coats.
Environmental Controls During Curing
Maintain suitable temperature, humidity, and airflow during the curing process for consistent results and to prevent issues like cracking or blushing.
Temperature: Keep a stable temperature between 50°F to 70°F (10°C to 21°C) for optimal curing. Refer to product labels for specific recommendations.
Humidity: Maintain humidity levels between 40% and 60%. If it’s too humid, use dehumidifiers or open windows. If it’s too dry, lightly mist the surface with water or use a damp cloth to increase humidity.
Ventilation: Ensure adequate airflow around the plaster for proper curing without creating drafts that could cause cracking. Use fans if necessary, but avoid pointing them directly at the wet plaster.
Timing between coats and final polish
The timing between coats is critical for achieving the desired sheen, texture, and durability. Rushing this process can undermine your results.
Judging readiness: Allow each coat to cure fully before applying the next one. Check if the surface feels cool to touch and has no visible residue or stickiness. Always refer to product-specific cure times and manufacturer’s recommendations.
Polishing/waxing: Only polish or wax once the final coat is completely cured. Polishing too early can damage the surface and reduce sheen. If you notice any issues, allow the plaster to fully cure in optimal conditions before attempting repairs or reapplication.
Lightly sand between coats if necessary, using fine-grit sandpaper (e.g., 220-grit) and following the direction of the trowel marks. Wipe off dust with a damp cloth before applying the next coat.
Repairing, Matching, and Blending to Existing Plaster
Begin with a clear patch plan: assess the surrounding finish, identify the original texture, and decide on patch size and layering to minimize visible transitions. Consider how the patch will age alongside the rest of the surface. Document your approach for consistency.
Develop color and patina matching strategies using limewash, acrylics, or subtle stains. Plan undertones and micro-variations to mimic aged plaster, and require test patches to confirm results. Outline gradual layering to achieve texture and gloss that blends with the existing work.
Patching techniques for seamless blends
To minimize visible transitions between new and old plaster, employ a combination of keying, feathering edges, and texturing tactics.
Keying involves scoring the patch edge to create mechanical interlocks with the surrounding material. This helps distribute stress evenly and prevents cracking at the joint.
For feathering edges, gradually reduce the thickness of your plaster mix towards the edge of the patch. This creates a smooth transition from new to old, minimizing any discernible line between them.
To replicate the existing texture, use appropriate trowel techniques and tools on the fresh patch. Match the directional patterns and pressure used in the surrounding area for seamless integration.
Color matching and aging treatments
Accurately replicating the original tone and subtle aging of 1920s interiors involves careful color selection, application techniques, and controlled distressing.
Begin by assessing base tones, undertones, and micro-variations in the existing plaster. Use mineral pigments to match these colors closely. Apply them in thin washes for better control and to mimic the translucency of aged finishes.
To replicate aging, employ controlled distressing techniques. This could involve lightly sanding or scoring the surface after application, or using a soft cloth to wipe away excess pigment in specific areas, creating micro-variations that echo the original finish.
If the original finish has significant variation, spend extra time observing and replicating these nuances through subtle toning and controlled distressing. Regularly compare your work with the existing plaster to ensure an accurate match.
Conclusion
Plan and proceed with care: the goal is a durable plaster finish that believable mimics 1920s texture without creating damage or hazard, and that starts with surface readiness, correct materials, and patient, repeatable technique. By testing, adjusting, and respecting curing requirements, you’ll reduce costly mistakes and achieve a subtle, lasting result.
Start by inspecting and repairing any damage, cleaning the area, and choosing materials that align with the existing plaster and the instructions you’ve followed. Set up a clean work zone, mask adjacent surfaces, and practice on a small test area to dial in trowel pressure, angle, and sheen. Work in thin, even passes with consistent motion, monitor pot life and mixing ratios as specified by the product, and keep humidity and temperature within the recommended range to support proper curing. When you’re ready, apply to the task area in incremental steps, blend edges carefully, and allow the finish to cure fully before any subsequent coats, sealing, or painting.
Common mistakes to avoid include rushing the application, using an unsuitable mix or wrong water ratio, and overworking the surface, which can round off or smudge the subtle marks. Don’t neglect the curing window or ventilation, and don’t force a patch to dry faster with heat or fans, as this can crack or craze the surface. Always test a small area first, protect surrounding work, and wear appropriate safety gear to keep dust and skin contact under control.
If you encounter hidden damage, significant gaps, or uncertain compatibility between old plaster and new materials, consider bringing in a professional rather than pressing on. A measured, conservative approach now reduces risk and helps you finish with confidence and a result that lasts. Stay patient, document your steps, and you’ll achieve a respectful, authentic finish that stands up over time.
FAQ
What ingredients are used in a plaster mix and how do I choose them?
Plaster mixes typically use lime, gypsum, or cement as the base. Check the manufacturer instructions for recommended binders and any additives. Look for guidance on suitability for historic finishes and suitable mixing ratios on the product label or datasheet.
How should I prepare surfaces before recreating a 1920s plaster finish?
Clean the surface and remove loose material. Patch and level any damaged areas, then dampen the area as advised by the product instructions. Apply a compatible primer or bonding agent if recommended by the plaster manufacturer.
What techniques help create subtle trowel marks?
Use a light, even pressure with a clean trowel or float. Work in small sections with consistent, sweeping motions and a slightly angled blade. Finish with a soft touch to avoid tearing and to leave a gentle, irregular texture similar to historic finishes.
What tools and materials are best for restoring sheen and finish?
Use the appropriate steel or composite trowel, a wooden float for texture, and brushes or cloths for burnishing or light embossing as needed. Always follow the plaster manufacturer’s guidance for timing, curing, and any layer-specific tools or finishes. Check product labels and local guidance for compatibility with existing plaster.