
Introduction
Marker and layout tools for concrete and masonry are simple implements used to mark lines and reference points on stone, brick, or poured surfaces. Soapstone sticks mark clearly on damp or rough surfaces, while paint pens provide visible lines that can stay legible in wet conditions. These tools are intended for use during layout, cutting, and setting operations, and they work best when surfaces are clean and dry when possible.
Choose a tool based on the surface texture, visibility you need, and how wet the work will be. Soapstone marks may fade with moisture, while paint pens can stay legible longer on rough or porous surfaces, but always check the product label for wet-work performance. After marking, recheck the lines as the work progresses and follow manufacturer instructions and local rules for safe, effective use.
Key takeaways
- Accurate layout saves rework by aligning slabs, blocks, and joints consistently.
- Soapstone provides erasable marks; avoid over-marking on slick or damp surfaces.
- Paint pens offer visible lines but require compatible coatings and timing.
- Waterproofing and adhesion boosters improve permanence where moisture is present.
- Test tools on similar substrates to confirm durability before full use.
- Smooth slabs require fine lines; porous blocks may require bold, contrasting marks.
- Safety: wear eye protection and gloves when applying and removing markings.
Table of Contents
- Introduction
- Key takeaways
- Why Marking Matters for Concrete and Masonry Jobs
- Soapstone and Basic Chalk Markers: Strengths and Limits
- Paint Pens and Permanent Markers: Types, Adhesion, and Longevity
- What Survives Wet Work: Waterproofing, Adhesion Boosters, and Field-Tested Options
- Surface-Specific Guidance: Smooth Slabs, Block, Brick, and Wet Surfaces
- Layout Tools and Techniques for Accuracy and Repeatability
- Removal, Longevity Expectations, and Cleanup Strategies
- Tools and Materials Checklist Plus Buying and Testing Guidance
- Conclusion
- FAQ
Why Marking Matters for Concrete and Masonry Jobs
Marking is used to transfer layouts, locate cut lines, and pinpoint anchor positions with accuracy. It also supports quality control by providing clear reference points during inspections. Masonry marking differs from wood or metal because concrete surfaces are porous, damp, and sometimes rough, which affects legibility and permanence.
The workflow relies on marks that survive handling, curing, and successive pours; poor marks can lead to rework, misalignment, and delayed deadlines. Accurate marks minimize rework risk by keeping teams aligned on layout, cutting, and placement throughout the job. Consider how marks behave under typical site conditions to plan for durability and clarity.
Role of Marks at Each Work Stage
Marking plays a crucial role throughout the concrete and masonry construction process. The visibility and permanence of marks should match the requirements of each work stage to ensure accurate layout, minimize errors, and maintain workflow.
Layout Stage (Dry): At this initial stage, use markers with clear, visible lines that can be easily erased or washed off once they’ve served their purpose. This allows for precise measurements and adjustments without causing permanent damage to the surface.
Rough-in Stage (Wet): As work progresses into the rough-in stage, choose markers resistant to water and moisture but still removable when needed. These marks guide installers through wet work, ensuring accurate placement of anchors, cutouts, and other elements without being washed away by water or chemicals.
Finish Stage: For the final stages, use markers that are easily removable yet provide clear guidance for precise cuts, installations, and inspections. Regularly inspect marks throughout these stages to ensure they remain visible and accurate, adjusting as needed.
Common Failure Modes and Consequences
Marking failures can lead to significant issues in concrete and masonry work. Understanding these common failure modes helps prevent errors, safety risks, and extra labor.
Smudging or Bleeding: Marks that smudge or bleed due to improper marker choice or working conditions can result in inaccurate layouts, leading to incorrect cuts, misaligned elements, and increased rework. To mitigate this, monitor working conditions for factors affecting mark visibility, and consider using different markers or techniques.
Marks Washing Away: During wet work, marks may wash away if not resistant enough to moisture. This can cause layout errors, safety hazards, and structural issues. To prevent this, ensure the surface is dry and clean before remarking, or use markers specifically designed for wet conditions.
Regularly inspect marks throughout the work stages to catch any failures early. If marks are incorrect due to these failure modes, carefully re-mark using appropriate methods to avoid repeating mistakes.
Soapstone and Basic Chalk Markers: Strengths and Limits
Soapstone is a popular masonry marker because it leaves a visible, erasable line on many substrates. It works well for chalking straight lines and temporary layouts on dry surfaces. On very wet work or highly porous stone, visibility and durability can drop quickly.
Visibility, erasability, and surface compatibility depend on the product, so verify the label or manufacturer instructions for intended surfaces. If a mark smears or disappears with moisture, plan an alternative or a field test before committing to the job. Use the data sheet to confirm surface compatibility and recommended conditions.
Best-use cases for soapstone
Soapstone markers excel in dry layout applications on smooth surfaces. They are particularly useful when working with concrete or metal templates.
Ideal surfaces include:
- Dry, smooth concrete
- Clean, dry metal
Test soapstone on a small, hidden area first to ensure it performs as expected. If the surface is wet or porous, consider alternative marking methods.
Preparing surfaces and using soapstone effectively
Proper surface preparation and technique are crucial for consistent results with soapstone markers. Follow these steps:
- Prepare the surface: Ensure it’s clean, dry, and free of contaminants.
- Check the tip: Make sure the soapstone tip is clean and undamaged before use.
- Apply even pressure: Use consistent pressure and angle for clear, unbroken lines.
If lines are faint or uneven, adjust your technique. If they’re smudged, re-clean the surface or soapstone tip.
Paint Pens and Permanent Markers: Types, Adhesion, and Longevity
Solvent-based paint pens, oil-based markers, and permanent felt-tips differ in adhesion to masonry, water resistance, and abrasion resistance. For rough or dusty surfaces, some markers bite better than others and may require a primer or surface prep. Drying time and odor vary by formulation and environmental conditions.
Tradeoffs include faster-set lines with higher odor versus longer open times with lighter marks. Always check the product label or manufacturer instructions for surface compatibility and curing guidance before use. Consider a field test on a representative area to confirm performance once dry.
Choosing the right tip and ink chemistry
The tip size and ink formulation of your paint pen or marker significantly impact its performance. Larger tips create thicker lines, while smaller ones produce finer lines. Ink that penetrates well into surface pores provides better adhesion and wear resistance.
Verify manufacturer claims about tip size and line thickness to ensure they meet your project’s requirements. Test on a small, inconspicuous area before full application to assess ink penetration and durability.
If the tip is too large or small for your required line width, choose another with an appropriate tip size. If the ink does not penetrate pores adequately, consider an alternative with better penetration properties.
When to avoid paint pens and alternatives
While versatile, paint pens are not suitable for every situation. Using them inappropriately can result in failed marks that require removal or rework.
- Freshly poured concrete: Paint pens may bleed into wet concrete, leading to illegible marks. Use soapstone or basic chalk markers instead.
- Highly alkaline surfaces: Alkaline conditions can cause paint pen ink to fade or peel. Consider acid-resistant markers or alternatives like stencils and stamps.
- Outdoor use in extreme weather: Extreme heat, cold, or humidity can affect paint pen performance. Opt for markers designed for outdoor use or test indoors first.
- Complex patterns or designs: For intricate layouts, consider using stencils, stamps, or soapstone for better control and precision.
Always assess surface conditions, including moisture content and alkalinity, before marking. Test on a small area first to ensure the tool’s suitability.
What Survives Wet Work: Waterproofing, Adhesion Boosters, and Field-Tested Options
Markers designed to resist rain, washing, and concrete finishing typically use formulations with water resistance and stronger adhesion to masonry. Surface texture and porosity influence whether a mark remains legible after wet work. Some marks may fade when exposed to concrete slurry or spray water.
Explain why certain marks fail during wet work by considering absorption and surface prep. Use a small test area to compare how different formulations hold up under expected wet conditions, and consult the manufacturer instructions for any recommended precautions. Verify any claims about water resistance with the product data sheet.
Field options that hold up in damp conditions
When working with concrete or masonry in wet conditions, marker longevity is crucial. Certain markers are more likely to resist washout than others.
Oil-based paint markers and those with waterproofing additives tend to perform better in damp environments. Always check manufacturer’s claims and user reviews for wet work performance.
However, no marker is completely immune to fading or washing off during heavy rain or washing. To ensure your marks last, consider reapplying or using additional marking methods like physical tags if marks fade during wet work.
Compatibility with curing, sealers, and chemical treatments
To maintain the quality of your concrete finish, it’s essential to ensure your markers are compatible with any curing compounds, bond breakers, or cleaners you plan to use.
Review each marker’s manufacturer guidelines for interaction with other chemicals. Conduct compatibility tests before application if possible.
Using compatible markers minimizes potential interference with concrete performance or finish. If marks smudge, fade, or cause finish issues, re-evaluate your chemical combinations.

Surface-Specific Guidance: Smooth Slabs, Block, Brick, and Wet Surfaces
Visibility strategies vary by substrate: smooth slabs may require higher-contrast marks, while textured block or brick can benefit from longer lines or broader markers. Porosity and roughness change how marks spread and wear. Adapt tool choice to the surface characteristics for consistent results.
Tailor recommendations to common substrates and test visibility on a small area first. If a surface is consistently damp or porous, verify performance claims with the manufacturer data and adjust your technique accordingly. Consider field-testing on similar material before committing to the full layout.
Smooth, dense concrete and formed surfaces
When working with smooth, dense concrete or formed surfaces, clarity and resistance to smearing are key for effective marking. These surfaces require tools that can deliver crisp lines and maintain adhesion during construction.
Soapstone is an excellent choice due to its ability to create clear, bold lines that resist smearing. Its wax-based formula adheres well to smooth surfaces, making it a reliable option for troweled or formed concrete.
Fine-tipped paint pens with permanent ink can also work effectively on these surfaces. They allow for precise marking and, when used with the right tip size, can create lines that are resistant to smearing. Always test on a small, hidden area before full application to ensure satisfaction with the visibility and durability of your marks.
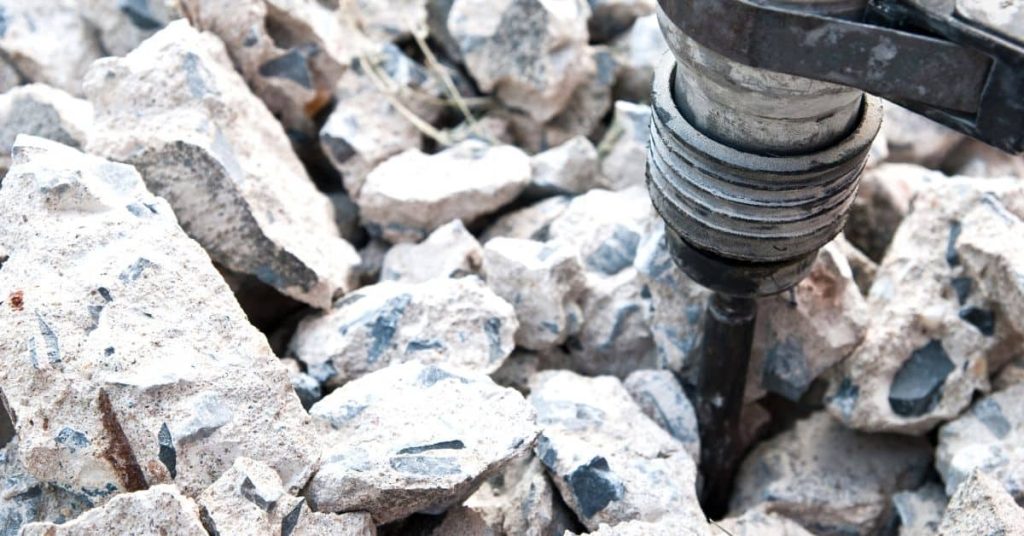
Rough or highly porous masonry (CMU, natural stone)
Marking rough or highly porous substrates like concrete masonry units (CMU) or natural stone presents unique challenges. To ensure visibility and longevity, consider using thicker lines, contrasting colors, or even physical tags.
Thicker lines can help compensate for the absorbency of porous surfaces, making your marks more visible. Using contrasting colors can also enhance legibility by creating a stark difference between your mark and the surface color. Physical tags, such as nails with attached labels, can provide an alternative solution that won’t be absorbed or washed away.
When selecting markers for these surfaces, consider those with enhanced adhesion boosters designed to improve performance on rough, porous substrates. Always perform a quick test on a small, inconspicuous area before full application to ensure the chosen marker can adhere well and provide lasting visibility.
Layout Tools and Techniques for Accuracy and Repeatability
Non-marking tools like chalk lines, laser layout, and templates provide repeatable references that complement marking tools. Integrating these tools helps transfer layouts with precision and reduces drift in subsequent steps. Consistency across repetitions improves overall accuracy.
Explain how to verify alignment and calibration when combining tools. Use manufacturer instructions or product data sheets to confirm proper use and limitations, and perform a quick check on scrap material before proceeding with the main work.
Best practices for transferring lines and offsets
To minimize measurement error when laying out parallel lines, bolt patterns, or templating:
1. Always double-check measurements before marking to avoid costly mistakes. Use a tape measure with clear markings and ensure it’s clean and functional.
2. For parallel lines, use a chalk line or laser layout tool for accurate transfer. Secure the starting point with a small nail or magnet, then pull the line taut and snap or activate the laser.
3. When templating, ensure the template is well-supported and secure during layout to prevent slippage or misalignment. Use clamps, weights, or double-sided tape as needed.
Combining mechanical guides with markers
Proper integration of mechanical guides and marking tools ensures precise, durable layout lines for accurate installation:
1. Confirm marker visibility on the surface before starting work. Test the marker on a small, hidden area to ensure it’s visible enough for your needs but won’t be too prominent after installation.
2. Ensure mechanical guides (snaps, straightedges, jigs) are level, plumb, and square. Use a torpedo level or laser level to check and adjust as needed. For snaps, ensure the snap line width is suitable for your marking tool.
3. When using snaps, straightedges, or jigs with markers, follow these steps: First, set up and secure the mechanical guide. Then, apply pressure with the marker along the edge of the guide to create a clear, accurate line. Lift the guide slightly as you pull the marker along to ensure consistent line width.
Removal, Longevity Expectations, and Cleanup Strategies
Different marking methods vary in permanence; some marks wear away with handling, while others resist routine cleaning. Mechanical removal, chemical cleaners, and pressure washing have distinct effects on the finished surface. Always consider finish risk and substrate compatibility when planning removal.
Plan safe removal approaches and test on a noncritical area to gauge impact. Refer to safety data sheets and manufacturer guidance for any chemical cleaners and follow local rules for disposal and ventilation during cleanup.
Safe Removal Methods by Marker Type
Removing markers from concrete or masonry surfaces depends on the marker’s chemistry and the substrate. Always test in an inconspicuous area before full cleanup.
Oil-based or acrylic markers: Use mineral spirits, turpentine, or specialized removers designed for these types of markers.
Water-based markers: Mild soap and water, or specialized water-based removers can effectively remove these markers. Check the marker’s label or manufacturer instructions to ensure compatibility with your chosen removal method.
Environmental, Safety, and Disposal Considerations
When using solvent-based markers or removers, it’s crucial to consider the environmental impact, safety measures, and proper disposal methods.
Safety: Wear appropriate personal protective equipment (PPE), ensure proper ventilation, and follow disposal instructions on the product label. Review Safety Data Sheets (SDS) for detailed information.
Environmental concerns: Solvent-based products may contain volatile organic compounds (VOCs) that can harm the environment if not disposed of properly. Check local waste management guidelines to ensure you’re following regulations.
Tools and Materials Checklist Plus Buying and Testing Guidance
Assemble a concise jobsite kit that covers marking options, layout tools, and basic cleanup supplies. Keep extra markers and replacement tips on hand to avoid workflow interruptions. Include a small set of test surfaces to compare performance before starting the project.
On labels, verify surface compatibility, environmental limits, and safety data. Do not rely on memory; check the manufacturer data sheets or product label for the exact guidance. When in doubt, run a brief test on a representative sample area to confirm suitability.
Validate Marker Choices Through Field Tests
Before applying markers across your entire project, perform the following on-site tests to ensure adhesion and visibility.
- Test Mark: Apply a small mark on an inconspicuous area of the target surface. Inspect it after drying.
- Wet Test: Apply a drop of water to the test mark. If it beads up or runs, reconsider the marker for wet surfaces.
- Scrub Test: Gently scrub the test mark with a damp cloth. If it fades or washes off, consider alternative markers or improve surface preparation.
- Long-Term Observation: Check the test mark after 24 hours and again after 7 days to ensure it maintains visibility and adhesion.
- Element Exposure: If possible, expose the test mark to sunlight, rain, or other relevant conditions to simulate real-world use.
- Staining Check: Ensure the marker does not stain the surface when applied and removed.
- Surface Compatibility: If working with multiple materials (e.g., concrete, brick, stone), perform tests on each to ensure compatibility.
- Manufacturer Guidelines: Some markers may have specific application instructions or limitations. Always check the product label for guidance.
Proceed With Caution: If marks adhere well and remain visible after these tests, proceed with full application. If not, re-evaluate your marker choice or surface preparation.
Material specs and standards explained for buyers
Understanding material specifications helps ensure you choose the right markers for your project’s needs.
- Water resistance: Look for markers rated as water-resistant or waterproof. This ensures they won’t run or fade when exposed to moisture.
- Adhesion: Check that the marker is designed for adhesion to your target surface (e.g., concrete, masonry). Poor adhesion can lead to cracking and peeling.
- Solvent type: Ensure the solvent used in the marker is compatible with any sealers or treatments you plan to apply. Incompatibility can cause staining or weak bond.
- Drying time: Consider markers with fast drying times to minimize downtime and potential smudging.
- Removal: Choose markers that are easy to remove, either by washing off with water or using a suitable remover. Difficult removal can lead to surface damage.
- Temperature/humidity limits: Ensure the marker can be applied within your project’s temperature and humidity ranges to prevent application issues.
- Safety data: Always check the safety data sheet (SDS) for information on handling, storage, and potential hazards. This ensures you’re using the product safely.
Conclusion
Solid marking today builds cleaner joints, better alignment, and longer-lasting results tomorrow, with safety and care at the core of every step. Focus on using the right tool for the surface, test marks in a hidden spot first, and protect work from moisture and abrasion as you go.
Begin with a simple, practical checklist expressed in normal language: choose a marker compatible with the surface, test a small area and observe for adhesion and visibility, set up the layout and measurement tools for repeatability, apply marks with even pressure and a consistent line, and follow up with any recommended sealing or waterproofing steps after the marks are dry enough for the next work phase. If a mark won’t hold or shows bleed, switch to a different option or improve prep and adhesion boosters as needed, then re-check before continuing.
Common mistakes to avoid are overreliance on a single method, skipping the small-area test, and ignoring surface conditions such as moisture or porosity that can destroy marks or damage the surface. Always work with a clear plan, verify the surface and ambient conditions, and keep safety gear in reach. Use test patches to confirm dry times, and never apply markings over wet surfaces or in a way that could trap moisture.
If the project involves uncertain waterproofing, complex adhesion, or load-bearing masonry, consider bringing in a professional for guidance or installation checks. With careful prep, the right tools, and conservative testing, you can mark accurately, protect your work, and finish with confidence.
FAQ
How do I choose between soapstone and paint pens for rough versus smooth surfaces?
Soapstone is often easier to control on rough or textured surfaces. Paint pens work well on smoother, sealed, or polished areas. Check the product label for surface recommendations and test in a small area first.
How long does a mark typically last in wet work, and what can I do to improve adhesion?
The durability depends on surface, moisture, and abrasion. Follow the manufacturer’s instructions for surface prep and cure times. Use proper surface cleaning and allow for any recommended set or dry times before exposure to water.
What are best practices for removal and cleanup after marking?
Remove marks with the method suggested by the marker’s instructions or a compatible cleaner. Test a small, inconspicuous area first to ensure it won’t damage the surface. Complete removal may require multiple passes or a gentle solvent as directed.
How can I test markers before starting a project?
Mark a small, representative patch on the actual surface type you will work with. Expose it to the expected conditions (dry, damp, or wet) and observe adhesion and readability. Always follow label directions for testing and safety.