
Introduction
Refastening loose lath is usually the simplest first step to fix plaster that’s pulling away. If the lath is rotten or severely warped, replacement might be the safer option. Check for signs of damp, rot, and whether the plaster remains solid.
Decide between refastening and replacing by inspecting the lath condition and the soundness of the plaster. Have on hand basic hand tools, appropriate fasteners, and compatible patch materials, and always follow manufacturer instructions and local rules. If in doubt, check the label on whatever you buy and ask for guidance at the store.
Key takeaways
- Refastening avoids complete lath removal but requires secure studs and solid plaster.
- Inspect lath pattern, framing, and nail density to decide replacement need.
- Basic tools: trim pry bar, hammer, nails, lath screws, masonry bit, level.
- Replacement may involve new wood lath or cementitious backing; consider costs.
- Historic context: plaster detached explains why older homes require careful assessment.
- Safety: wear eye protection, avoid damaged plaster collapse; support structure before work.
Table of Contents
- Introduction
- Key takeaways
- Causes of Loose Lath and Why Historic Plaster Detaches
- How to Inspect and Assess Structural Integrity
- Refastening Loose Lath — Methods and Step-by-Step Approach
- Replacing Lath and Partial Rebuild Options
- Tools, Materials, and Material Specs Explained
- Cost, Time, and Long-Term Durability Comparison
- Safety, Common Mistakes, and When to Hire a Pro
- Conclusion
- FAQ
Causes of Loose Lath and Why Historic Plaster Detaches
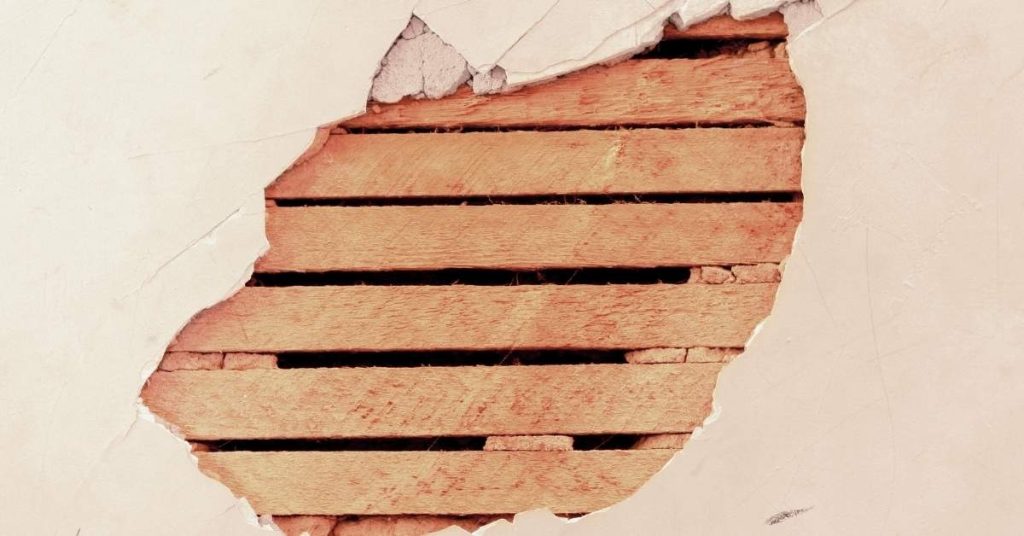
Loose lath in historic plaster walls shows up as detachment, cracking, hollow taps, and nails that pull away from the substrate. You’ll often notice areas that sound different when you knock them or feel them shift under light pressure.
Common, age-specific causes include nail corrosion and metal lath rust, wood lath decay, seasonal framing movement, moisture intrusion or prior water damage, vibration from nearby work or earthquakes, and past improper repairs. Each cause weakens the keying between plaster and lath in different ways and signals how you should approach repair or replacement.
Material and environmental contributors
Material choices play a significant role in the longevity of your plaster walls. Understanding how different materials behave can help you identify issues early.
- Moisture: Excessive moisture weakens lath adhesion, leading to detachment. Look for signs like staining or mold during inspection. Keep areas dry to prevent this.
- Wood species: Some woods are more susceptible to movement and decay than others. Softwoods like pine swell more with humidity. Check the wood type; if it’s softwood, consider reinforcing with harder woods or metal lath.
- Nail type: Galvanized nails resist corrosion better than plain ones. If you find rusted nails during inspection, replace them with galvanized ones to prevent further damage.
- Building movement: Seasonal expansion and contraction can cause lath to pull away from the substrate. Look for cracks at corners or around windows and doors that may indicate movement.
- Nail spacing: Insufficient nail spacing weakens the bond between lath and substrate. Check if nails are evenly spaced; if not, reinforce with additional nails where needed.
Human factors and previous repairs
Previous renovations or repairs can sometimes hide underlying issues, leading to further detachment. Understanding these factors can help you make informed decisions.
Layered plaster: Multiple layers of plaster can hide loose lath underneath. If you notice cracks or hollow sounds, consider that there might be deeper issues even if the surface seems stable.
Mechanical impacts: Previous work like hanging heavy items or impact from nearby construction can loosen lath. Be mindful of this when inspecting areas near previous renovations or adjacent to busy streets.
Improper repairs: Past repairs using incorrect materials or methods can cause more harm than good. If you suspect previous repairs were not done correctly, consider consulting a professional before proceeding with further work.
How to Inspect and Assess Structural Integrity
Set clear safety and scope goals for the inspection, and plan to document findings with photos and notes. Establish PPE and access considerations before you start any probing or tapping tests.
Conduct a visual checklist for cracks, lath condition, surface moisture, and prior patch work. Use light taps and gentle pressure tests to locate hollow areas and delamination near corners and joints.
Step-by-Step Process
The following steps guide you through inspecting and assessing the structural integrity of your plaster walls, ensuring safety and accuracy.
- Preparation: Put on PPE (gloves, goggles), clear the area, and gather tools (hammer, putty knife, moisture meter, ladder). Ensure you have access to all areas needing inspection.
- Visual Inspection: Scan for cracks, lath condition, moisture signs, prior patches, and adjacent wall conditions. Use your photos and notes from planning as a reference.
- Tactile Tests: Tap-test walls to locate hollow areas, press for soft spots, and check corners/edges for delamination. Listen and feel for any give or weakness in the plaster.
- Non-Destructive Tests: Use a moisture meter to map damp zones, probe edge joints with a putty knife, and inspect behind plaster if possible. These tests help identify hidden issues without causing damage.
- Structural Assessment: Identify load paths, check for sag/bowing, locate structural members, and note any signs of movement. This step helps determine the best repair strategy.
- Hidden Damage Check: Look for rot, rusting metal lath, insect damage, efflorescence, or hidden plaster rot. If found, decide if partial replacement or full restoration is needed.
- Document Findings: Update your notes and photos to reflect all findings. This will help in making informed repair decisions.
- Clean Up: Tidy the work area, store tools safely, and dispose of any debris properly. A clean workspace promotes safety and efficiency during repairs.
Visual checkpoints and tactile tests
Use this checklist to identify loose lath and localized plaster delamination during your visual and tactile inspection.
- Crack Patterns: Check for hairline cracks, diagonal cracks, or wide cracks. Hairline cracks may indicate minor settling, while wider cracks could signal more significant issues.
- Lath Condition: Look for exposed lath, corrosion on metal lath, or rust stains. Exposed lath indicates a need for refastening or replacement, while corrosion/rust suggests potential structural compromise.
- Moisture Signs: Inspect for water stains, peeling paint, or efflorescence (white powdery deposits). Moisture can cause plaster to detach and may indicate hidden damage.
- Prior Patches: Examine existing patches for signs of failure or further cracking. Failed patches may indicate recurring issues that need addressing.
- Adjacent Walls: Check nearby walls for similar symptoms to assess if the issue is localized or widespread. Widespread symptoms might suggest a more significant problem affecting multiple areas.
- Tapping Test: Gently tap walls with a hammer or knuckle. Listen and feel for hollow areas, which indicate loose lath or delamination behind the plaster. Hollow sounds suggest further investigation is needed.
- Soft Spots: Press firmly on the wall to feel for soft spots or give in the plaster. Soft spots may indicate rot, hidden damage, or loose lath.
- Delamination at Corners/Edges: Check corners and edges for signs of plaster pulling away from the lath or substrate. Delamination can cause plaster to detach and fall off over time.
- Probing Edge Joints: Gently probe edge joints with a putty knife to check for bond integrity. A loose putty knife may indicate delamination or loose lath behind the joint.
Quick rule: If you find multiple signs of loose lath or hidden damage, consider engaging a professional to assess and repair the issue safely and effectively.
When to investigate for hidden damage
Certain red flags indicate the need to investigate further behind your plaster walls. Opening small access panels or engaging a professional can help uncover hidden issues and prevent more significant problems down the line.
Active Leaks: If you notice water stains, peeling paint, or efflorescence, there may be an active leak behind the plaster. Investigating further can help locate and repair the source of the leak before it causes rot or structural damage.
Mold Growth: The presence of mold indicates excess moisture behind your walls. Opening access panels can help you determine if the mold is localized or widespread, allowing you to address the issue effectively and prevent further growth.
Compromised Framing: If you suspect that the framing behind your plaster walls has been compromised due to rot, insect damage, or other causes, opening access panels can help you assess the extent of the damage. Engaging a professional may be necessary to ensure safe and proper repair.
Unexplained Plaster Detachment: If you find areas where plaster is detaching from the wall but cannot determine the cause through visual or tactile tests, opening access panels can help uncover hidden issues such as rot, rusting metal lath, or other structural problems. Addressing these issues promptly can prevent further detachment and potential safety hazards.
Refastening Loose Lath — Methods and Step-by-Step Approach
First assess whether the lath is salvageable and if the plaster shows only minor looseness. Identify if you’re dealing with wood or metal lath and whether sections are beyond repair.
Choose a refastening strategy based on conditions: adhesives or epoxy for mild loosening, screws or fasteners into studs for solid backing, or bridging methods when direct stud attachment isn’t possible. Plan the workflow from assessment to stabilization and set expectations for cure and inspection milestones.
Step-by-Step Process
Follow these practical steps to refasten loose lath and restore your plaster’s stability.
- Assess the damage: Identify loose, cracked, or deteriorated sections. Determine if lath is wood or metal and if any sections are beyond salvage.
Reason: To understand the extent of work needed and choose the right method. - Choose refastening strategy: Select appropriate methods based on context – adhesives/epoxy for minor looseness, screws/fasteners into studs for solid support, or toggle/bridging when direct stud attachment isn’t feasible.
Reason: Different situations require different solutions. - Prepare work area and safety checks: Confirm access to studs, check moisture levels, remove fragile plaster only as needed, protect occupants, and plan dust control and containment.
Quick check: Ensure all safety measures are in place before starting. - Gather tools: Collect fasteners, anchors, adhesives, drill bits, and protective coatings. Have incrementally testing stability.
Reason: Having the right tools ensures the job is done efficiently and effectively. - Perform refastening: Follow specific steps for each method – seating depth, incremental testing, and curing times.
Quick check: Inspect your work at each milestone to ensure it’s holding properly. - Final inspection: After all materials have cured, perform manual shake tests and visual checks for any signs of creeping or failure.
Reason: To confirm the fix is solid and no further action is needed.
Adhesive/Consolidant Systems and Best Practice
Adhesive consolidation works by bonding loose lath to the existing substrate, providing a strong, durable hold.
Note: Adhesives are not suitable for wet substrates or contaminated surfaces. Ensure your surface is clean, dry, and free of any debris before application.
Reason: Moisture and contaminants can compromise adhesion.
Preparation steps include removing loose plaster, cleaning the surface, and allowing it to dry completely. Apply adhesive according to manufacturer’s instructions, ensuring even coverage and proper curing time.
Quick check: Inspect the surface after drying to ensure no contamination or moisture remains.
Mechanical Refastening Techniques
Mechanical refastening involves using screws, washers, and discreet fastening patterns to secure loose lath directly to studs or other structural elements.
Use appropriate screw length based on lath thickness and substrate. Drive screws slowly and incrementally to avoid over-tensioning or cracking the plaster.
Tip: Use a pilot hole to prevent splitting thin lath.
Install screws in a discreet pattern, ensuring they’re not visible from the finished surface. Consider using washers for added support and to distribute pressure evenly.
Quick check: Gently tug on the lath after installation to ensure it’s securely fastened.
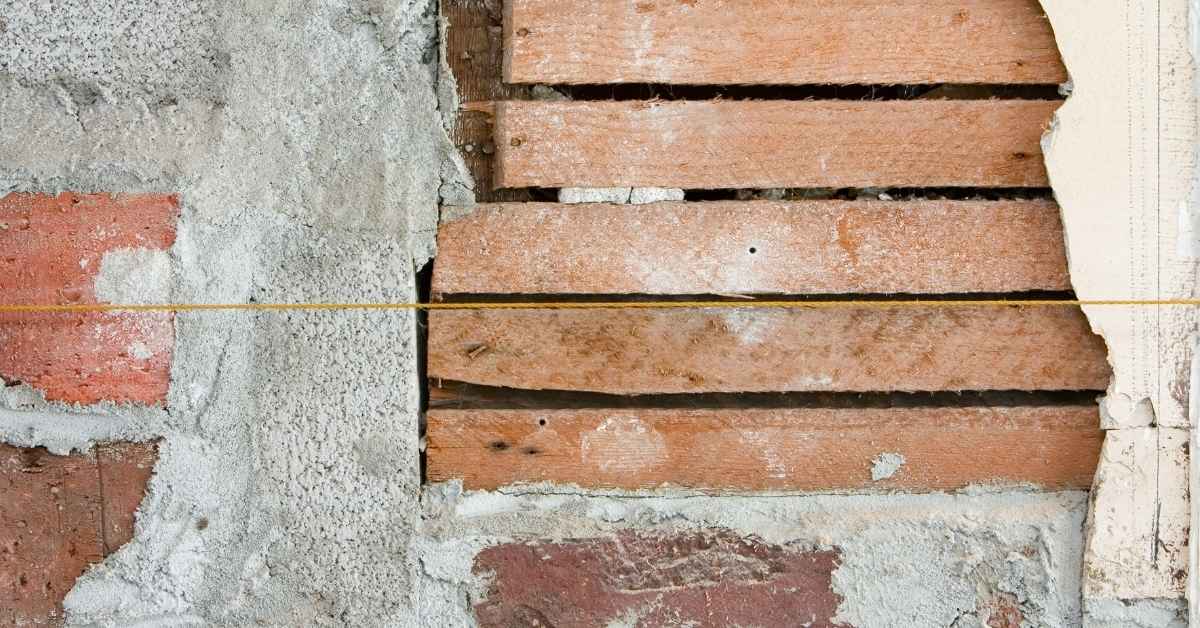
Replacing Lath and Partial Rebuild Options
Define when full lath replacement is warranted versus targeted partial replacements. Look for severe rot, widespread rusted metal lath, or extensive plaster delamination as signals for bigger work.
Outline step-by-step methods for full replacement and for partial replacement, including when to remove plaster first and how to abut new backing to existing lath. Consider modern backing options and how they affect rigidity and moisture tolerance while keeping safety in mind.
Cut-out and patch workflow
When damage is localized, a cut-and-patch approach saves time and material. Here’s how:
Step 1: Mark out the damaged area. Cut along these lines with a utility knife or reciprocating saw.
Step 2: Remove the damaged lath and plaster, keeping it neat to use as a template for new backing.
Step 3: Install new lath or backing (wood, metal, or modern alternatives) using the old pieces as guides. Ensure it’s securely fastened to the studs.
Step 4: Apply scratch and brown coats or install gypsum board, feathering edges to blend with existing plaster.
Matching historic finish and minimizing disturbance
Maintaining the character of your old home means preserving its original finishes. Here’s how to achieve that:
Step 1: Inspect the surrounding plaster for thickness, texture, and color. Take samples if necessary.
Step 2: When cutting out damaged areas, keep lines straight and neat to minimize disturbance to adjacent plaster.
Step 3: Key new lath or backing to match the original keying pattern. This helps new plaster bond better with old.
Step 4: Apply new plaster thinly, feathering edges to blend with existing plaster. Use compatible bonding agents and follow proper curing times to avoid cracks.
Tools, Materials, and Material Specs Explained
Clarify when refastening is appropriate versus full replacement, and outline the decision criteria you’ll use on site. Be prepared to explain what you’ll check on product labels and data sheets before buying.
List essential tools and materials, with quick usage notes, and describe the key specs to verify, such as compatibility with existing plaster and substrate limitations. Include guidance on bonding agents, lath types, and patch compounds so you can pair products confidently.
Tools and consumables checklist
Before you start, ensure you have all these tools and materials to make your job easier and safer.
- Hammer: For tapping lath back into place or driving nails. A claw hammer is versatile.
- Trowel: To apply plaster or patch compounds. Choose a trowel size that fits your project.
- Pliers: For bending wire lath or cutting nails. Lineman’s pliers are useful for this task.
- Drill and driver bits: For driving screws into hard-to-reach places or where a hammer won’t do.
- Safety glasses: To protect your eyes from debris and dust.
- Dust mask: Essential for protecting your lungs from plaster dust.
- Work gloves: To protect your hands from cuts, scrapes, and burns.
- Ladder: For reaching high areas. Ensure it’s stable and secure before climbing.
- Fasteners (nails or screws): Choose the right size and type for your lath material. Galvanized nails or screws resist corrosion.
- Plaster washers: For reinforcing screw holes in metal lath.
- Wire brush: To clean old plaster off lath before refastening.
Quick rule: Always check your tools and materials before starting. Missing something can slow down your progress or compromise the result.
Material selection and what to verify
Choosing the right materials is crucial for a successful refasten or replacement job. Here’s what to look out for:
- Lath type: Choose metal lath (steel or aluminum) for strength, or wood lath if you’re replacing and want a traditional look. Ensure it’s compatible with your existing plaster.
- Plaster mix: Match the base (lime or gypsum) to your existing plaster. Check the bag for compatibility with your substrate.
- Bonding agent: Use a bonding agent to improve adhesion between old and new plaster. Look for one that’s compatible with both.
- Joint reinforcement: Plaster washers or wire lath can help prevent cracks at joints. Choose based on your substrate and plaster type.
- Moisture resistance: Check the material specs for moisture tolerance. High moisture areas need materials that can handle it.
- Nail corrosion resistance: Galvanized nails or screws resist rust, extending the life of your repair.
- Setting time: Consider how long you have to work before the plaster sets. Faster-setting plasters may be more convenient but can be harder to work with.
- VOC limits: Check for low or zero VOC emissions, especially if you’re working indoors.
Quick rule: Always read and follow manufacturer instructions. They provide specific sizes, strengths, and usage guidelines tailored to their products.
Cost, Time, and Long-Term Durability Comparison
Compare how refastening vs replacement affects short-term stabilization and long-term durability. Consider how each path might influence energy efficiency, crack resistance, and moisture management in your wall system.
Identify typical cost drivers and outline a practical method to estimate the project, step by step. Use clear decision criteria to decide when refastening is acceptable and when replacement is warranted for lasting performance.
Cost factors and how to estimate project cost
Estimating the cost of your plaster repair involves understanding several key factors. Let’s break them down:
Labor: Refastening loose lath is generally quicker than replacing it, so labor costs will be lower. Expect to pay around $50-$100 per hour for a skilled tradesperson.
Materials: For refastening, you’ll need fasteners and possibly bonding agents. Replacement involves lath, plaster, and more fasteners. Material costs can vary greatly depending on the size of your project and local prices.
Access/Scaffolding: If you need to rent scaffolding or hire a professional to access high areas, this can add $100-$300 per day to your bill.
Durability and maintenance outlook
A well-done refasten job can last as long as the original installation if the lath is still sound. Expect around 50-70 years with proper maintenance.
Refastening may require less maintenance initially, but keep in mind that any damage to the underlying lath could lead to future issues. Regular inspections and prompt repairs can extend the life of your plasterwork.
A full replacement or modern reboard installation typically lasts longer – around 70-100 years – due to improved materials and techniques. However, they may require more maintenance in their early years as new materials settle and cure.
Safety, Common Mistakes, and When to Hire a Pro
Define safety scope including asbestos and lead considerations, air-quality posting, and effective dust containment plans. Create a PPE checklist and a simple on-site protocol to protect occupants.
Highlight common DIY pitfalls and the signs you should escalate to a preservation-minded contractor. Use a clear decision flow to decide whether to DIY or hire, based on risk, scope, and historic-detail requirements.
Health hazards and required precautions
Asbestos and lead are common health hazards in old plaster work. Always test for these before starting any demolition or repair work.
Use negative-pressure containment to control dust, and seal off areas with plastic sheeting. Wear a NIOSH-approved respirator, disposable coveralls, eye protection, and decontaminate footwear before entering and leaving the work area.
Consult certified abatement guidance if hazardous materials are present to ensure safe removal and disposal.
Common mistakes and how to avoid them
Here are some common DIY pitfalls to steer clear of:
- Overdriving fasteners: Be gentle with lath nails. Overdriving can cause damage.
- Neglecting moisture sources: Fix leaks first. Moisture weakens plaster and lath.
- Mismatching materials: Use compatible materials for repairs to maintain historic integrity.
- Ignoring support: Don’t remove lath without supporting it to prevent collapse.
Take your time, plan ahead, and don’t rush through the work.
Hiring a professional: what to look for
When hiring, look for contractors with experience in historic plaster work. Ask for references and examples of their past projects.
Check if they’re licensed and insured, and ask about warranties on their work. Get everything in writing.
For complex jobs, consider hiring structural or conservation specialists. They can assess the damage and provide tailored solutions to preserve historic details.
Conclusion
Loose lath and old plaster aren’t a mystery problem if you treat the fix like a concrete plan: address safety, confirm what’s actually loose, and choose a path that won’t damage the structure or ruin the look.
Check by checking the structure: start at a small, hidden area and verify you can tighten or replace without pulling on the surrounding plaster, then move in a controlled pattern—inspect fasteners, assess lath condition, test for daylight or movement, and choose refastening or partial replacement based on how widespread the looseness is and what the wall supports.
Common mistakes to avoid are clear: don’t over-tighten and crack the plaster, don’t remove more lath than you must, and never skip proper anchor points or headlands. Always wear eye and breathing protection, secure ladders, and test a small area before committing to a full repair. If you’re unsure about structural integrity, or the project would require extensive lath removal or plaster work, pause and reassess your plan before proceeding.
When in doubt, call a pro—especially if grainy lath, heavy plaster collapse, or unknown water damage shows up. A skilled contractor can confirm the scope, prevent costly mistakes, and get the job done safely. With a solid plan and careful steps, you’ll restore strength, appearance, and peace of mind to the wall—no drama, just results.
FAQ
What are the practical options for fixing loose lath: refastening vs. replacement?
You can either refasten the existing lath or replace it with new lath. Ref stretching and securing lath to the studs or soprats is faster but may not address severely rotten lath. Replacement is more thorough but takes longer and adds cost.
What tools and materials do I need for refastening loose lath?
You’ll need a hammer or fastener gun, nails or appropriate screws, a pry bar, utility knife, and safety gear. For lath, use corrosion-resistant nails or screws sized for wood or metal lath as appropriate. Lime-plaster compatible setting compounds and bonding agents may be used if a patch is needed.
What tools and materials are required if I decide to replace the lath?
Expect to need new lath strips or sheets, plaster or base coats compatible with your system, and bonding agents. You’ll also want cutting tools, a saw or snips, a trowel, and a mixer or mixing container for mortar or plaster. Check product labels for compatibility with historic plaster if applicable.
How does refastening vs. replacing lath affect the structure and long-term durability?
Refastening restores the existing frame and can stabilize the surface if the lath is still sound. Replacing ensures a solid base if the lath is compromised or rotten. Both impact how the plaster will hold up; assess lath condition before deciding.