
Introduction
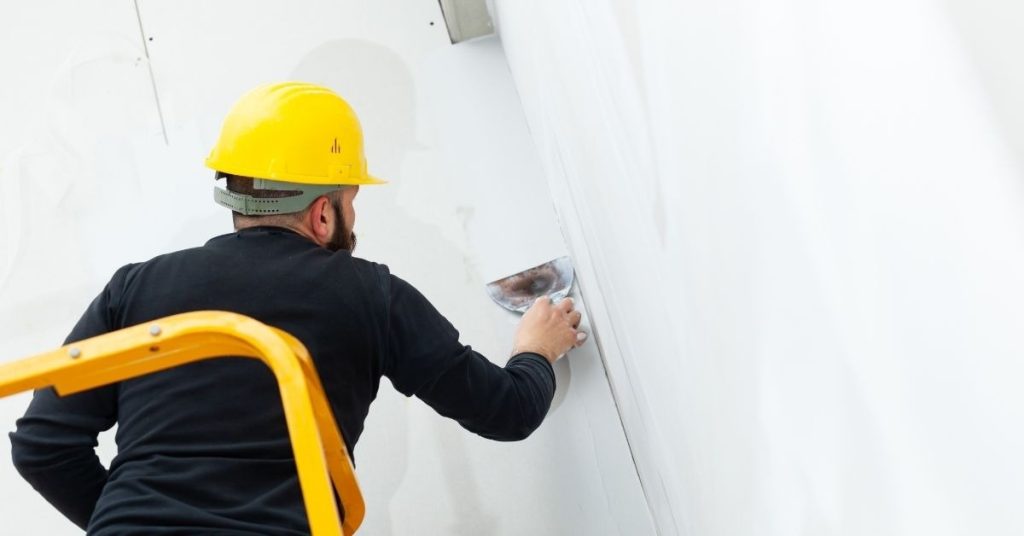
Lime plaster base coats are the first thick layer of lime-rich render that provides a key substrate for finish coats and helps control moisture and movement. For DIY work that means picking clean, well-graded sand suited to lime, keeping hair or fiber reinforcement evenly distributed to bridge shrinkage, and using mixing proportions recommended by the lime product label or manufacturer. Check product instructions and local rules for any required proportions or curing guidance.
Start by choosing a washed or well-graded sand with particle sizes and cleanliness that match what the lime manufacturer specifies, and test a small patch to see workability. Add natural hair or approved fiber at the rate the product guidance suggests, apply the base in thin, even lifts, and keep drying slow and consistent to minimize shrinkage and cracking.
Key takeaways
- Choose clean, low-debris sand graded for plaster to ensure cohesion.
- Use hair reinforcement when plaster base coats risk movement or cracking.
- Test small batches for workability and compatibility before full-scale application.
- Allow controlled plastic movement and proper curing to aid shrink management.
- Follow manufacturer instructions and local rules for material proportions and mixes.
- Wear PPE and use dust control; lime plaster particles irritate eyes and lungs.
Table of Contents
- Introduction
- Key takeaways
- Project Planning and Substrate Assessment
- Sand Selection, Grading, Testing and Cost
- Lime Types, Binders and Mix Guidance
- Hair and Fiber Reinforcement — Materials and When to Use
- How to Prepare, Add and Distribute Hair/Fibres
- Shrink Control and Managing Plastic Movement
- Application, Curing, Protection and Reworking
- Troubleshooting, Common Mistakes, Safety and Sustainability
- Conclusion
- FAQ
Project Planning and Substrate Assessment
Start by scoping the job: decide whether a two‑coat or three‑coat system fits the substrate, expected loads and finish expectations, then set target dry thicknesses and acceptable tolerances for each coat. If the substrate shows unusual structural movement, heavy imposed loads, or complex interfaces, pause and bring an engineer or lime specialist in to confirm the approach.
Assess the background by type — cob, masonry, wood lath or plywood — checking stability, visible movement, suction rate and any contaminants like dust, oil or efflorescence before mixing materials. From that inspection establish surface prep steps (cleaning, stabilization, dampening) and a materials/logistics plan covering binder mixes, reinforcement location, order of operations and key inspection checkpoints.
Assessing cob and masonry stability
Before you start, check your substrate’s stability. This is crucial for a strong bond.
For cob, tap it gently with a trowel. If it crumbles easily, it’s friable – too weak. You might need to stabilize it or consult a specialist.
For masonry, check for loose bricks or stones. Tap them; if they sound hollow, they’re not secure. Check joints too – if they’re cracked or missing mortar, the wall’s unstable.
Look for deep cracks or stepped cracks. These could indicate serious structural issues. If you find any, stop and call an engineer.
Planning coats, thickness and exposure
Decide on your coat system – two or three? It depends on exposure and substrate.
For exposed locations, use a bonding/harling coat first. This protects against weathering. Then, apply a floating coat for finish.
Max thickness per coat? Aim for 10-15mm. Any more, it might crack as it dries.
Exposure matters too. More exposure means more coats – three instead of two. This gives better protection against the elements.
Sand Selection, Grading, Testing and Cost
Choose sand by grading, particle shape and fines content because these control workability, bond with lime putty and shrink behaviour in base coats. Read supplier sieve info or batch data and compare how different gradings change packing density and water demand rather than assuming a single “all-purpose” sand will work.
Use simple on-site checks: feel a pinch for plasticity, observe slump and wet workability during trial mixes, and if possible request sieving results from suppliers to confirm max particle size and fines content. Balance performance against cost and availability by sampling nearby suppliers and considering transport and seasonal variability when planning orders.
Grain size and grading explained
The key to a good base coat lies in the sand’s grain size and how they’re distributed. This is called grading.
For lime-based plasters, you want a well-graded sharp sand. That means it has a range of sizes, from coarse to fine. This improves cohesion, reduces shrinkage, and helps with workability.
Look at the grading curve or supplier specs. You’re aiming for a well-distributed mix that doesn’t have too many fines (too much fine sand can reduce air voids) or too many coarse grains (which can hurt workability).
Cleanliness, contaminants and simple field tests
Clean sand is crucial for lime mortars. Contaminants like silt, clay, or salts can cause problems with setting, strength, and durability.
To check cleanliness, do a wash test. Rinse some sand in water; if it’s clean, the water will run clear. For a more thorough check, try the jar test: mix sand with water in a jar, shake, then let it settle. Clean sand should have a clear layer of water on top.
Also, look for any signs of organic matter or other deleterious materials that could impair set or durability.
Sourcing and cost trade-offs
The cost of sand can vary greatly depending on how it’s sourced and supplied. Quarry-run sand is usually cheaper but may not be as well-graded or clean.
Bagged sand is convenient but more expensive due to packaging. Bulk sand is cheaper but requires proper storage and handling.
When choosing, consider these trade-offs: paying more for graded sharp sand can be justified if it improves performance and reduces mixing costs or rework. Check local availability, transport costs, and seasonal price variations too. Recycled aggregate can also be a cost-effective option when suitable.
Lime Types, Binders and Mix Guidance
Different binders — lime putty, natural hydraulic limes (NHL grades) and other hydraulic products — give different set speeds, early strength and compatibility with soft, porous backgrounds. Compare classes by intended use and always cross‑check manufacturer datasheets or product information for exact setting, strength and mixing guidance before committing to a full run.
Use conservative, commonly used mix approaches and trial patches to dial in water demand and aggregate grading for the binder chosen; adjust mixes for substrate porosity and working time needs. If unsure about compatibility with finishes or substrates, run small tests and consult product literature for pot life, curing needs and any restrictions.
Choosing NHL grade or putty for base coats
When it comes to lime binders, you’ve got a few options. Let’s break down the most common ones:
NHL 2: This is your slow-setting option. It’s great for internal work where you don’t need to rush. It gives you plenty of time to work with it and achieve a smooth finish.
NHL 3.5: This one sets faster than NHL 2, making it a good choice for external work or when you’re working against the clock. But remember, faster set means less working time.
Then there’s lime putty. It’s made by slaking quicklime and letting it age. It’s highly workable and great for fine plastering work. You can gauge it with pozzolan to improve its strength if needed.
Now, hydraulic lime is a bit different. It sets under water, making it ideal for exterior work or areas prone to damp. But it’s not always compatible with soft substrates, so be careful.
Typical mix proportions and water control
Mixing lime plaster is a bit of an art. Here are some common ratios to get you started:
For lime putty, you’re looking at around 1:2 or 1:3 by volume (putty:sand). For NHL, it’s typically 1:3 or 1:4. With hydraulic lime, you might go up to 1:6.
But remember, these are just starting points. You should always check the product datasheet and do some trial mixes to get it right for your specific job.
Water control is crucial too. Too much water weakens the mix, too little makes it hard to work with. Start with a little less than you think you need, then add more as needed. Always measure by volume or weight consistently.
Hair and Fiber Reinforcement — Materials and When to Use
Reinforcement options include natural hair, polypropylene and alkali‑resistant glass fibres, each affecting crack control and breathability differently; choose based on coat thickness, exposure and expected long‑term durability. Check compatibility with the lime system and manufacturer guidance for alkali resistance or degradation concerns where applicable.
Make reinforcement mandatory for friable backgrounds, large void fills, heavy lath‑backed base coats or where movement is expected; for cohesive, low‑movement substrates it may be optional. Include embedment, dosage and placement in the application plan and inspect later for signs of degradation or debonding so you can retrofit if necessary.
Types of hair and synthetic fibres
Reinforcement options for lime plaster base coats include natural animal hair, polypropylene, and alkali-resistant (AR) glass fibres. Each has its unique characteristics:
Animal Hair: Natural, biodegradable, and flexible. It’s alkali-resistant but may degrade over time in exposed conditions.
Polypropylene: Synthetic, durable, and resistant to rot and decay. It’s less flexible than hair but offers good crack control.
AR Glass Fibres: Inorganic, highly durable, and alkali-resistant. They’re stiffer than hair but provide excellent reinforcement for large void fills.
When reinforcement is required
Reinforcement isn’t always necessary in lime plaster base coats. Here’s when it’s crucial:
Use fibres for:
- Friable backgrounds like crumbly cob or loose masonry.
- Large void fills where a well-graded hydraulic lime alone won’t suffice.
- Lath-backed coats or thick base coats to prevent delamination.
For thin finish coats over cohesive substrates with low exposure, a well-graded hydraulic lime may be sufficient without additional reinforcement.
How to Prepare, Add and Distribute Hair/Fibres
Prepare fibres by teasing or cutting to consistent lengths and decide whether to pre‑wet or add dry based on the fibre type and mixer robustness to reduce dust and clumping. Do small trial batches to establish the sequence — usually mix mortar first, then slowly fold in fibres to disperse evenly — and avoid dumping all fibres in at once.
Visually check for even distribution with no dense bundles and use trowel beard length as a practical cue for adequate reinforcement during application. Document trial mixes and tweak proportions until the mix shows uniform fibre spread, consistent workability and no excessive slump when applied.
Step-by-Step Process
Follow this clear sequence to prepare, add, and distribute hair/fibres effectively in your lime plaster base coat.
- Safety first: wear gloves and a mask when handling fibres. Reason: Fibres can be itchy and may cause irritation.
- Prepare fibres: clean, tease, and cut them to consistent lengths (see next section). Check: All fibres should look similar in size and length.
- Pre-wet your fibres or add them dry to the mix. Reason: Pre-wetting reduces dust, but dry-stirring may improve workability.
- Add fibres last: after sand and lime putty/base coat. Check: Ensure fibres are well incorporated before adding water.
- Fold the mix thoroughly: use a paddle or shovel to turn and fold the mix repeatedly. Check: The mix should look uniform with no visible lumps of fibres.
- Let it rest: allow the mix to sit for 10-15 minutes before using. Reason: This helps fibres absorb water evenly.
- Test a small batch first: apply a thin layer on a scrap piece of wall or board. Check: Look for even distribution and adequate reinforcement (see below).
- Clean up: remove any leftover mix from tools and equipment. Reason: Leftover mix can harden and damage tools.
Preparing natural hair and cutting fibres
Proper preparation of natural hair fibres ensures even distribution and optimal reinforcement in your lime plaster base coat.
Cleaning: Remove any dirt or debris by gently brushing the fibres. Reason: Contaminants can affect adhesion and workability.
Teasing: Gently tease the fibres apart using a fork or your fingers to separate clumps. Reason: This helps distribute fibres evenly in the mix.
Cutting: Trim fibres to consistent lengths, typically 1-2 inches. Reason: Uniform length prevents lumps and ensures even reinforcement.
Mixing technique and visual checkpoints
Use this checklist to ensure even fibre dispersion while mixing your lime plaster base coat.
- Pre-wet fibres: If using, ensure they’re fully saturated before adding. Check: Fibres should be soft and flexible.
- Add fibres last: After sand and lime putty/base coat. Check: Fibres should be well incorporated into the mix.
- Fold, don’t stir: Use a paddle or shovel to turn and fold the mix. Reason: Stirring can cause fibres to clump.
- Repeat turning: Turn the mixer or bucket repeatedly to ensure even distribution. Check: The mix should look uniform with no visible lumps of fibres.
- Check for clumps: Look for any dense pockets of fibres. Reason: Clumps can cause weak spots in the plaster.
- Adequate reinforcement: Check trowel beard length after applying a thin layer. Check: A visible ‘beard’ indicates adequate reinforcement (see main article).
- Slump test: Gently tap the mix to check slump. Reason: Too much slump can indicate fibre degradation or excess water.
- Monitor workability: Ensure the mix is easy to spread but not too wet. Check: Adjust water content if necessary.
Quick rule: If fibres clump easily, try pre-wetting or reducing fibre length.
Shrink Control and Managing Plastic Movement
Shrinkage comes from both plastic movement and drying; control starts with mix proportion discipline, controlled water content and staged application rather than trying to solve it after the fact. Use fibres, staged coats and reinforcement keys to interrupt crack paths, and limit single‑coat thickness where practical to reduce internal stresses.
Test unfamiliar backgrounds conservatively with spot patches to observe plastic movement before committing to full areas and adjust binder content or staging as needed. Monitor environmental conditions during early set and slow curing with dampening or shelter where required to reduce rapid moisture loss and cracking risk.
Mix and application strategies to minimise shrink
To control plastic shrinkage, focus on your mix and application. Start with a lower sand fines content – around 2-3mm. This reduces the surface area exposed to water loss.
Control water: Too much water thins the mix, increasing plastic shrinkage. Aim for a consistent, workable mix without excess water.
Avoid over-thinning: Apply in thinner, bonded layers. Thicker coats can’t be properly toolled and may crack as they shrink. Keep each coat under 15mm thick.
Mechanical and reinforcement methods
Use hessian scrims for added strength and movement control. Apply them between coats, embedding in the wet plaster to create a mechanical interlock.
Bedding coats: Start with a thin, well-bonded base coat. This helps distribute stress evenly and reduces cracking risk.
Rasping between coats: Lightly rasp the surface before applying the next coat. This opens up the surface, improving bond and mechanical keying.
Fibre reinforcement: Add hair or synthetic fibres to your mix. They resist plastic movement and help distribute stress evenly. Use around 0.5-1% by volume for best results.
Application, Curing, Protection and Reworking
Follow a clear workflow: prepare the substrate, mix to the chosen binder/aggregate/consistency, apply in the planned coat sequence and provide proper keying or scratching between layers to ensure mechanical interlock. Apply each coat to the target thickness and maintain consistent edges and texture to simplify subsequent coats and inspections.
Cure gently with regular dampening and protection from sun, wind and rain until the material gains strength; adjust practices seasonally and protect fresh work with covers or temporary windbreaks. If reworking the next day is needed, check bond and firmness, re‑scratch or blend edges as required and finish only when the previous layer will accept further trowel work without tearing.
Practical application steps for base coats
The first step is to prepare your substrate. Ensure it’s clean, dry, and free of any contaminants.
Now, let’s mix our lime plaster. Remember the ratio we discussed earlier? Use that. For aggregate sizing, stick with medium-sized sand for base coats. Workability is key here; you want a smooth, lump-free mix.
Apply the render using a trowel or throw it on with a hawk and trowel. Aim for around 10-15mm thickness per coat. Embed those fibres as you go, distributing them evenly.
Once applied, use a float to scratch the surface. This creates keying points for the next layer to bond with. Maintain a uniform texture and control edges to avoid any unsightly lines.
Curing, damp curing and protective measures
Ideal curing conditions are between 10-25°C with around 60% humidity. Keep an eye on the weather forecast; if it’s too hot or dry, you might need to adjust your schedule.
Damp curing is crucial for lime plasters. Spray or mist the surface lightly a few times a day. This helps maintain moisture and prevents cracking. But be careful not to overdo it; we don’t want waterlogging.
Protect your work from sun, wind, and rain. Use coverings like plastic sheets or burlap. Windbreaks can help too. Keep foot traffic to a minimum to avoid contamination.
Reworking is best done within 24 hours of application. But remember, lime plasters take time to cure fully. Don’t rush it; let nature do its job.
Troubleshooting, Common Mistakes, Safety and Sustainability
Expect a small set of recurring defects: shrink cracks, delamination, staining or hair/fibre issues; diagnose by checking substrate moisture, bond quality and coat thickness before prescribing repairs. For each defect pick compatible repair mortars and methods and run small tests rather than aggressive interventions on the whole surface.
Use PPE for lime dust and control dust with misting and containment; dispose of waste per local rules and avoid making dust clouds during mixing or clean‑up. Consider lime’s vapor‑permeable benefits and pick lower‑impact aggregates or recycled materials where suitable, while keeping durability and compatibility in mind.
Common defects and how to fix them
Hair Clumping: Check for clumps during mixing. Break up any clumps with a trowel or clean hands.
Shrink Cracks: Inspect cracks for width and depth. Seal narrow cracks with lime-putty, wider ones may need fibrous repair mortars.
Poor Adhesion: Check bond by gently tapping the surface. Delaminated areas need re-bonding using a suitable scratch/float coat.
Patching Finished Lime Plaster: Clean and prepare the area, apply a compatible lime-putty or repair mortar, and smooth with a trowel.
Safety, PPE and environmental considerations
Dust Control: Use misting/wet methods to minimize dust. Wear a dust mask rated for fine lime dust.
Eye/Skin Protection: Wear chemical-resistant gloves, goggles, and long sleeves. Avoid creating dust clouds.
Safe Handling of Lime: Keep lime products dry. Mix only what you need to avoid waste. Dispose of per local regulations.
Sustainable Choices: Source sand locally, use recyclable fibres, and opt for breathable finishes to reduce environmental impact.
Conclusion
Plan, test, and guard against mistakes now, because a solid base with proper lime plaster yields durable, smooth walls that stay true over time. Safety comes first, and a careful approach saves trouble and money later.
Check in this order: assess the substrate and plan for substrate preparation, select the right sand grade, run a small test patch to verify the mix and the hair reinforcement, mix in the binders and pigments as guided, distribute hair or fibers evenly, apply the base coats with consistent thickness and plastic-mimicking movement, cure properly and protect during drying, and finally rework or patch only where needed.
Avoid common missteps: don’t mix from unknown or dusty sand or skip grading checks, don’t under- or over- reinforce with hair or fibers, and don’t skip shrink-control measures or cure protection. Always test a small area first, wear proper eye and skin protection, and keep the work area well ventilated. If anything looks off during planning, or you encounter frequent cracking, stop and reassess before continuing.
If you’re unsure about substrate suitability, inconsistent grades, or persistent cracking, calling a professional is wise rather than pushing on. With the right prep, precise mixing, and careful curing, you’ll finish with a strong, lasting lime plaster that looks great and performs well for years to come. Stay steady, follow the checks, and you’ll finish confident and on schedule.
FAQ
What should I look for in sand when using lime plaster base coats?
Choose clean, well-graded sand with low clay content. Check that the sand is free of organic matter and large debris. If unsure, read the bag label or manufacturer instructions for acceptable sand types and any sieve guidance.
How can I reinforce lime plaster base coats with hair or fibers?
Use natural fibers that are recommended for lime work and mix them evenly into the plaster. Avoid clumps by pre-dibringing the fibers and working in small batches. Follow product or supplier guidelines for safe mixing ratios and preparation steps.
What shrink control measures help prevent cracks in lime plaster?
Keep plastic movement managed by proper jointing, bonding breaks, and avoiding overly thick one-coat renders. Work in suitable weather windows and use proper mixing to minimize rapid drying. If unsure about timing and practices, check the manufacturer instructions or local guidance for your mix.
How should I proportion lime plaster base coat materials?
Follow the mix guidance from your lime binder and sand supplier, applying only what the manufacturer approves. Do not guess ratios; use the labeled instructions or datasheets and adjust based on workability and substrate response. If in doubt, consult the product label or local expert for safe ranges.