
Introduction
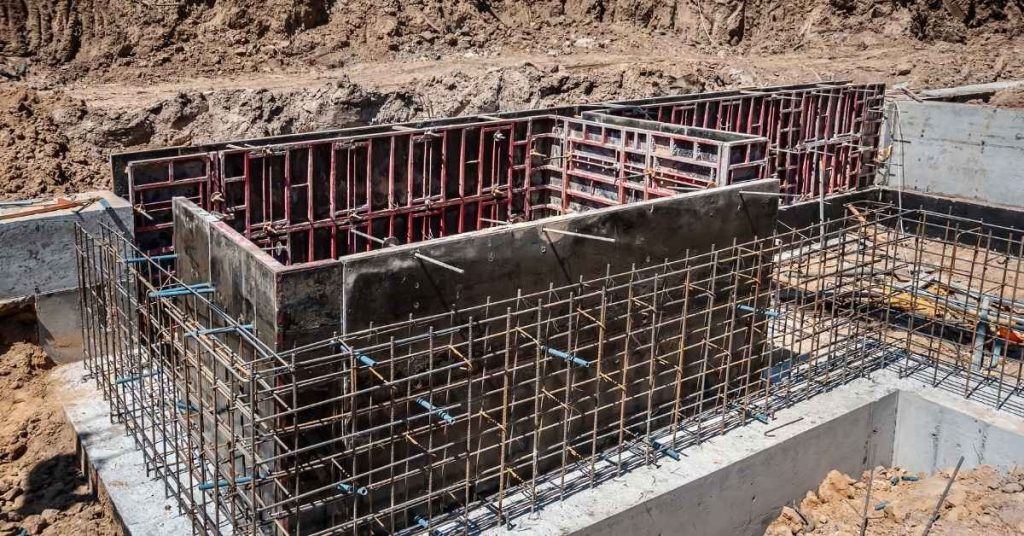
Integrating lighting into exterior concrete means routing electrical wiring through concrete using sleeves or conduit so lighting can be added without cutting into finished surfaces. Plan for where the lights will live and how access will be maintained. This article highlights practical, hands-on considerations for sleeves, conduit, and future-proofing in a DIY context.
Sleeves come in different sizes and configurations; choose based on wiring size and install method. Conduit options include rigid, flexible, and weather-rated types; check manufacturer instructions and local rules for suitability. Think ahead about future-proofing by leaving space for upgrades and ensuring accessible junction points as you plan the installation.
Key takeaways
- Plan sleeve and conduit locations early to minimize future rework and damage.
- Select concrete-sleeve types suitable for exterior exposure and load paths.
- Choose conduit material based on burial depth, flexibility, and moisture resistance.
- Plan wiring strategies that allow future fixtures without cutting hardened concrete.
- Document pre-pour sleeve locations and post-pour access for maintenance.
- Observe safety: follow codes, secure tools, and verify box fill requirements.
Table of Contents
- Introduction
- Key takeaways
- Planning the Lighting Layout and Future Needs
- Types of Lighting Sleeves for Exterior Concrete
- Conduit Selection and Layout Strategies for Future Wiring
- Materials and Installation Methods for Embedding Fixtures
- Step-by-Step Pre-Pour and Post-Pour Installation Workflow
- Safety, Codes, and Inspection Guidance
- Maintenance, Troubleshooting, and Common DIY Errors
- Cost Analysis, Budgeting, and Case-Study Examples
- Conclusion
- FAQ
Planning the Lighting Layout and Future Needs
Begin with a site assessment that maps existing utilities, notes slopes and drainage, and records setback requirements for lighting and conduit routes. Establish clear lighting goals and performance targets, including ambiance, security, task lighting, and preferred color temperature, while considering photometric layout and uniformity. Plan conduit and sleeve strategy for future expansion by preselecting sizes, locations, and access points that align with anticipated equipment changes and smart controls.
Integrate safety, weatherproofing, and code considerations early, and plan for weatherproof enclosures and tamper-resistant installs while leaving spare capacity to grow. A practical workflow includes marking junction boxes and pull points, noting accessible maintenance spaces, and including pull strings or chase paths to support future changes. Verify slope direction for drainage by walking the site, and consider alternative routes if restricted areas exist for lighting or conduit routing to address long-term flexibility.
Site assessment and zoning
Begin by thoroughly inspecting your site for any hazards, restrictions, or existing utilities that may impact your lighting layout. This quick check will help you identify potential issues early on.
Pro tip: Evaluate soil stability, drainage patterns, traffic flow, and visibility lines to optimize fixture placement and prevent damage or obstruction. If the soil is unstable or has poor drainage, consider additional support, elevation, or waterproofing for your fixtures.
Common mistakes often arise from not re-evaluating site conditions, leading to instability and safety issues. Always ensure your fixtures are safe, effective, and compliant with local regulations by adjusting placement as necessary.
Defining functional and aesthetic goals
To achieve the desired ambiance, security, and task lighting while minimizing glare and energy waste, start by verifying the preferred color temperature and photometric performance of your selected fixtures meet project requirements.
Pro tip: Balance illumination levels with glare control measures, such as shielding or aiming fixtures downward, to maintain design intent and comfort. If high-glare potential is present due to fixture type or placement, implement glare control measures or adjust fixture selection.
Reviewing and adjusting your lighting design ensures it meets functional, aesthetic, and comfort goals without compromising safety. Always stakeholder in achieving the desired outcome while maintaining a safe and efficient environment.
Future-proofing checklist
Use this checklist when planning your lighting layout to enable easy upgrades and expansions with minimal disruption and cost. This proactive approach ensures your initial investment supports long-term growth.
- Preselect conduit sizes: Based on anticipated future needs, choose conduit sizes that can accommodate growth and equipment changes.
- Plan sleeve locations: Position sleeves to support growth and allow for easy access during maintenance or upgrades.
- Include access points: Plan for junction boxes and pull strings to facilitate easy maintenance and future expansions.
- Consider chase paths: Include chase paths in your design to simplify running additional wiring in the future.
- Verify local codes: Ensure your plans comply with local electrical codes, wet-dry location ratings, frost depth, and corrosion protection requirements.
- Plan for weatherproof enclosures: Incorporate tamper-resistant installations and weatherproof enclosures to protect against the elements.
- Allow spare capacity: Include extra conduit and sleeve space to accommodate future growth and changes in equipment.
- Mark pull points: Clearly mark junction boxes or pull points during installation for easy identification during maintenance or upgrades.
Quick rule: Regularly review and update your future-proofing plan to ensure it supports anticipated upgrades, expansions, and changes in technology. If conduit or sleeve size is insufficient for future needs, upgrade them accordingly to accommodate growth.
Types of Lighting Sleeves for Exterior Concrete
Understand the role of lighting sleeves in protecting conduit and guiding upgrades while maintaining exterior aesthetics. Consider how sleeves support future fixture changes and repair access without major demolition. Evaluate how sleeves interact with the surrounding concrete finish.
Compare sleeve materials and constructions, focusing on durability, corrosion resistance, and ease of installation. Consider embed depth, inner diameter, and compatibility with conduit types. Review any relevant code or IP considerations before selecting sleeves.
Preformed rigid sleeves (PVC/ABS)
Preformed rigid sleeves, made from materials like PVC or ABS, are ideal for straight runs and embedded junctions in exterior concrete. They protect conduit, maintain aesthetic continuity with the concrete, and are easy to place during installation.
Durability is a key advantage of these sleeves. They withstand the forces exerted by concrete pours and cure well within the structure. The rigid nature also ensures they keep their shape over time.
The inner diameter should match your fixture size to ensure a proper fit, while the wall thickness must meet local code requirements for safety and structural integrity. For straight runs or embedded junctions, consider preformed rigid sleeves as they excel in these applications.
To avoid common mistakes, ensure proper alignment during installation to prevent misplaced fixtures. This will save you time and effort in the long run.
Flexible and corrugated sleeves
Flexible and corrugated sleeves offer benefits for directional runs, vibration tolerance, and routing around obstacles. They are made from materials like PVC or other flexible polymers that allow for bending and twisting during installation.
The flexibility of these sleeves allows them to accommodate slight bends and changes in direction. This makes them ideal for routing around obstacles or following complex paths within the concrete structure. However, avoid excessive bends to prevent conduit damage.
These sleeves also tolerate vibrations well, making them suitable for areas prone to minor tremors or equipment vibrations. When planning your lighting layout, consider flexible or corrugated sleeves if directional runs or routing around obstacles are required.
Before installation, verify the flexibility meets your routing needs and check the freeze-thaw performance to ensure they can withstand temperature changes in your specific climate.
Temporary sacrificial sleeves and removable inserts
Temporary sacrificial sleeves and removable inserts serve a crucial role in protecting conduit during the concrete pour and allowing for later replacement or upsizing of wiring. They are typically made from materials like plastic or foam that can withstand the pouring process but are easily removed afterward.
The primary benefit of these sleeves is their ability to future-proof your lighting system. They allow you to install conduit now, knowing you can upgrade or change fixtures later without having to tear into the concrete.
When choosing these sleeves, verify the material can withstand the pouring process and check the removal ease to ensure they can be taken out when needed. If future-proofing is a priority and there’s potential for later fixture upgrades, consider temporary sacrificial sleeves or removable inserts.
A common mistake is not properly protecting the sleeves during backfilling, which can lead to damage. To prevent this, ensure the sleeves are well-protected throughout the construction process.
Conduit Selection and Layout Strategies for Future Wiring
Evaluate exterior conduit materials for exposure to UV and moisture, noting installation ease and compatibility with concrete embedding. Consider how load-bearing conditions affect conduit choices in embedded sections. Select options that balance protection with practicality for future access.
Differentiate between sleeve and conduit strategies, choosing sleeves for quick future access and conduits for longer-term runs. Size sleeves to allow future wiring with minimal disruption. Plan routes that avoid rebar and control joints while following foundation lines.
Conduit Types and Trade-offs
When selecting conduit for exterior use in concrete, consider the following materials:
Rigid Conduits (PVC/ABS/HDPE): These are durable, UV-resistant, and suitable for embedding in concrete. HDPE is particularly resistant to water and UV exposure.
EMT (Electrical Metallic Tubing): EMT offers ease of installation and bending but may not be load-bearing when embedded in concrete. Ensure it’s rated for your needs.
Flexible PVC: This type is easy to install, bend, and route around corners. However, it may not be suitable for embedding in concrete due to its flexibility and potential movement.
Sizing, Sweeps, and Pull Points
Proper conduit sizing and planning of bends and pull points are crucial for future-proofing:
Size conduits based on current and future wiring needs. Allow room for additional wires or larger cables. Check local code for exact fill limits to prevent wire damage.
Use long-radius sweeps for bends to minimize wire stress and damage. This ensures easier future access and reduces the risk of wire breakage.
Plan accessible pull points along conduit runs, especially at corners and where wires may need to be pulled through. This facilitates easy future wiring additions or changes.
Routing for Accessibility and Protection
Proper routing practices protect conduits from damage, enable future access, and prevent water traps:
Route conduits along foundation lines, around corners, and cross-paths. Be mindful of rebar and control joints to avoid interference.
Avoid high-traffic areas and potential stress points. If water sources are present, route conduits above grade or use sloped trenches to prevent water traps.
Plan pull boxes and accessible points along the conduit run for easy future wiring additions. This ensures that you can accommodate potential changes without damaging existing wires.
Materials and Installation Methods for Embedding Fixtures
Materials and embedding methods for exterior concrete focus on compatibility, corrosion resistance, and serviceability. Choose sleeves, conduit, and mounting hardware suited for outdoor use—HDPE or PVC sleeves, stainless steel or coated steel studs, and non-corrosive fasteners—with attention to UV exposure, freeze-thaw cycles, and chemical exposure. Compare through-sleeves, short sleeves, and conduit runs, and evaluate recessed boxes, surface-mounted housings, and adjustable brackets to balance durability with future access.
A simple on-site check involves visually inspecting materials for signs of corrosion or incompatibility before installation, and a pro review should confirm ratings for exterior use and resistance to the environment. Waterproofing, sealing, and curing practices matter to preserve sleeve alignment and prevent moisture entry, while precise placement supports clean face finishes and future conduit upgrades. Stake and pro checks help catch issues early, guiding you to re-evaluate material choices if sleeves or conduit aren’t rated for exterior use, and to plan for future-proofing with pull points and accessible fixtures.
Material Compatibility and Corrosion Resistance
Selecting suitable materials for sleeves, conduit, and mounting hardware is crucial for the durability of your exterior concrete lighting. These materials should resist UV exposure, freeze-thaw cycles, and chemical exposure.
- Stainless Steel: High corrosion resistance, ideal for outdoor use; ensure it’s 304 or 316 grade with a minimum of 12% chromium content. Avoid: Uncoated steel to prevent corrosion and staining.
- HDPE (High-Density Polyethylene) Sleeves: UV-resistant, durable; choose outdoor-rated sleeves with temperature ranges suitable for your climate (-40°C to 80°C). Tip: HDPE is less prone to cracking than PVC in extreme temperatures.
- PVC/ABS Sleeves: Inexpensive options are available; ensure they meet outdoor exposure standards and have suitable temperature ranges (-20°C to 60°C). Caution: Avoid prolonged exposure to harsh chemicals as it may degrade the material.
- Non-Corrosive Fasteners: Use stainless steel or galvanized fasteners; ensure they are compatible with your chosen mounting hardware and can withstand outdoor conditions.
- Coated Steel Studs: Galvanized or powder-coated for corrosion resistance; verify the coating’s integrity and suitability for outdoor exposure.
Mounting systems and embedded boxes
Choosing the right mounting system facilitates fixture installation, accessibility, and serviceability. Consider these options:
Cast-in Boxes: Recessed into concrete; ideal for low-profile fixtures like LED strips or wall washers. They offer a clean finish but may limit future upgrades.
Post Mounts: Surface-mounted with adjustable brackets; provide easy access and maintenance, suitable for bollards, step lights, or other standalone fixtures. They may require additional support during concrete pouring.
Bollard Anchors: Designed for heavy-duty fixtures like bollards or large luminaires; they offer stability but may limit future fixture changes due to their fixed position.
Tools and materials checklist
Having the right tools ensures efficient pre-pour and post-pour work. Here’s a concise list of essentials:
- Tape Measure: Accurate measurement for sleeve placement; consider a laser measure for long distances.
- Conduit Bender: For shaping conduit to fit your layout; rent or buy based on project scale and frequency of use.
- Hole Saw: To create voids for sleeves or boxes; sizes vary, so choose based on fixture requirements.
- Concrete Sealant: Silicone or polyurethane-based; ensures a watertight seal around penetrations. Tip: Choose a paintable sealant for a clean finish.
- Safety Glasses: Protects eyes from debris during cutting and drilling. Caution: Always wear appropriate personal protective equipment (PPE).
- Drill with Masonry Bit: For creating pilot holes in concrete; consider a hammer drill for better performance.
- Level: Ensures accurate alignment of sleeves and fixtures; a laser level can help with larger projects.
- Conduit Staples/Nails: Secure conduit to formwork or reinforcement; choose the appropriate size and type based on your conduit and layout.
Step-by-Step Pre-Pour and Post-Pour Installation Workflow
Develop a clear schematic that marks sleeve and conduit locations, depths, and intended fixture positions. Include future additions and edge considerations in the planning markups. Keep the plan accessible for all crew members.
Prepare pre-pour details such as sleeve dimensions, spacing, and sealing methods. Plan for protective measures to prevent movement during the pour and to protect sleeves during curing. Outline post-pour steps for restoration and verification.
Step-by-Step Installation Process
The following steps outline a practical workflow for integrating lighting into exterior concrete. This sequence ensures a successful, future-proof installation.
- Prepare the site: Clear the area of debris and ensure all necessary tools and materials are on hand.
- Mark sleeve locations: Using your layout plan, mark where each sleeve should be placed.
- Install sleeves: Dig holes at marked locations, ensuring they’re deep enough to accommodate sleeve length plus additional space for concrete.
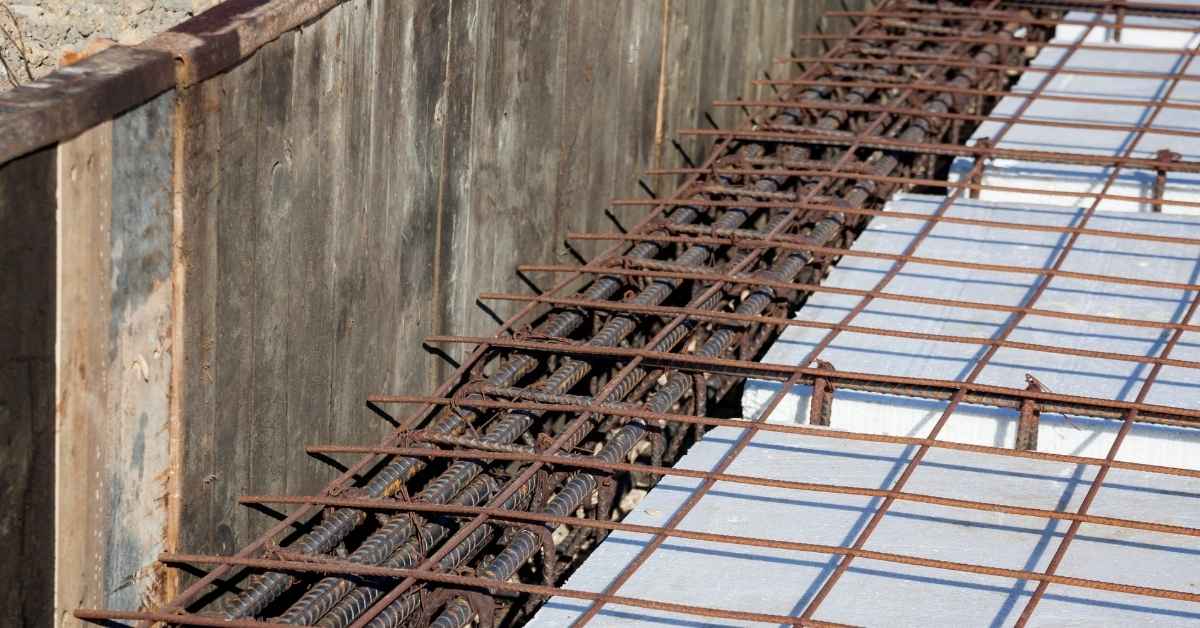
- Secure conduits and sleeves: Anchor conduits and sleeves in place using appropriate straps or anchors to prevent movement during the pour.
- Pour concrete: Follow your mix’s instructions, vibrating around sleeves to remove air pockets and ensure consolidation.
- Level and finish: Ensure the surface is level and finished according to your design.
- Allow curing: Follow manufacturer guidelines for curing time to allow the concrete to gain full strength.
- Inspect and document: Once cured, inspect the installation and document it for future reference.
Pre-pour layout, marking, and securing sleeves
Accurate sleeve placement is crucial for proper lighting fixture alignment post-installation. Begin by reviewing your site schematic to ensure all sleeves are placed correctly.
Marking: Use a durable marker or paint to mark sleeve locations on the surface where concrete will be poured. Ensure marks are visible and easily identifiable.
Securing sleeves: Once holes have been dug, secure sleeves in place using appropriate anchors or straps. This prevents displacement during the pour. Double-check all markings before proceeding to the next step. If sleeves are not properly secured, re-secure them using appropriate anchors or straps.
Pour-time considerations and concrete interaction
Proper consolidation around sleeves prevents voids and ensures structural integrity. Here’s how to achieve this during the pour:
Vibrating: Use a vibrator tool around sleeves to remove air pockets and ensure concrete consolidates properly. This helps prevent voids from forming.
Pour elevation: Monitor the pour elevation to prevent overfilling or underfilling around sleeves. This ensures sleeves are fully encased in concrete, preventing water ingress.
If air pockets are forming around sleeves during the pour, use a vibrator tool to consolidate concrete and remove air. Re-vibrate the area if voids are detected after pouring.
Post-pour access, seals, and junction strategies
Proper sealing and junctioning ensures waterproofing and future accessibility for pulls. Here’s how to achieve this post-pour:
Sealing: Once concrete has cured, reopen sleeves and install watertight seals according to the manufacturer’s instructions. Ensure seals are compatible with sleeve material and concrete.
Junctions: Install accessible junctions at strategic locations for future wire pulls. Temporary covers should be properly secured before leaving the jobsite.
If seals or junctions are damaged during reopening, replace or repair as necessary to maintain waterproofing. Re-inspect and re-seal if any leaks or gaps are discovered post-installation.
Safety, Codes, and Inspection Guidance
Highlight safety risks when embedding lighting in concrete and outline mitigations such as PPE and controlled work zones. Emphasize handling procedures for electrical components to reduce injury or damage. Ensure clear access to high-risk areas after installation.
Identify the codes that typically apply and when to involve a licensed electrician or inspector. Document permits, inspections, and acceptance criteria as part of a compliant record. Outline a plan for ongoing collaboration with authorities and professionals.
Electrical Code Touchpoints and Local Permits
Before starting any work, ensure you’re aware of the electrical codes and local regulations that apply to your project.
- Burial depth: Check NEC (National Electrical Code) and local rules for required burial depths. Incorrect depth can lead to damage or exposure to elements.
- Conduit type: Verify approved conduit types with NEC and local authorities. Using incorrect conduit can result in code violations.
- Junction requirements: Consult NEC Article 300 for proper junction box usage and installation. Improper junctions can cause safety hazards.
- GFCI protection: Ensure GFCI (Ground Fault Circuit Interrupter) protection is installed where required, typically within 6 feet of water sources.
- Conduit sizing: Size conduits appropriately based on wire gauge and load. Undersized conduit can cause overheating and damage.
- Weatherproof enclosures: Use outdoor-rated, weatherproof enclosures to protect electrical components from the elements.
- Permit requirements: Contact local building or electrical authorities to confirm if a permit is needed. Working without a required permit can result in fines or forced demolition.
- Pre-pour planning: Schedule pre-pour inspections with the relevant authority to ensure your installation meets code before concrete pouring begins.
Quick rule: Always consult NEC and local rules, and contact authorities before starting work to avoid costly mistakes and ensure compliance.
Bonding, Grounding, and Moisture Protection
Proper bonding, grounding, and moisture protection are crucial for electrical safety and system longevity.
- Grounding: Ensure all equipment is properly grounded to the earth. Improper grounding can cause electrical shock hazards.
- Bonding metallic conduit: Bond metallic conduit to the grounded circuit conductor at each end. Unbonded metallic conduit can create potential differences and cause corrosion or shock hazards.
- Moisture protection: Implement approved methods such as sealants, gaskets, or potting compounds to prevent water ingress and corrosion. Moisture in electrical systems can lead to short circuits and damage.
- Expansion joints: Consider expansion joint requirements to accommodate concrete movement and prevent stress on electrical components.
- Conductivity of concrete: Check if the concrete mix has conductive properties. Conductive concrete can cause grounding issues and should be avoided in outdoor lighting installations.
Quick rule: Always follow NEC Article 250 for bonding and grounding requirements, and consult manufacturer instructions for moisture protection methods to ensure electrical safety and system longevity.
Maintenance, Troubleshooting, and Common DIY Errors
Set a practical maintenance schedule focused on exterior sleeves, conduits, and weatherproof fixtures. Include checks for seals, moisture control, and cable management. Keep records of inspections and servicing for future reference.
List common failure modes such as moisture intrusion and degraded seals, and provide steps to diagnose issues safely. Emphasize proper sealing practices and protection against expansion and movement. Document corrective actions to support future upgrades.
Routine inspection and preventive maintenance
Regularly inspecting your exterior concrete lighting system helps maintain its longevity and safety. Here’s a checklist to follow:
- Visual Inspection (Monthly): Check for cracks, leaks, or damaged fixtures.
- Cable Management: Ensure cables are secure and not exposed to excessive wear or damage.
- Moisture Detection (Annually): Inspect around sleeves and conduit for signs of moisture intrusion.
- Conduit Condition: Check for blockages, corrosion, or damage. Use a multimeter to test continuity and grounding.
- Fixture Condition: Inspect fixtures for wear, damage, or UV/weathering effects.
- Seal Integrity (Annually): Ensure seals around sleeves and conduit are intact and not degraded.
- Power Supply Health: Check for tripped breakers or flickering/dimming lights. Test power supply with a multimeter.
- Documentation: Keep records of layout, maintenance history, and any repairs made for future reference.
Quick rule: Perform monthly visual checks and annual in-depth inspections to keep your system in optimal condition.
Typical DIY mistakes and fixes
Avoiding common pitfalls ensures a durable, functional exterior concrete lighting installation. Here are some frequent errors to watch out for:
- Incorrect Sleeve Placement: Double-check sleeve alignment and size during layout to avoid misalignment or oversizing.
- No Pull String: Ensure conduit has a pull string installed before pouring concrete to facilitate post-pour access.
- Poor Sealing: Use compatible, rated sealants and follow manufacturer’s instructions for application and curing time.
- Skipping Moisture Barriers: Install drip edges to protect sleeves from water ingress and leave expansion gaps to accommodate concrete movement.
- Over-tightening Fittings: Avoid damaging fittings by using appropriate torque settings during installation.
By avoiding these common mistakes, you’ll ensure a long-lasting, functional exterior lighting system.
Cost Analysis, Budgeting, and Case-Study Examples
Identify primary cost drivers and how each element affects total project expenditure. Consider how upfront decisions influence long-term maintenance and energy use. Use this to inform budgeting without relying on speculative numbers.
Offer a budgeting framework that supports phased deployment and contingency planning. Provide narrative case studies that illustrate different approaches and trade-offs, focusing on practical outcomes rather than exact figures. Include notes on ensuring code compliance and durability within budgets.
Major Cost Drivers and Budgeting Tips
When integrating lighting into exterior concrete projects, several factors significantly impact the overall cost. Understanding these primary cost drivers helps balance upfront costs with long-term savings.
Labor: Labor costs can vary greatly depending on the project’s complexity and access requirements. If complex access is needed, factor in rental costs for specialized equipment or scaffolding and potential labor delays.
Materials: The cost of concrete sleeves, conduit, LED fixtures, and other materials significantly influences the budget. To control material costs, ensure accurate take-offs from detailed plans and regularly review and adjust quantities as needed to avoid underestimations.
Future-proofing: Investing in adequate conduit sizing, pull boxes, and space for additional circuits may seem costly upfront but can significantly reduce long-term maintenance and upgrade costs. Regularly review and update your budget to account for material price fluctuations and labor rate changes.
Mini Case Studies and Lessons Learned
Learning from others’ experiences can help avoid pitfalls and optimize costs. Here are two brief examples illustrating trade-offs, unexpected issues, and cost-saving strategies:
Residential Driveway Retrofit: A homeowner wanted to add lighting to their existing driveway. Initially, they planned to install surface-mounted fixtures but later decided on a more discreet, integrated approach using sleeves and conduit. This change increased the upfront cost but significantly improved the aesthetic result and added value to the property.
Pathway Retrofit: During a pathway retrofit project, unexpected soil conditions led to delays and additional costs. The original plan did not account for these challenges. To avoid similar issues in future projects, it’s crucial to thoroughly investigate site conditions before beginning work and maintain open communication with contractors, suppliers, and other stakeholders.
Conclusion
Finishing your exterior concrete lighting project with attention to sleeves, conduit, and future needs pays off in safety, durability, and clean appearance. A thoughtful, well-planned install reduces the risk of damage during pours and keeps wiring protected for decades.
First, confirm the overall layout and future needs, verify sleeve and conduit placements before the pour, check local code requirements and manufacturer instructions, and then mark all access points, mounting heights, and fixture depths. Ensure you have the right sleeve types for the expected fixtures, plan conduit routes that stay clear of high-traffic areas, and prepare pre-pour fittings and post-pour access points. Validate your plan in a small test area or mock-up if possible, and document any changes for inspections.
Common mistakes to avoid include delaying sleeve placement or conduit routing until after the concrete is set, using undersized or incompatible conduit, and neglecting drainage or sealing around penetrations. Apply proper sealing, maintain straight, protected runs, and test all connections and weatherproofing in a controlled way before final use. Do not skip safety checks, and avoid irreversible changes that could compromise the structure or void warranties.
If the project extends beyond basic wiring or requires uncertain code compliance, call a licensed electrician or structural contractor to review the plan before proceeding. When in doubt, pause and reassess rather than forcing completion. With careful steps and early planning, you can arrive at a lighting system that is safe, reliable, and ready for future upgrades.
FAQ
What are the best types of lighting sleeves for exterior concrete?
Choose sleeves that fit the fixture size and allow for future wiring changes. Look for sleeves with a smooth interior and a sealed end to reduce debris entry. Check the manufacturer guidelines for compatible fits and recommended installation methods.
What conduit installation methods work well when embedding in concrete?
Plan for a combination of pre-pour conduits and post-pour access where needed. Use conduit runs that minimize bends to reduce wear on wires. Always follow the manufacturer instructions and local rules for sealing joints and protecting against moisture.
How should I choose conduit material for exterior use?
Select materials rated for outdoor use and compatible with concrete. Consider durability, impact resistance, and resistance to UV and moisture. If unsure, review the label, datasheet, or manufacturer recommendations for environmental suitability.
What should I consider for waterproofing conduits and connections?
Seal all conduit penetrations and junctions to prevent water ingress. Use appropriate gaskets, seals, or caulks specified for exterior installations. Verify that all components are rated for outdoor exposure and follow installation instructions.