

Introduction
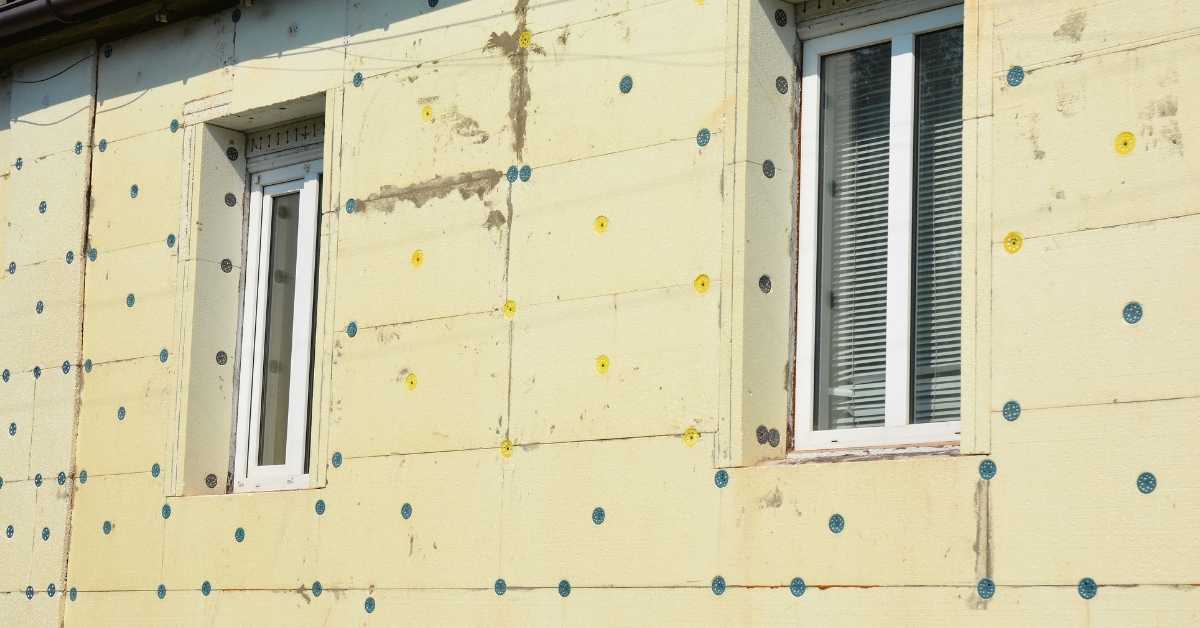
Installing a new vent through stucco means creating a weather-tight opening in stucco siding to run a vent sleeve and sealant geometry. This keeps airflow functional while protecting the wall from water penetration. You’ll want to plan the sleeve, slope, and seal around the opening so the vent directs moisture away from the home.
Choose the vent sleeve material that matches stucco conditions and local climate, and verify it with manufacturer instructions or local rules. Make sure the vent is set at the proper angle for drainage, and use sealing techniques that maintain a clean, continuous barrier around the opening. Gather a practical tools-and-materials list and follow safe, straightforward steps to complete the install without compromising the stucco finish.
Key takeaways
- Choose a vent sleeve material compatible with stucco and exterior exposure.
- Verify proper slope and geometry so moisture drains away from the wall.
- Wear eye protection and dust mask during cutting and chisel work.
- Use appropriate flashing and sealant per manufacturer instructions to seal gaps.
- Prepare a concise tools and materials checklist to track sleeve, flashing, and sealant stages.
- Document permits, codes, and inspection steps to ensure compliance.
Table of Contents
- Introduction
- Key takeaways
- Why a Correct Stucco Vent Penetration Matters
- Planning, Permits, and Code Compliance
- Choosing the Right Sleeve and Materials
- Proper Slope and Vent Geometry
- Flashing, Sealant Geometry, and Application Techniques
- Step-by-Step Installation Workflow (Wall Penetration)
- Troubleshooting, Common Pitfalls, and Longevity Strategies
- Tools, Budgeting, and DIY Vs. Professional Considerations
- Conclusion
- FAQ
Why a Correct Stucco Vent Penetration Matters
Improper vent penetrations through stucco can lead to water intrusion, mold growth, stucco cracking, and reduced appliance performance. When geometry is off, these issues compound and become harder to fix later.
A properly designed envelope uses sleeve alignment, slope away from the wall, and flashing to keep water from wicking behind the stucco. This section outlines when a DIY approach is appropriate and when a licensed pro is wise to hire, with a practical checklist for verification.
Common vent types and failure modes
Vents come in various types, each serving a specific purpose. Here’s what you need to know:
Dryer vents are common in laundry rooms. They should be made of rigid metal or flexible foil with a smooth interior to prevent lint buildup.
Bathroom and kitchen exhaust vents remove moisture and odors. They require proper sizing to match the appliance’s CFM rating and should have a backdraft damper to prevent cold air infiltration.
Combustion vents are crucial for gas appliances like water heaters and furnaces. They must be properly sized, sloped, and sealed to ensure safe operation.
When to replace vs retrofit
Knowing when to replace or retrofit a vent can save you time and money. Here are signs to look for:
If you notice recurrent leaks, it might be better to replace the entire vent rather than just resealing. This indicates that the original installation was flawed, and patching won’t solve the problem.
Check for structural damage. If the vent or its surrounding area is cracked or damaged, replacement may be necessary. Retrofitting might not address these underlying issues.
Inspect for corrosion, especially on metal vents. If corrosion is present, it’s a sign that water has been getting in, and replacing the vent is likely the best course of action.
Planning, Permits, and Code Compliance
Start by identifying local codes that govern exterior penetrations through stucco, including weatherproofing, fire separation, and vent sizing. Check which code sections apply and how local amendments may change requirements.
Determine permit triggers and the required documentation, then define clearance, firestopping, and flashing expectations. Establish a clear path for plan review, inspections, and handling variations with the building department.
What to check in local codes and manufacturer instructions
Before you start, ensure your vent installation aligns with both local codes and manufacturer guidelines. Here’s a checklist to help:
- Vent type clearance: Check the minimum clearances from combustibles for your chosen vent type.
- Fire-collar or firestop needs: Confirm if you need a fire-rated assembly, and if so, what’s required (e.g., metal fire collar, intumescent paint).
- WRB/flashings: Verify water-resistive barrier and flashing requirements to prevent air and water intrusion.
- Slope and termination: Ensure the vent slope promotes proper drainage and termination details match your wall finish.
- Sealant type: Choose a compatible sealant with your stucco finish, ensuring it’s suitable for exterior use and can withstand UV exposure.
- Vent size: Confirm the vent size meets both local codes and mechanical requirements.
- Vent material: Check if the vent material (e.g., metal, plastic) is approved by local codes.
- Installation method: Follow manufacturer’s installation instructions to avoid voiding warranties or causing damage.
Quick rule: Always prioritize manufacturer and local code specifications over personal preference. Skipping these checks could lead to improper installation, safety hazards, or costly rework.
Permit and inspection checklist
Stay on top of permit requirements and inspections to avoid fines and ensure your vent installation is up to code. Here’s a helpful checklist:
- When to file for a permit: Check with your local building department when exterior penetrations require permits.
- Who to file with: Determine if you need to file with the building department, plumbing/mechanical department, or both.
- Plan submittal items: Gather necessary drawings, vent specifications, and sealant/product lists for permit application.
- Required inspections: Know when to call for inspections (e.g., rough-in, final) to ensure your installation meets code.
- Inspection points: Familiarize yourself with common inspection points, such as vent clearances, sealant application, and termination details.
- Record-keeping: Keep records of approved products, installation methods, and inspection results for future reference.
- Variations or appeals: Understand how to handle code variations or plan review appeals if local practice differs from standard guidance.
Quick rule: Stay proactive with permit requirements and inspections. Missing a required inspection could lead to fines, rework, or delayed project completion.
Choosing the Right Sleeve and Materials
Compare sleeve materials such as stainless steel, galvanized metal, and PVC/hard plastic for corrosion resistance, longevity, and maintenance needs. Consider how environments like coastal air or inland heat affect material choice.
Assess flange and collar designs for flashing integration and gasket compatibility. Ensure the sleeve geometry supports a watertight seal and proper sealant interaction with stucco and the wall assembly.
Sleeve sizing, length and fit guidance
The sleeve’s inside diameter (ID) must match your vent’s size. Check manufacturer charts or use typical extensions like 1/4″ or 1/2″.
Consider insulation and cladding thickness when choosing sleeve length. It should extend at least 1″ into the wall cavity.
Verify local rules and product specs to ensure proper fit and compliance with building codes.
Material compatibility with stucco, lath, and WRB
Choosing the right sleeve material ensures a strong bond and prevents premature failure.
- Stainless steel: Corrosion-resistant, ideal for coastal areas. Use stainless fasteners to avoid galvanic reactions.
- Galvanized metal: Cheaper but less durable in salt air. Requires regular maintenance and may stain stucco.
- PVC/hard plastic: Inexpensive, lightweight, but can degrade in heat. Not suitable for all environments.
- Avoid aluminum: Prone to corrosion and galvanic reactions, leading to vent failure.
- Flashing and gaskets: Use compatible materials to create a watertight seal with stucco and WRB.
Proper Slope and Vent Geometry
The vent must slope toward the exterior to drain condensation and prevent water backflow. Gravity-driven drainage reduces the risk of moisture tracking behind the stucco.
Verify a field slope that meets local guidance and maintain clearances around the sleeve without sharp bends. Plan for uninterrupted airflow while keeping water out through proper flashing and backer support.
Recommended slope principles and safe ranges
The vent must slope towards the exterior to drain condensation. This is crucial to prevent water backflow and potential damage.
Most manufacturers recommend a minimum slope of 1/4 inch per foot, but check your specific product’s spec sheet for exact values. Local codes may also dictate a certain slope.
Always follow the manufacturer’s or code’s recommendations. A slight downward pitch towards the outside ensures proper drainage and protects your home from moisture issues.
Setting and checking slope during installation
To set the correct slope, use shims or sloped mounting blocks behind the vent sleeve. Ensure they’re level with a slight downward pitch towards the exterior.
For dryer vents, consider using an angled collar to maintain the required slope at the termination point.
Once installed, verify the slope using a level or by pouring water into the vent and watching it drain. The water should flow smoothly out of the vent.
Special geometry for high-moisture vents
For dryer vents, install a condensate trap or drip pan to collect moisture. This prevents water from entering your home and causing damage.
Condensing appliance vents (like gas dryers) need extra care. Ensure the vent sleeve is properly insulated to prevent condensation from forming on the outside of the sleeve, which can lead to freeze-thaw cycles and damage.
Avoid sharp bends in high-moisture vents as they can trap moisture and cause issues. Maintain a clear path for air and water to flow through the vent.
Flashing, Sealant Geometry, and Application Techniques
Explain how to integrate flashing with the WRB behind the stucco, including placement and continuous drainage paths to prevent leaks at the vent sleeve. Ensure flashing overlaps and directs moisture away from the opening.
Detail sealant bead geometry options and how they minimize three-sided adhesion and capillary leaks. Include steps for priming, tooling, and transitioning to the vent flange for a durable seal.
Choosing the right sealant: comparison and compatibility
When selecting a sealant for your vent through stucco, you’ve got three main families to consider: silicone, polyurethane, and MS/polymer hybrids. Each has its own strengths and weaknesses.
Silicone is great for high-moisture areas due to its water resistance. It’s also paintable once cured. But it doesn’t handle extreme temperatures as well as others.
Polyurethane, on the other hand, performs well in both hot and cold conditions. It’s tough and durable but may not be suitable for high-moisture areas due to potential water damage.
MS/polymer hybrids combine properties of both silicone and polyurethane. They’re versatile, handling a range of temperatures and moisture levels. But they might not perform as well in extreme conditions compared to dedicated sealants.
Joint geometry and proper bead profiles
Proper bead profiles around your vent sleeve can make all the difference in preventing leaks. Concave or hourglass shapes are ideal as they reduce stress and water pooling.
Use backer rods or bond-breakers to control the depth of your sealant bead. This helps prevent adhesion on all sides, which could lead to cracking or debonding under movement or temperature changes.
For concave beads, use a suitable tool like a sealant applicator gun with a concave nozzle tip. For transition fillets, use a triangular trowel or similar tool to create the desired profile.
Flashing details and integration with stucco layers
Proper flashing is crucial for directing water away from your vent sleeve. Start by routing the flashing over the WRB, ensuring it’s well-secured to prevent movement.
Extend the flashing up the wall at least 4 inches above the top of the sleeve. This creates a continuous drainage plane and helps prevent water from getting behind the stucco. Tie the flashing into any lath or weep screed details for added support.
Ensure there’s a gap between the flashing and the sleeve to allow for movement and prevent adhesion. This is where your sealant will go, creating a flexible barrier that can accommodate thermal expansion and contraction.
Step-by-Step Installation Workflow (Wall Penetration)
Outline planning checkpoints such as vent type, stucco thickness, and access behind the wall for flashing work. Confirm the interior clearance for sealing and drainage tasks.
Describe cutting, sleeve placement, flashing geometry, and sealing interfaces in sequence. Include finishing checks for water intrusion and interior access notes for resealing and maintenance.
Step-by-Step Installation Process
The following steps guide you through the installation workflow, from preparation to final checks.
- Prepare the site: Clear debris, ensure safety, and have all tools ready. Safety first: wear appropriate PPE (personal protective equipment).
- Mark the cut line: Measure and mark the exact location for your vent penetration through stucco and lath.
- Cut the hole: Using a reciprocating saw or rotary tool, carefully cut along the marked line. Keep dust to a minimum with a vacuum attachment.
- Install sleeve and flashing: Follow the order of operations described in the next subsection to ensure proper water management.
- Seal and finish: Apply sealant around the sleeve and flashing, then apply stucco patch if needed. Test for leaks and inspect your work.
- Clean up: Remove any remaining debris and dispose of it properly.
Cutting the Hole and Protecting the Wall Assembly
Carefully cutting through stucco and lath ensures you don’t damage underlying layers. Control dust to keep your workspace clean.
Start with a pilot hole: Drill a small hole at the center of your mark, then insert a thin blade to score the cut line on both sides before sawing.
Use a reciprocating saw or rotary tool with a metal-cutting blade. Keep the blade perpendicular to the wall and maintain steady pressure. Protect surrounding finish: Use painter’s tape and a sharpie to mark your cut line, then apply a thin bead of caulk along the line before cutting.
Exposing underlying layers: If you need to expose the WRB or lath for repair, do so carefully. Patch any exposed areas with new lath and stucco compound before proceeding.
Installing Sleeve, Attaching Flashing, and Sealing
The order of operations ensures proper water management around your vent penetration.
Flashing first: Install the flashing or kick-out at the base of the sleeve opening. Ensure it’s properly sloped to shed water away from the interior.
Insert sleeve and fasten: Insert the sleeve into the hole, ensuring it’s centered with proper slope. Use mechanical fasteners to secure it in place.
Sealant application: Apply a bead of breathable but watertight caulk around the sleeve and flashing. Ensure the geometry of your sealant bead follows recommended profiles to maintain a proper seal.
Exterior Finishing, Stucco Patching, and Inspection Points
Once the sleeve is installed, follow this checklist to finish your penetration and ensure it’s watertight.
- Slope check: Verify that the sleeve and flashing are properly sloped away from the interior.
- Sealant bead: Inspect the sealant bead around the sleeve and flashing. Ensure it’s continuous and follows recommended profiles.
- Stucco patching: If needed, apply a stucco patch to blend with the surrounding finish. Allow it to cure according to manufacturer instructions.
- Water test: Spray water around the penetration and observe for leaks. Ensure no water enters the interior.
- Flashing check: Verify that flashings are visible, continuous, and properly integrated with stucco layers.
- Interior clearance: Check interior access points to ensure they’re clear of obstructions for future maintenance.
- Code compliance: Ensure your installation meets local codes and manufacturer requirements.
- Maintenance notes: Document any special maintenance needs or re-sealing instructions for future reference.
Quick rule: Always test for leaks after applying sealant and before finishing with stucco patch.
Troubleshooting, Common Pitfalls, and Longevity Strategies
Use a diagnostic checklist to identify leaks, confirm sleeve alignment, and verify proper slope and flashing overlap. Look for common failure points during weather events and inspections.
Discuss durability strategies, routine maintenance, and proactive signs of wear. Provide repair approaches that minimize stucco damage and maintain performance over time.
Diagnosing leaks and performance problems
Leaks around a vent through stucco can be tricky to diagnose. Start by checking for visible signs of water intrusion like stains, mold, or peeling paint.
Water tests are helpful: wet the area and look for water entry points. Use a probe to gently poke around sealant joints to find any gaps. Inspect inside your wall where possible to see if moisture is present.
Intermittent symptoms can be tough. Try to recreate conditions that cause leaks, like heavy rain or high winds. If you’re unsure whether the problem lies with the sleeve, flashing, or interior duct, start at the exterior. Check sealant joints, flashing overlap, and sleeve alignment.
Repair tactics: reseal, reflash, or replace?
Before deciding on a repair tactic, assess the damage. If it’s minor – like a small crack in the sealant – resealing might do the trick.
For more extensive damage, like torn flashing or a rusted sleeve, you’ll need to reflash or replace. Always prioritize safety when working with electrical or plumbing vents. If you’re unsure about any aspect of the repair, don’t hesitate to call a professional.
Here’s a simple guide: if the damage is minor and only affects the sealant, reseal it. If the flashing or sleeve is damaged but still structurally sound, reflash it. But if there’s significant corrosion or physical damage, replace the entire assembly. It might seem like overkill, but it ensures longevity and prevents further issues.
Maintenance and inspection intervals
When to use this checklist: Inspect your vent through stucco annually or after severe weather events. Regular maintenance extends the life of your assembly.
- Check sealant joints: Ensure they’re intact and flexible. If they’re cracked, hard, or missing, it’s time to reseal.
- Inspect flashing overlap: Make sure it’s properly secured and extends at least 4 inches into the stucco.
- Verify sleeve alignment: It should be straight and not pushed back into the wall.
- Assess slope/drainage: Water should drain away from the wall. If it’s ponding or wicking, you may need to adjust the slope.
- Check for moisture inside the wall: Use a moisture meter if necessary. If there’s excess moisture, investigate further.
- Examine stucco around the vent: Look for cracks, gaps, or other signs of damage.
- Inspect interior ductwork: Ensure it’s properly connected and not damaged.
- Review material condition: Check sleeves, flashing, and sealant for signs of wear, corrosion, or deterioration.
Quick rule: If you find any issues during your inspection, address them promptly to prevent further damage and leaks.
Tools, Budgeting, and DIY Vs. Professional Considerations
List the essential tools and materials for venting through stucco, including sleeves, flashing, sealants, and backing materials. Plan for access equipment and proper disposal methods.
Explain budgeting drivers and decision criteria for DIY vs. professional help. Include a framework for permits, timelines, contingencies, and warranty considerations.
Tools and materials checklist
Before you start, make sure you have all the necessary tools and materials for a smooth installation. Here’s a quick checklist to keep you on track.
- Drill: For cutting holes and mixing mortar.
- Masonry bits (1/2″ & 3/4″): To drill through stucco and into the wall.
- Core bit (size of sleeve): To cut out a perfect hole for the sleeve.
- Chisel: For tapping the core bit and cleaning up edges.
- Stucco sleeves: Match the size to your vent’s dimensions. Check they’re compatible with your wall assembly.
- Flashing (galvanized steel or aluminum): To protect the opening from water intrusion. Ensure it’s wide enough to cover the sleeve and extend into the stucco.
- Sealants: Use a compatible, high-quality sealant for your wall type. Check compatibility with flashing material.
- Backer rod: To fill gaps before applying sealant for a smooth finish.
- Mortar or stucco patching materials: For finishing the job and blending in with existing stucco.
Quick rule: Always check your tools and materials before starting. Missing something can lead to delays or poor results.
Cost factors and how to estimate your job
The cost of installing a vent through stucco varies depending on several factors. Here’s what drives the price:
Materials: Better quality materials mean higher costs. Cheap sealants or sleeves can lead to leaks down the road.
Access difficulty: If you need a scaffold or special equipment, expect additional costs.
Permit/inspection fees: Check with your local building department for permit and inspection costs. They vary by location.
Labor: Hiring a professional will add labor costs to your estimate. Get quotes from suppliers or contractors to compare prices.
Safety precautions and when to hire a pro
Safety should always be your top priority. Here are some key safety items to consider:
Ladder safety: Always use a sturdy ladder and have someone spotting you if needed.
Dust and silica controls: Wear a respirator when drilling or sanding stucco to avoid inhaling harmful dust.
Electrical isolation: If your vent is near electrical lines, ensure they’re isolated before starting work.
Combustion vents: Be extra careful with gas appliances. Ensure proper ventilation and follow manufacturer’s guidelines.
Hiring a professional is recommended in the following scenarios:
Complex installations: If your vent requires reframing or extensive stucco repair, consider hiring a pro to ensure a solid result.
Safety concerns: When dealing with electrical lines, gas appliances, or high places, it’s best to leave it to the professionals.
Conclusion
Getting this vent right isn’t optional. A correct penetration protects the wall, keeps water out, and makes the vent last through years of weather and use. Stay deliberate, check each step, and you’ll avoid costly fixes later.
Make it actionable: verify local permits and codes, confirm you have the right sleeve and slope, dry-fit the assembly, install flashing and correct sealant geometry, then test the assembly for leaks before you finish. Plan your wall cut, install sleeve level and plumb, align the vent with proper slope away from the stucco, seal joints cleanly, and cure as required before exposure to moisture.
Common mistakes to avoid are trying to rush the penetration, skipping flashing or improper sealant geometry, and assuming one size fits all sleeves. Always practice good safety—shut off nearby utilities when cutting, protect the surrounding stucco, and test in a small area first to verify fit and drainage. Remember: plan, don’t improvise; measure twice, seal once; and watch for leaks after the first rain or spray test.
If the project intersects complicated framing, irregular stucco, or you’re unsure about local codes, know when to call a professional. When in doubt about permits, code compliance, or the integrity of the wall, get a pro involved. Stay focused, stay safe, and you’ll finish confident and with a durable, neat vent that works as intended.
FAQ
What sleeve material works best for stucco vent penetrations, and how do I choose it?
Choose a sleeve designed for exterior stucco and moisture management. Look for materials that resist cracking and corrosion, and match the vent type you’re installing. Check the label or manufacturer instructions for compatibility with stucco finishes and climate conditions.
What slope or angle should the vent have relative to the wall to avoid leaks?
Follow the manufacturer’s guidance for your vent and sleeve, and ensure the vent points slightly downward to shed water away from the wall. The key is a consistent, gradual slope that aligns with the wall plane and flashing details. If unsure, check local product instructions or ask the supplier.
What are the best sealing techniques around the vent opening in stucco?
Sealant should bridge between the sleeve and the stucco with a compatible sealant or caulk rated for exterior use and moisture resistance. Use backer rod where needed to maintain proper seal gap and avoid squeezing out excessive material. Always follow the sealant label for cure times and joint prep.
What tools and materials do I need, and what safety steps should I follow?
You’ll need the sleeve, vent, exterior sealant, flashing, stucco-compatible backer rod, a caulk gun, putty knife, utility knife, and basic hand tools. Wear eye protection, gloves, and a dust mask when cutting or grinding. Check the vent and sleeve instructions, plus local rules, for any additional safety requirements.