
Introduction
Blocking behind stucco provides a solid mount point that the hardware can bite into. To find studs behind stucco, look for the interior framing and intended anchor points, and test suspected areas with a stud finder or by tapping and listening. Check manufacturer instructions and local rules for acceptable methods, and proceed only after you confirm the location is safe.
Install blocking so it sits behind the stucco with solid contact to the framing, and avoid creating gaps that can trap moisture. When drilling, protect yourself and the surface, use proper bits, and verify that you are not severing drainage paths or weep systems. If in doubt, stop and check labels and instructions from the hardware and local regulations.
Key takeaways
- Locate studs behind stucco using existing anchors and careful tapping, confirm with test drill.
- Block behind mounting plates to transfer loads to framing, not just stucco.
- Preserve drainage paths by aligning blocking with weep screed and flashing routes.
- Drill with appropriate bits, avoid exceeding plate depth, and check for utilities.
- Verify weatherproofing after mounting, seal penetrations, and maintain flashing continuity.
- Consult local codes or professionals for high-risk installations and structural compliance.
Table of Contents
- Introduction
- Key takeaways
- Why Add Blocking Behind Stucco and When It Is Necessary
- Understanding Stucco Wall Assemblies and Drainage Paths
- Tools, Materials Checklist and Visual Checkpoints Before Work
- Step-by-Step Methods to Locate Studs Behind Stucco
- Installing Blocking and Mounting Plates Behind Stucco (Methods and Steps)
- Preserving and Restoring Drainage, Flashing, and Weatherproofing
- Safety, Code Compliance, and Hiring Professionals
- Costs, Common Mistakes to Avoid, and Long-Term Maintenance
- Conclusion
- FAQ
Why Add Blocking Behind Stucco and When It Is Necessary
Blocking behind stucco serves a purpose beyond simply giving mounts something to bite. It provides a solid path for load transfer from rails, cameras, lights, or safety devices to the framing, while considering dynamic vs. static loads and wind uplift. The goal is to balance strength with preserving the drainage plane and air gaps that the stucco system relies on.
Use blocking when criteria indicate it will improve safety without compromising moisture management. Consult product labels, manufacturer instructions, and local rules to decide between blocking, adhesive anchors, sleeves, or surface mounting with proper flashing. Include best practices for maintaining drainage, weep slots, and rain screen details, and outline where EIFS, foam-backed systems, or wood behind stucco affect your approach. A quick decision tree and checklists can help you decide when to block, when to use alternatives, and when to bring in a pro.
Loads and common use cases
Blocking behind stucco is crucial to support various mounts safely. Let’s break down loads and common use cases:
Light Loads (under 50 lbs): These include small cameras, lights, or security sensors. Through-blocking may not be necessary; consider alternatives like adhesive anchors or exterior-rated mounting rails.
Medium Loads (50-200 lbs): Mounts like safety rails, larger screens, or heavy-duty lighting fixtures require through-blocking. Ensure blocking is appropriately spaced and secured to handle dynamic loads and wind uplift.
Heavy Loads (over 200 lbs): For heavy mounts like large signage or heavy-duty equipment, consult a structural engineer for specific blocking requirements. Always follow local building codes.
Alternatives to cutting stucco
Cutting into stucco can compromise its integrity and drainage plane. Here are some non-invasive alternatives:
Freestanding Supports: For light loads, consider freestanding mounts that don’t require penetration. These can be adjusted for height and angle as needed.
Exterior-Rated Mounting Rails: These can be attached to the stucco surface using adhesive anchors or sleeve anchors, providing a secure base for mounting fixtures without compromising the stucco.
Adhesive Solutions: For very light loads, exterior-rated adhesives can be used. However, ensure they are compatible with your stucco and follow manufacturer guidelines to prevent delamination.
Understanding Stucco Wall Assemblies and Drainage Paths
The typical wall behind stucco includes a surface coat, lath, a water-resistive barrier, sheathing, and studs. Each layer plays a role in moisture management and structural integrity. Blocking work must respect these layers to avoid disrupting drainage paths or creating trap/moisture issues.
Drainage planes, flashing detail, and weep locations work together to shed water and keep the wall dry. Common mistakes during blocking involve blocking too deep, interfering with weep slots, or sealing off breathable channels. Learn to locate unobtrusive blocking points by safely finding studs behind lath using stud finders, magnets, or decorative anchors, while avoiding WRB damage. Plan blocking approaches that preserve drainage with shallow blocking, mounted plates, or behind-stud placements, and select fasteners that resist corrosion in exterior brick/stucco assemblies.
How drainage paths work and where they run
The key to a durable stucco wall is managing water. Here’s how:
Flashing at the base of walls and around openings directs water downwards. It stops water from seeping behind the stucco.
Weep screeds, those small holes or slots near the bottom of your wall, let water out. They’re usually covered with a protective mesh to keep critters out.
Gaps between layers – like the one between your lath and sheathing – allow air circulation. This helps dry any moisture that gets in. Keep these gaps clear when adding blocking.
Telling EIFS (synthetic) from traditional stucco
EIFS and cement-based stucco look similar but behave differently. Here’s how to tell them apart:
EIFS feels light, almost like plastic. It’s often textured with a synthetic material. Traditional stucco is heavy and has a rough, porous surface.
EIFS is usually applied over foam insulation. Stucco goes directly onto the wall structure. This affects how you mount things – EIFS can’t support much weight without proper backing.
If you’re unsure, consult with a professional before starting any work. The wrong approach could damage your wall or void warranties.
Tools, Materials Checklist and Visual Checkpoints Before Work
Before cutting or drilling, confirm wall type and drainage considerations, and ensure there is a clear path for drainage after mounting. Verify no plumbing or electrical lines are in the mounting zone and that water flow channels remain unobstructed.
Tools and PPE include non-invasive detectors, a drill and bits, a bore-scope or inspection camera, flashing materials, backer materials, corrosion-resistant fasteners, sealants, level, chalk line, gloves, eye protection, and a stable ladder. Check material compatibility and corrosion ratings for local climate and substrate combination. Visually inspect for moisture damage, cracks, efflorescence, or delamination, and confirm the substrate can support mounts while leaving drainage intact.
Non-invasive detection and inspection tools
Before you start cutting, use these tools to locate studs and inspect the wall without causing damage.
- Stud finder (multi-sensor): Use it to locate studs and check for metal or moisture behind the stucco. Skip this and you might hit a pipe or wire.
- Thermal camera: If available, use it to identify cold spots that could indicate hidden cavities or insulation gaps.
- Borescope or inspection camera: Inspect any drilled holes to ensure they’re clear of obstructions and to check for proper backer material installation.
Quick rule: Always double-check your findings with multiple tools. Relying on just one can lead to costly mistakes.
Material selection and fastener guidance
Choose the right materials and fasteners to ensure a secure, durable mount that won’t corrode or fail over time.
- Fasteners: Use stainless steel or hot-dip galvanized fasteners. Skip this and your mounts could rust and fail.
- Flashing materials: Choose compatible flashing to prevent water intrusion and maintain drainage paths.
- Backer materials: Select backers that match your substrate (stucco or EIFS) and provide a solid base for mounts. Skip this and your mounts might not hold securely.
Quick rule: Always follow manufacturer guidelines for fasteners, sealants, and backer materials to ensure they’re used correctly and safely.
Step-by-Step Methods to Locate Studs Behind Stucco
Start with a non-invasive assessment: use a magnet or stud finder with non-destructive sensing, then map suspected beam lines while preserving the stucco. Progress gradually from surface checks to gentler tracing methods to avoid unnecessary damage.
Document and label findings with a consistent grid, noting elevation references and orientation (vertical studs vs. blocking). Consider drainage and how your marking may interact with water paths. Before any destructive work, perform small confirmations such as pilot dots or shallow drills to verify stud presence, then adjust as needed for accuracy and safety.
Step-by-Step Process
This sequence will guide you through locating studs behind stucco, ensuring your project is accurately aligned and securely fastened.
- Gather tools: You’ll need a stud finder, a tape measure, a pencil, and safety glasses. The stud finder’s accuracy depends on the tool’s quality and the wall’s composition, so check its reviews or manual before starting.
- Prepare the area: Ensure the surface is clean and dry. Remove any obstacles that could hinder your work. Safety first: turn off power to nearby outlets and remove any faceplates.
- Mark the centerline: Use a tape measure to find the center of the wall, then mark it with a pencil. This will help you locate studs more efficiently.
- Scan for studs: Turn on your stud finder and hold it flat against the wall at the marked centerline. Slowly move it horizontally, watching for changes in the display that indicate a stud’s location. Mark these spots with a pencil.
- Confirm findings: Once you’ve located potential studs, use your tape measure to check their spacing. Standard stud spacing is 16″ or 24″ on center. If they’re not evenly spaced, double-check your work and consider using a different stud finder.
- Test with a small pilot hole: Before drilling or screwing into the wall, use a small drill bit to make a pilot hole at one of your marked spots. This will confirm you’ve found a stud and prevent damaging drywall or electrical wires.
- Drill or screw into place: Now that you’re confident in your stud locations, proceed with drilling or screwing as needed for your project. Always wear safety glasses to protect against debris.
- Clean up: Once finished, wipe down the wall to remove any pencil marks or dust. Replace faceplates if removed earlier.
Pro tip: If you’re having trouble locating studs with a stud finder, try using a magnet instead. It can help detect metal nails or screws in the studs, giving you a more accurate reading.
Using magnetic and electronic stud finders effectively
First off, let’s get one thing straight: no stud finder works perfectly through thick stucco. But with the right technique, you can increase your chances of finding those studs.
Calibrate your stud finder. Check the manufacturer’s instructions to ensure it’s set for the right wall thickness and material. Most electronic models have an adjustment knob for this.
Now, here’s how you scan:
Start high, around 7 feet, then work your way down. Move the finder in a slow, steady line, like you’re mowing a lawn. Overlap each pass slightly to ensure you don’t miss anything. If you get a signal, mark it with a pencil, then move on. Don’t linger on one spot too long.
Magnetic stud finders can be trickier. They work best on metal lath behind stucco. Hold it flat against the wall and move it in a grid pattern, checking for any pulls or wobbles. Again, mark any positives with a pencil.
Pilot holes and borescope verification
Before you start hacking into your stucco, remember: small holes now save big repairs later. Here’s how to make exploratory pilot holes and use a borescope to inspect cavities.
First, mark out where you think the studs are. You’ve probably used magnetic or electronic stud finders (see here) for this. Now, grab your drill and a bit slightly smaller than your wall anchors (usually 3/8″ to 1/2″).
Start making pilot holes about every 6-8 inches along your marked lines. Go slow and steady, stopping when you hit resistance. If the bit goes in easy, you’re likely through the stucco into a void.
Now, grab your borescope. Insert it into the pilot holes to check what’s behind. You should see:
- Studs: They’ll look like vertical lines with a gap in between (the cavity).
- Lath: This looks like a mesh or grid.
- Water Resistive Barrier (WRB): It’s usually a shiny, plastic-like sheet.
If you’re not sure about something, double-check your findings with the manufacturer’s instructions. Once you’ve located and verified your studs, you can proceed with installing your anchors or fasteners.
When to Hire Specialty Testing (Radar/Thermal/Core)
Even with the best stud finders, sometimes you can’t see through that stucco. When your magnetic and electronic stud finders hit a wall, it’s time to consider specialty testing.
Hire professionals for Ground Penetrating Radar (GPR), thermal imaging, or core sampling. These methods give you a clear view behind the stucco. Here’s when to call them:
– When non-invasive methods fail and you’re still left guessing.
– For critical installations like heavy shelving, cabinets, or structural work where accuracy is a must.

Installing Blocking and Mounting Plates Behind Stucco (Methods and Steps)
Blocking behind stucco can follow open-cavity blocking, recessed backer plates, or surface-mounted rails. Each method has pros, cons, and typical use scenarios, including new construction versus retrofit and varying stud spacing. Choose the method that best preserves drainage while meeting load requirements.
For each method, outline locating and attaching to structural members, maintaining alignment with mounts, and preserving drainage paths behind cladding. Protect WRB and flashing during installation and re-establish flashing at penetrations. Use appropriate fasteners, set depth carefully, and consider corrosion resistance. Plan checks to avoid moisture traps, verify backer plate clearances, and ensure weep channel continuity after mounting. If problems arise, have a concise closure plan for repairs and moisture mitigation.
Open-cavity blocking installation (for heavy loads)
For heavy mounts like cabinets, shelves, or TV brackets, open-cavity blocking provides solid support. Here’s how to install it:
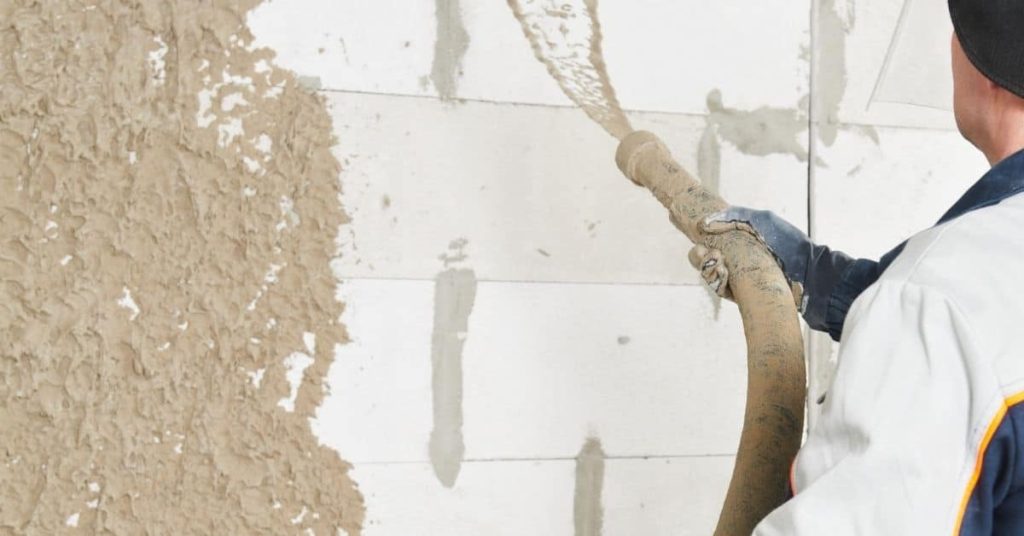
1. Carefully cut a controlled opening in the stucco using a utility knife or oscillating tool, keeping the size minimal and neat.
2. Locate studs using your stud finder (refer to our earlier guide). Install solid blocking between them with 3-1/4″ screws, ensuring it’s level and plumb. Use 2×4 or 2×6 lumber depending on load needs.
3. Before patching stucco, reinstall the kick-out flashing at the bottom of your opening to maintain drainage. Apply a bead of caulk behind the flashing to seal it.
4. Patch the stucco using a pre-mixed repair kit or fresh mix, following the manufacturer’s instructions. Ensure the patch is level with the existing surface and allows for proper drainage.
Surface-mounted backing and anchors (less invasive)
For lighter loads or when preserving stucco integrity is crucial, use surface-mounted backing. Here’s how:
1. Locate studs as before. Use exterior-rated through-bolts, sleeve anchors, or heavy-duty anchors to attach a backing plate directly to the studs. Ensure fasteners are long enough to reach into the framing without protruding through.
2. Distribute loads evenly across multiple mounting points to avoid stress on individual fasteners. For example, use three anchors instead of one for a heavy mount.
3. Seal around the backing plate with caulk or foam sealant to prevent moisture intrusion. Ensure no sealant blocks weep holes in the stucco.
4. Mount your item using appropriate hardware, ensuring it’s level and plumb. Check for any compromised flashing or WRB during installation and repair as needed.
Preserving and Restoring Drainage, Flashing, and Weatherproofing
Reestablish drainage and weep path integrity by ensuring flashing and WRB details continue to shed water from the stucco cavity to the exterior. Pay attention to penetrations and mounting blocks that may alter water flow.
When adding flashing, select appropriate material and placement (surface, counter, or step flashing) with proper overlaps and WRB integration. Maintain WRB continuity across added blocking, and ensure transitions at corners and penetrations won’t leak. Choose compatible sealants and backer materials to avoid trap moisture, and verify long-term compatibility with stucco, lath, metal, or foam components. Finally, perform post-install checks for water shedding behavior and schedule periodic inspections after weather events or stucco work.
Flashing placement and sealant compatibility
When reinstalling or adding flashing, place it above and behind your mounts to ensure water is directed away from the cavity. Flashing should overlap the stucco by at least 2 inches.
Use flexible sealants rated for both stucco and exterior WRB interfaces. These sealants can expand and contract with temperature changes without cracking or peeling off. Never use paintable caulks as they are not waterproof and will fail over time.
Apply sealant in a continuous bead along the flashing’s top edge, where it meets the stucco. This creates a watertight bond that prevents leaks at this critical junction.
Visual checkpoints to verify correct drainage restoration
After completing your repairs, use the following checklist to ensure you’ve restored proper drainage. Inspect these points within a few days after rain or during a garden hose test.
- Continuous flashing lines: Check that all flashing is intact and runs continuously from top to bottom of the wall.
- WRB around patches: Ensure the WRB (weather-resistant barrier) extends around any patched areas, sealing them off from moisture intrusion.
- Unobstructed weep paths: Verify that all weep holes are clear and unblocked to allow water to escape from the cavity.
- Flashing at corners: Inspect corner flashing to confirm it’s properly installed, with step flashing overlapping both sides of the corner.
- Sealant integrity: Check sealants around penetrations and mounts for any cracks or gaps that could allow water entry.
- Ground clearances: Ensure there are no obstructions (like soil or debris) blocking weep holes at the base of the wall.
- Flashing at windows/doors: Verify that flashing around openings is intact and properly integrated with the WRB to prevent leaks at these vulnerable areas.
- Gutters and downspouts: Confirm that gutters are securely attached, free of debris, and directing water away from the foundation.
Quick rule: If you see any signs of water damage or find issues during your inspection, address them promptly to prevent further deterioration.
Safety, Code Compliance, and Hiring Professionals
Check local building codes, permit requirements, and any rules for mounting hardware behind stucco or EIFS, including inspections or disclosures. Do not assume uniform rules across jurisdictions or project types.
Follow safety practices for cutting or drilling near stucco, including PPE, dust control, and procedures to minimize water intrusion or structural damage. Define clear criteria for when to hire a licensed contractor or structural engineer, such as evaluating load paths and ensuring code-compliant drainage and weep paths. Use a simple decision guide to decide between DIY within permitted scope and professional plan review, and prepare a checklist of questions to discuss with pros and how to document permits and inspections.
What to verify in code and permit reviews
Before you start any work, check your local building codes for specific rules on mounting hardware behind stucco or EIFS. You’ll want to look into structural attachments, exterior penetrations, and required inspections or permits.
Structural Attachments: Ensure the load path is properly surveyed and engineered to support the weight of your mounts.
Exterior Penetrations: Check for rules on penetration size, spacing, and any specific requirements for waterproofing or flashing around your mounts.
Required Inspections/Permits: Confirm if you need to have inspections at different stages of the project or obtain permits before starting work. Always document these in case of future home sales or inspections.
Jobsite safety and utility avoidance
Safety is paramount when working with stucco. Here are some common mistakes to avoid:
- Avoid electrical and plumbing lines: Scan the area for any hidden utilities before drilling or cutting. You can use a utility locator service in your area.
- Isolate circuits: If you must drill near electrical lines, isolate the circuit at the main panel to prevent accidental electrocution.
- Wear PPE: Protect yourself from dust and debris with safety glasses, a dust mask, and gloves.
- Avoid overloading fasteners: Be mindful of the load-bearing capacity of your fasteners. Overloading can cause structural damage or failure.
Always prioritize safety on the jobsite to prevent accidents and ensure a successful project.
Costs, Common Mistakes to Avoid, and Long-Term Maintenance
Major cost drivers include labor, stucco repair scope, material costs, and any specialized tools. Anticipate variations by project size and mounting method, and plan for contingencies related to moisture management during the process.
Map common mistakes that lead to leaks or failed mounts, such as improper blocking thickness, spacing, or alignment, missing weather barriers, or inadequate drainage and flashings. Establish a practical maintenance schedule to inspect mounts, sealants, and flashing over time. If full blocking behind the stucco isn’t feasible, consider cost-effective alternatives such as partial blocking or alternative mounting methods, while keeping drainage and stucco integrity in mind. A quick decision tree helps decide when to block, retrofit with alternatives, or consult a pro, factoring in codes, weather, and safety considerations.
Typical pitfalls and how to avoid them
When adding blocking behind stucco, watch out for these common mistakes.
- Over-drilling: Drilling too many holes weakens the stucco. Tip: Use pilot holes and verify with a borescope.
- Sealing weep paths: Blocking weep paths traps moisture. Tip: Leave weep paths open for drainage.
- Insufficient fastener engagement: Fasteners not deep enough can pull out. Tip: Use proper length fasteners and secure them well.
- Poor flashing: Inadequate or improperly placed flashing leads to leaks. Tip: Install flashing correctly, following manufacturer’s guidelines.
Preventing these pitfalls ensures your mounts stay secure and your stucco stays dry.
Long-term inspection and maintenance checklist
Inspect your work periodically to ensure everything is in good shape. Here’s a simple checklist.
- Fasteners: Check for any signs of corrosion or loosening.
- Sealants: Inspect sealant joints for cracks or gaps.
- Flashing integrity: Ensure flashing is intact and properly secured.
- Moisture ingress: Look for any signs of water intrusion, like stains or mold.
- Drainage paths: Verify that weep paths are clear and functioning.
- Mount integrity: Check mounts for any movement or instability.
- Weatherproofing: Inspect caulking and sealants around windows, doors, and penetrations.
Quick rule: Inspect annually, especially after heavy rains or storms. Address any issues promptly to prevent bigger problems down the line.
Conclusion
Blocking behind stucco matters for safety, durability, and a clean final look. If plates or mounts aren’t tied to proper blocking and drainage paths, you risk loose hardware, cracks, and water damage that costs more than the fix now.
Before you proceed, make a quick, practical check: locate reliable studs or framing behind the stucco, confirm there is a clear drainage path, verify the area is dry and free of hidden voids, gather the right blocking and mounting plates, and plan how you will preserve flashing and weatherproofing as you work. Do a small test in a hidden spot first, then extend to the main area, and stop if you see unexpected framing, moisture, or rot.
Common mistakes to avoid include guessing the stud location, over-tightening without proper supports, and skipping proper drainage or flashing steps. Always work in dry conditions, use appropriate fasteners for the siding type, and recheck for level and plumb as you go. If you’re unsure about the wall assembly, water intrusion risk, or any code requirements, step back and pull in a pro rather than pushing ahead.
Know when to call a professional: if you encounter concealed rot, unfamiliar wall assemblies, or conflicts with local codes, or if the project involves complex flashing and weatherproofing beyond your comfort zone. Stay deliberate, test first, and keep the area sealed and safe every step of the way. You can finish strong—steady progress, proper checks, and smart mounting will deliver a solid, lasting result.
FAQ
How do I reliably find studs behind stucco without damaging the wall?
Use a stud finder rated for masonry walls and listen for a solid thump when tapping. Start near corners and electrical outlets, then verify with multiple passes. If in doubt, drill a small test hole in a hidden area to confirm the stud and avoid chasing lines across the surface.
What blocking should I add behind stucco for mounts, and how should I install it?
Install horizontal blocking that lines up with the intended mounting points. Secure it to the studs you locate with appropriate fasteners, then use shims if needed to keep the surface flush. Check that the blocking remains square and level before mounting plates.
How can I keep drainage paths clear and prevent water from backing up behind the stucco?
Ensure you preserve or restore flashing and weep paths as you add blocking. Do not cover drainage routes; leave space or use a method that transfers loads without blocking weep holes. If you’re unsure, follow the manufacturer’s guidance for any mounting hardware and flashing members.
What safety steps should I follow when drilling into stucco and tying into blocking?
Wear eye protection and a dust mask. Use the correct masonry bit and start slowly to control crack propagation. Stop if you hit metal lath or wet areas; reassess location and method before proceeding.