

Introduction
A hydrophilic waterstop is an embedded strip or sealant that swells when exposed to water and helps seal a concrete construction joint. Successful installation depends on using the exact product detail—not a generic overlap, adhesive, cover, or fastening rule. Identify the product profile and current installation guide before laying out the joint.
This procedure applies to strip-applied hydrophilic waterstops installed on the first concrete pour before the second pour. A hydrophilic sealant, a PVC/hydrophilic composite, or a conventional PVC or rubber waterstop uses a different detail and must not be installed as though it were a simple strip.
Key takeaways
- Use a hydrophilic strip only where the drawings and product data permit a non-moving construction joint.
- Confirm the product-specific profile, cover or setback, moisture condition, primer or adhesive, fasteners, and splice detail before starting.
- Keep the strip clean, dry, continuous, and firmly secured until the pour.
- Do not invent an overlap: some products require tightly butted ends and specifically prohibit overlaps.
- Before and during placement, prevent reinforcement, formwork, concrete flow, and vibration from displacing the strip.
- Replace damaged, contaminated, or prematurely swollen material before it is buried in concrete.
Table of Contents
- Introduction
- Key takeaways
- What Are Hydrophilic Waterstops and Why Use Them
- Types and Material Options for Hydrophilic Waterstops
- Tools and Materials Checklist Before You Start
- Pre-Installation Planning and Site Preparation
- Step-by-Step Installation Process
- Typical Installation Locations and Special Project Considerations
- Troubleshooting, Blowout Prevention, and Inspection Checkpoints
- Safety Protocols, Cost Comparison, and Long-Term Maintenance
- Conclusion
- FAQ
What Are Hydrophilic Waterstops and Why Use Them
Once confined by concrete, a hydrophilic material can swell into small irregularities at a joint. It is not a repair for structural cracks, poor consolidation, or joint movement. Selection and installation guidance for waterstops distinguishes static construction joints from movement joints; expansion, isolation, seismic, settlement, and other moving joints need a movement-capable system designed for that joint. Related guidance: Construction Joint Waterstops: PVC vs Bentonite vs Hydrophilic (How to Choose).
Check the project detail for maximum movement, required concrete cover, water exposure, chemical exposure, and any potable-water certification. Do not assume that a product suitable for one tank, basement, or sewer project is approved for another. See the ASTM guide for selecting and using waterstops for the important distinction between non-moving and movement joints.
How Hydrophilic Waterstops Work
Water contact causes the hydrophilic component to expand. Swelling rate and extent vary with the product chemistry, water, temperature, and test method, so do not rely on claims that every strip reaches a particular size within a day. The concrete must confine the waterstop; adequate cover and sound, consolidated concrete are part of the seal.
Key Benefits and Performance Claims to Verify
Use the current data sheet for the exact profile to verify its stated joint use, substrate condition, service limits, exposure restrictions, and approved accessories. “ASTM compliant,” chemical resistance, pressure capability, and potable-water suitability are not blanket properties of hydrophilic waterstops.
Types and Material Options for Hydrophilic Waterstops
First identify the system you have. Strip-applied hydrophilic waterstops are commonly bonded and, where required, mechanically fastened to the first pour. Hydrophilic sealants are gunned as a specified bead or into a specified recess. PVC/hydrophilic composite systems and conventional PVC or rubber waterstops have their own supports, intersections, and formwork details.
Material specs, standards, and what to check on datasheets
- Exact product name, chemistry, profile width, and thickness.
- Joint classification and maximum permitted movement.
- Required recess, centerline, setback, and minimum concrete cover.
- Required cure age and substrate condition: dry, damp, matt-damp, or other stated condition; whether standing water is allowed.
- Approved primer, adhesive, fastener type and spacing, splice method, and corner or T-junction detail.
- Air and substrate temperature limits, storage conditions, shelf life, and protection from moisture before the pour.
- Documented chemical or potable-water approvals when the project requires them.
Tools and Materials Checklist Before You Start
Have the approved waterstop, current data sheet, joint drawings, and enough new material to replace any damaged length. Do not substitute an adhesive, sealant, cleaner, fastener, or lubricant from another system. Lubricant is not a default installation aid; use it only when the product manufacturer has approved it in writing.
Recommended installation tools
- Measuring tape, chalk line or marker, and a sharp cutting tool suitable for the product.
- Wire brush or specified mechanical preparation tool, plus vacuum or other approved dust removal equipment.
- Brush, roller, or trowel required for the specified primer or adhesive.
- Manufacturer-approved fasteners and installation tool where fastening is required.
- Clean protection material to keep the installed strip free of dirt and accidental wetting before placement.
- PPE and ventilation controls listed on the product safety data sheet; concrete-pour PPE and a first-aid kit.
Materials, fasteners, and accessory products
Record the product-specific adhesive or primer, fastening pattern, splice detail, and minimum cover on the pour checklist. For example, one manufacturer’s Swellstop instructions call for a continuous primer band and tight butt joints with no gap or air pocket; they do not permit overlaps. That is an example for that product, not a transferable rule for every hydrophilic strip.
Pre-Installation Planning and Site Preparation
Before work begins, confirm approved drawings, the concrete placement sequence, reinforcement position, cover, and whether the joint is non-moving. Obtain engineer and manufacturer direction for water-retaining or critical containment work, high water head, chemical exposure, potable-water service, unusual geometry, retrofit work, or any condition outside the product guide.
Site assessment and environmental checks
Strip the first pour and allow it to reach the product’s required cure condition. Remove laitance, dust, release agent, oil, coatings, loose particles, and weak concrete. Smooth or repair rough and honeycombed areas that would leave a void under the strip. Verify the required moisture condition and remove standing water unless the selected product expressly permits it. Follow the selected data sheet—not a universal temperature range—for both substrate and air conditions.
Layout, joint mapping, and coordinating with other trades
Mark the exact waterstop line, terminations, corners, and penetrations from the approved detail. Dry-fit pieces before adhesive is applied. Coordinate with the reinforcing and concrete crews so bars, ties, forms, and hoses cannot lift, pinch, contaminate, or shift the waterstop. Do not use a generic “open-cell” orientation, overlap length, or corner technique; follow the profile drawing for the selected product.
Step-by-Step Installation Process
Step-by-Step Installation Process
- Confirm the detail. Match the product name and profile to the drawings. Verify cover, substrate condition, approved accessories, splice method, and movement limit.
- Prepare the first pour. Clean and sound the concrete as required. Mark the placement line and correct voids or irregularities that prevent continuous contact.
- Cut and dry-fit. Cut cleanly, keep pieces dry, and arrange corners, intersections, and terminations according to the product detail. Do not force a kinked or damaged strip into place.
- Apply the specified bonding system. Use only the named primer or adhesive, at its required coverage and drying condition. Do not place the strip into wet or contaminated adhesive unless the instructions explicitly say to do so.
- Place and secure the waterstop. Press it continuously onto the marked line. Add approved mechanical fasteners where required, especially on vertical or overhead work. Keep the required cover clear of reinforcement and the exposed joint face.
- Make each splice exactly as specified. Butt, overlap, weld, or use a factory fitting only as directed. Eliminate gaps and air pockets. Never add an overlap merely because another product uses one.
- Protect and release for pour. Keep the strip dry, clean, aligned, and protected until the immediate pre-pour inspection is passed.
Anchoring, sealing, and overlap techniques
Adhesive alone may not be adequate for every location. Use the fastening method and spacing stated for the selected product, without crushing or deforming the profile. Use a factory corner, approved splice kit, or specified field detail at corners and T-junctions. Do not add a bead of unapproved sealant as a substitute for a failed splice.
Post-installation protection before concrete placement
Protect the installed run from rain, wash water, mud, foot traffic, and other premature hydration. Remove protection only as the placement sequence requires, without pulling the strip loose. Immediately before concrete placement, inspect the full run; damaged, contaminated, displaced, or swollen sections must be removed and replaced.
Typical Installation Locations and Special Project Considerations
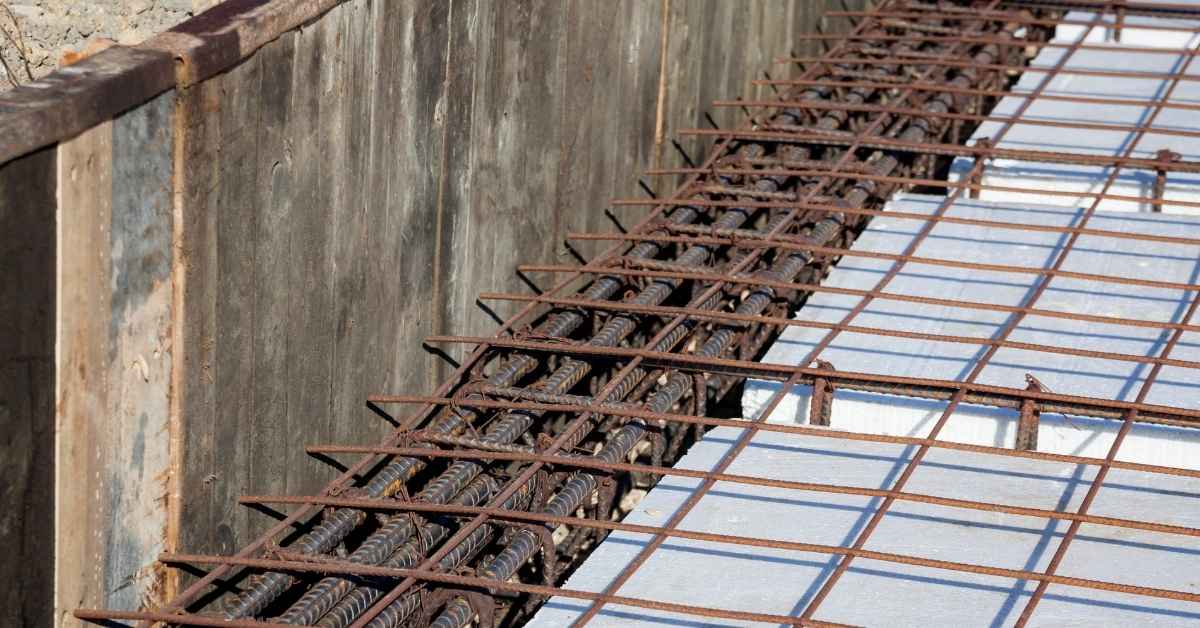
Strip systems are typically detailed at non-moving construction joints, such as wall-to-footing and wall-to-slab joints. Pipe penetrations, slab edges, corners, multiple penetrations, and changes in plane require a drawing that shows continuity, cover, and the approved connection—not an improvised strip layout. Related guidance: Preventing Cracks Around Slab Penetrations: Pipe Sleeves, Bond Breakers, and Joint Layout.
Joints, Bends, and Complex Geometries
Dry-fit factory pieces or manufacturer-approved field splices before bonding. A corner or T-junction with a gap, fold, or thin cover is a likely leak path. If the guide does not show the detail, stop and obtain a project-specific one.
Retrofitting, Repairs, and Existing Structures
Do not assume a strip designed for a first-pour/second-pour construction joint is suitable for a routed groove, existing crack, shotcrete, precast, or leak repair. Embedded leak repairs may require injection, localized demolition, or another engineered waterproofing method. The cause, location, pressure, movement, and access must be evaluated before selecting a repair.
Troubleshooting, Blowout Prevention, and Inspection Checkpoints
A waterstop “blowout” usually starts with displacement, inadequate cover, a loose splice, or poorly consolidated concrete near the joint. It cannot be prevented by a universal placement rate or vibrator clearance: those controls must follow the approved concrete-placement plan, mix, formwork design, and product/project documents.
Visual checkpoints and acceptance criteria before concrete pour
- Correct product and profile are installed at the marked location.
- Strip is continuous, clean, dry, firmly bonded, and mechanically secured where required.
- Splices, corners, and terminations match the selected product detail, with no gap, air pocket, tear, or unapproved overlap.
- No premature swelling, damage, contamination, loose end, or reinforcement interference is present.
- Required cover and setback are maintained along the entire run.
- Forms are stable, and the pour crew knows the strip location and protection plan.
During placement and immediate remedies
Place concrete so its flow does not directly dislodge the waterstop. Consolidate carefully around the joint without striking, dragging, or vibrating the strip out of position. Follow the approved plan for lifts, placement rate, vibrator size, insertion pattern, and clearance. Observe critical or inaccessible joints during the pour.
If material shifts before it is covered, stop placement