
Introduction
Embarking on a DIY painting project? Understanding the timeline and steps involved in each sprayer type is crucial for planning your project efficiently. This guide compares HVLP, airless, and conventional sprayers based on time taken, setup, application, and cleanup to help you choose the right system for your durability needs.
Whether you’re a seasoned DIYer or just starting, knowing how long each process takes will ensure you allocate sufficient time and resources for a successful outcome. Let’s dive into the timeline and steps involved with each sprayer type.
For the full guide, see HVLP vs Airless vs Conventional Sprayers: Picking the Right System for DIY Durability.
The Complete Timeline & Steps by Time
- HVLP Sprayer Timeline:
- Setup: 15-30 minutes (including masking)
- Priming: 5-10 minutes per coat
- Painting: 10-20 minutes per coat, depending on surface area and detail work
- Cleanup: 30-60 minutes
- Airless Sprayer Timeline:
- Setup: 15-30 minutes (including masking)
- Priming: 5-10 minutes per coat
- Painting: 5-15 minutes per coat, depending on surface area and material viscosity
- Cleanup: 20-45 minutes
- Conventional Sprayer Timeline:
- Setup: 15-30 minutes (including masking)
- Priming: 5-10 minutes per coat
- Painting: 10-20 minutes per coat, depending on surface area and finish requirements
- Cleanup: 30-60 minutes
Key takeaways
The prep time for each sprayer type is similar, but the application process varies significantly in terms of speed and technique. Understanding these differences will help you allocate the right amount of time for your project.
- Understand how HVLP, airless, and conventional sprayers differ in pressure and overspray for DIY durability.
- Choose based on project finish, coverage, and material savings without compromising durability.
- Regular maintenance and thorough cleaning extend sprayer life and prevent clogs.
- Balance speed with quality to reduce waste and material cost over time.
- Check safety: follow manufacturer instructions, wear PPE, and avoid spraying indoors without ventilation.
- Portability and noise influence workspace layout; plan hoses, power, and cleanup access.
Table of Contents
- Introduction
- Key takeaways
- Quick Comparison Overview
- Spray Quality, Coverage, and Finish
- Performance: Speed, Throughput, and Productivity
- Cost-Effectiveness and Total Cost of Ownership
- Maintenance, Durability, and Longevity
- Portability, Noise, and Workspace Considerations
- Safety, Common Pitfalls, and Troubleshooting
- Buying Guide and Actionable Decision Flow for DIY Durability
- Conclusion
- FAQ
Quick Comparison Overview
HVLP, airless, and conventional sprayers differ in how they form and propel paint: HVLP uses low-pressure air to carry larger droplets for high transfer efficiency, airless forces material through a small orifice at high pressure creating fine atomization without added air, and conventional (compressed-air) mixes air and fluid at the gun for very fine finishes but more overspray. Check product data sheets or manufacturer instructions for each model’s operating pressure and recommended tip/nozzle ranges to match the coating you plan to use.
For DIY work, think small, detail-focused jobs (cabinets, furniture) for HVLP, large flat exterior or concrete surfaces for airless, and thin-surface or specialty coatings where conventional spraying is specified. Weigh strengths—HVLP for control and finish, airless for speed and coverage, conventional for ultimate atomization—against weaknesses like overspray, cleanup time, and maintenance; answer simple project questions (surface area, desired finish, coating viscosity, cleanup tolerance) to pick the best system and avoid common pitfalls like wrong thinning, poor surface prep, or improper tip selection.
How each system works
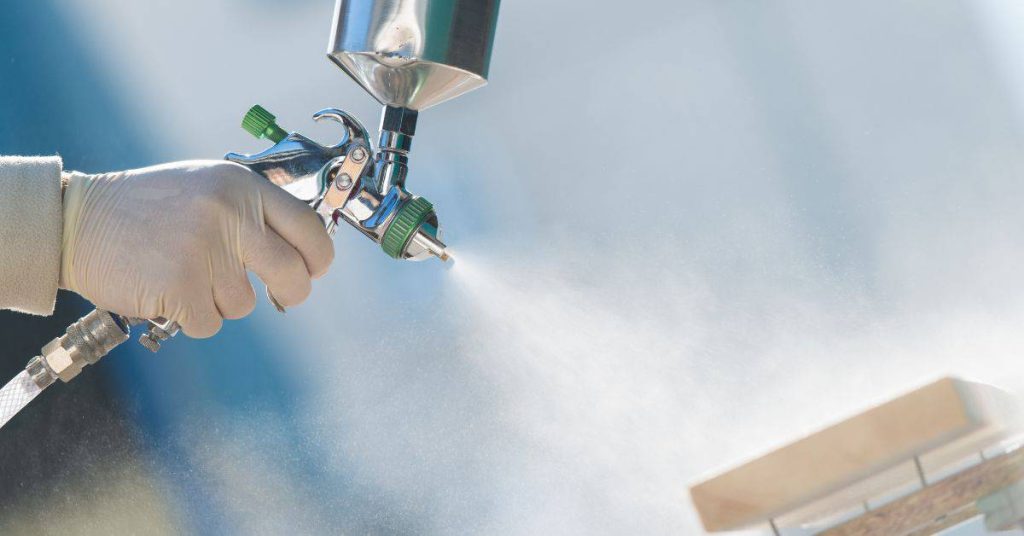
The HVLP (High Volume, Low Pressure) sprayer uses a turbine to create air pressure and atomizes paint through a high-volume, low-pressure airflow. This method produces less overspray but requires more thinning.
The airless sprayer operates by pumping paint at high pressure through a small opening in the spray gun tip, creating tiny droplets. It’s efficient but can cause overspray.
The conventional (compressed-air) sprayer uses compressed air to atomize paint. It’s versatile and good for thin coatings but requires more skill to control overspray.
Who each system is best for
The HVLP sprayer is ideal for DIYers tackling detailed projects like cabinets, furniture, and interior walls. It’s great for reducing overspray in tight spaces.
The airless sprayer is perfect for large exterior surfaces such as siding, decks, and fences. It’s fast but requires careful masking to control overspray.
The conventional sprayer is suitable for thin coatings or high-overspray tolerance projects like spraying primers or sealers. It’s also good for touch-ups and small repairs.
Spray Quality, Coverage, and Finish
Your finish goal (slick, brushed, textured) should drive sprayer choice because atomization and droplet size dictate surface texture and edge control. Review the manufacturer’s specs for recommended nozzle sizes and pressure ranges to understand expected droplet distribution and fan width for the coating you’ll use.
HVLP tends to give large droplets and softer edges that suit fine cabinetry but can require multiple thin coats; airless produces smaller droplets and wide fans for efficient coverage on concrete slabs; conventional offers very fine atomization but with greater overspray. Do a test pass on a sample panel, record pressure, tip size, distance, and speed, then iterate—check substrate moisture and curing conditions before spraying, and adjust thinning and overlap to control runs, material use, and final appearance.
Finish appearance and control by system
The sprayer you choose greatly affects the final look of your concrete. Here’s how:
HVLP systems produce fine atomization, ideal for thin, smooth finishes like polished or sealed surfaces.
Airless and conventional sprayers give heavier laydown, perfect for textured or brushed looks. Airless offers more control than conventionals for detailed work.
Coverage efficiency and minimizing waste
Coverage varies by sprayer. Here’s how to maximize efficiency:
HVLP offers better coverage per coat due to its fine atomization, but requires more coats.
Airless and conventional sprayers lay down more material per coat, reducing total coats needed but increasing waste if not managed properly.
To minimize overspray, maintain consistent pressure, distance, and speed. Consider multiple thin coats over one heavy one for better penetration and reduced waste.
Performance: Speed, Throughput, and Productivity
Measure productivity as surface area achieved per hour including setup and cleanup; throughput depends on tip/orifice size and pump or compressor capacity, so consult the equipment specs for flow rates before assuming performance. For DIYers, small-detail HVLP jobs have longer surface prep per square foot but shorter pump cycles, while airless systems push more material quickly and reduce spray passes on big surfaces.
Expect setup and teardown to be a key part of total time—HVLP and conventional require careful gun cleaning; airless needs thorough flushing of fluid passages and tips. Plan for viscosity impacts (temperature and additives change flow), streamline by staging parts and having solvent/cleaning tools at hand, and balance speed vs. finish quality when choosing nozzle sizes and travel speed to meet your project timeline.
Speed versus control tradeoffs
Faster material delivery doesn’t always mean better control. Here’s where speed can compromise finish quality:
- Overspray: Airless sprayers deliver material fast but can overspray, leading to waste and a mess.
- Orange peel effect: High pressure from airless or conventional sprayers can cause an orange peel texture on the finish if not controlled properly.
- Masking needs: Faster application means quicker masking requirements. If you’re not careful, you might rush and make mistakes.
Accept this tradeoff when:
- You’re working on a tight deadline.
- The project is small, and quick setup/teardown outweighs minor finish imperfections.
- You’re comfortable with the extra cleanup and touch-ups that might be needed.
Job scale recommendations
Choose your sprayer based on project size for optimal throughput and practical setup:
- Small projects (DIY patches): HVLP is ideal. It’s slower but offers superior control and minimal overspray, making it perfect for small touch-ups.
- Medium projects (single room or wall): Airless sprayers are great here. They offer a balance between speed and control, with reasonable setup/teardown times.
- Large projects (entire house exterior or multiple rooms): Conventional sprayers are your best bet. They’re the fastest but require more masking and cleanup. Use them when time is of the essence and finish quality can be sacrificed slightly.
Cost-Effectiveness and Total Cost of Ownership
Upfront purchase is only one piece of cost: include tips/nozzles, filters, seals, hoses, and potential replacement parts when comparing systems; check product labels or seller info for warranty and included accessories. Consumables and wear items differ by type—airless tips and seals can wear with heavy use, HVLP cups and filters need attention, and conventional systems may require more frequent diaphragm or regulator service—so factor lifespan and part availability into your choice.
Estimate ongoing costs by considering material waste from overspray, cleaning solvent usage, and energy/air supply needs; use a simple framework (initial cost + annual consumables + expected repairs) over your intended ownership period to compare options. If unsure about specific life-expectancy or part prices, consult manufacturer documents or retailer listings, and build a small contingency for unexpected repairs or specialized servicing.
Upfront versus ongoing expenses
When considering sprayers, look at both upfront and ongoing costs. Upfront, you’ll pay for the unit itself. HVLP systems are typically the cheapest, ranging from $200 to $500. Airless units cost more, around $400 to $1,000, while conventional sprayers can top out at over $2,000.
Each system comes with different warranties and accessories. HVLP often includes a basic warranty and essentials. Airless usually offers longer warranties and more extras. Conventional sprayers may have the best warranties but require additional purchases for some features.
Ongoing expenses include consumables like tips/nozzles, filters, seals, gaskets, hoses, and cartridges. HVLP uses fewer materials due to its efficiency but has pricier tips. Airless has lower material costs but goes through tips faster. Conventional sprayers have the lowest ongoing supply expenses.
When a higher initial cost pays off
Investing in a more durable unit can reduce future costs, especially for frequent users. If you’re planning to tackle multiple projects or use your sprayer regularly, consider an airless or conventional system.
Airless units have robust construction and longer warranties. They may cost more initially but last longer, reducing the need for replacements. Conventional sprayers offer the best durability, with some models lasting decades with proper maintenance.
HVLP systems are cheaper upfront but may require more frequent replacements due to their lighter build. While they’re great for occasional use or tight budgets, they might not be the most cost-effective choice in the long run for heavy users.
Maintenance, Durability, and Longevity
Cleaning routines vary: follow manufacturer instructions for post-use flushing and solvent selection—HVLP guns need cup and air passages cleaned, airless units require thorough pump and hose flushes, and conventional systems demand regulator and fluid line attention. Dry and store components as advised on labels or manuals to avoid corrosion and residue hardening, and keep a record of solvents used for safe disposal.
Track key wear items (tips, seals, diaphragms, filters) and inspect them after heavy jobs; replace at the first sign of pattern degradation or leaks. Keep a simple maintenance log with post-use clean, weekly checks, and seasonal overhauls; if spray pattern changes or pressure fluctuates, isolate the issue—clogged tip, worn seal, or air leak—and refer to the manufacturer’s troubleshooting steps before attempting repairs.
Daily and deep-clean routines
After each use, flush your sprayer with clean water. For HVLP and conventional sprayers, use a suitable solvent like lacquer thinner or xylene to remove paint residue. Airless sprayers can be flushed with water, but consider using an airless cleaner for tough jobs.
Deep cleaning should be done weekly or monthly, depending on usage. Disassemble the gun and pump (if applicable), soak parts in solvent, scrub with a brush, then reassemble and dry thoroughly before storing.
Never store sprayers with paint or water inside. Always clean and dry completely to prevent clogs and corrosion.
Common wear parts and extending life
Tips are the first line of defense against wear. Replace them when they become dull or damaged. For HVLP sprayers, consider using stainless steel tips for longevity.
Seals and diaphragms (in airless sprayers) should be checked regularly. Replace them if they show signs of cracking or leaks. Good maintenance includes lubricating seals with a suitable grease during disassembly.
Pumps in airless sprayers are the most expensive components to replace. To extend their life, keep the inlet strainer clean, avoid running the pump dry, and use an airless cleaner regularly to prevent clogs.
Regularly check filters and fluid passages for blockages or damage. Clean or replace as needed to maintain consistent performance.
Portability, Noise, and Workspace Considerations
Portability affects how easily you move gear around a job: check product dimensions, dry weight, tank or cup capacity, and whether carts or wheel kits are available to handle stairs and truck transport. Verify cord and hose lengths against your site layout and confirm electrical or compressor needs before moving equipment to avoid surprises on setup day.
Noise and ventilation matter for neighbor-friendly runs and indoor work—consult manufacturer noise info where available and limit spray times or use acoustic barriers when required. Plan containment and airflow for overspray control and curing: define work area size, set fresh-air paths, and use plastic sheeting or tents to protect surroundings and minimize dust and contaminant intrusion during curing.
Noise, ventilation, and PPE
Each sprayer type has its own noise level:
HVLP: Quietest at around 65-70 dB(A).
Airless: Moderately loud at about 80-85 dB(A).
Conventional: Loudest at over 90 dB(A).
Ventilation varies:
HVLP: Needs good ventilation due to overspray.
Airless & Conventional: Less overspray, but still need cross-ventilation or exhaust fans for dust control.
Wear a respirator, safety glasses, and ear protection with all systems.
Transport, storage, and on-site setup
HVLP: Lighter (20-40 lbs dry), compact. Fits in truck beds. Easy to move with handles.
Airless: Heavier (50-100 lbs dry). Needs a trailer hitch platform or dolly for transport. Requires more space on-site.
Conventional: Heaviest (80-120 lbs dry). Needs a trailer or truck bed. Requires most space on-site.
Protect equipment with cases, secure hoses during transit. Set up quickly by plugging in, connecting hoses, and adjusting spray tips.
Safety, Common Pitfalls, and Troubleshooting
PPE and environment are nonnegotiable: use appropriate respiratory protection, eye and skin protection, and ensure ventilation when spraying solvents or fine particulates. Verify system compatibility with your coating—check nozzle sizes, pressure ranges, and hose lengths against manufacturer guidance to reduce kickback and safety risks.
Common mistakes that harm durability include spraying too thick in one pass, wrong tip selection, or inadequate surface prep; immediate cleanup is critical to prevent cured buildup. Use a quick troubleshooting checklist—inspect tip condition, clean or change filters, confirm correct viscosity, and adjust pressure—to identify orange peel, runs, or inconsistent fans, and consult the machine manual for corrective steps if basic fixes don’t restore pattern quality.
Common mistakes to avoid
Knowing these common pitfalls can save you time, money, and a lot of frustration. Here are some mistakes to steer clear of when using sprayers for concrete applications.
- Wrong tip/pressure: Using the wrong nozzle size or pressure setting can lead to poor finish quality. Always match your tip to the job’s requirements and adjust pressure accordingly.
- Poor surface prep: Skipping proper surface preparation can result in adhesion issues and reduced durability. Ensure surfaces are clean, dry, and free of contaminants before spraying.
- Improper thinning: Thinning your concrete mix incorrectly can cause runs, sags, or poor atomization. Follow the manufacturer’s guidelines for thinning agents and ratios.
- Spraying too thickly: Applying too much material in one pass can lead to an uneven finish and reduced durability. Maintain a consistent, even spray pattern and avoid over-applying.
By avoiding these common mistakes, you’ll achieve better results with your sprayer and extend the life of your equipment.
Troubleshooting checklist
When issues arise during spraying, use this troubleshooting checklist to quickly identify and resolve problems. Don’t let minor setbacks turn into major headaches!
- Orange-peel or runs: Check viscosity; if too thick, thin properly. Runs indicate over-thinning or incorrect pressure.
- Inconsistent fan pattern: Inspect tip for clogs or damage. Inconsistency may also stem from improper air settings.
- Clogging: Clean or replace filters regularly. Clogging can cause inconsistent spray and reduced productivity.
- Poor adhesion: Ensure proper surface preparation. Poor adhesion indicates contaminants on the surface or incorrect primer use.
- Fish-eyes: Check for contaminants in the mix. Fish-eyes form when small particles disrupt the coating’s surface tension.
- Paint separation: Stir or shake the material thoroughly before use. Separation indicates improper mixing or storage.
Quick rule: Always inspect your equipment and materials before starting a job to minimize troubleshooting during application.
Buying Guide and Actionable Decision Flow for DIY Durability
Start by categorizing your projects by exposure and wear: indoor furniture or trim, outdoor concrete or decks, or high-wear commercial-style surfaces; match those needs to sprayer classes and confirm material compatibility in product literature. Prioritize features that affect durability: adjustable nozzle options, easy cleaning access, available replacement parts, and a clear maintenance plan from the manufacturer.
Before buying, perform in-store or rental tests—check trigger feel, pattern stability, clog resistance, and cleanup effort using representative materials and record settings to reproduce in the field. Use a simple decision flow: define project type and durability goal → test candidate systems for finish and throughput → compare total ownership factors → choose the system that balances finish, speed, and maintainability, then set a maintenance schedule to protect long-term performance.
Feature checklist and questions to ask
Use this checklist when comparing concrete mixers at the store or reading reviews. It’ll help you make an informed decision that saves you time, money, and hassle.
- Warranty: Check for a solid warranty (at least 1-2 years). This shows the manufacturer’s confidence in their product.
- Serviceability: Ensure spare parts are readily available. Ask about lead times and costs.
- Tip availability: Verify that tips for your specific tasks (e.g., mixing, pouring) are included or easily accessible.
- Accessory ecosystem: Check if there are compatible accessories (e.g., water reducer, accelerator) to enhance your work.
- Motor power: Ensure the motor is powerful enough for your needs. Check the amps and horsepower.
- Drum size: Measure the drum’s capacity to ensure it suits your project’s requirements.
- Portability: Check the mixer’s weight, wheel type, and handle design for easy maneuvering around your jobsite.
- Safety features: Look for safety latches, emergency stop buttons, and other safety measures to prevent accidents.
Quick rule: Always cross-check the mixer’s specs with your project’s demands. A mixer that’s too small or weak can cause rework, while one that’s too large may be difficult to handle.
Rent vs buy and recommended starter setups
Before you start your durable DIY project, consider renting or buying equipment. Renting is great for short-term projects, saving space, and trying out tools before committing to a purchase.
Factors favoring renting: Short duration, lack of storage space, testing tools before buying.
When to buy: Long-term projects, frequent use, or when you’ve tested and decided on the right tool. Check local rental prices against purchase costs to make an informed decision.
For common durability-focused DIY projects like concrete work, consider these starter equipment combos:
- Concrete Mixer (rent or buy): Essential for mixing batches. Rentals start around $50/day, purchases from $200.
- Concrete Saw (rent): For cutting and shaping. Rentals start around $40/day.
- Trowel (buy): Inexpensive ($15-$30) and essential for finishing surfaces. Buy to keep.
Conclusion
Choose the sprayer system that matches your project scale, your finish quality needs, and your tolerance for setup time. Prioritize safety and test patches to protect durability and appearance before committing to a full job.
Decide by running a quick check: confirm the material type and viscosity you’ll spray, verify your best nozzle size and pressure, test on a small area with an even pass, check the spray pattern for consistency, and compare noise, mess, and speed against your schedule. Start with a dry run to map out coverage and then proceed with the actual work, keeping safety gear and ventilation in place at all times.
Common mistakes to avoid are underestimating ventilation and masking, rushing without a test patch, and swapping systems mid-project without rechecking spray settings. Safety rules are simple: wear eye and skin protection, keep the workspace well ventilated, and never spray unfamiliar coatings at high pressure in enclosed spaces. If the project is large, or if the coating requires strict film thickness control or specialized finishes, it’s wise to bring in a pro rather than push on alone.
When in doubt, choose the option that minimizes rework and damage risk—and remember that a controlled test patch today saves costly repairs later. Stay disciplined, follow the flow from quick comparison to decision flow, and you’ll finish with a durable, professional-looking result.
FAQ
What’s the key difference between HVLP, airless, and conventional sprayers for a DIY project?
HVLP pushes a lot of air at low pressure to give fine control and less overspray. Airless sprays with high pressure lay down material fast but throw more mist. Conventional sprayers use a compressed air pattern or a roller/brush approach; they’re simple but can be less efficient for large, open areas. Check the label and manufacturer instructions for your system’s pressure and flow ranges.
Which sprayer type is best for a typical DIY home exterior or interior project?
For large flat surfaces, airless can be fastest but requires masking and patience. HVLP is great for doors, trim, and detail work with less overspray. Conventional may be fine for small spots or coatings that don’t need a sprayed finish. Consider project size, required finish, and your masking ability before choosing.
How can I save material and get better efficiency with these sprayers?
Practice proper setup and thinning as recommended by the manufacturer. Maintain consistent distance and speed to reduce waste. Use the right tip size and spray pattern for the job, and always follow cleaning steps so the unit stays efficient over time. If in doubt, consult the product instructions and test on scrap material.
What maintenance and safety steps matter most to extend life and stay safe?
Rinse and flush the system after use with the correct solvent or water, then clean filters and passages. Keep airless tips and HVLP needles clean and replace worn gaskets or seals as needed. Wear proper PPE, ventilate, and avoid spraying near ignition sources or on hot surfaces. Always follow the manufacturer’s cleaning and safety guidelines and your local rules.