
Waterproof a concrete pool by diagnosing the source of water loss first, safely draining and preparing bare, sound concrete, repairing active leaks and defects, then applying a system specifically approved for continuous pool immersion. Allow the repairs and coating to cure for the times stated on their labels before inspection and refilling. Waterproofing the shell, repairing a leak, and installing the final visible finish are related but different jobs. Do not expect a coating to correct moving cracks, failed plumbing, structural damage, or groundwater pressure. Related guidance: How Long Does it Take to Waterproof a Concrete Pool?.
- Confirm whether the problem is shell leakage, plumbing, evaporation, a failed finish, or groundwater pressure.
- Decide whether it is safe to drain the pool; then isolate equipment and inspect the empty shell.
- Remove failed coatings and contamination, profile the concrete as required, and map defects.
- Stop active seepage and repair cracks, joints, penetrations, hollow areas, and damaged concrete with compatible repair materials.
- Let every repair cure, choose an immersion-rated system compatible with the intended finish, and apply it at the label-specified thickness and conditions.
- Allow the full immersion cure, inspect the completed surface, refill as directed, and investigate any continuing water loss rather than simply adding another coat.
The Significance of Waterproofing in Concrete Swimming Pools
Concrete is not automatically watertight. Its performance depends on the concrete itself, curing, cracks, joints, penetrations, detailing, and the waterproofing or finish system selected. A sound waterproofing system helps limit water passage through the shell, but it cannot compensate for structural movement, a broken pipe, or water pressing on the outside of the pool.
Waterproofing is especially important when there is recurring seepage, efflorescence, blistering or delamination of an old finish, or a known groundwater issue. If the shell has moved, risen, developed wide or recurring cracks, or leaks while outside groundwater is high, stop and obtain advice from a pool contractor or structural professional. Those conditions need diagnosis before surface work.
The Advantages of Effective Waterproofing
- Protects the shell and finish: A compatible system can limit water intrusion through prepared, sound concrete.
- Makes defects easier to manage: A clean, continuous finish makes pinholes, cracking, and delamination easier to spot.
- Supports a durable pool finish: The waterproofing layer and visible finish must be compatible with one another and with pool chemicals.
Waterproofing is not sanitation. Maintain circulation, filtration, cleaning, and water chemistry after the pool returns to service.
Preparation: Essential Steps Before Waterproofing
Do not drain an in-ground pool until you understand the groundwater and hydrostatic-relief situation. Groundwater can place outside pressure on an empty shell and, in severe cases, contribute to cracking or uplift. Check the pool’s hydrostatic-relief provision, local groundwater conditions, drainage, and the pool builder’s or contractor’s guidance. If you cannot establish that draining is safe, hire a qualified pool professional.
Do not enter an empty pool until its hazards have been assessed. An empty pool may be confined-space or other regulated work, and it can present atmospheric, silica-dust, fall, access, chemical, and rescue hazards. Entry may require atmospheric testing, ventilation, an attendant, rescue arrangements, trained personnel, and applicable confined-space controls. If those controls cannot be established, do not enter; hire a qualified professional. See OSHA’s confined-spaces guidance and follow applicable local requirements.
Before draining or beginning work, de-energize, isolate, and lock out pool lights, pumps, heaters, automatic chemical feeders, and other relevant circuits and equipment. Do not rely on a switch alone. Do not use improvised electrical equipment, extension-cord arrangements, or unprotected electrical tools in or around the drained pool. Where electrical equipment is necessary in a potentially wet work area, use only equipment and protection permitted by applicable electrical requirements, including GFCI protection where applicable, and keep cords, connections, and power sources out of wet areas.
Use a safe, stable access arrangement that permits entry and exit without climbing on fittings, coping, or unsecured objects. Protect against falls at the pool edge and do not work alone where the hazard assessment requires an attendant or rescue capability.
Gather cleaning and scraping tools, stiff brushes, approved profiling tools, mixing containers, application tools specified by the product, inspection lighting, and waste containers. If remaining water or sludge must be removed, use a pump or wet vacuum only after electrical hazards have been controlled; place its power source and connections away from wet areas and follow the equipment instructions. Wear the gloves, eye or face protection, protective clothing, footwear, hearing protection, and respiratory protection required by the selected product and its SDS. Control dust rather than dry-sweeping it.
Drain only when it is safe, then remove standing water, sludge, algae, dirt, grease, oils, scale, efflorescence, laitance, loose concrete, and form-release residue. A pressure washer or stiff brush may be useful when permitted by the coating instructions, but allow the substrate to reach the moisture condition the system requires afterward.
Determine what is on the shell. Soundly bonded existing material is not automatically an acceptable substrate. Remove peeling, chalking, soft, loose, contaminated, or incompatible coating by the method allowed on the new product label. Some pool-rated coatings require bare masonry and exclude application over previous coatings. For example, the DRYLOK Extreme product data sheet requires prepared masonry, patching before coating, and product-specific cure conditions; use its requirements only when using that exact product.
After cleaning, inspect in good light. Mark cracks, floor-to-wall joints, construction joints, steps, drains, skimmers, returns, light niches, pipe penetrations, honeycombing, spalls, hollow-sounding areas, and damp spots. Smooth concrete may need mechanical profiling. Where the selected system requires an absorbent substrate, check that water can wet the concrete rather than beading on contamination or a sealed surface. Related guidance: Can You Paint a Concrete Floor? Prep Steps That Prevent Peeling.
Various Waterproofing Techniques
Choose a system only after the shell condition and intended finish are known. Confirm in the current label or product data sheet that it is approved for continuous swimming-pool immersion, the actual sanitizer and cleaning chemicals, the concrete moisture condition, and the direction and amount of water pressure expected. Also confirm compatibility with plaster, tile, paint, or any other finish that will cover it.
| System type | Typical role | Key limitation |
|---|---|---|
| Cementitious or paint-on pool-rated coating | A practical DIY option on accessible, sound concrete when the manufacturer permits the substrate and immersion exposure. | Preparation, coat thickness, recoat timing, and immersion cure are product-specific. It does not solve movement or structural cracking. |
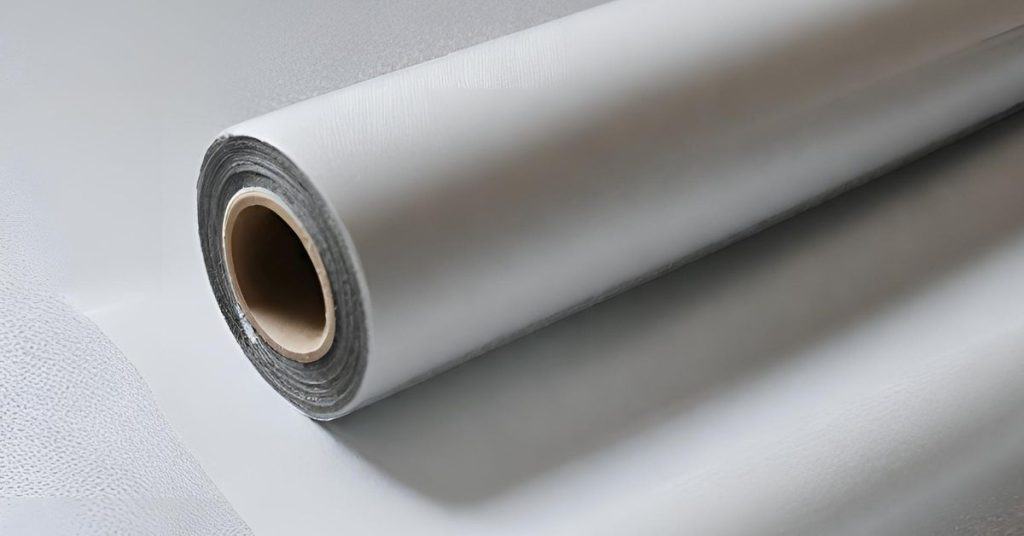
| Liquid- or sheet-membrane system | A barrier system that may require reinforcement and detailed treatment at corners, joints, and penetrations. | Installation errors at laps and details can cause leaks. Many systems require specialist installation; do not assume roofing or general-purpose membranes are pool-safe. |
| Integral crystalline admixture | Mixed into new concrete during batching, not brushed onto an existing pool shell. | It requires mix design, batching, trial mixes, and curing controls. It is not a substitute for repairing an existing cracked shell. |
Do not select modified bitumen, PVC, rubber, epoxy, polyurethane, or a “crystalline” product solely by material name. The approval for immersion, chemical exposure, pressure, substrate moisture, and the intended finish is what matters.
Essential Considerations Prior to Waterproofing
- Find active leaks first. Water emerging through a defect must be stopped with a repair product specifically rated for active water flow and the substrate. A surface coating or ordinary crack filler may not hold against active pressure. Stop and obtain professional diagnosis if seepage continues after the permitted repair method, the source appears external, groundwater pressure remains, the repair product requires a dry substrate that cannot be achieved, or water is emerging from multiple or changing locations.
- Match the repair to the defect. Stable shrinkage cracks, moving cracks, construction joints, floor/wall joints, penetrations, and honeycombing need different details. Use only repair materials and reinforcement methods approved by the waterproofing-system manufacturer.
- Do not treat moving or structural cracks as cosmetic. Recurring cracks, displacement, rust staining, major delamination, or hollow areas require professional assessment before coating.
- Allow repairs to cure. Follow the repair product’s stated cure or service-entry time and any additional coating requirements. New concrete also needs the selected system’s required cure and moisture condition.
- Work only in acceptable conditions. Check the label for air and substrate temperatures, rain and condensation limits, ventilation, substrate dampness, pot life, recoat window, coverage, and required wet-film thickness. These values are not interchangeable between products.
Implementing Your Selected Waterproofing Technique
Pre-coating gate: Do not mix or apply the waterproofing system until no active water is emerging, no shell movement or unresolved structural defect remains, repairs have reached their stated cure or service-entry condition, and the concrete meets the selected system’s required profile and moisture condition.
Once the shell is sound, dry or damp as required, repaired, and properly profiled, apply the chosen system in this order:
- Read the current label, product data sheet, and SDS before mixing. Confirm the batch quantity, mixing method, pot life, application tools, coverage, thickness, number of coats, detailing requirements, recoat window, and immersion cure.
- Mask or protect fittings and surfaces that must remain free of coating. Detail corners, floor/wall transitions, drains, returns, skimmers, steps, and penetrations with the manufacturer-approved sealant, cove, fabric, or reinforcing method.
- Mix only what can be placed within the stated pot life. Do not thin, add water, or combine products unless the manufacturer specifically directs it.
- Apply a uniform first coat at the required coverage or wet-film thickness, maintaining a wet edge. Brush material into rough areas and around details rather than leaving thin spots.
- Allow the stated recoat interval. Apply the required additional coat or layers in a direction that makes missed areas easier to see. Do not coat over a soft, contaminated, rain-damaged, or out-of-window layer.
- Clean tools and dispose of residues according to the label and local requirements. Keep the pool protected from rain, debris, traffic, and unauthorized entry while it cures.
Before moving on, inspect under strong angled light. The coating or membrane should be continuous, fully bonded, and free of pinholes, holidays, blisters, exposed substrate, soft spots, and missed detailing. Verify coverage or thickness if the system provides a way to measure it. Correct defects using the manufacturer’s repair method; do not assume an extra coat will cure poor adhesion or an unresolved crack.
Post-Application Considerations
Allow the complete cure before water immersion. The correct delay comes from the selected product’s current instructions, not from a generic number of hours or days. Refill at the rate and with the startup procedure specified for that system, then commission circulation and chemical equipment according to the finish and equipment instructions.
If the water level falls after refilling, do not immediately diagnose waterproofing failure. Mark the water level, account for evaporation with a suitable comparison, and inspect fittings, plumbing, drains, and equipment as well as the shell. Persistent or substantial unexplained loss warrants a professional leak investigation.
Finishing Touches After Waterproofing
A waterproofing layer may be the exposed finish only if its manufacturer says so. If the pool will receive plaster, tile, paint, or another finish, verify compatibility and the required application window before proceeding. Keep records of the products used, batch numbers, weather conditions, repair locations, and cure dates; they are useful if a defect appears later. Related guidance: Building a Pool: How Long Will It Take You?.
Essential Tips for Ongoing Pool Maintenance
- Visually inspect the waterline, steps, corners, fittings, and accessible finish periodically, such as at seasonal opening and closing, and whenever water loss or a surface change is noticed. Look for blistering, peeling, cracking, pinholes, efflorescence, damp areas, or exposed concrete. Follow any inspection schedule provided by the waterproofing and finish manufacturers.
- Use pool equipment carefully so vacuums, poles, and tools do not gouge the finish.
- Maintain water chemistry, circulation, filtration, and cleaning according to the finish manufacturer, sanitizer instructions, and local requirements. The CDC’s home pool water-treatment guidance notes that sanitizer targets vary by pool and chlorine product; waterproofing does not replace chemical control.
- Winterize in freezing climates according to the pool and finish manufacturer’s directions. Do not drain an in-ground pool as a routine winter step unless its groundwater and structural conditions have been addressed.
Exploring the Financial Aspects of Pool Waterproofing
Budget for diagnosis, safe draining, preparation, repairs, waterproofing materials, final finish, and refill or chemical startup—not just the coating. Obtain comparable estimates that identify substrate preparation, crack and joint treatment, detailing, cure time, exclusions, and warranty conditions. Major preparation, plumbing leaks, membrane work, groundwater management, or structural repairs can make professional work the more economical choice.
Conclusion: The Long-Term Advantages of Waterproofing
A successful pool-waterproofing job starts with diagnosis rather than a product purchase. Make draining safe, assess entry hazards before entering the empty pool, remove failed material, repair and cure defects, use a system rated for continuous pool immersion, and follow that system’s conditions and cure schedule. Stop and call a qualified professional when the shell moves, water pressure is external or active, plumbing is suspect, entry hazards cannot be controlled, or the repair is beyond a stable surface defect.
FAQ
What should I do if I notice leaks after waterproofing?
First determine whether the loss is evaporation, plumbing leakage, a fitting or drain leak, groundwater pressure, or a shell defect. Inspect the coating for pinholes, blisters, cracks, and loss of bond, but do not recoat until the cause is identified and repaired. A persistent unexplained leak needs professional testing.
How often should I inspect my pool for waterproofing integrity?
Inspect periodically, such as at seasonal opening and closing, and whenever you notice water loss, damp spots, efflorescence, peeling, blisters, cracking, or exposed concrete. Follow any inspection schedule provided by the waterproofing and finish manufacturers.
Can I apply waterproofing materials in cold weather?
Apply only within the product’s stated air and substrate temperature range and moisture limits. Cold surfaces, condensation, rain, or inadequate ventilation can interfere with adhesion and cure.
What are the signs that my pool needs re-waterproofing?
Recurring seepage, pinholes, blistering, delamination, exposed substrate, cracking, efflorescence, or chemical damage can indicate a failing system. Diagnose the underlying cause before choosing repair or replacement; structural movement and groundwater pressure are not solved by re-waterproofing alone.