
Introduction
Preventing roller marks in clear sealers is about keeping a smooth, wet edge and consistent roller motion. Set up your work zones so you move methodically and don’t drag a dry edge across the surface. Check the product label and local rules for timing, and re-roll small areas to blend before the edge starts drying.
Plan your strokes to avoid stopping mid-panel and to keep the edge feathered as you roll. If you see a line forming, back up and re-roll with a fresh pass, watching for a uniform sheen. Keep your tools clean, work in consistent directions, and follow the manufacturer’s instructions for application notes and recoat timing.
Key takeaways
- Plan work zones before starting to prevent cross-contamination and rework.
- Use compatible sealers and check label instructions to match surface and conditions.
- Choose short naps and rounded edges rollers to minimize edge marks.
- Keep a wet edge and back-roll slightly to even out translucency.
- Inspect after each pass and re-apply only where sealer is missing.
- Wear eye protection and gloves; clean spills promptly to prevent staining.
Table of Contents
- Introduction
- Key takeaways
- Common Causes of Roller Marks
- Selecting the Right Sealer and Understanding Specs
- Choosing Rollers and Tools to Minimize Marks
- Surface Preparation and Visual Checkpoints
- Planning Work Zones and Workflow Sequencing
- Application Techniques: Loading, Pressure, Passes, and Back-Rolling
- Wet Edge Management and Common Re-Roll Traps
- Troubleshooting, Inspection, and Repair Methods
- Conclusion
- FAQ
Common Causes of Roller Marks
Roller marks usually come from a mismatch between the sealer and the surface, or from how the product is applied. You’ll see streaks where the roller left line impressions or where the film starts to dry unevenly. Understanding these root causes helps you pick fixes that actually work.
Also look for substrate issues and how they interact with the sealer. Poor surface prep, dust, or residual contaminants can magnify marks. By identifying the real drivers, you can plan the right corrective steps before you roll again.
Application errors and technique failures
These are common mistakes to avoid when applying clear sealers.
- Overloading the roller: Too much sealer causes drips and sags that leave marks. Tip: Lightly load the roller, just enough to cover evenly.
- Excessive pressure: Pressing too hard leaves deep marks and uneven film build. Tip: Use a light touch, let the sealer level on its own.
- Inconsistent speed: Varying application speed causes streaks and uneven drying. Tip: Maintain a steady pace across the entire surface.
- Improper pass patterns: Overlapping or crisscrossing passes can create visible lines. Tip: Use parallel, side-by-side passes with minimal overlap.
Correct application technique ensures an even film and minimizes roller marks.
Material and substrate interactions
The right material choices are crucial for a smooth, mark-free finish.
- High viscosity sealers: Thicker sealers can leave visible roller marks. Tip: Choose low to medium viscosity sealers for clear coats.
- Low solids content: Sealers with too little solids may not level properly, showing every mark. Spec: Look for high solids content (60% or more).
- Porous surfaces: Absorbent substrates can cause sealers to dry too fast, leaving marks. Tip: Consider a primer or base coat to seal the surface first.
- Existing coatings: Incompatible or poorly adhered coatings can cause show-through of roller marks and other issues. Tip: Ensure existing coatings are clean, dry, and compatible with your sealer.
- Cracking/staining/weak bond: Using the wrong material for your substrate can lead to these problems, making roller marks more visible.
Selecting the Right Sealer and Understanding Specs
Sealer chemistry and solids affect flow, leveling, and dry behavior. The choice determines how likely you are to see roller marks after application. Read the product data sheet or manufacturer instructions for guidance on flow and application methods.
Check the drying profile and open time so you don’t rework while the coating is too soft. Always verify with the label or data sheet how the sealer should be applied and what conditions influence performance.
Sealer types and leveling characteristics
Not all clear sealers are created equal when it comes to preventing roller marks. Here’s a quick rundown:
Waterborne sealers are water-based, making them easier to clean up but they can be more sensitive to application technique. They level well and have good flow, but may require a longer drying time before recoating.
Solventborne sealers use organic solvents for thinning, providing faster drying times and better leveling. However, they’re harder to clean up and have stronger odors. Recoat windows are typically shorter.
Polyurethane and acrylic sealers come in both waterborne and solventborne varieties. They offer excellent protection but can be more sensitive to application errors due to their higher solids content and slower drying times.
Interpreting product data sheets and safety info
Before you start, dig into the product data sheet (PDS) and safety data sheet (SDS). They’re your roadmap to a successful job:
PDS: Look for recommended application tools – brushes, rollers, or spray equipment. Check the ideal temperature and humidity ranges for application. Recoat times are crucial; too soon can trap solvents and cause marks.
SDS: This is your safety guide. It tells you about hazardous ingredients, proper handling and storage, and emergency procedures. Always wear recommended PPE (personal protective equipment).
Follow these guidelines to the letter. They’re there to help you get the job done right, safely.
Choosing Rollers and Tools to Minimize Marks
Roller face material and nap length influence how much material transfers and how textures form. A worn roller can create uneven coverage or crosshatched marks. Inspect tools for even padding and consistent texture before use.
Test rollers with the specific sealer on scrap to confirm how they behave. Replace damaged or heavily shed rollers and keep a clean set ready for changes in product or surface condition.
Roller nap, material, and core considerations
The roller’s nap length, cover material, and core construction play a significant role in minimizing marks. Here’s what to look for:
- Nap Length: Shorter naps (1/4″ to 3/8″) leave thinner films, ideal for clear sealers. Longer naps (>1/2″) can cause uneven coverage and roller marks.
- Cover Material: Synthetic covers (polyester, nylon) are best for clear sealers as they don’t absorb much sealer, reducing streaking. Lambswool or mohair can leave lint and absorb too much sealer.
- Core Construction: A rigid, hollow core prevents streaks from a flexible core bending under pressure. Avoid solid cores that can cause marks due to uneven pressure.
- Cover Weight: Heavier covers (13-18 oz) provide better coverage and reduce roller marks. Lighter covers may leave thin spots and marks.
- Avoid: Cracked or worn-out rollers that can leave visible marks on the sealer’s surface.
Ancillary tools and maintenance
Proper tools and their care ensure a smooth, mark-free application. Here are essentials to consider:
- Squeegees: Used for backrolling, they help remove excess sealer and reduce roller marks. Choose one with a comfortable handle and a blade that matches your roller’s width.
- Brushes: For edge work, use a 2″ to 3″ angled brush to cut-in without leaving bristle marks. Synthetic bristles are best for clear sealers.
- Trays: Deep trays (1″ to 1.5″) allow full immersion of your roller, ensuring even coverage and reducing streaks. Consider renting if needed ($2-$5 per day).
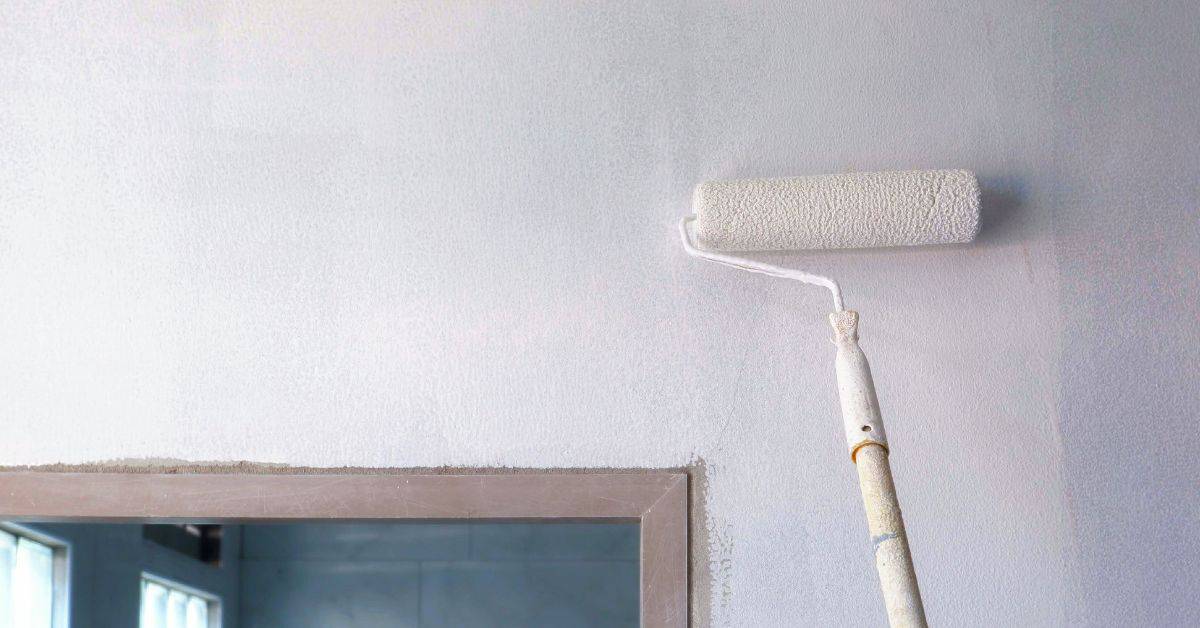
- Extension Poles: For high walls or ceilings, extension poles help maintain a consistent pressure and reduce fatigue. Rentable for around $10-$20 per day.
- Tack Rags: To remove dust and debris before application, use tack rags with mineral spirits. Keep them clean to prevent contamination-caused marks.
Surface Preparation and Visual Checkpoints
Prep starts with cleaning to remove dust, oils, and residues that can trap film imperfections. Light sanding can help with profile and adhesion, but avoid creating gouges. Wipe down thoroughly to finish with a clean surface.
Set up visual checkpoints to compare gloss level and texture as you work. Contamination control and surface profile play a big role in how evenly the sealer lays down.
Cleaning, Sanding, and Profile Verification
Before you start sealing, follow this checklist to ensure your surface is clean, smooth, and ready for application.
- Remove all dirt: Use a broom or leaf blower to clear large debris. Then, scrub with a solution of water and mild detergent to remove any remaining grime.
- Eliminate grease and oil stains: Apply a degreaser, let it soak, then scrub and rinse thoroughly. Neglecting this step can lead to poor adhesion and visible roller tracks.
- Check for mildew or mold: Inspect corners and shaded areas. If present, use a mold remover and follow up with a mild bleach solution.
- Sand the surface: Lightly sand with 120-grit sandpaper to create a uniform profile for better sealer adhesion. Be consistent; missed spots can show up as roller marks.
- Remove sanding dust: Vacuum and wipe down the surface with a damp cloth to eliminate any residue that could affect adhesion or cause visible defects.
- Inspect for leveling compounds: Ensure no residual compounds are present, as they can interfere with sealer bonding and create roller marks.
- Check for loose material: Tap the surface to identify any loose particles. Remove them to prevent them from becoming trapped under the sealer.
- Verify uniform profile: Run your hand over the surface to feel for any inconsistencies. Use a magnifying glass or bright light to visually confirm a consistent profile.
Quick rule: Inadequate sanding or residue can lead to poor adhesion and visible roller tracks, so always ensure your surface is clean, smooth, and free of contaminants before sealing.
Visual Checkpoints Before, During, and After Application
Regularly inspect the surface at key moments to catch potential roller mark issues early and prevent them from becoming major problems.
- Pre-seal inspection: Examine the surface for any missed spots during cleaning or sanding. Address these now to avoid roller marks later.
- Wet film inspection (10-15 minutes after application): Check for any missed spots, roller marks, or inconsistent coverage. Address these immediately while the sealer is still wet.
- Tack-free check (30-60 minutes after application): Gently touch the surface to ensure it’s no longer sticky. If it is, allow more time for drying before proceeding with the next coat or applying a topcoat.
- Check for orange peel texture: Look for any areas where the sealer has formed small dimples or bumps. This indicates that the surface was not properly prepared or the sealer was applied incorrectly.
- Inspect for roller marks (during drying): Keep an eye out for visible tracks left by the roller. If present, address them immediately to prevent them from becoming permanent.
- Final inspection (after full cure): Once the sealer is completely dry, perform a thorough visual check for any roller marks or other defects. Address any issues found during this stage.
Quick rule: Regular visual inspections at key moments allow you to catch and correct potential roller mark issues early in the application process, ensuring a smooth, even finish.
Planning Work Zones and Workflow Sequencing
Divide the job into work zones to preserve a consistent wet edge and minimize backtracking. This helps maintain uniform coverage and reduces edge pull and overlap issues. Consider whether a single operator or a team fits the pace and product open time.
Map your sequence in advance so you don’t run dry areas into wet ones. Planning around open time helps you avoid marks from rushed sections or prolonged drying under surface heat.
Establishing wet-edge zones and overlap strategy
To prevent roller marks, it’s crucial to maintain a continuous ‘wet edge’ while applying sealer. Here’s how:
Size your work zones based on the sealer’s open time. That’s the window when you can blend new passes with old without creating lap marks. Check your product data sheet for this info.
Also, consider your crew’s speed. If they’re slow, make smaller zones to keep up with the sealer’s drying time.
When rolling, overlap each pass by about a third of the roller width. This blends new strokes into old, maintaining that all-important wet edge. But don’t overlap too much or you’ll create lap marks.
Crew roles and timing coordination
A well-coordinated crew is key to maintaining a continuous wet edge. Here’s how to assign roles:
The roller operator applies sealer in even strokes, working from one side of the zone to the other.
The back-roller follows close behind, smoothing out any imperfections and ensuring full coverage. They should start work as soon as the roller operator has finished a pass, before the sealer starts to skin over.
The edge worker handles those tricky areas where walls meet floor or where patterns change. They need to be agile and quick, working ahead of the main crew to maintain that wet edge.
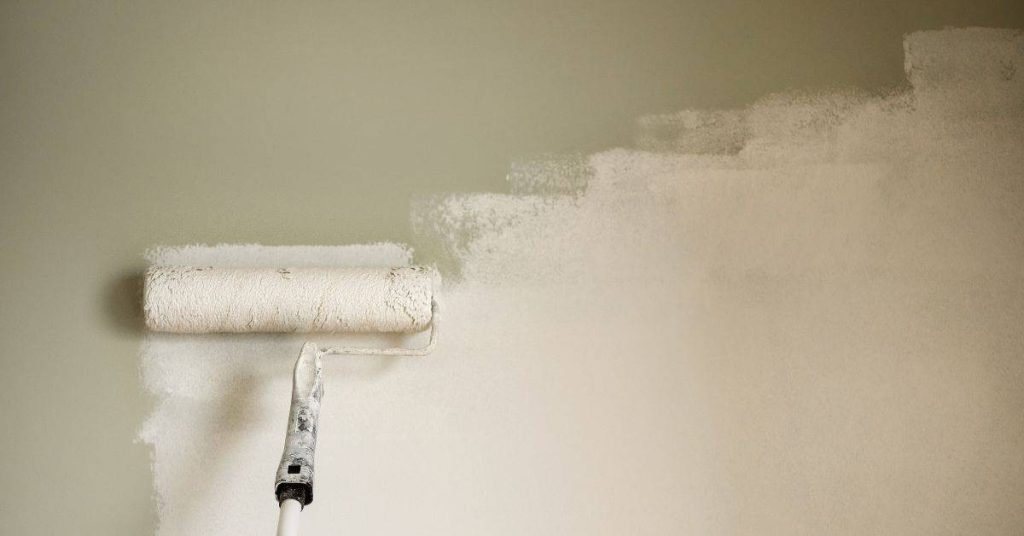
Application Techniques: Loading, Pressure, Passes, and Back-Rolling
Proper roller loading means enough material on the roller without excess pooling. Use steady pressure to keep the film moving smoothly. Keep stroke length consistent to avoid pigment accents and streaks.
The purpose and timing of back-rolling is to even out texture and close micro-porosity. Practice on scrap first to refine your rhythm before working on the actual surface.
Proper roller loading and even pressure
Avoid overloading your roller. Too much sealer can cause drips, sags, and roller marks.
Dip the roller into the sealer tray until it’s evenly coated, then roll it out on a scrap piece of material to remove excess. You should see even coverage with no dry spots or puddles.
Apply consistent pressure as you roll. Too much pressure can cause streaks and lap lines. A good rule of thumb is to use just enough pressure to leave an even film of sealer on the surface.
Pass patterns, directional strategy, and back-rolling
Use a ‘W’ or ‘M’ pattern for your first pass to ensure even coverage. Start at the top of the work zone and roll downwards, then upwards in an overlapping ‘W’ shape.
Maintain directionality as you work. For example, if you’re rolling downwards on the first pass, continue downwards on subsequent passes to avoid texture lines.
After applying sealer, perform a light back-roll. This helps equalize the film and removes any lap marks or streaks. Back-rolling should be done in the same direction as your initial passes.
Wet Edge Management and Common Re-Roll Traps
Re-roll traps occur when edges dry faster or when viscosity changes mid-application. Slow back-rolling or inconsistent flow can create hard lines or ridges at the edge. Recognize these patterns early to intervene before the film cures.
Identify when a re-roll improves the look and when it makes it worse. If the edge shows signs of tearing or lifting, avoid a second pass and adjust your approach instead.
Recognizing and preventing wet edge failure
A failing wet edge is easy to spot. You’ll see visible lines or a color shift where the sealer meets the previously applied area.
Preserve the blend: If you notice this happening, act fast. Adjust your pace to slow down and give the wet edge more time to blend in. Or, reduce your work zone size to apply smaller sections at a time.
Remember, patience is key here. Rushing will only make those lines worse.
Correct re-rolling method and timing for repairs
Re-rolling can fix marks, but it’s a delicate operation. You want to catch it while the film is still open – that’s when you have the best chance of blending.
Gentle strokes: Use light pressure and even strokes. Think ‘tickling’ not ‘pounding’. Aggressive pressure will only create glaze and texture differences, making marks worse.
Start from the wet edge and roll back into the previously applied area. This helps blend the two together seamlessly.
Troubleshooting, Inspection, and Repair Methods
Adopt a decision-making approach to identify mark types and the least invasive repair. Spot-fixes can work for small defects, while feather-sand may be needed for soft edges. A full recoat is considered when the defect spans a large area or affects film integrity.
Outline criteria for when surface prep and recoat are required. If unsure, verify with product instructions or local guidelines before proceeding.
How to inspect and classify roller marks
Use this checklist when you’ve finished rolling your concrete surface. It helps you identify the severity of roller marks for appropriate repair.
- Check mark depth: Use a straight edge and feeler gauge to measure the indentation. Less than 1/32″ is light, anything more is severe.
- Inspect mark width: Measure the width of the marks. Narrow lines (less than 1/4″) are easier to repair than wide ones.
- Examine mark spacing: Check how close together the marks are. Tightly spaced marks may require a different approach than widely spaced ones.
- Feel for mark edges: Run your hand over the marks. Sharp, well-defined edges indicate light marks, while blurred edges suggest severe ones.
- Check mark consistency: Ensure marks are consistent across the entire surface. Inconsistencies may point to equipment or technique issues.
- Inspect for overlapping marks: Overlapping marks can indicate improper rolling technique, which may require re-rolling and additional inspection.
- Check mark direction: Ensure all marks run in the same direction. Cross-hatched or random marks can weaken the concrete’s strength.
- Feel for mark hardness: Gently tap the marks with a hammer. Hard, resonant sounds indicate light marks, while dull thuds suggest severe ones.
Quick rule: If marks are light (less than 1/32″ deep), you can often just let them cure and sand them off later. Severe marks (deeper than 1/32″) may require grinding or even re-pouring.
Repair techniques: spot repairs, feathering, and recoating
Use this checklist when you need to fix minor concrete issues or refresh an existing surface. It’s best to tackle these repairs before the damage worsens.
- Inspect the area: Check for cracks, chips, or other defects. Use a flashlight at different angles to ensure thorough inspection.
- Clean the surface: Remove dirt, debris, and any loose material using a stiff brush or pressure washer. The surface should be clean and dry before proceeding.
- Light sanding (if needed): Use medium-grit sandpaper to lightly abrade the area. This helps the repair material bond better. Be careful not to sand too much, as it can weaken the concrete.
- Check for moisture: Concrete must be dry before applying any repair material. Use a moisture meter if unsure; readings should be below 4% for best results.
- Prepare your repair mix: Follow the manufacturer’s instructions to ensure you have the right consistency. A common mistake is using too much water, which weakens the repair.
- Spot repair (small defects): Apply the repair material with a trowel or putty knife, filling cracks and chips completely. Use a damp sponge to strike off any excess and smooth the surface.
- Feathering (transition areas): When blending repairs into existing concrete, use a feathering technique. Start with a thin layer of repair material, gradually increasing thickness as you move towards the defect. This helps create a seamless transition.
- Recoating (full surface refresh): If the entire surface needs refreshing, strip off any loose or flaking material first. Then apply a new coat of concrete sealer or overlay, following manufacturer instructions for best results.
Quick rule: Always test your repair materials on a small, hidden area first to ensure color and texture match the existing concrete.
Conclusion
Control the process start to finish: prep thoroughly, create clear work zones, and keep a fresh wet edge so the sealer lays flat, looks even, and lasts without peel or ghosting. When you respect the workflow, you reduce rework, cut costs, and keep you and the job safe.
First, plan the sequence, test in a small area, mix and load the sealer properly, set consistent roller pressure, make the first pass, back-roll to blend, maintain a wet edge as you move, and inspect as you go so any fixes stay small and easy. Stick to these checks in order: surface clean and dry, zones defined, sealer chosen for the job, roller and tools suited, loading light but steady, passes consistent, back-rolling timely, and a final check before the sealer cures.
Common mistakes to avoid are overloading the roller, skipping prep, letting edge areas dry or skin over, rushing passes, and ignoring patchy spots. Safe rules: wear eye and skin protection, ventilate well, test a tiny area first, and never push a second coat onto a surface that’s not ready. If you see uneven deposition, slow down, re-check seam and edge work, and keep your movements controlled to prevent vision-defeating streaks.
If large areas, complex substrates, or previous coatings spark trouble, consider bringing in a professional instead of forcing a finish that may fail. When in doubt, pause, assess the test area, and plan the next steps with these guardrails in mind. Stay steady, stay safe, and you’ll end with a durable, smooth result you can be proud of.
FAQ
What should I do if I see roller marks forming before the sealer dries?
Stop and check your loading and pass count. Keep a wet edge by moving steadily and avoid heavy back-rolling that creates ridges.
How can I prevent re-rolling traps from showing up after the first pass?
Plan a continuous flow so you don’t lay down dry patches. If you must re-roll, do it lightly and cross-overs only when the surface is still slightly damp.
What indicators tell me I’m applying too much sealer with the roller?
Look for pooling or a visible sheen that won’t level out. Too much sealer can trap air and leave streaks after it dries, so back off and roll thinner coats.
When is it safe to recoat a sealant layer without risking more roller marks?
Follow the manufacturer’s guidance on recoat windows and dry times. If in doubt, test a small area first and ensure the surface tack-free before applying another coat.