
Introduction
Pigment streaks come from how you mix the pigment and how long you keep the mix moving. The mixing order and the amount of shear time you use matter a lot for a uniform color. Keep it practical and observe what the product instructions and local rules say to check for your mix.
Start by laying out a simple, repeatable mixing sequence and use the same felt tempo each batch. Have the right tools on hand, and don’t overwork the mix beyond what the pigment and concrete description suggest. If anything seems off, check the pigment label, the manufacturer’s instructions, and local guidance before proceeding.
Key takeaways
- Follow manufacturer mixing order to prevent pigment streaks and uneven coloration.
- Limit shear time to avoid overwork; stop when pigment dispersion seems uniform.
- Add pigment after initial cement and aggregates are blended to reduce streaks.
- Use a high-shear mixer or dedicated paddle to improve dispersion.
- Inspect color distribution early; perform visual checkpoints before finishing and curing.
- Always wear gloves and eye protection; clean spills promptly to prevent hazards.
Table of Contents
- Introduction
- Key takeaways
- Why Pigment Streaks Happen in Concrete
- Correct Mixing Order to Minimize Streaks
- Shear Time and Mixing Intensity That Matter
- Tools and Equipment That Improve Pigment Dispersion
- Common Mistakes and How to Avoid or Fix Them
- Visual Checkpoints and Quality Control Procedures
- Planning for Large-Scale Colored Concrete Projects
- Safety, Cleaning, and Maintenance Best Practices
- Conclusion
- FAQ
Why Pigment Streaks Happen in Concrete
Pigment streaks are visible bands or patches of color that break up an even finish. They often result from segregation, uneven pigment dispersion, and variability in the mixing process. Viscosity, aggregate distribution, and slump can magnify those color differences in the surface layer.
Understanding how mixing order and shear time affect color helps you prevent streaks. When color is not distributed evenly, the finished surface can show contrast lines and patchy tinting. Practical checks during setup, mixing speed, and dispersion indicators guide you toward uniform color before a full pour.
What is pigment streaking and how to recognize it
Pigment streaking in concrete appears as unsightly bands, veins, or blotches of color that vary from the desired uniform finish. These streaks become visible during finishing or after curing, marring the otherwise smooth surface.
Bands can run horizontally or vertically, while veins are thin, linear streaks. Blotches are irregular patches of uneven color. Recognizing these patterns early helps address the issue before it becomes a bigger problem.
Tip: Inspect your concrete regularly during and after pouring to catch any signs of pigment streaking early on.
Primary causes—materials and process factors
Material choices and mixing processes significantly impact the prevention of pigment streaks. Understanding these factors helps create a consistent, streak-free finish.
- Agglomerated pigments: Poorly dispersed pigments clump together, leading to visible streaks. Use high-quality, well-dispersed pigments.
- Incorrect addition order: Adding pigments too early or late in the mixing process can cause uneven distribution. Follow the recommended order of ingredients.
- Inadequate shear: Insufficient blending time results in incomplete pigment dispersion. Ensure proper mixing duration and equipment speed.
- Inconsistent water/cement ratios: Varying water or cement amounts affect pigment distribution. Maintain consistent proportions for a uniform finish.
- Improper aggregate distribution: Unevenly distributed aggregates can cause color variations. Ensure proper grading and mixing of aggregates.
When streaking is a quality vs. environmental issue
Jobsite conditions can exacerbate mixing problems, leading to pigment streaks. Understanding these factors helps differentiate between inherent material issues and environmental influences.
High temperatures and low humidity can cause rapid cement hydration, leading to uneven pigment distribution. Conversely, cold temperatures and high humidity may slow down the process, allowing pigments to settle or segregate.
Delays: Prolonged mixing times or pauses in the pouring process can lead to pigment segregation, resulting in streaks. Keep your process consistent and timely.
While some streaking may be due to inherent material issues, many cases are exacerbated by environmental factors. Controlling these variables as much as possible helps achieve a better-quality finish.
Correct Mixing Order to Minimize Streaks
The core sequence begins with pre-dispersion of pigments, followed by the bulk solids, then liquids, all in a controlled progression. This order reduces pigment separation and helps keep color even as the batch develops. Documenting the flow ensures consistency from batch to batch.
Liquid versus powder pigments require different handling to avoid micro-clumping. In general, powders should be pre-mixed into a small portion of dry mix or binder; liquids should be introduced with part of the liquid binder for even distribution. Always follow manufacturer directions and note any compatibility considerations with admixtures and bonding agents.
Best practice sequence for powdered pigments
Powdered pigments need a little extra care to ensure even distribution. Here’s how:
Pre-blend or create a slurry. Mix your powdered pigment with water or a small portion of the binder (cement) before adding it to the mix. This helps break up any clumps and ensures better dispersion.
Then, follow this sequence: pre-dispersed pigments, then cement, followed by aggregates. This order minimizes pigment separation and streaking.
Best practice sequence for liquid pigments and colorants
Liquid pigments need a head start to ensure they’re evenly distributed. Here’s how:
Add your liquid pigments to the mixing water or slurry first. This gives them time to spread out before the solids are added.
Then, introduce the cement, followed by the aggregates. This sequence helps maintain a uniform color throughout your concrete mix.
Batch-to-batch color transition strategies
Maintaining consistent color from one batch to the next is crucial. Here’s how to do it:
Blend a portion of old and new batches. When starting a new batch, mix in some of the old batch to ensure continuity in color.
Do test pours. Before pouring a large slab, test a small area with your new batch. This helps you catch any color discrepancies early.
Record sequence protocols. Keep notes on your pigment ratios and mixing sequences. This helps maintain consistency across shifts and prevents streaking due to changes in the mix design.
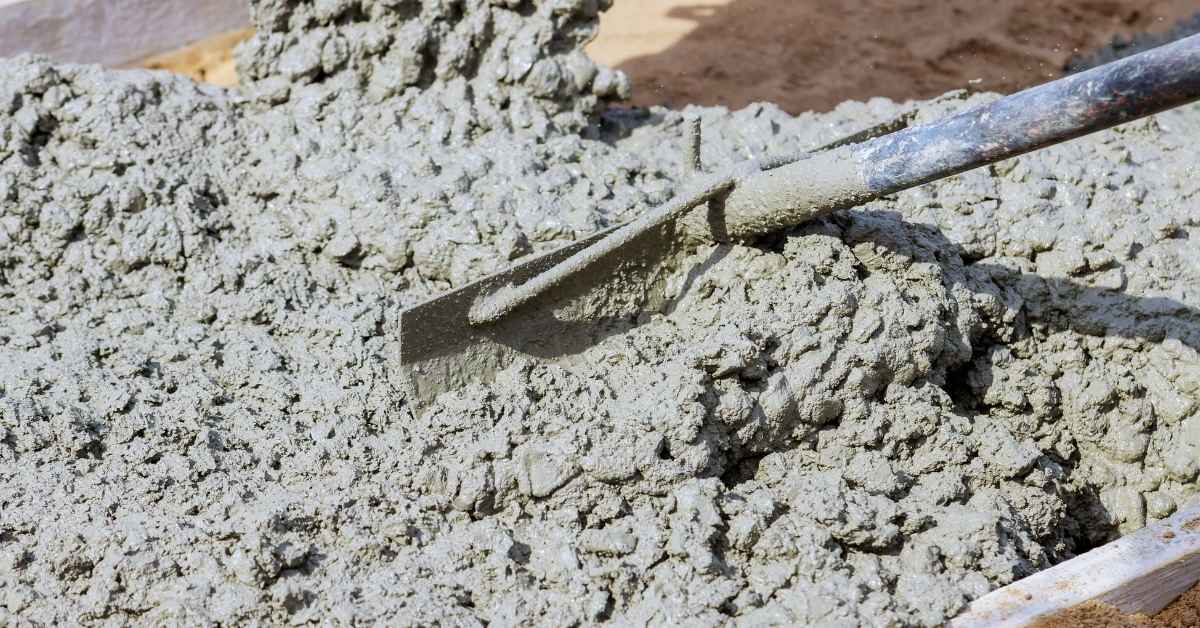
Shear Time and Mixing Intensity That Matter
Shear time and mixing intensity describe how long and how vigorously the pigment is dispersed. Adequate shear breaks up clumps and promotes uniform distribution, while too little leaves streaks and settling. Excessive shear can degrade pigment and affect workability.
Follow the pigment and mixer manufacturers’ guidance for when to introduce color and how long to mix at each step. Use a pilot batch to verify dispersion, check color consistency, and perform a quick slump or flow check to ensure the mix remains workable. Adjust timing gradually and document results for future batches.
Typical Shear Time Guidance
Shear time is crucial for pigment dispersion. It’s typically around 10-20 minutes, but this varies.
Factors increasing shear need: High pigment loading, heavy clays in aggregates.
Start with a short slurry mix (5 min), then add aggregates and continue mixing (15-20 min). Always confirm with your pigment supplier.
Mixing Intensity Matters
Mixing speed and impeller design impact shear rate. Faster speeds and proper impellers help disperse pigments.
Match intensity to pigment: Higher viscosity or smaller particles need more intense mixing.
For example, use high-speed, high-shear mixers for small particle sizes. Check your mixer’s manual and pigment supplier’s recommendations.
Jobsite Checks for Adequate Shear
Before placing concrete, ensure pigments are well-dispersed. Here’s how:
- Color Uniformity: Check a small sample for even color.
- Agglomerates: Look for visible pigment clumps.
- Slump/consistency: Perform a quick slump test to ensure workability hasn’t been compromised.
Tools and Equipment That Improve Pigment Dispersion
Choose mixer types that match your scale and workflow, from portable field units to plant-sized drums. High-shear or dual-paddle systems help maximize dispersion while minimizing air voids when used correctly. Avoid overloading equipment beyond its intended capacity.
Match paddle and impeller designs to pigment types and carrier compatibility. Material choices and surface finishes influence how effectively shear is transmitted into the mix. Plan for staged additions and keep cleaning routines tight to prevent cross-contamination between batches.
Mixer types: benefits and trade-offs
When it comes to mixing pigments into concrete, the right mixer can make all the difference. Here’s a quick rundown of common types:
High-shear mixers are top-notch for pigment dispersion. They create intense shear forces that break up pigment clumps. But they’re heavy and pricey, making them better suited for plant use.
Paddle mixers, on the other hand, are lighter and more portable. They’re great for field work but may not deliver the same level of shear as high-shear mixers. Choose one with a large enough capacity to handle your batch size without overloading.
Planetary mixers combine rotation and revolution to create excellent mixing action. They’re versatile, handling both small batches in the field and larger ones at the plant. But they can be complex to operate and maintain.
Paddle and impeller selection and speed guidance
The shape of your mixer’s paddles or impellers affects how well they break up pigments. Here are some tips:
Flat paddles create a strong vortex, drawing materials into the mix. They’re great for dry powders but can introduce air voids if not used carefully.
Helical/whirl impellers generate a more gentle mixing action, reducing air entrapment. They’re ideal for liquids and colorants but may require longer mixing times.
Mixing speed is crucial too. Higher RPMs increase shear intensity, breaking up pigments faster. But be careful not to introduce excessive air or overheat the mix. Test different speeds on small batches to find the sweet spot.
Accessories: check valves, sampling tools, and inline dispersers
To get the most out of your mixer, consider these helpful accessories:
- Inline dispersers: For liquid pigments, an inline disperser can help break up clumps before they reach the mixer. It’s a small investment that pays off in better color consistency.
- Sampling tools: Regularly check your mix with a sample tube to ensure consistent color and dispersion. It’s quick, easy, and helps catch any issues early.
- Mixing buckets: Use buckets sized to allow proper vortexing. This ensures all materials are drawn into the mix, preventing streaks.
- Check valves: These prevent backflow during mixing, ensuring a thorough, even mix. They’re especially useful in high-shear mixers.
- Decorative spatulas and scoops: For small batches or touch-ups, these tools can help ensure accurate pigment addition and minimize waste.
Common Mistakes and How to Avoid or Fix Them
Common errors include adding pigment at an inappropriate stage, rushing mixing, or mixing across inconsistent batch temperatures. Set a rule to pigment blend only after the base mix is uniform and verify dispersion with quick checks before pours. Establish a simple pass/fail test for color accuracy in the batch.
Adhere to consistent mixing times, speeds, and cleanliness to prevent streaks. If contamination or color shifts occur, identify the source, correct the process, and decide whether remixing is feasible or if discard is required. Keep a quick rework protocol on hand for reference.
Under- and Over-Dispersion Problems and Corrective Steps
Under-dispersed pigment can lead to unsightly spots or clumps in your concrete. Over-dispersion risks excess air entrainment, which weakens the concrete.
Signs of under-dispersion: You’ll see color streaks, speckles, or unmixed pigment clumps. Fix: Stop mixing immediately and check your pigment-to-water ratio. Add more water if needed, then remix until uniform.
Over-dispersion risks: Excessive air entrainment can cause gloss loss and surface imperfections. Prevent: Keep an eye on the timer; over-mixing can introduce too much air. If you suspect over-mixing, stop immediately and check for excess air bubbles.
Handling Inconsistent Raw Materials or Batches
Inconsistencies in your raw materials can lead to varied results. Here’s how to troubleshoot:
- Pigment variation: Check the pigment’s color consistency and particle size. Use: Test blend small batches before committing to larger ones.
- Water quality: Ensure water is clean, free of contaminants, and consistent in temperature. Avoid: Using water with high mineral content or wide temperature swings.
- Cement type: Different cement types have varying strengths and setting times. Spec: ASTM C150 for standard Type I/II cements. Tip: Track lot numbers to ensure consistency between batches.
- Aggregates: Size, shape, and type affect concrete’s strength and appearance. Spec: ASTM D6270 for aggregate quality. Tip: Keep aggregates clean and dry before mixing.
Field-Specific Errors: Delays, Temperature Swings, Equipment Swaps
Jobsite conditions can affect your concrete mix. Here’s how to mitigate these issues:
- Temperature swings: Extreme temperatures can speed up or slow down setting times. Key spec: Maintain a consistent temperature between 50°F and 90°F (10°C and 32°C). Tip: Use holding slurries to maintain consistency.
- Equipment swaps: Changing mixers or tools mid-project can lead to inconsistencies. Warning: Avoid swapping equipment if possible. If necessary, test blend a small batch with the new equipment first.
- Delays in pouring: Delays can cause setting issues and color shifts. Prevent: Keep your mix moving; consider using admixtures to extend workability time.
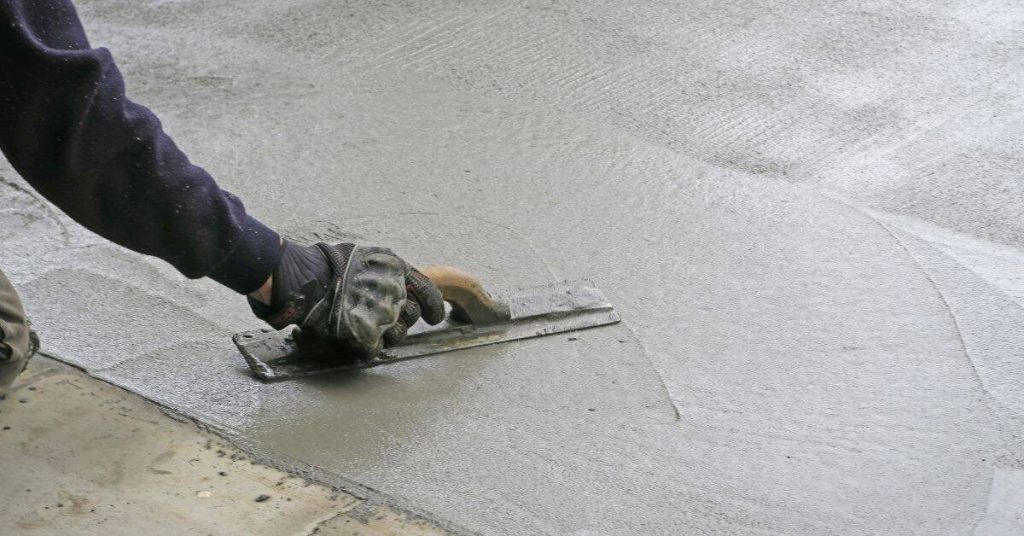
Visual Checkpoints and Quality Control Procedures
QC should be a sequence: during mixing, at a sample pour, and after finishing with clear pass/fail criteria. Look for dispersion uniformity, absence of streaks, and color consistency across the sample. Use a simple color reference to confirm alignment with target hue.
Photographic references help with repeatability. Capture images under controlled lighting, include a color card, and document angles and counts for future batches. Maintain a log with batch IDs, order details, and any corrective actions taken.
On-the-spot visual checks during mixing
Before you start pouring, check the mix in the bowl or bucket. Here’s a quick checklist to ensure uniform color and texture.
- Uniform color: Look for even distribution of pigment. If it’s not uniform, you might have under-dispersion issues.
- Absence of streaks: Scoop out a sample with your trowel or shovel. No visible streaks mean good dispersion.
- Consistent texture: The mix should feel smooth and consistent throughout. Lumps or clumps could indicate improper mixing.
- Check for lumps: Break up any lumps you find to ensure even distribution of materials.
- Pigment consistency: Check that the pigment is well-mixed into the concrete. If it’s not, you might need more shear time or a higher mixing intensity.
- Color match: Compare your mix to the target color. If it’s off, adjust your pigment dosage accordingly.
- Water content: Check that the water content is correct. Too much or too little can affect dispersion and color.
- Temperature check: Ensure the mix temperature is within acceptable limits. Extreme temperatures can affect pigment dispersion.
Quick rule: If you spot any issues during these checks, address them before pouring to avoid streaks and color inconsistencies.
Sample pours, test panels, and documentation
Before you place your bulk pours, make small test slabs to confirm color and consistency. Here’s what to check.
- Consistency with target hue: Compare the test panel’s color to your target. If it’s off, adjust your pigment dosage.
- Absence of streaks: Look for any visible streaks in the test panel. If present, recheck your mixing process.
- Consistency across surface: Check that the color is even throughout the test panel. Inconsistencies could indicate improper finishing methods.
- Micro-streaks or bleed: Inspect for any tiny streaks or signs of bleeding. These can indicate improper mixing, finishing, or curing.
- Document results: Record the test panel’s pass/fail status, pigment dosage, water content, and ambient conditions.
- Photograph test panels: Take pictures from multiple angles to document color and consistency. Include a color card for reference.
- Compare to previous tests: If you have records from past pours, compare them to ensure consistency.
- Adjust as needed: Based on your test results, adjust your mix design or finishing methods before placing bulk pours.
Quick rule: Regularly testing and documenting small pours helps maintain color consistency across your entire project.
When to send samples for lab testing
If you’re still seeing streaks after following recommended corrective actions, it might be time to escalate to lab testing. Here’s when and what to test.
- Persistent streaks: If you’ve tried adjusting mixing order, shear time, and water content but streaks persist, consider lab testing.
- Particle-size distribution: Ask the lab to check your concrete’s particle-size distribution. This can help identify any issues with your aggregates or cement.
- Dispersion testing: Have the lab perform dispersion tests to ensure your pigment is mixing properly into the concrete.
- Consistent raw materials: Ensure you’re using consistent raw materials between your site and the lab for accurate results.
- Compare results: Compare the lab’s findings with your on-site checks to identify any discrepancies.
- Adjust mix design as needed: Based on the lab’s results, adjust your mix design or pigment dosage to eliminate streaks.
Quick rule: Lab testing should be a last resort after you’ve exhausted all on-site troubleshooting options. It can provide valuable insights but isn’t always necessary.
Planning for Large-Scale Colored Concrete Projects
For large pours, plan batch sequencing to maintain pigment consistency across zones. Split pours and manage transfer times to avoid color drift. Implement checks that catch streaks early in the workflow.
Develop a color control plan with supplier lot tracking and test panels. Establish clear communication between batching, transit, and finishing crews with on-site handoffs and real-time updates. Schedule logistics to minimize variability and keep color uniform across the project.
Batch sequencing and color lot management
Planning your batch sequence is crucial to prevent pigment streaks. Start by splitting large pours into smaller, manageable sections – ‘zones’.
Each zone should get a consistent mix from the same batch. Reserve enough mixed material per zone to avoid mid-pour color shifts.
Use blending passes to ensure even pigment distribution in each batch. This helps maintain consistency across zones.
Tip: Keep track of your batches and their respective zones. This helps monitor any potential color drift and allows for quick adjustments if needed.
Logistics: mixing cadence, transport, and placement timing
Maintain a steady mixing cadence to keep up with your pour schedule. This minimizes holding time and reduces the risk of pigment separation.
Transit can alter dispersion, so get your mixed concrete to the site as quickly as possible. Keep trucks moving in a steady rotation.
Coordinate your crews to reduce holding times. Finishing should start soon after placement to prevent unwanted curing effects.
Remember: Every minute counts when working with colored concrete. Plan your logistics accordingly.
Cost implications of uneven pigment distribution
Uneven pigment distribution can lead to direct costs like rework and wasted pigment. It also causes indirect costs through delays and increased labor.
To estimate potential waste, consider your project’s size, the cost of pigment per batch, and the likelihood of rework due to color inconsistencies.
For example, if you’re pouring 100 cubic yards at $50 per yard in pigment, a 10% waste rate means $500 down the drain – not including labor and time costs.
Suggestion: Allocate extra resources for pigment and plan for contingencies. It’s better to have too much than not enough when it comes to colored concrete.
Safety, Cleaning, and Maintenance Best Practices
PPE should cover pigment powders and liquids, with respiratory protection where dust control is needed. Use gloves, eye protection, and appropriate clothing to minimize exposure. Be mindful of potential allergens and ensure proper dust control practices.
Store pigments in dry, labeled containers with dating and rotation. Keep workspaces ventilated and use spill kits for quick containment. Clean and decontaminate equipment between batches, and perform regular maintenance checks to prevent residue buildup and cross-contamination.
PPE and Handling Precautions
Safety first, folks. When dealing with pigments and additives, you need the right gear.
Respiratory protection: Dust can be harmful. Use a respirator or dust mask as per your SDS (Safety Data Sheet).
Gloves: Protect your hands with gloves suitable for the chemicals you’re handling. Check your SDS.
Eye protection: Safety glasses or goggles are a must to keep dust and splashes out of your eyes.
Cleaning and Maintenance
To avoid those pesky streaks, you’ve got to keep your equipment clean. Here’s how:
Mixer and paddle cleaning: After each batch, scrub ’em down with a stiff brush and water. If it’s pigment residue, use a mild detergent.
Frequency matters: Clean every time you switch colors or at the end of your workday.
Avoid residue buildup: Inspect your mixer and paddles for any leftover material before starting a new batch.
Waste Management
We all want to keep our jobsite clean and safe, right? Here’s how to handle waste:
Pigment slurries and wash water: Don’t dump them down the drain. They can harm the environment. Follow local regulations for disposal.
Reduce waste: Collect and reuse wash water where possible. Keep pigment containers sealed when not in use to minimize spills.
Spill kits: Have one ready. Clean up spills immediately to prevent them from spreading or causing harm.
Conclusion
Getting pigment streaks under control matters for safety, durability, and appearance. When you respect the right mixing order and watch shear time, you reduce waste and end up with a solid, uniform finish.
First, verify clean materials and the correct order, then mix pigments with minimal air incorporation, monitor the combined time for shear, perform a small test patch and visual check before committing, keep tools clean and ready, and plan ahead for any larger project so you stay within the limits of your equipment and environment while following quality control procedures.
Avoid skipping a test, changing mixing steps late in the process, or running mixing speeds or durations that aren’t recommended, and always keep your PPE on, work in a well-ventilated area, and clean up spills or splashes promptly to prevent stains or damage. If you’re unsure about pigment compatibility, or the project calls for precise color control or large volumes, don’t push through—consult a professional rather than risking costly mistakes; with careful planning and steady, calm work, you’ll deliver a consistent, attractive color every time.
FAQ
What is the proper mixing order for concrete pigment to minimize streaks?
Follow the pigment manufacturer’s instructions. In many mixes, pigment is added with cement and a portion of the mixing water before the aggregates, then dispersed fully before adding the rest of the water and aggregates. If you see uneven color, stop and recheck the dispersion before proceeding.
How long should you shear mix to properly disperse pigment?
Use the mix time and cues shown on the pigment label or datasheet. Look for uniform color with no visible streaks or clumps. If streaks remain, consult the product instructions and adjust your process rather than guessing.
What are practical tips to prevent pigment streaks during placement?
Keep mix uniform from batch to batch and avoid retempering with water on the job. Pour in even lifts, use consistent vibration and finishing practices, and check color consistency as you go. If the color shifts, pause to re-pump or remix a small batch rather than trying to fix it later.
What equipment helps with efficient mixing of pigmented concrete?
Use a mixer that suits the job size and a paddle or high-shear mixer attachment recommended by the pigment and cement suppliers. Have clean tools, a reliable discharge method, and a way to maintain a steady mixing speed without overheating. Always verify compatibility of pigments with your mixer and follow the manufacturer’s setup instructions.