
Introduction
Cold nights create dew and condensation that can sabotage paint adhesion. If you paint when surfaces are damp or the surface is cooling through the night, you risk cloudy finishes and peeling. This article explains practical checks and timing to avoid those problems.
To plan smartly, check the forecast and test surfaces for moisture before you start. Look at surface temperature and watch for visible dew or a cold, moist feel when you touch metal or concrete; if in doubt wait. Always follow the paint manufacturer’s guidance on temperatures, surface moisture, and recoat times, and adapt to local rules.
Key takeaways
- Monitor surface, air, and dew with a hygrometer and surface thermometer before painting.
- Plan start times for acclimated temps, avoiding nights with forecast dew risk.
- Check painter’s tape, plastics, and moisture barriers for damp surfaces before coats.
- Store paints upright, sealed, and off the floor to prevent moisture ingress.
- Follow safety gear recommendations; wear respirator, gloves, and eye protection.
- If moisture appears, pause, dry surfaces, and schedule a recoat window.
Table of Contents
- Introduction
- Key takeaways
- What Causes Dew and Condensation on Painted Surfaces
- Why Morning Painting Sometimes Fails (Typical Failure Modes)
- How to Check Dew Point, Humidity, and Surface Temperature (Tools and Methods)
- Scheduling and Planning Paint Jobs Around Cold Nights
- Surface Preparation and Moisture Mitigation Techniques
- Paint Types, Formulations, and Additives for Cooler, Damper Conditions
- Tools and Materials Checklist, Storage, and Material Specs Explained
- Troubleshooting, Visual Checkpoints, and When to Redo a Job
- Conclusion
- FAQ
What Causes Dew and Condensation on Painted Surfaces
Dew forms when the surface cools enough to bring the surface temperature down to the dew point of the air. This happens more easily on surfaces that lose heat quickly at night. Relative humidity and air temperature work together to determine if moisture will condense on the surface.
Overnight, exposed surfaces often drop in temperature while the air stays relatively moist, which pushes moisture out of the air onto the cooler surface. The result is a thin moisture film that can show up before you start painting. Understanding this interaction helps you predict where dew will collect and when it will dry off.
Dew point explained in plain terms
The dew point is the temperature at which air becomes saturated with water vapor, and excess moisture starts to condense into liquid. It’s like when you see water droplets form on a cold glass of lemonade on a hot day.
For painters, understanding the dew point is crucial because it helps predict when condensation will form on surfaces overnight, ruining your paint job.
Here’s why: When night temperatures drop, surfaces cool down too. If the surface temperature drops below the dew point, moisture from the air starts to condense onto the surface, forming dew or even heavier condensation.
Surface and microclimate factors
Not all surfaces are created equal when it comes to dew formation. Some factors that create microclimates, encouraging dew to form, include:
Orientation: North-facing walls in the Northern Hemisphere (or south-facing in the Southern Hemisphere) receive less sun and stay cooler longer.
Thermal mass: Materials like concrete or brick absorb and release heat slowly. They can stay cool at night, inviting dew to form.
Wind: Protected areas with little wind, like behind a fence or under an overhang, trap moisture and encourage condensation.
Common building and outdoor scenarios where dew forms
Certain situations around your home are more prone to nighttime condensation. Watch out for:
Cool roofs: Light-colored or reflective roofs stay cooler at night, making them prime spots for dew formation.
Unheated sheds and garages: These structures can’t warm up the air inside like heated buildings, so condensation is common.
Shaded north walls (or south walls in the Southern Hemisphere): Walls that don’t receive much sun stay cooler at night, inviting dew to form.
Why Morning Painting Sometimes Fails (Typical Failure Modes)
Dew and early moisture can prevent good adhesion, leaving the paint unable to grab the surface properly. Blushing and hazy films can form if the film traps moisture beneath the topcoat. You may also see blistering or extended cure times when moisture is present at the time of application.
These failures occur because moisture interferes with bonding, pigment dispersion, and film formation. As a rule, if moisture is still present, the coating won’t dry to a durable finish. Morning painting is riskier when overnight humidity remained high and surfaces are damp.
Adhesion loss and early-stage failures
Painting when the surface is wet or dew-coated can lead to adhesion problems. The moisture prevents the paint from bonding properly with the substrate.
The first sign of this failure mode appears after the paint dries. You’ll notice that the paint doesn’t stick well and starts to peel, flake, or chip off easily.
This is because the water in the dew or morning moisture creates a barrier between the surface and the paint. The paint can’t form a strong bond with the surface under these conditions.
Aesthetic problems: blushing, streaking, and clouding
Moisture trapped in the paint film as it dries can cause aesthetic issues. This is known as ‘blushing’. It appears as a haze or cloudiness on the painted surface.
Streaking can also occur when moisture is present during painting. This happens because the water dilutes the paint, causing it to run and form streaks as it dries.
Blushing and streaking are usually removable if caught early enough. You can often sand them out and repaint the area. However, if left untreated, they can become permanent defects in the finish.
Long-term durability issues
Initial moisture-related defects can shorten the lifespan of your paint job. These defects provide pathways for water to penetrate and weaken the paint film over time.
Dirt and grime can also accumulate in these weak spots, further damaging the paint and promoting peeling or mildew growth. This is why it’s crucial to address any blushing or streaking promptly.
The long-term effects of painting when the surface is wet include reduced durability, increased maintenance requirements, and a shorter lifespan for your paint job.
How to Check Dew Point, Humidity, and Surface Temperature (Tools and Methods)
Carry a hygrometer to monitor relative humidity and use an infrared thermometer or surface temp probe to verify surface temperatures. A simple dew point check compares surface temp to measured humidity and air temperature. Keep a notebook or app log of readings for planning decisions.
Always verify readings with the product label, manufacturer instructions, or data sheets before applying any coating. If in doubt, consult the coating’s technical support for acceptable ranges and minimum surface conditions.
Step-by-Step Process
Follow these steps to accurately check dew point, humidity, and surface temperature before painting on cold nights.
- Gather your tools: hygrometer, IR or contact thermometer, safety gear (gloves, glasses).
- Choose a representative spot on the surface to test. It should be typical of the area you’ll paint.
- Use the hygrometer to measure ambient humidity. Keep it level and steady for accurate reading.
- Calculate dew point using your hygrometer’s wet-bulb calculator or an app. Follow the instructions provided with your tool.
- Measure surface temperature using IR or contact thermometer. Ensure the surface is clean and dry before measuring.
- Compare surface temp to calculated dew point. If surface temp is 5-10°F (3-6°C) above dew point, conditions are likely safe for painting.
- If unsure, consult product labels or contact a professional painter for advice.
- Clean and store your tools properly after use.
Instruments: hygrometers, wet-bulb calculators, and dew-point apps
A hygrometer measures humidity. Choose one with a large display for easy reading.
Some hygrometers come with a built-in wet-bulb calculator. If not, use an app to calculate dew point based on your hygrometer’s readings.
Ensure your hygrometer is calibrated regularly and store it properly when not in use. Dew-point apps should be used as a guide; always double-check with a hygrometer for accuracy.
Measuring surface temperature (IR thermometer and contact thermometers)
An infrared (IR) thermometer is handy for quick, non-contact readings. Point it at the surface, press the trigger, and wait for the beep.
A contact thermometer provides more accurate readings but requires direct contact with the surface. Press and hold the sensor against the surface until the temperature stabilizes.
Both tools should give you a good idea of the surface’s temperature. If they differ significantly, recheck or use both methods to confirm.
Simple rule-of-thumb and when to follow product labels
A general rule is to paint only if the surface temperature is a few degrees (5-10°F or 3-6°C) above the dew point. This helps prevent condensation and ensures better adhesion.
However, always check your product labels. Some paints have specific temperature guidelines that may differ from this rule of thumb.
If conditions are borderline or you’re unsure, follow the manufacturer’s guidelines. It’s better to wait for optimal conditions than risk a poor paint job.
Scheduling and Planning Paint Jobs Around Cold Nights
Set a plan that tracks overnight temperatures and humidity levels. Check local forecasts for the next day’s conditions and compare them to your target start time. Build in buffer time for drying windows if conditions shift.
Use a practical planning checklist that includes start time, ventilation needs, and expected overnight cooling. If conditions aren’t within your safe window, postpone or adjust your approach accordingly.
Reading weather forecasts and overnight humidity trends
The first step in planning your paint job around cold nights is understanding the weather forecast. You’re looking for three key pieces of information:
Night low temperatures: These are the lowest temperatures expected overnight. If it’s going to dip below 50°F (10°C), you might have dew issues.
Humidity levels: High humidity increases the risk of dew formation. Look for humidity above 70% at night.
Cloud cover: Clouds trap heat and moisture, increasing the likelihood of dew. Keep an eye on forecasts that call for overcast nights.
Time-of-day strategy: when to start and when to stop
Morning painting can be tricky in cold conditions. Here’s a flexible time-of-day strategy:
Start early, but not too early: Begin around sunrise or slightly after. This gives the surface a chance to warm up and dry out any morning dew.
However, don’t start if there’s still visible dew on the surface. Wait for it to evaporate naturally or use a leaf blower to speed things up.
Stop painting by late morning: As the sun gets higher, temperatures rise and humidity drops. This can cause early-stage failures like poor adhesion and blushing. Aim to finish by 10:30 AM at the latest.
Contingency planning and rescheduling criteria
Even with careful planning, weather can be unpredictable. Here’s how to decide when to delay or reschedule your paint job:
Predicted dew or surface temps near the dew point: If forecasts suggest overnight temperatures close to the dew point, or if there’s a high risk of dew, consider delaying the job.
Communicate this clearly to your client or crew. Explain that painting under these conditions can lead to poor results and wasted effort.
Last-minute decisions: Make a final call on whether to proceed in the morning, after checking surface temperatures and conditions. If it’s too risky, reschedule for another day with better conditions.
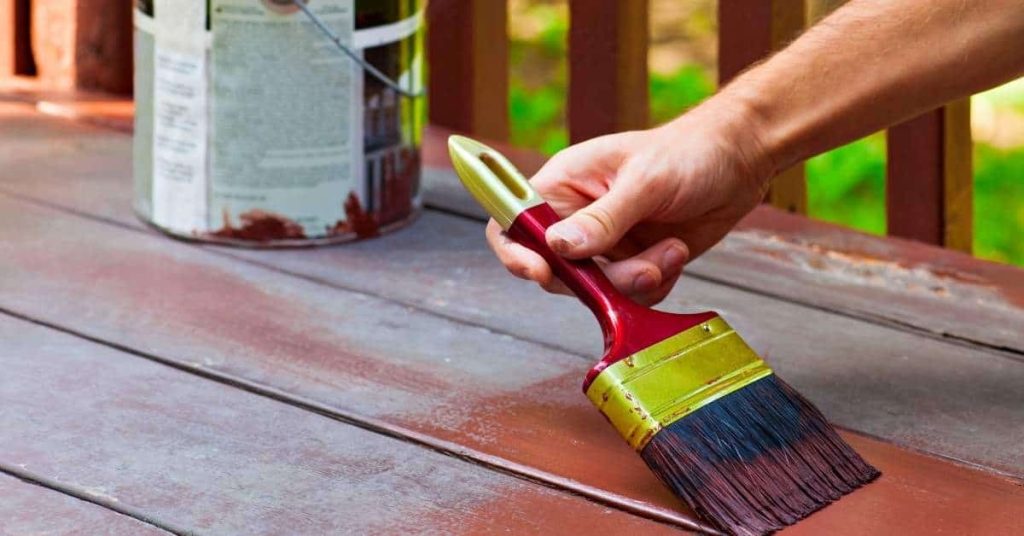
Surface Preparation and Moisture Mitigation Techniques
Dry surfaces thoroughly and improve air movement to reduce condensation risk. Wipe, scrub, or lightly abrade only as needed and then recheck for moisture before coating. Ventilation helps keep surface temperatures from lagging behind ambient temperatures.
Clean and degrease the substrate according to the product instructions, then test for moisture with an appropriate method. Use moisture meters or simple surface dryness checks as directed by the manufacturer to confirm readiness.
Drying and warming methods (fans, heaters, timed ventilation)
Before you start painting on cold nights, you need to warm up your surfaces. Here’s how:
Safety first: Never use open flames or heat sources that can damage substrates.
1. Ventilation: Open windows and doors for at least an hour before painting. This helps reduce humidity in the room.
2. Fans: Use box fans to circulate air. Point them towards the walls to help dry any condensation.
3. Heaters: Space heaters can raise surface temperatures, but be careful not to overheat. Keep them away from flammable materials and never leave them unattended.
Testing and prepping damp surfaces (tack tests, moisture meters)
How do you know if your surface is dry enough? Here are simple checks:
1. Tack test: Stick a small piece of painter’s tape on the surface. If it peels off easily, there might be moisture.
2. Moisture meter: For concrete or wood, use a moisture meter. readings above 15% for wood and 4% for concrete indicate dampness. Consider using a test patch with paint to see if it bubbles up.
Note: If your surface is too damp, wait until it dries naturally before painting.
Primers and sealers that tolerate marginal conditions
If your surface is slightly damp, using the right primer or sealer can help improve adhesion:
1. Bonding primers: These are designed to stick to difficult surfaces. They can be used on slightly damp substrates but follow product specs.
2. Sealers: Some sealers can lock in moisture and prevent it from affecting your paint job. Again, always follow the manufacturer’s instructions.
Remember: Even with these products, painting on surfaces that are too wet can lead to adhesion loss and other problems down the line.
Paint Types, Formulations, and Additives for Cooler, Damper Conditions
Waterborne and solvent-borne coatings react differently to cooler temperatures and higher humidity. Some formulations tolerate damp air better, while others require drier conditions for proper cure. Consider the coating’s data sheet for operating temperature and humidity ranges.
Specialty products may be appropriate when conditions are marginal, but always verify with the label or manufacturer instructions. If you’re unsure, ask for guidance on approved use in damp or cool weather before starting the job.
Water-based vs Oil-based Performance Near Dew Point
When nights are cold and damp, the performance of your paint can be affected by the dew point. Waterborne paints, also known as latex or acrylic paints, and oil-based paints behave differently in these conditions.
Waterborne Paints: These are more sensitive to high humidity and low surface temperatures. They dry slower in cold, damp conditions due to reduced evaporation rates. This can lead to longer drying times and increased risk of condensation or dew formation on the paint film.
Oil-based Paints: These typically perform better in cooler, damper conditions. They dry slower than waterborne paints but are less affected by humidity. However, they have their own challenges like strong odors and longer drying times that can make them less user-friendly for DIY homeowners.
Fast-dry and Low-temperature Formulations
Some paints are specifically designed to perform well in cooler conditions. These fast-dry, low-temperature formulations can help you complete your painting project even when nights are cold.
Check the manufacturer’s guidelines for temperature and humidity limits. Some products may be suitable for application at temperatures as low as 35°F (1.7°C). However, always remember that these are still guidelines, and actual performance may vary based on other factors like surface condition and relative humidity.
These fast-dry paints can help you save time and reduce the risk of dew or condensation forming on your paint job. But they’re not a magic solution. Proper surface preparation and understanding the weather conditions are still crucial for a successful paint job.
Additives and Accelerators: Pros and Cautions
In cold, damp conditions, you might consider using drying accelerators or anti-condensation additives to speed up the drying process. These products can help reduce the risk of dew or condensation forming on your paint job.
Pros: They can help you complete your project faster and improve the final finish by reducing the time the paint is exposed to cold, damp conditions.
Cautions: Always check with the paint manufacturer before using any additives. Some additives may not be compatible with certain paints, which could lead to poor performance or even damage to your paint job. Also, keep in mind that while these products can help, they’re not a substitute for proper surface preparation and understanding the weather conditions.
Tools and Materials Checklist, Storage, and Material Specs Explained
Assemble a concise, job-ready list: measurement tools, moisture-testing devices, protective gear, and replacement parts. Include storage considerations for cold or damp environments to prevent premature aging or moisture uptake. Keep containers sealed and labeled to avoid mix-ups.
Understand what the product data sheet and label require for storage, temperature, and handling. When in doubt, reference the manufacturer instructions and local regulations to ensure compliance and performance.
Essential Measurement Tools and How to Use Them
Before you start painting, check these tools to ensure your surface is ready.
- Hygrometer: Measure relative humidity. Dew forms when RH exceeds 80%.
- IR Thermometer: Check surface and ambient temperatures. Paint won’t stick if it’s too cold.
- Moisture Meter: Test for hidden moisture. It can cause dew and ruin paint.
- Tack Test: Confirm paint adhesion before applying. Skip this, risk poor adhesion.
Quick rule: Use these tools to ensure your surface is dry, warm, and ready for paint.
Paint Storage and Conditioning Before Application
Properly store and condition your paint to prevent dew-related issues.
- Store Indoors: Keep paint indoors, away from temperature swings.
- Bring to Site Temp: Let paint reach site temp before use. Sudden temp changes cause dew.
- Mix Thoroughly: Stir paint well. Separation can lead to poor coverage and dew.
- Avoid Extreme Temps: Don’t store or apply paint in extreme heat or cold.
Quick rule: Store and condition your paint properly to prevent dew during application.
Material Specs to Verify on Product Labels
Check these specs on your paint’s label to ensure it’s suitable for cold, damp conditions.
- Min Surface Temp: Check if surface temp is above the min. Paint won’t stick otherwise.
- Max Relative Humidity: Ensure RH is below max. Dew forms when RH exceeds this.
- Recommended Dew-Point Margin: Follow these guidelines to avoid dew during application.
- Drying Time at Low Temps: Check if drying time suits your conditions. Slow drying can lead to dew.
Quick rule: Always check and follow the specs on your paint’s label.
Troubleshooting, Visual Checkpoints, and When to Redo a Job
Establish a simple inspection workflow to detect dew-related defects early. Look for moisture on the surface, hazing, or poor film formation as you progress. Document environmental conditions at the time of each inspection for warranty or decision-making purposes.
If defects are detected, decide whether a touch-up is feasible or if the job should be redone after conditions improve. Record the conditions and reasoning to provide clear notes for future reference or warranty discussions.
Visual checkpoints during and after application
Use this checklist to monitor your paint job’s progress and catch any issues early.
- Beading: Check for beads of paint that don’t level out. This could indicate dew or condensation.
- Uneven sheen: Look for areas where the sheen is noticeably different. This might signal moisture beneath the surface.
- Blushing: After cure, check for a hazy or whitish appearance. This often indicates trapped moisture.
- Peeling: If paint starts to peel, it’s a sign of underlying moisture or poor adhesion.
- Bubbling: Bubbles under the paint indicate trapped moisture or solvents.
- Cracking: Fine cracks can appear due to dew forming and evaporating repeatedly.
- Mildew spots: Dark spots could be mildew, which thrives in damp conditions.
- Drips or runs: These can happen if paint is applied too thickly or if it’s not drying properly due to dew.
Quick rule: If you spot any of these issues, address them immediately. Don’t wait for the problem to worsen.
On-the-spot fixes vs. full rework
Use this guide to decide whether you can fix a defect on the spot or if you need to strip and repaint.
- Light sanding marks: These can often be addressed with touch-up painting.
- Minor peeling: If it’s small and localized, you might be able to scrape off the loose paint and recoat.
- Mild blushing: Lightly sanding and recoating can sometimes resolve this issue.
- Severe bubbling or peeling: These usually require stripping the affected area and repainting.
- Cracking over large areas: This typically indicates a systemic problem that needs full rework.
- Mildew spots: If they’re extensive, you’ll need to strip, clean, and prime before repainting.
Quick rule: When in doubt, it’s better to strip and prep the area properly rather than risking further issues down the line.
Recordkeeping, photos, and communication for client assurance
Documenting your work helps protect both you and your clients. Use this checklist to keep track of key information.
- Prejob conditions: Photograph and note any existing damage or moisture issues.
- Measurements: Keep records of surface measurements for future reference.
- Deviations from plan: Note any changes made during the job, like adjusting primer types due to damp conditions.
- Weather conditions: Log daily weather data, including temperatures and humidity levels.
- Moisture readings: Record moisture meter readings taken before painting.
- Paint types used: Keep a record of the specific paints, primers, and sealers you’ve applied.
- Photos during application: Snap pictures as you work to document your progress.
- Final walkthrough notes: Make note of any agreed-upon touch-ups or follow-up actions.
Quick rule: Regular, clear communication with clients about these records helps manage expectations and ensures everyone’s on the same page.
Conclusion
Painting in cold nights hinges on controlling dew, condensation, and surface moisture so the finish stays durable and looks right. Plan ahead, test first, and don’t push through damp conditions.
Checklist in plain language: confirm the forecast and air flow, check the surface temperature with a reliable thermometer and compare it to the dew point, assess humidity, then schedule the work for a dry window. Clean and dry the surface, seal any open joints, and test a small patch before full work. Keep materials in proper storage, mix and apply only with the right paint type for cooler, damper conditions, and finish each day with a thorough cleanup and safe storage.
Avoid these mistakes: never paint on a visibly damp surface or when dew is forming, don’t thin or recoat too soon in cold air, and don’t skip moisture checks or ventilation. Safety rules: wear eye and skin protection, work in a well-ventilated area, never leave unfinished work exposed to frost or moisture, and store materials out of the cold when not in use. If the moisture keeps coming back or you’re unsure about the surface, take a step back and get a second opinion before proceeding.
If moisture or complex conditions show up on a large or exposed surface, or you’re unsure about the right formulation for your climate, consider bringing in a professional. Stay steady, follow the checks, and you’ll get a durable finish that lasts through the season.
FAQ
How do I know if it’s safe to start painting after a cold night when there might be dew?
Check the surface and air for visible moisture. If you see dew or the surface feels damp to the touch, wait longer or dry the area thoroughly before painting. Use a dry, clean cloth to test a small spot if you’re unsure.
What should I do if the temperature rises during the day but dew will form again in the evening?
Plan to finish exposed areas early in the day when surfaces are dry. Avoid leaving unprotected paint to attract dew; cover or bring tools and paint indoors if night temps drop quickly.
How can I protect paint jobs from rapid moisture changes between day and night?
Keep surfaces dry before applying and use breathable primers or paints per manufacturer guidance for damp conditions. Monitor the forecast and avoid long drying times in high humidity or lingering dew periods.
What are practical signs that a morning painting session should be delayed?
If the surface is cool to the touch and shows condensation, or if the air feels damp and sticky, delay. Do a quick touch test on a small area—if the film feels soft or tacky, postpone until it’s dry and the surface is above the dew point.